Category: Projects

Where various build projects are documented and posted.

  • VF-33 F-14A: Main Construction

    VF-33 F-14A: Main Construction

    With the preliminary work on the cockpit and gear finished, I could turn my attention to bringing these elements together and completing the major construction for the F-14.

    The first thing I did was swap out the identification lights molded into the kit plastic. These are fairly basic and the Quickboost replacements I got for this project are definitely an improvement. With all that said, it was a huge pain to replace these with the aftermarket set and I probably wouldn’t want to do this again. These accessories required quite a bit of cutting and sanding followed by polishing to ensure that they were as clear as possible. The section in the kit plastic must be cut out and the Quickboost part must be cut so that it fits in place. Then, you have to sand down the joint so that there is not obvious seam, all the while taking care that you don’t scratch where the actual light is. Knowing that this was meant to stay clear on the final result, I used a chrome marker to paint the back of the clear part before polishing it with Tamiya polishing compound. I’ll admit it looks good, but the time wasn’t worth it for me.

    After this was done, I got to work on the intakes. I’ll have next to no ability to paint these when installed onto the model so that means they’ll have to be completed before installation. As per the instructions and reference photos, these are gloss white and the fuselage colour. Tamiya is kind enough to provide masks for this to be recreated and I was fairly happy with the end result using them. The fuselage colour I would be using was SMS PL60 Blue grey FS35237. I put down a coat of gloss white, applied the mask, then added the Blue grey.

    I also took this time to weather the Blue grey as it was common for dirt to accumulate in this area due to inspections by maintainers. I did this with a dark brown oil paint, and slowly feathered it onto the surface to create a restrained look. I then installed the main gear bays, the completed intakes and was able to seal everything up. It should be noted that the fit of the MCC gear bay was somewhat rough and it took a lot of work to ensure that a solid seal was being achieved around the kit parts. Furthermore, when cutting off the indicated section on the intakes to fit the MCC part, aim to cut 0.5-1mm shallow. Cutting as indicated will leave a significant gap between the MCC gear bay and the intakes.

    Following the installation of the gear and intakes I joined the two fuselage halved together. I used to tape do this as I’ve never had a ton of luck using clamps. Following some filling and sanding (especially around the nav light location) I attached the forward fuselage. This section has excellent fit and creates an almost non-existent seam. I was also able to check that the gear fit properly into the installed gear bays. I’ll be keeping these detached during the painting process so that the bays can be masked up.

    The next step was to complete the various sub assemblies before moving on to paint. This included the wings, stabilizers, pylons and canopy. This went together in typical Tamiya fashion and before I knew it this bird was ready for paint. This being a Tamiya kit, the fit was excellent. I decided to take advantage of this and opted to incorporate some magnets into various parts so that the model would be able to be partially disassembled after being completed. I stuck some tiny 1mm magnets inside the vertical stabs and the effect is practically invisible.

  • RF-4E Phantom II: Completed Model

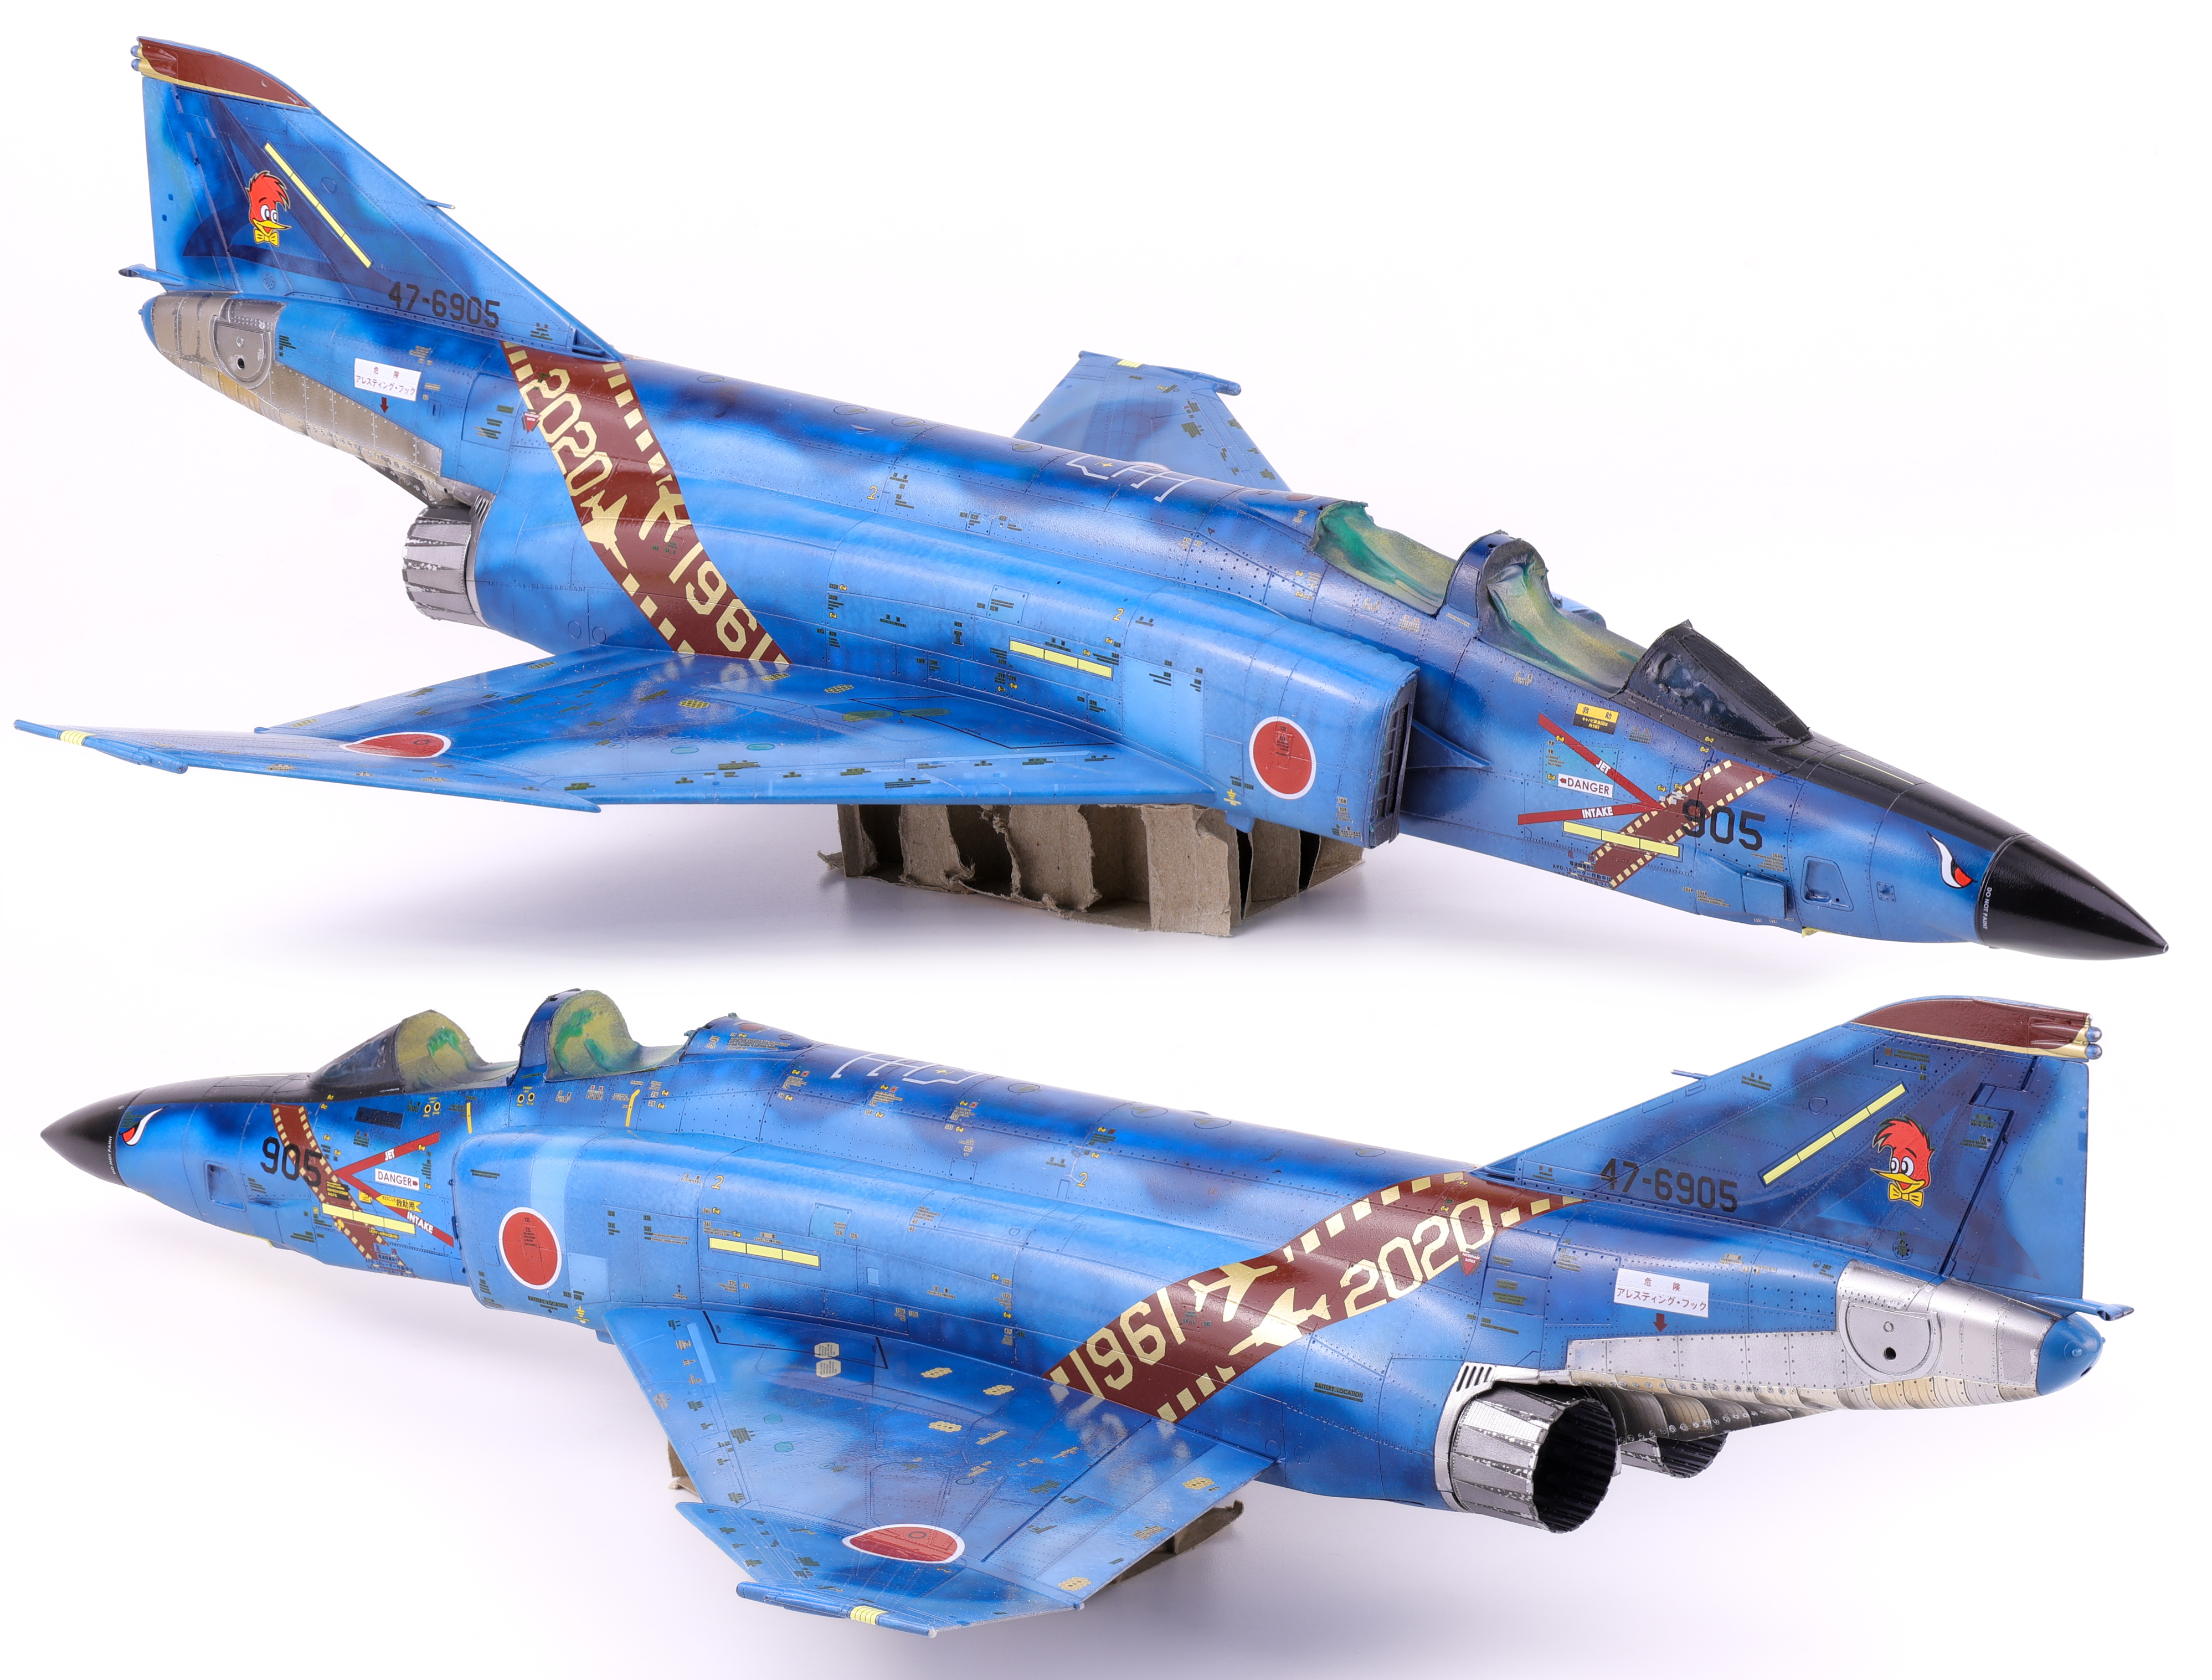
    RF-4E Phantom II: Completed Model

    After six months on the bench, I’m quite happy with the end result on this one. This build faced a lot of challenges and problems to solve but never stopped being a fun build. It was incredibly satisfying to update this kit to a modern standard.

    I finished the model in a standard flat finish, enjoy the completed build photos Below!

  • VF-33 F-14A: Gear & Gear Bays

    VF-33 F-14A: Gear & Gear Bays

    With the work on the F-14’s cockpit completed, I would need to complete the nose gear and gear bay prior to sealing everything up in the forward fuselage. For this project I opted to use the Master Craft Collection (MCC) gear bays in addition to the Reskit gear for this project.

    Right off the bat I was presented with a problem. MCC calls for one of the location nubs on the gear to be cut off so that it can be rotated into place within the gear well. I felt however that this would significantly compromise the structural integrity of the nose gear. As a work around, I decided to strategically break the resin in a way that would allow for the Reskit part to slot into place smoothly. To do this, I cut out grooves with a saw where I wanted the fracture to follow. I then used pliers to break out this section.

    The main reason I chose to do it this way was that if I cut out a section completely, there would be a half millimetre gap (the width of the blade) which would be very apparent on the finished part. When the resin is broken, it creates a very clean break, causing the two pieces to sit very flush against each other. With this minor surgery completed, I got to work painting the gear parts, first with primer and then with Tamiya flat white.

    After the white base coat was dried, I applied some dark grey paint chips using a sponge. It was important not to allow the sponge to drag across the surface as this would create an inaccurate effect. I wanted a somewhat weathered, unrealistic look here as I wanted the detail in the gear to be a focus point on the model. Following the application of the paint chips, I then picked out some details that I wanted to catch the viewers eye. These were primarily various hoses and cables that were very present on this part of the F-14.

    Next, I applied a gloss coat over the paint in preparation for decals and weathering. This stage would be somewhat involved as there would be many decals to apply in this area, namely hose clamps and other markings that were present on the gear. I started with the decals that were provided with the Reskit set as they were accurate as to the kinds of placards that were required. For the other sets, I utilized various decals from Anyz, namely the hose clamp and hydraulic fluid markings present on many aircraft. Jira-Gio decals were again used for some miscellaneous placards.

    With the decals applied, I sealed them with a satin varnish coat (50/50 GX gloss and matt) in preparation for weathering. The aircraft I’m depicting in this build was stationed at NAS Fallon and as such I wanted a bit of a dustier look than what might be present on an operational aircraft carrier. To do this, I started with some various dust/discolouration of the white paint. I applied a light brown oil colour on various sections of the gear, taking care not to soak it into recesses, only focusing on flat sections.

    After allowing this layer to partially dry, I then loaded brush up with oil thinner and began to slowly move around the oils, fading them in with the white paint underneath. Next, I applied a dark brown oil pinwash over the various details on the gear, taking care not to overload the surface which would have required significant cleanup.

    It was important to be judicious when applying the dark brown wash as applying too much can result in it overpowering the lighter brown. As with the light brown, I used a brush dampened with thinner to wipe away the excess. I repeated this process for all three gear and bay parts and I’m quite happy with how these parts turned out.

    For the nose gear, I decided to omit the clear part that was included in the set for the light and instead chose to use clear UV resin instead. For the multi coloured lights, I applied clear red, yellow, green on top of silver.

    For the individual wheels, I wanted to make an attempt at weathering them instead of just painting them in a rubber black and calling it a day. Rubber can have a fairly unique patina effect when it fades and I wanted to recreate that here.

    After painting the wheels in black and applying a satin varnish, I applied a light grey oil paint onto the surface with a brush. After allow this to dry for several minutes, I then feathered the effect with a brush soaked with oil thinner. This helps to soften the colours here and blends them with the base colour as seen in the gear bays. I think this technique was pretty successful in adding some detail to an often overlooked part so I’ll definitely be using this approach in the future.

    With the completion of the wheels, I could count the gear as completed and was able to finally move on to closing the fuselage. Enjoy the photos below!

  • RF-4E Phantom II: Decals and Weathering

    RF-4E Phantom II: Decals and Weathering

    With the paintwork sealed under a gloss coat, I then was able to apply the scheme decals. With some of the markings being painted on with masks this phase of the build was fairly quick and proceeded smoothly. Where things bogged down was with the 200+ stencils that needed to be applied over top these markings. I can’t lie; this wasn’t a particularly enjoyable part of the build and I’m glad I’m past it!

    With the decals more or less completed I was able to move on to weathering. With the amount of pre-shading work completed, I knew that I wanted to keep the weathering light as to not overpower the paintwork. I opted for a simple dark wash and some light streaking effects. After these were applied, I applied a flat coat to keep everything together. With the flat coat done it was finally time to unmask the canopy and camera bay.

    At this late stage of the build the last things left were the gear bays, the camera equipment and the canopy frames. I completed the gear and gear bays first so that I could get the model standing on its own legs. Painting and weathering were pretty straightforward in this area, just some Gloss white over black primer before adding some decals and weathering in the form of a brown oil wash. 

    I also took this time to build up the pylons and the ECM pod. These were from Reskit and the detail was fantastic.

    Last but not least was the canopies and their resin frames. The set from Hypersonic models really fills out the detail in this area and makes these parts look a lot more real in my option.

  • VF-33 F-14A: Cockpit

    VF-33 F-14A: Cockpit

    Tamiya’s F-14 has been on my Wishlist for some time now and only recently have I gotten the chance to build it. I decided to go all out for this build and opted to pickup a load of aftermarket for this project.

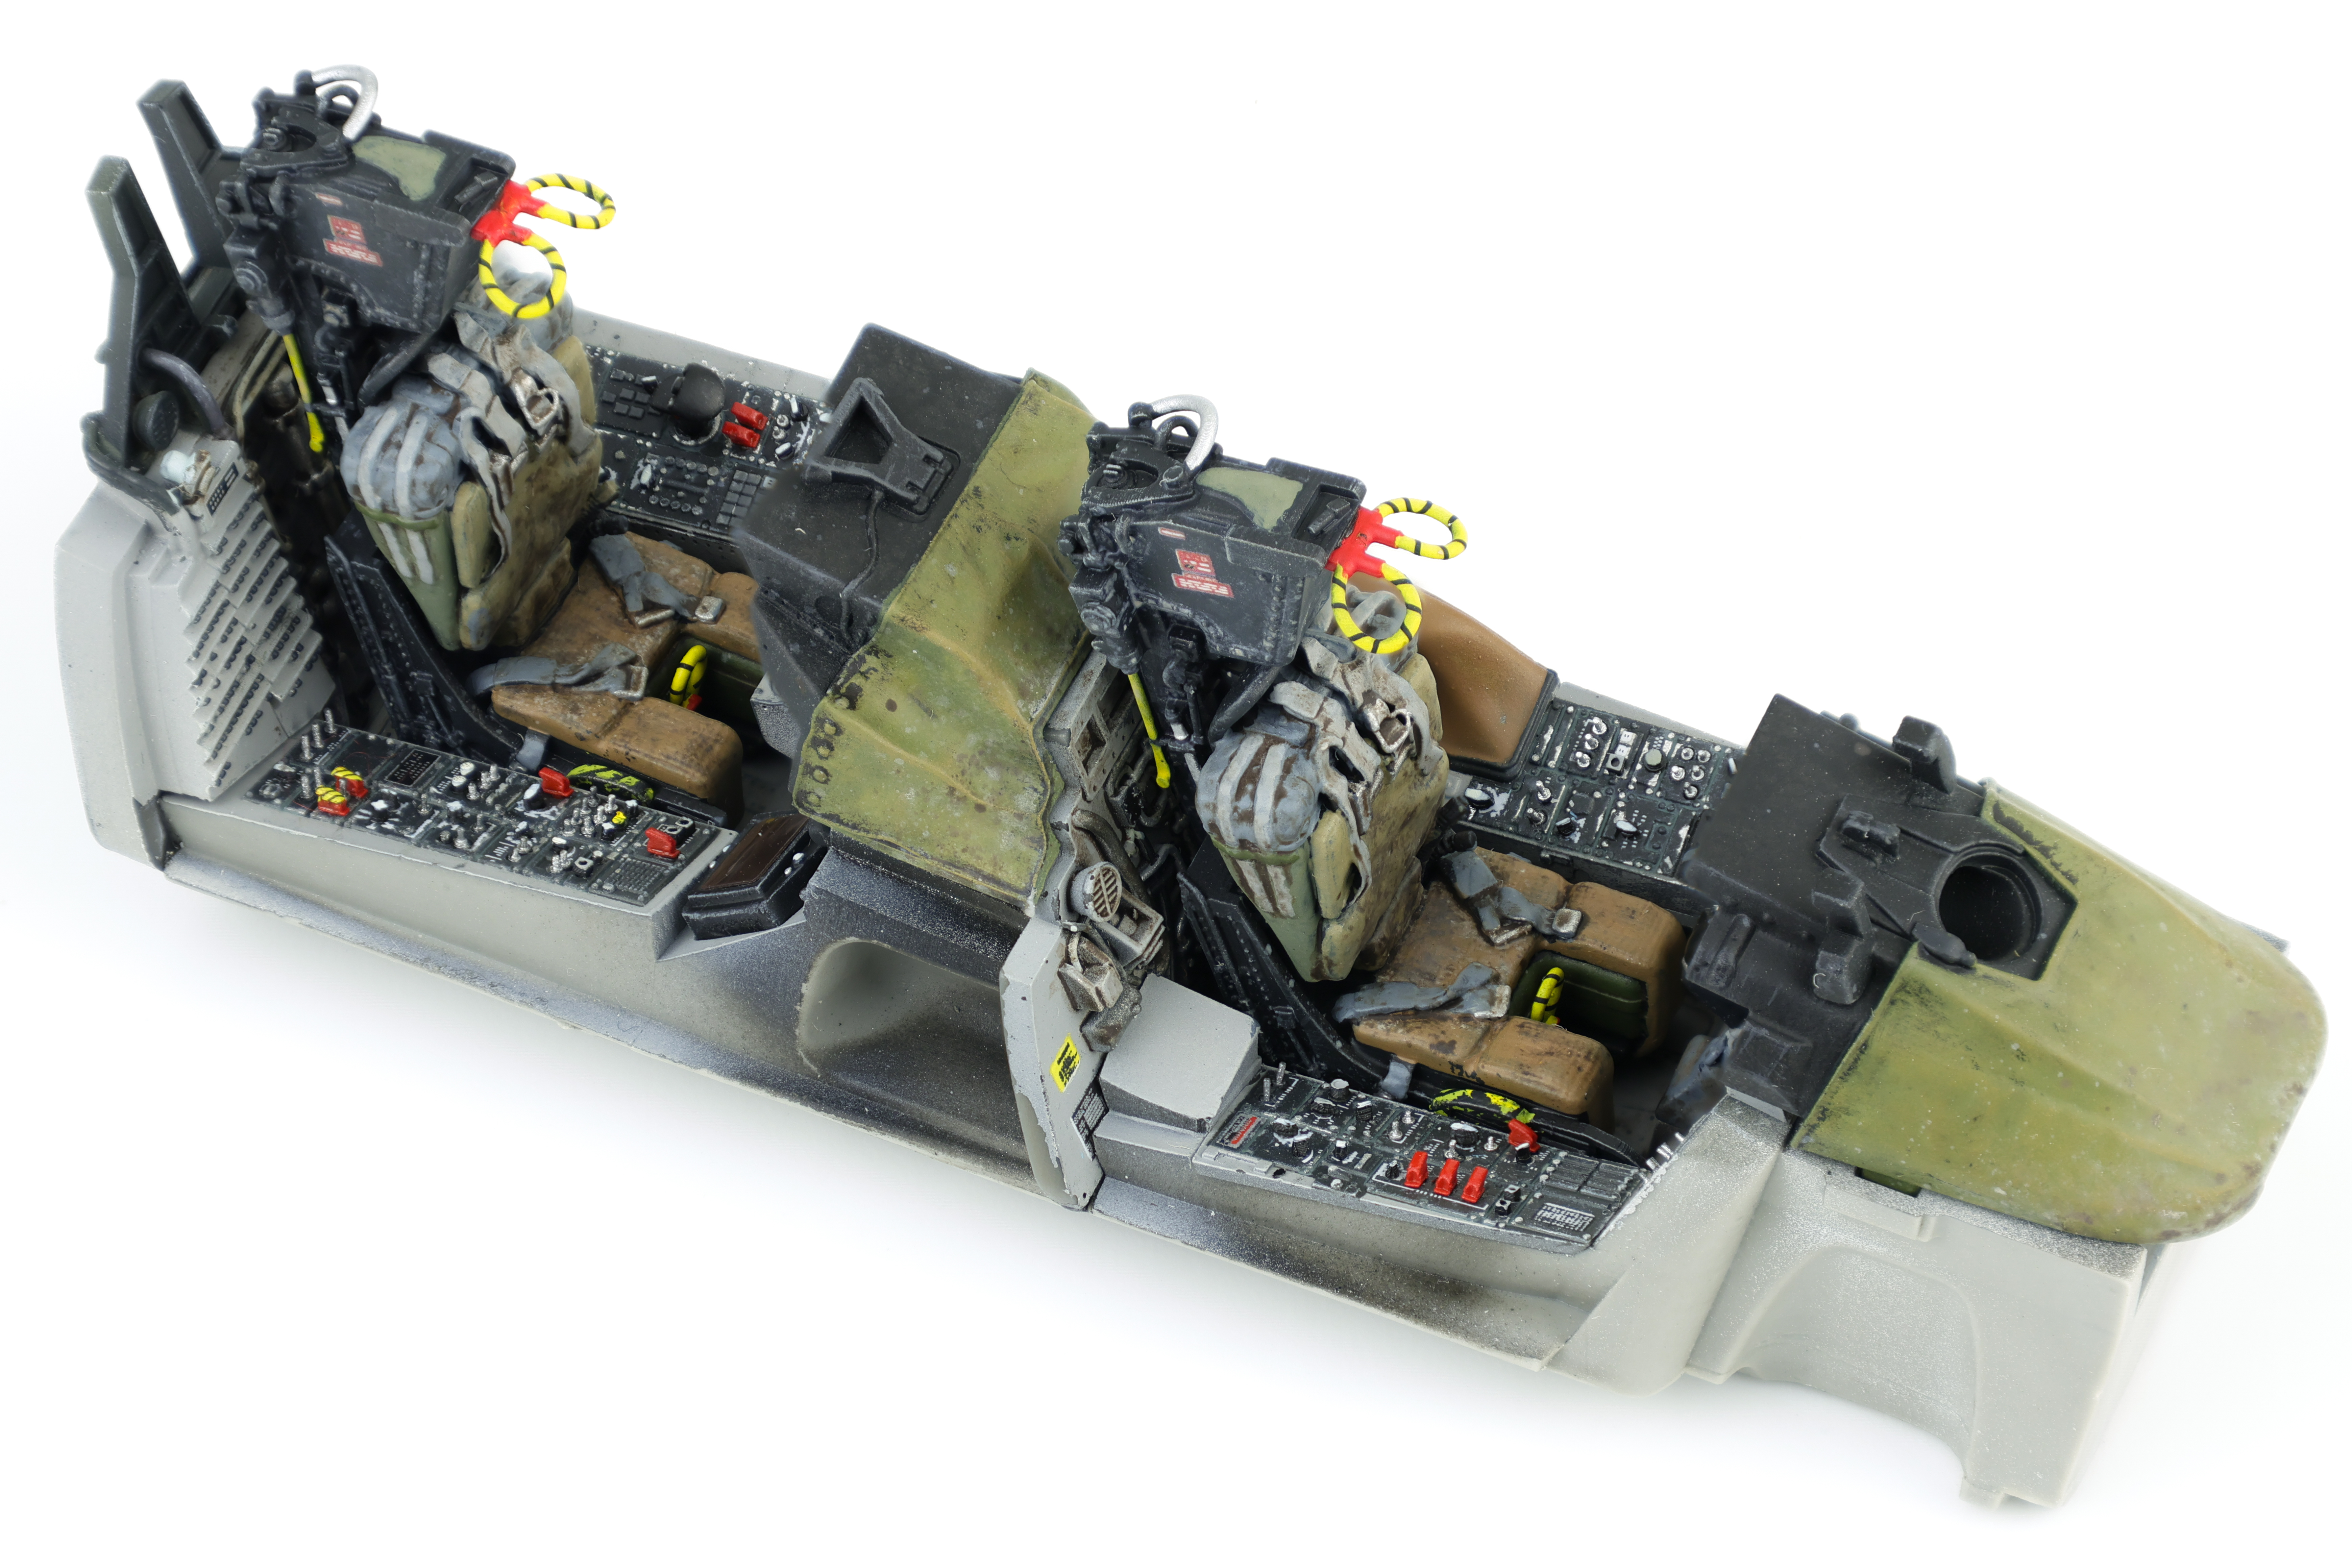
    Like all aircraft, construction started with the cockpit. The Eduard set is very well detailed and a definite upgrade over the already fantastic stock cockpit. I also chose to include Master Craft Collection (MCC) 3d printed seats as the Eduard set does not include the later model GRU. 7A ejection seats. Work started by drilling out the side consoles in preparation of adding Anyz switches and dials. I’ve found that adding decals over top the molded on switches is difficult and I preferred to remove the all together.

    Unlike my Phantom project, the addition of the resin cockpit meant that I needed to complete no scratchbuilding work. This was a welcome change and it meant that work quickly progressed to the painting phase.

    After a coat of black primer and a silver chipping coat+hairspray, I applied Tamiya Sky grey for the majority of the cockpit with the side panels emphasized with Nato black. I then did some cockpit chipping by soaking the cockpit in water before rubbing a stiff brush over the areas where I wanted wear to accumulate. On my recent Phantom project, I chose to use sponge chipping instead of the hairspray method and I wasn’t super pleased with the results I managed to achieve. I found that using the Hairspray method here was far better and got the result I was after. That said, It was still important not to overdo this effect, especially on the side consoles as the chips were particularly visible.

    I then moved on to working on the front and rear instrument panels. These were somewhat less straightforward than the cockpit tubs as the paintwork required for them required some delicate masking. As indicated by the instructions and reference photos the instruments themselves were painted black with the panel itself finished in grey. I chose to try out a new technique for painting the instrument panels and I opted to first paint them black, followed by hairspray chipping, with grey following over top.

    This would allow me to use the raised detail of the instruments to chip off the grey, revealing the black underneath. I think this approach worked ok, although there is some definite improvement to be found. I finished the panels with a medium grey drybrushing to highlight details.

    With the paintwork completed, I then moved on decals. I chose to use decals from Anyz and Jira-Gio to placard the side and instrument panels. This really helps to bring the cockpit alive and is a really key step in finishing the cockpit. After the decals dried, I applied a grey wash in-between the panels and a dark brown wash on the cockpit floor. After sealing the cockpit in a matt varnish, I decided that I wanted to try something new when it came to the main displays. I chose to use photography film to recreate the displays as they provide a really nice reflective finish.

    Next up, I decided to work on the ejection seats. These were 3d printed from MCC and are very well detailed. After a primer coat of Mr. Surfacer 1500 black followed by a layer of Tamiya Nato Black, I got to work brush painting all the various elements of the ejection seat. This meant painting the seat cushions/belts in the appropriate browns and greens, along with the various wires and cables attached to the seat.

    Weathering the seat was done with oils to recreate years of staining and discolouration on the seat cushions. I chose two shades of oils, a dark brown shade and a lighter dust colour. I first flicked on each of the two colours before blending them with oil paint thinner. This helped to create random shapes and intensities of both colours and really helps to achieve a weathered look in the fabric which is what I was looking for. I utilized this same technique for the fabric coverings behind the instrument panels as I wanted to recreate what the fabric looked like after sitting in the sun for some time.

    With the completion of the ejection seats, the cockpit on the F-14 was more or less completed. I added the Anyz swtiches along with the required cockpit parts (Control sticks and throttle). I was really quite happy with the end result here and I think it was a definite improvement over my previous Phantom cockpit. Next up: the Gear bay!