Category: Projects

Where various build projects are documented and posted.

  • Tiger I Early: Painting and Decals

    Tiger I Early: Painting and Decals

    For this project I took the approach of avoiding any pre-shading or subtractive chipping. While this strategy was not entirely new to me (see my T-55A project) it is still is not something I’m used to. I made this decision because I felt that post-shading was a better approach for achieving the desired look I was after.

    This decision led into the next, namely what kind of chipping I wanted to apply to the build. To start, I knew that the chipping effects were going to be somewhat limited in this project. My rationale was that Kursk tigers were often new additions to their units and were not heavily worn down vehicles. These factors heavily favored in my decision to use additive chipping (with a brush or sponge) instead of subtractive chipping (with chipping medium). With the fact that the chipping was not going to be a significant effect I was happy to omit a chipping medium from my workflow.

    It came time to prime the model and as usual, I turned to Mr. Surfacer 1500 black as my primer as choice. Some people say that using a black base can make the surface colour look “colder” however in my case I don’t see it.

    I was particularly happy to finally see my efforts in creating a realistic cast texture and I’m particularly happy with how it turned out, although black is not the best colour for detecting surface finish variation.

    Next up was the main coat and for it I selected Tamiya’s Dark Yellow 2 shade (LP-55 and XF-88). I’m familiar with this specific colour and used it on my Sd.Kfz 251/22 Pakwagen project. I did find that it was slightly too dark and to compensate for this I added a few drops of flat white. I used Tamiya’s lacquer range and while I like how they cover the model, I find that they just run out too quickly. Tamiya’s acrylics can be heavily thinned and as such last a long time. The lacquers were significantly thinner and didn’t require a lot of thinner. As such I relied on a lot more paint to get proper coverage For this specific build I pretty much emptied the jar I bought for this project.

    The results speak for themselves however and I was happy with how my Tiger looked after completing the first main coat.

    After completing the main coat I began the post-shading process To do so I simply used more dark yellow with added white and black. I sprayed the light coats on higher areas and the darker coats where shadows would be. This was my first time going heavily into the world of post-shading and I’m quite happy with the results here.

    Next up in the process was the camouflage which was a process that, although it would be challenging, I was looking forward to immensely. It was hard to determine an exact scheme from reference photos and the colour profiles from Echelon FD didn’t help a lot either. The best way to describe the scheme was “dunkelgleb with olivegrun splotches”. I took a slightly different approach and tried to re-create a webbed look with long strands of olivegrun over the base dunkelgleb. It took about two days to finally finish but overall I’m very happy with how the scheme came out.

    After getting the initial Olivegrun colour on I did another post-shading coat although this time I was more thorough with my approach and took the effect further in some areas. I whipped up a 50/50 mixture of Tamiya Dark Green 2 and White in order to make the initial scheme more faded and worn. Additionally, it blends in a lot better with the dark yellow base coat which is what I was after. I also did more shading with black, or at least a very dark brown. This effect can be most seen where the skirts meet the hull as well as the engine deck as well as a few other areas. Overall I really enjoyed the post-shading process on this model and at this point a decided to wrap it up and move on to the next phase of the build – Markings.

    Considering that I had used Tamiya lacquers for all the paintwork, I felt confident in applying the decals straight onto paint. I’ve never worked with Echelon decals before and, after a test run on a spare piece of plastic, decided to use Tamiya Mark Fit Super Strong as the setting solution. I lightly sanded the paint surface with a 12000 grit sanding sponge in order to get the surface as smooth as possible in preparation for the decals. After a few passes the surface felt a lot smoother with no visible loss of paint.

    Decals went on really well and with the help of setting solution, conformed excelently to the cast texture I had re-created. Results like these are really why I like to go the extra mile on small effects, it can really make a difference in the (almost) final result.

    Truth be told, there weren’t a whole ton of markings to apply and it only took an hour or so to get them on the model. Of particular note are the kill markings on the barrel that Echelon provides. I was amazed as to how easy this decal conformed around the barrel to perfectly line up when it overlaps itself. This is done by making it slightly curved inward to match the dimensions of the barrel. It’s clear that they did their research and tested this product before selling to customers. Very happy with this sheet and I’ll be using them in the future.

    After applying the decals I went along with some light chipping effects before sealing the model in VMS satin varnish. I didn’t want to go overboard on the chipping as I wanted a cleaner look from the vehicle. That’ll be it for now and enjoy the detail photos below!

  • F6F-5 Hellcat: Completed Build

    F6F-5 Hellcat: Completed Build

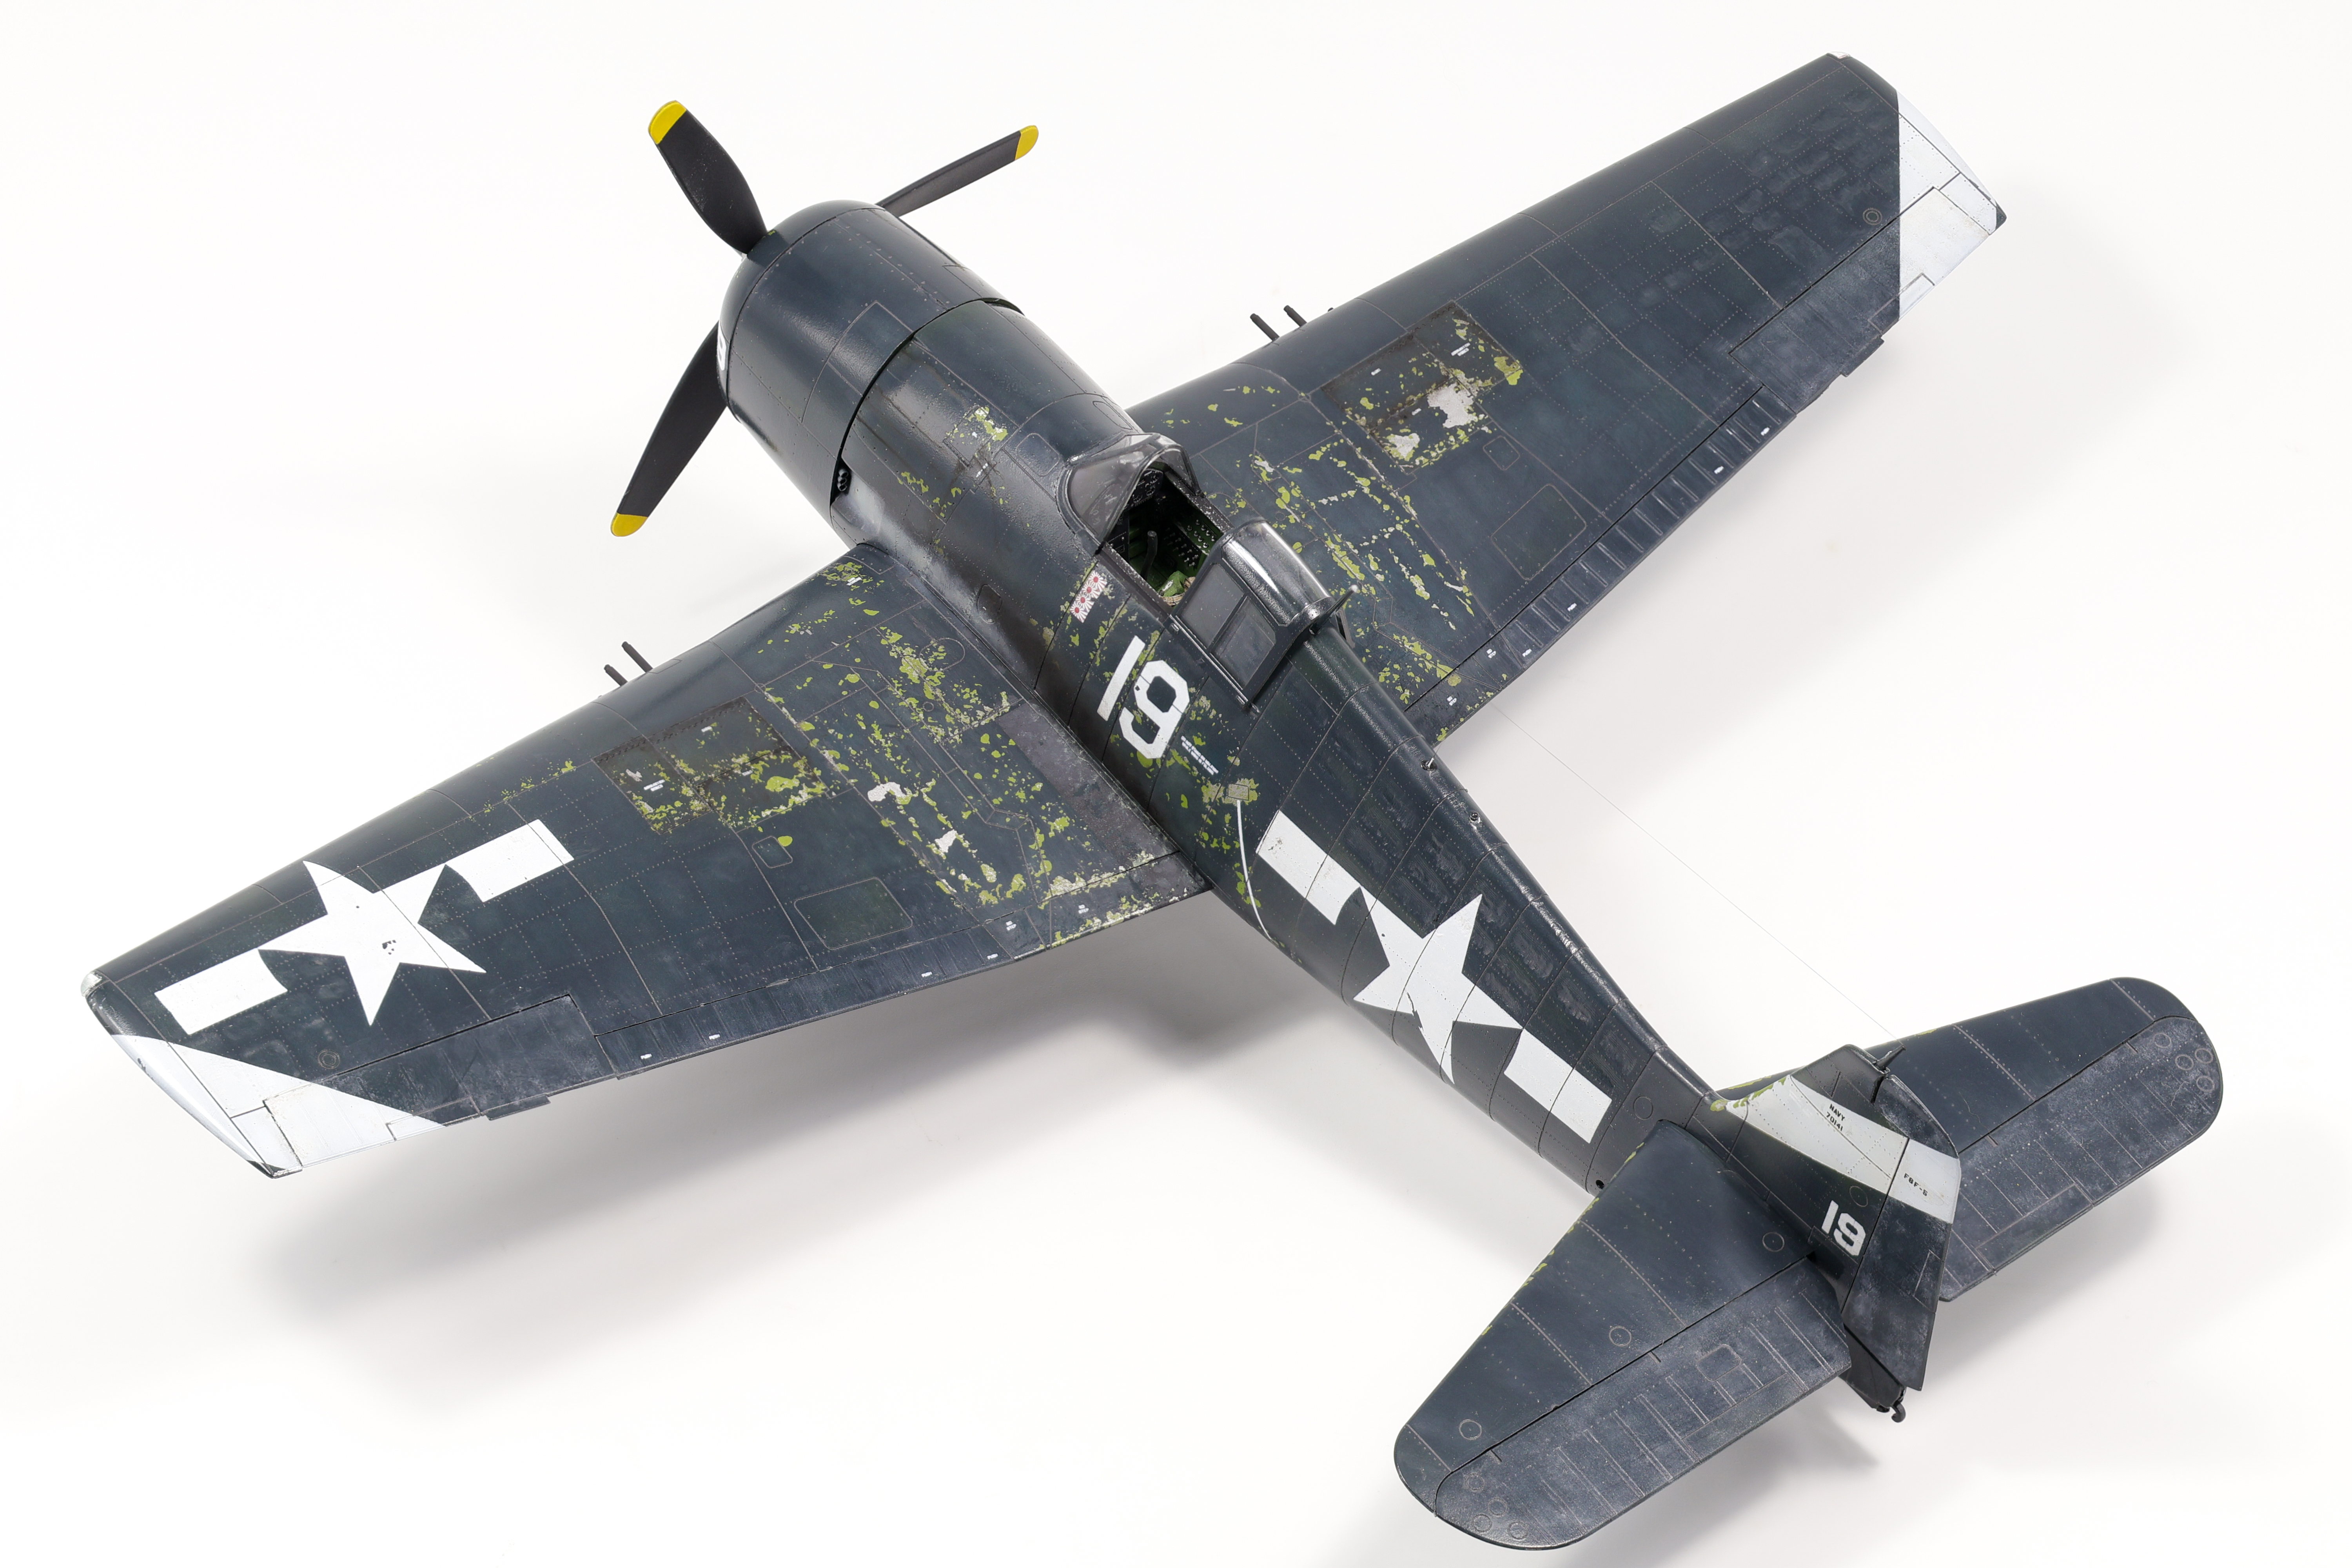
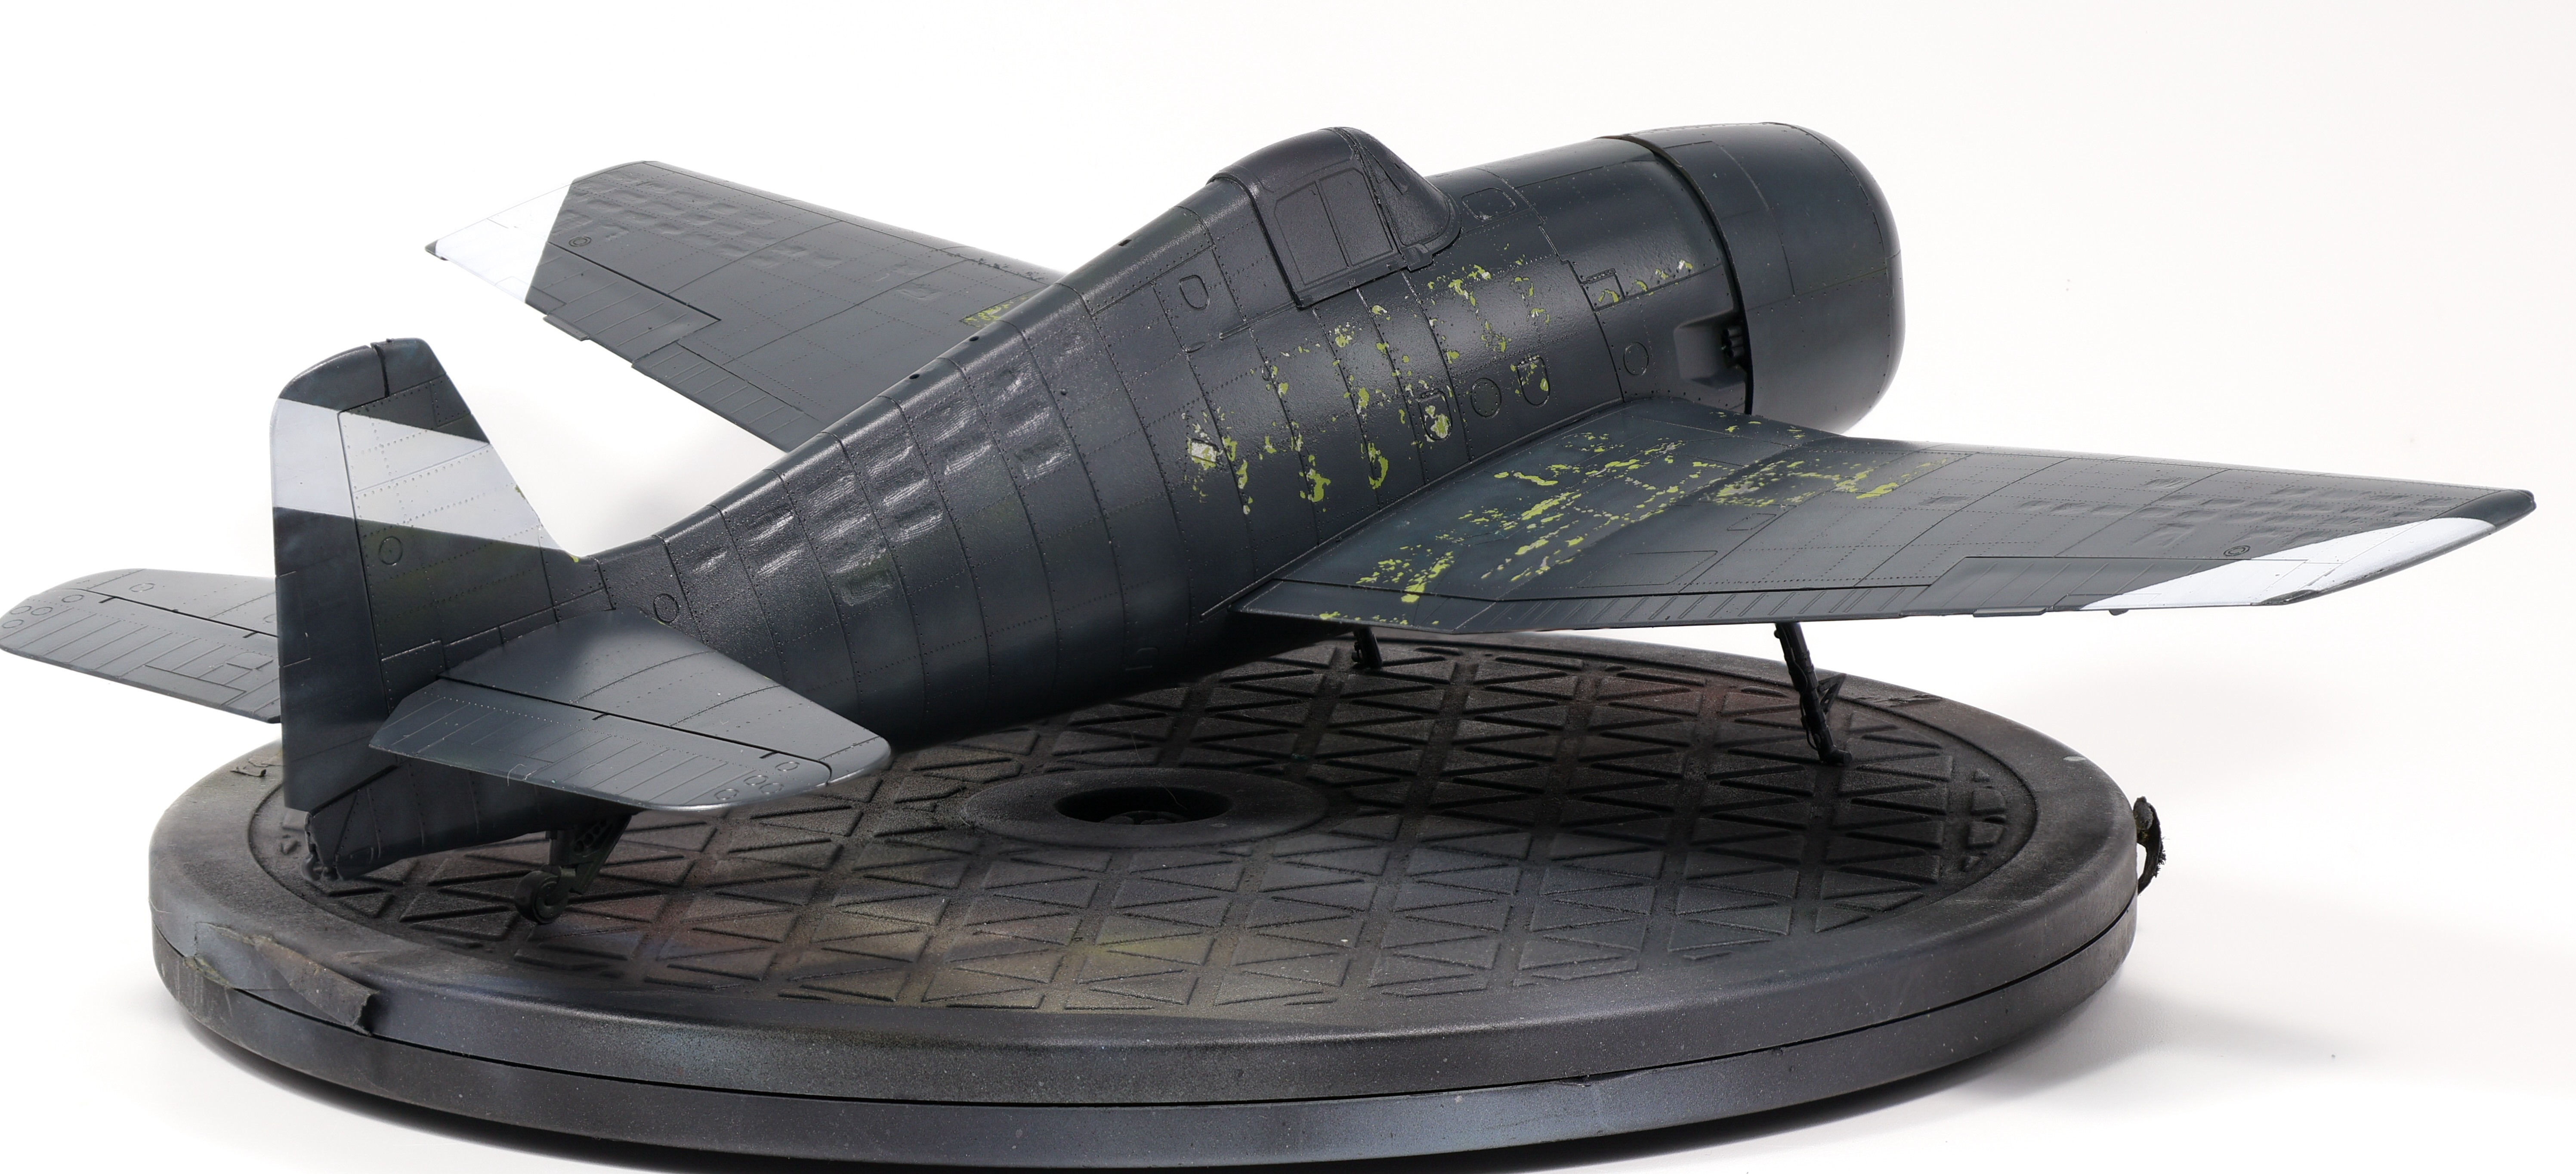
    A few weeks ago I completed Eduard’s F6F-5 Hellcat and I’m finally getting around to post the photos and compile my thoughts about the build.

    If you’re just here for the photos check them out below 👇

    As for my thoughts, this build was a pretty fun, short project. I really didn’t invest a ton of money or time into this project but it was still a blast.

    Weathering was fairly straightforward and basic seeing as due to the extensive pre-shade, a lot of the work was already done in creating surface variation. I started with a grey wash completed with oil paints. Washes can be tricky with dark base coats as using a dark colour can really blend in and be hard to see. With a grey colour it’s a lot easier to see the panel lines and added rivets and, in my opinion, looks more realistic.

    After the wash I did some oil paint rendering, primarily on the fabric control surfaces in order to show some colour variation in the different type of material. I did some further OPR on the gun access panels in order to represent crews servicing those areas with oily hands.

    I knew I wanted to pay specific attention to the exhaust staining as well. From my reference photos I could tell the Hellcats had the tendency to build up both dark and light soot if left uncleaned. I even found a photo of the specific aircraft I was building which showed a substantial buildup of exhaust gasses.

    To re-create this effect I first did a pass this the airbrush painting a heavily diluted coat of a dark brown (almost black) mixture in the area I wanted the staining. I then went back over the area with a grey-white mixture, being careful to remain in the larger area covered by the black soot.

    After the paint dried I then added some oil paints directly over the previous layer to further add colour variation. I added straight black over the darker areas while a light tan colour was used with the grey tones. I think the results speak for themselves:

    To wrap up the build I did some light oil streaking around the cowling which almost disappears into the Navy Blue finish. I added ultra fine wire as the arial and that was it!

    Enjoy the photos below!

  • F6F-5 Hellcat: Painting and Decals

    F6F-5 Hellcat: Painting and Decals

    For the past few weeks I’ve been steadily building Eduard’s 1/48 F6F-5 Hellcat as a sort of “reset” build to complete before diving into the painting stage of the Tiger project. I picked the Hellcat because I’ve always had a soft spot for U.S Navy fighters and also because I wanted to move this kit out of the stash.

    Construction was straightforward although a bit disappointing. This kit is by no means a new Eduard release with the molds dating back to 2008. This is not that ancient but in the grand scheme of things it’s a far cry from the hyper detail kits the brand is releasing nowadays. If you’d like to hear more about my thoughts on this kit, I did a out of box review on it last year:

    Eduard F6F-5 Hellcat (Late) In Box Review

    Eduard’s Profipack Hellcat has impressive features including photo-etched parts, resin wheels, mask set, and armament options. However, its quality of molding is below-par as it lacks detail and crispness. Eduard’s excellent instructions and various marking options are commendable, albeit limited in color and vibrant prints. With a challenging price, the kit’s weekend edition provides better…

    The chipping effects on this build required a two stage chipping process. The first stage consisted of a metallic colour underneath a custom zinc chromate mix chipped with standard hairspray chipping. This was done somewhat quickly as the results didn’t matter too much in that only a small fraction of this coat would be visible in the final model. After this coat was chipped, I hit it with a coat of hairspray and re-primed with 1500 black for the preshading coat.

    The preshade/marble coat took an entire day to complete and I was very happy with how it came out in the end. I was able to get a lot of variability in the finish which I knew would be needed to show through the very dark blue final coat.

    For the main coat I selected Mr. Colour 14 (Navy Blue). It’s a semi gloss paint to start and I added some GX100 gloss to increase the sheen which worked well I found. I knew that I’d be finishing this model in a gloss finish and wanted to make sure that my base coat was as smooth as possible.

    I then got to work removing the masking fluid left behind as part of the weathering process and I was really happy with how this approach turned out. It was difficult at first to remove the fluid but with a plastic tool I was able to scrape it off quite efficiently. I was worried about paint peeling off in areas where the fluid was not applied but this ended up not being an issue as the main coat of Navy Blue was very durable.

    After removing the masking fluid I hit the model with a coat of GX100 gloss varnish in anticipation of the decals.

    Decals were out of the box, and went down somewhat well. Being from Eduard, I decided to experiment with removing the carrier film with Tamiya Enamel thinner. This went well and helped achieve an even greater painted on effect.

  • Tiger I Early: Completed Construction

    Tiger I Early: Completed Construction

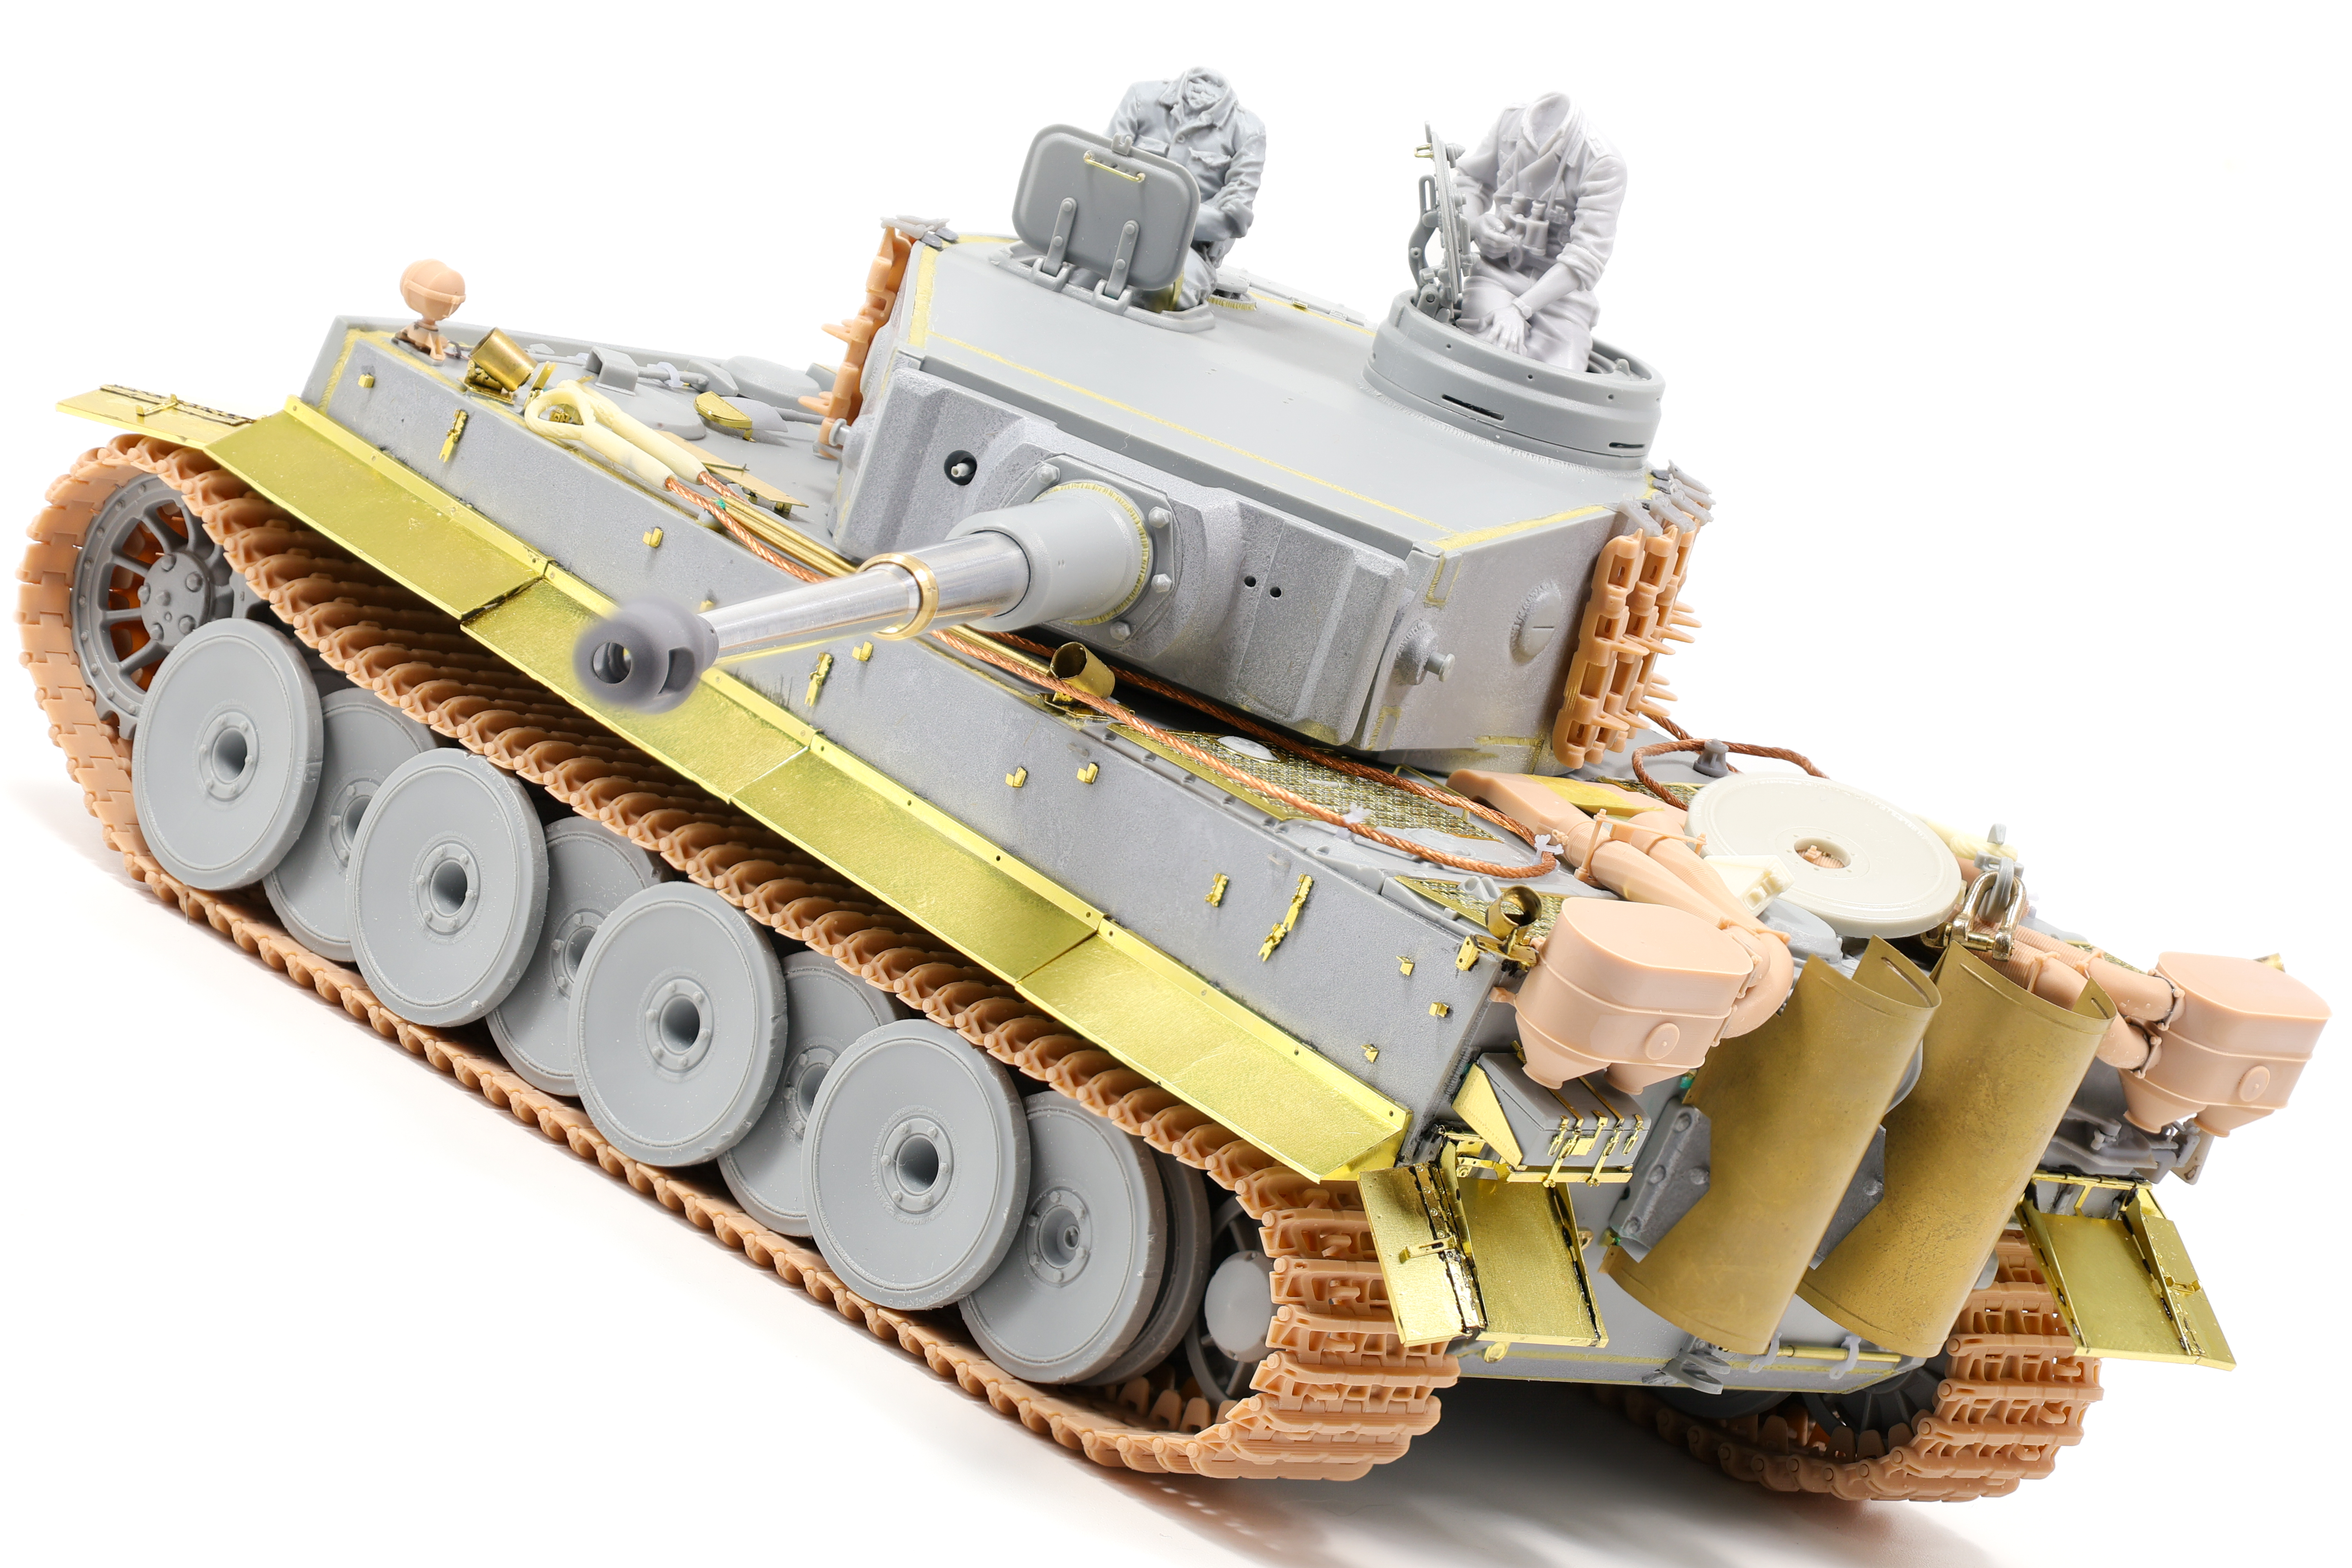
    After over a month I’ve finnaly completed the major construction phase of the Tiger project. I won’t lie, it’s been a bit of a slog with all the extra detail I wanted to add to the build however it was to be expected. of course. After completing the hull construction I naturally moved onto the turret which was somewhat more straightforward.

    Like the hull, cast texture and weld details were added where needed. For the track brackets I added 3d printed Rochm parts which I found added a great amount of detail for being such small additions.

    I also wanted to try my hand at adding cloth details with Tamiya epoxy putty. I really liked how this putty handles when baby powder is added, it rolls very thin and doesn’t stick at all. I’ll definitely be using this technique in the future.

    Also of note are the figures I picked out for the build, which were by Alpine and Stalingrad. I really liked the quality of both, although I found that the Alpine offering was slightly better quality than the one by Stalingrad.

    Part of the reason of going through the entire mockup process was that I wanted to experiment with stowage options for the Tiger. I knew from reference photos that Tigers didn’t really have a lot of stuff pilled up on the rear deck however I couldn’t resist adding some bits and pieces here and there.

    It’s a short and sweet update this time around but I wanted to get some photos out of this build before moving onto the painting phase. Enjoy the glamour shots below!

  • Tiger I Early: Hull Construction

    Tiger I Early: Hull Construction

    With the wrap-up of my D-Day LCA build I was able to move on to a project I’ve been looking forward to for some time now, a revisit to the infamous Tiger tank. The last Tiger I built was in 2017 (see the projects tab) and at the time it was probably the best kit I had completed. I’ve been able to grow my skillset since then and it’ll be an interesting comparison to see the two builds side by side and document my growth as a modeller.

    For the build itself I picked up the excellent Dragon 6820 kit, otherwise known as the “131” Tiger. Even though it is marketed as a Tunisian variant specific to Pz.Abt 504 it can be built up as any early Tiger, especially the vehicles at Kursk. Even though it’s a 2015 release this is still a high quality kit in 2024.

    Speaking of the subject I had in mind I’ll be building another Kursk vehicle (exciting I know!). This project started with the markings to be honest. I was swayed by a set from Echelon that depicted the 3.SS Pz.Rgt. “Totenkopf” during Operation Citadel. I was interested in the distinct yellow numbering of the vehicle numbers and felt that over a camo scheme of dunkelgelb and olivegrun the vehicle would pop really nicely.

    With such a high potential with this build I also decided to absolutely pack it to the gills with aftermarket. The full list is below:

    • Trex Studio 3d printed tracks
    • Trex Studio 3d printed Feifel filters
    • Rochm Full detail photo etched set
    • Rochm 3d printed spare track holders
    • Voyager brass cleaning rods
    • Master metal barrel
    • Aber late model brass shackle
    • Alpine Minatures Panzer commander summer
    • Stalingrad WSS Panzer crewman Kursk 1943

    Construction was anything but straightforward on this project. Dragon can be infamous for having busy instructions and with all the accessories added in this kit, I was frequently going back and forth between different instruction sheets. Additionally the aftermarket accessories had overlap in some places and I had to decide which sets I wanted to utilize for the build. A good example of this are the tool clamps. Rochm provides photo etched tool clamps that you have to assemble. I also had a spare set of MJ miniatures 3d printed clamps in my spares drawer which I opted to use instead, as they come pre-assembled.

    After a few weeks on the bench I had completed most of the hull construction. To enhance the detail on the model, I added cast texture and weld beads using Tamiya grey putty and epoxy putty respectivley. To add the weld beads, I first had to scribe out a groove and after assembling the hull I was able to work the putty inside the pre-made gaps and apply a weld texture with a scratch built tool.

    I can’t lie, this phase of the build was very tedious and time consuming. Spending the time to attach then weld the dozen or so photo-etch mounting block took something out of me. Looks great at the end though. While joining the hull pieces together I found that the lower hull “bathtub” had quite a significant warp to it and needed additional prodding to allow other pieces to slot into their attachment points. The frontal armour pieces were especially useful in forcing the hull into the correct alignment. After the major construction of the hull was completed, I turned my focus to the small sub assemblies and parts that would be fixed in place on the final model.

    Tool construction was up next, and as I touched on earlier I opted to use 3d printed clamps to improve this area of the model. The jack block was improved as well by scraping a razor saw along the surface to simulate a more realistic woodgrain texture.

    hull construction followed, unsurprisingly, with more photo-etch. I started working on the fenders and found they built up surprisingly easily. A few bends here and there and they were completed. What caused me issues however were the hinges on the front and rear fenders. Each fender required two complete hinge assemblies with two parts each. Suffice to say, this was a tedious process and somewhat time consuming. Was it worth it? You be the judge:

    The side fenders were pretty straightforward and went together a lot better. I did have some issues affixing them to the hull as the mounting blocks were a bit off but all together I think they went on very well. I opted to remove some fenders on the front of the tank to add some visual interest as well.

    Quite a bit of work was done to the rear of the vehicle as well including test fitting the T-Rex studio Feifel filter along with some stowage from Panzerart and Ultracast. I also tested fitted the tow cable to see what positions worked in relation to the planned stowage.

    I also neglected to attach one of the headlights and S-mine launchers as from my reference photos I could tell that the specific vehicle I wanted to document was missing these features on the right side.

    All in all this build so far has been unnaturally slow for me. I’m almost a month in and it feels like it’s taking forever yet I know that slow and steady is the required strategy for this project. There are too many possible issues that could creep up if this project is rushed. With so much aftermarket being included in the build it’ll be easy to miss things but as long as I take my time then I’ll be able to finish this project to the standard I’m aiming for.