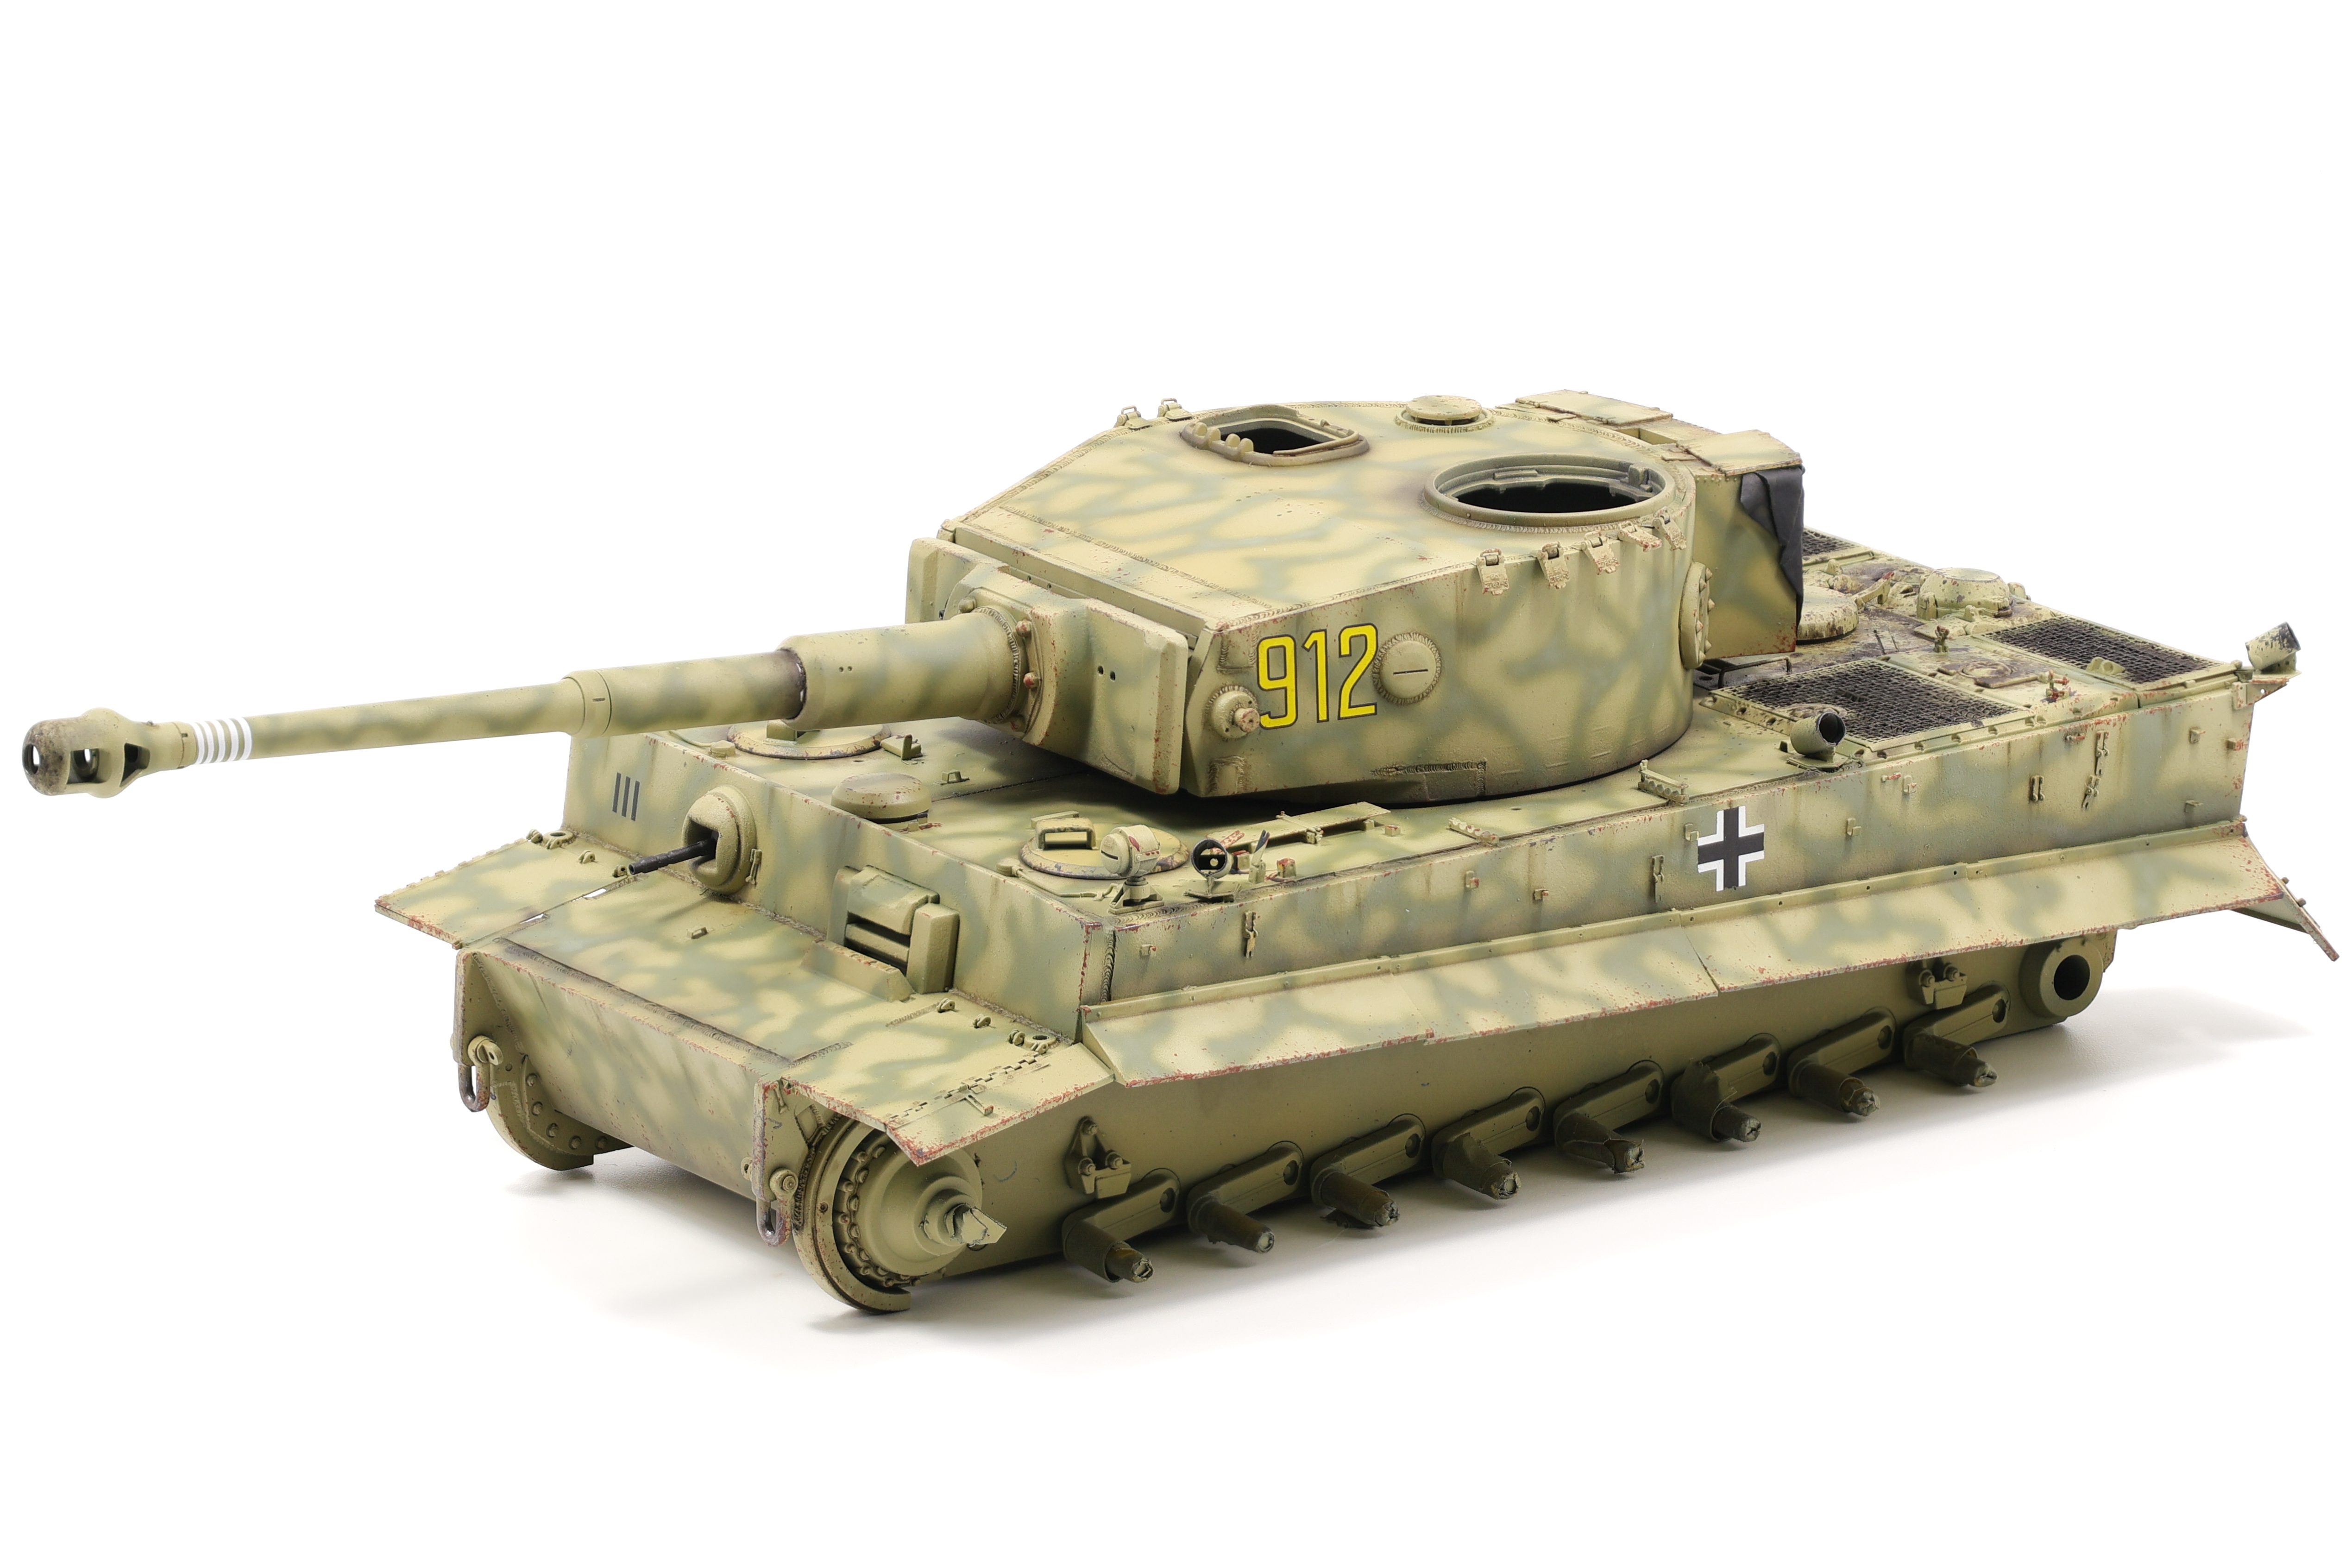
The weathering stage of the project was the perfect sweet spot of being challenging but not frustrating. I really pushed myself to use prior techniques I had only experimented with even further and make them centrepieces of how the model was weathered. For the Tiger project I wanted a relatively clean vehicle that had a lot of environmental effects added to it, basically, a lot of mud and oil spills but not a lot of chipping and paint wear.
As I complete more and more armor models I’ve realized that the weathering process starts as soon as paint is laid and that five light effects look so much better than two heavy handed ones. To quickly summarize the effects I used on this project here they are below:
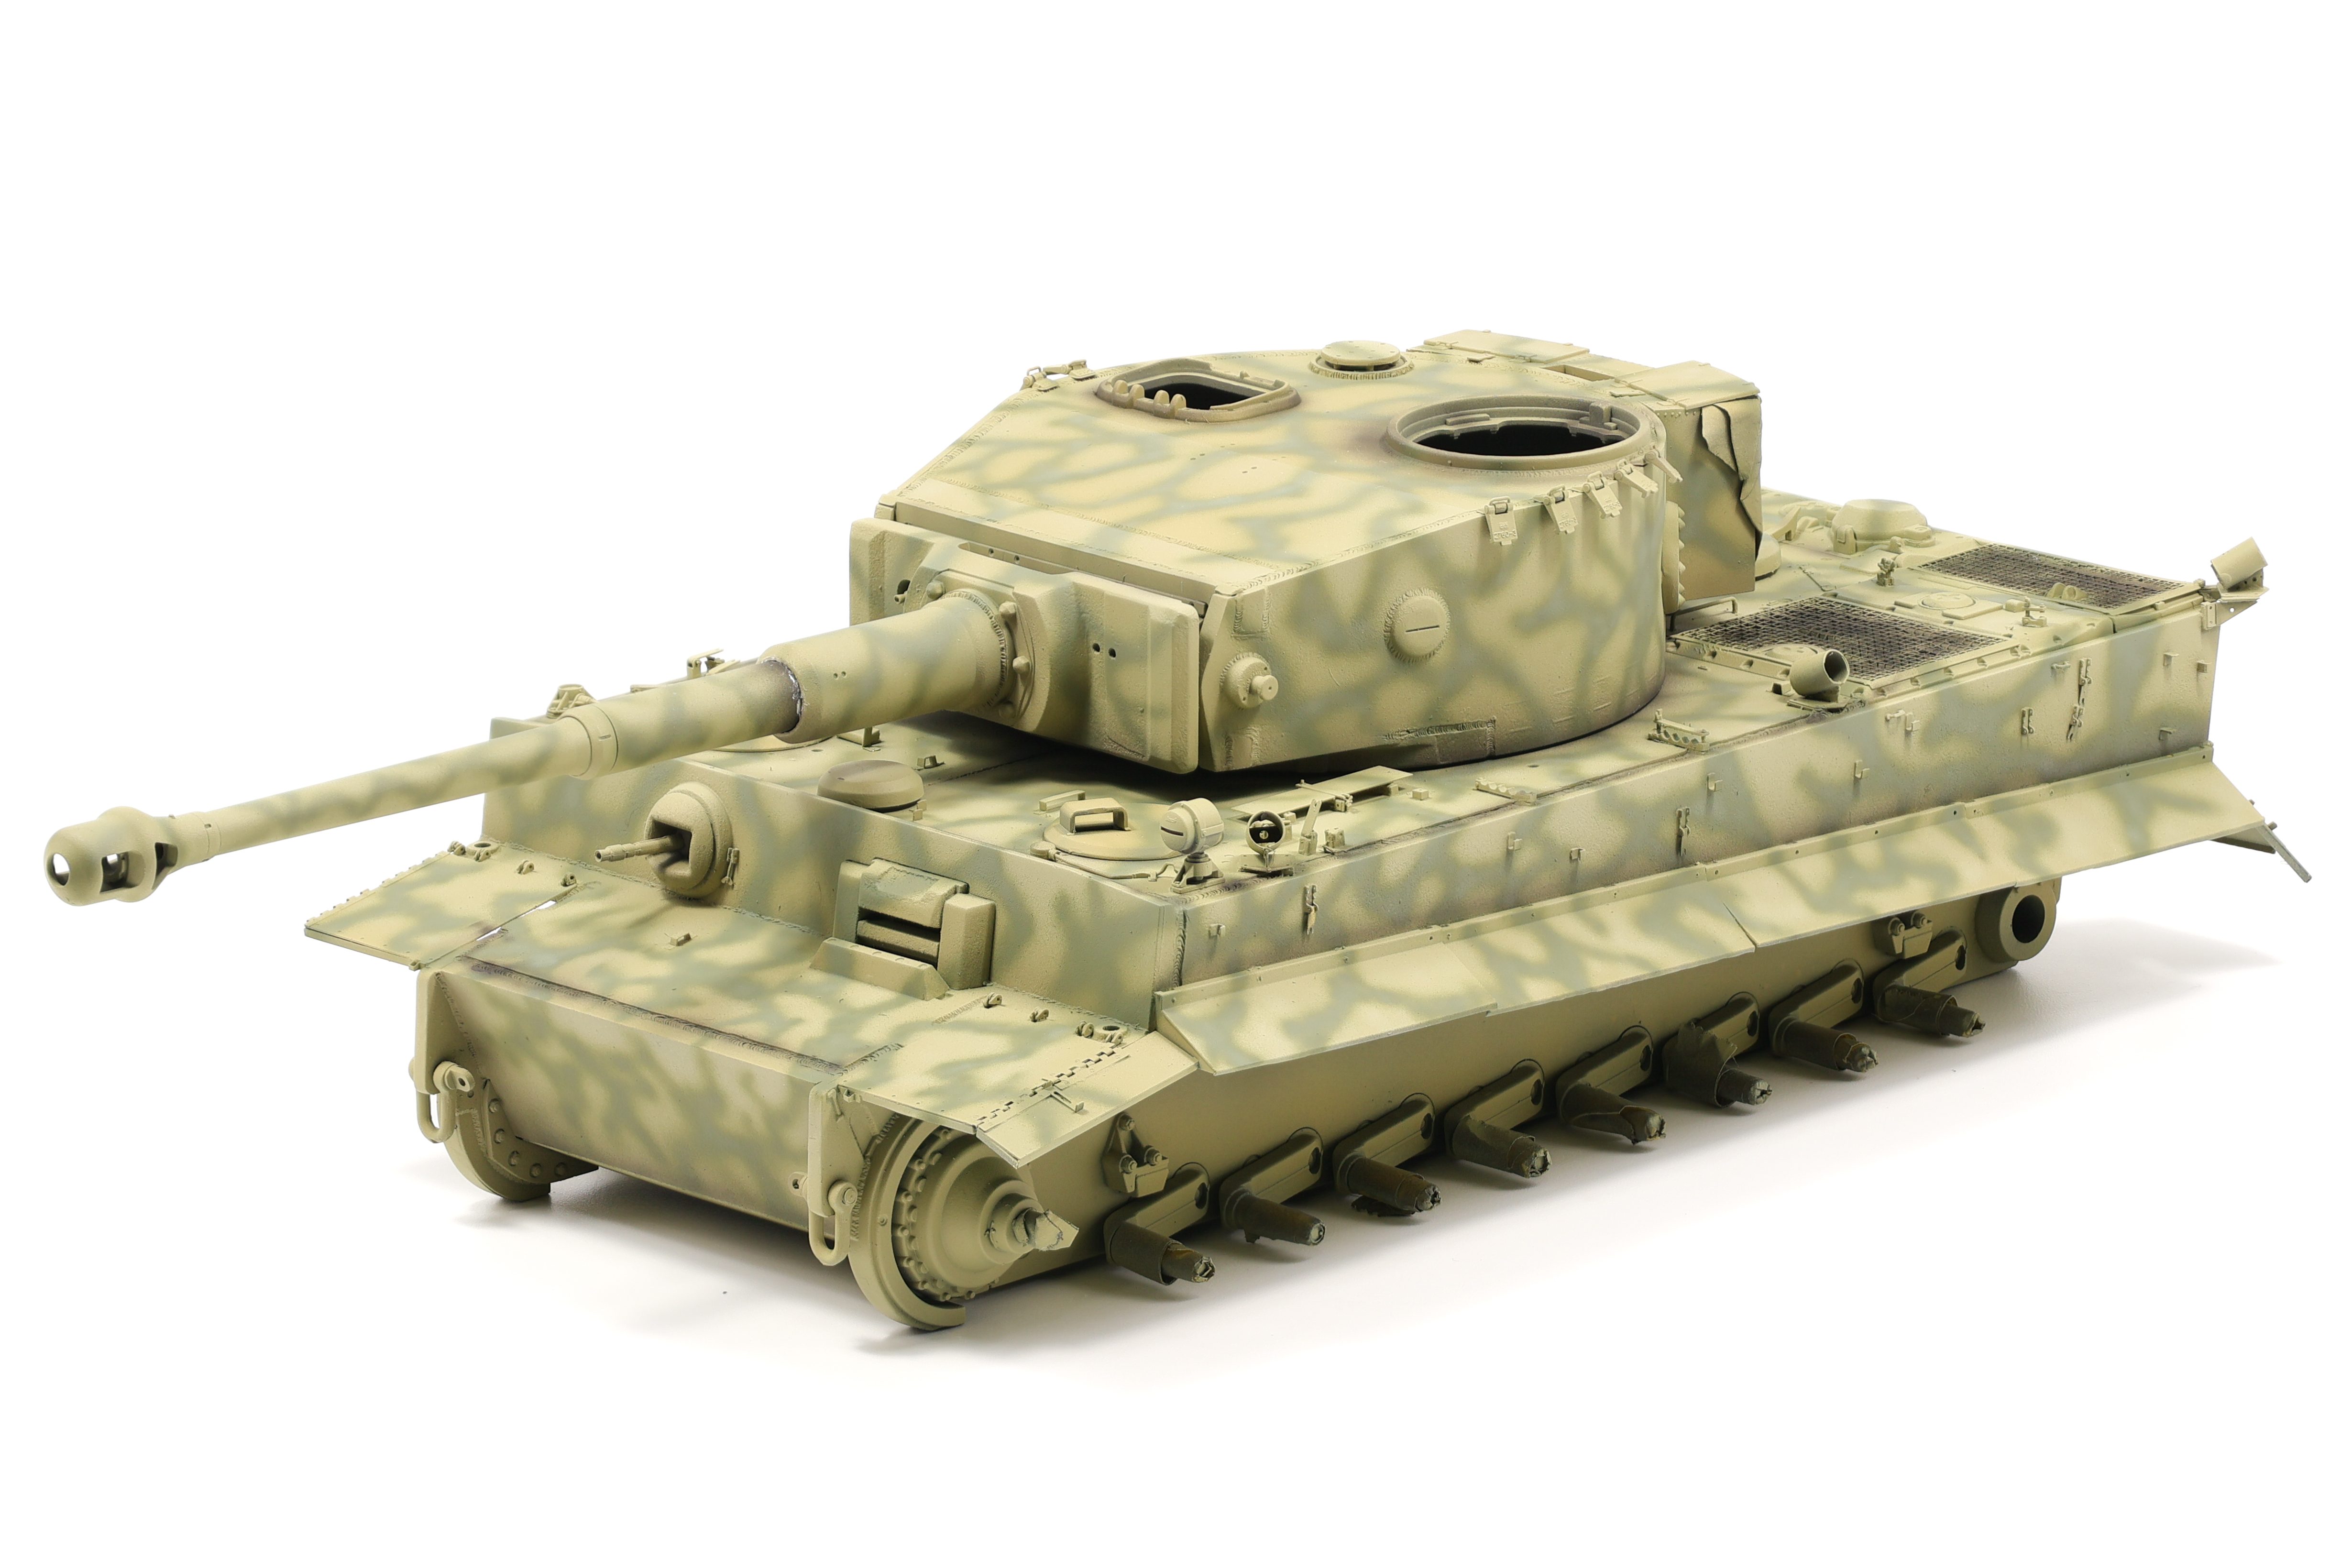
- Base coat and camo colour marbling
- Postshading (highlights and shadows)
- Sponge chipping effects
- Dark brown enamel wash
- Oil and fuel spills
- Airbrushed enamel dirt effects (mud shade and dust shade)
- Brushed enamel dirt effects (light, mid, and dark tones)
- Pigment application via dusting
- Pigment application via speckling
- Grass application via enamel dirt effect + thinner mixture
- Light dust pigment speckling for blending)
- Oil staining in selected areas over top mud and dirt
Ok that was a lot but now it’s time to go into each effect and in my mind how each effect builds on top of the others.


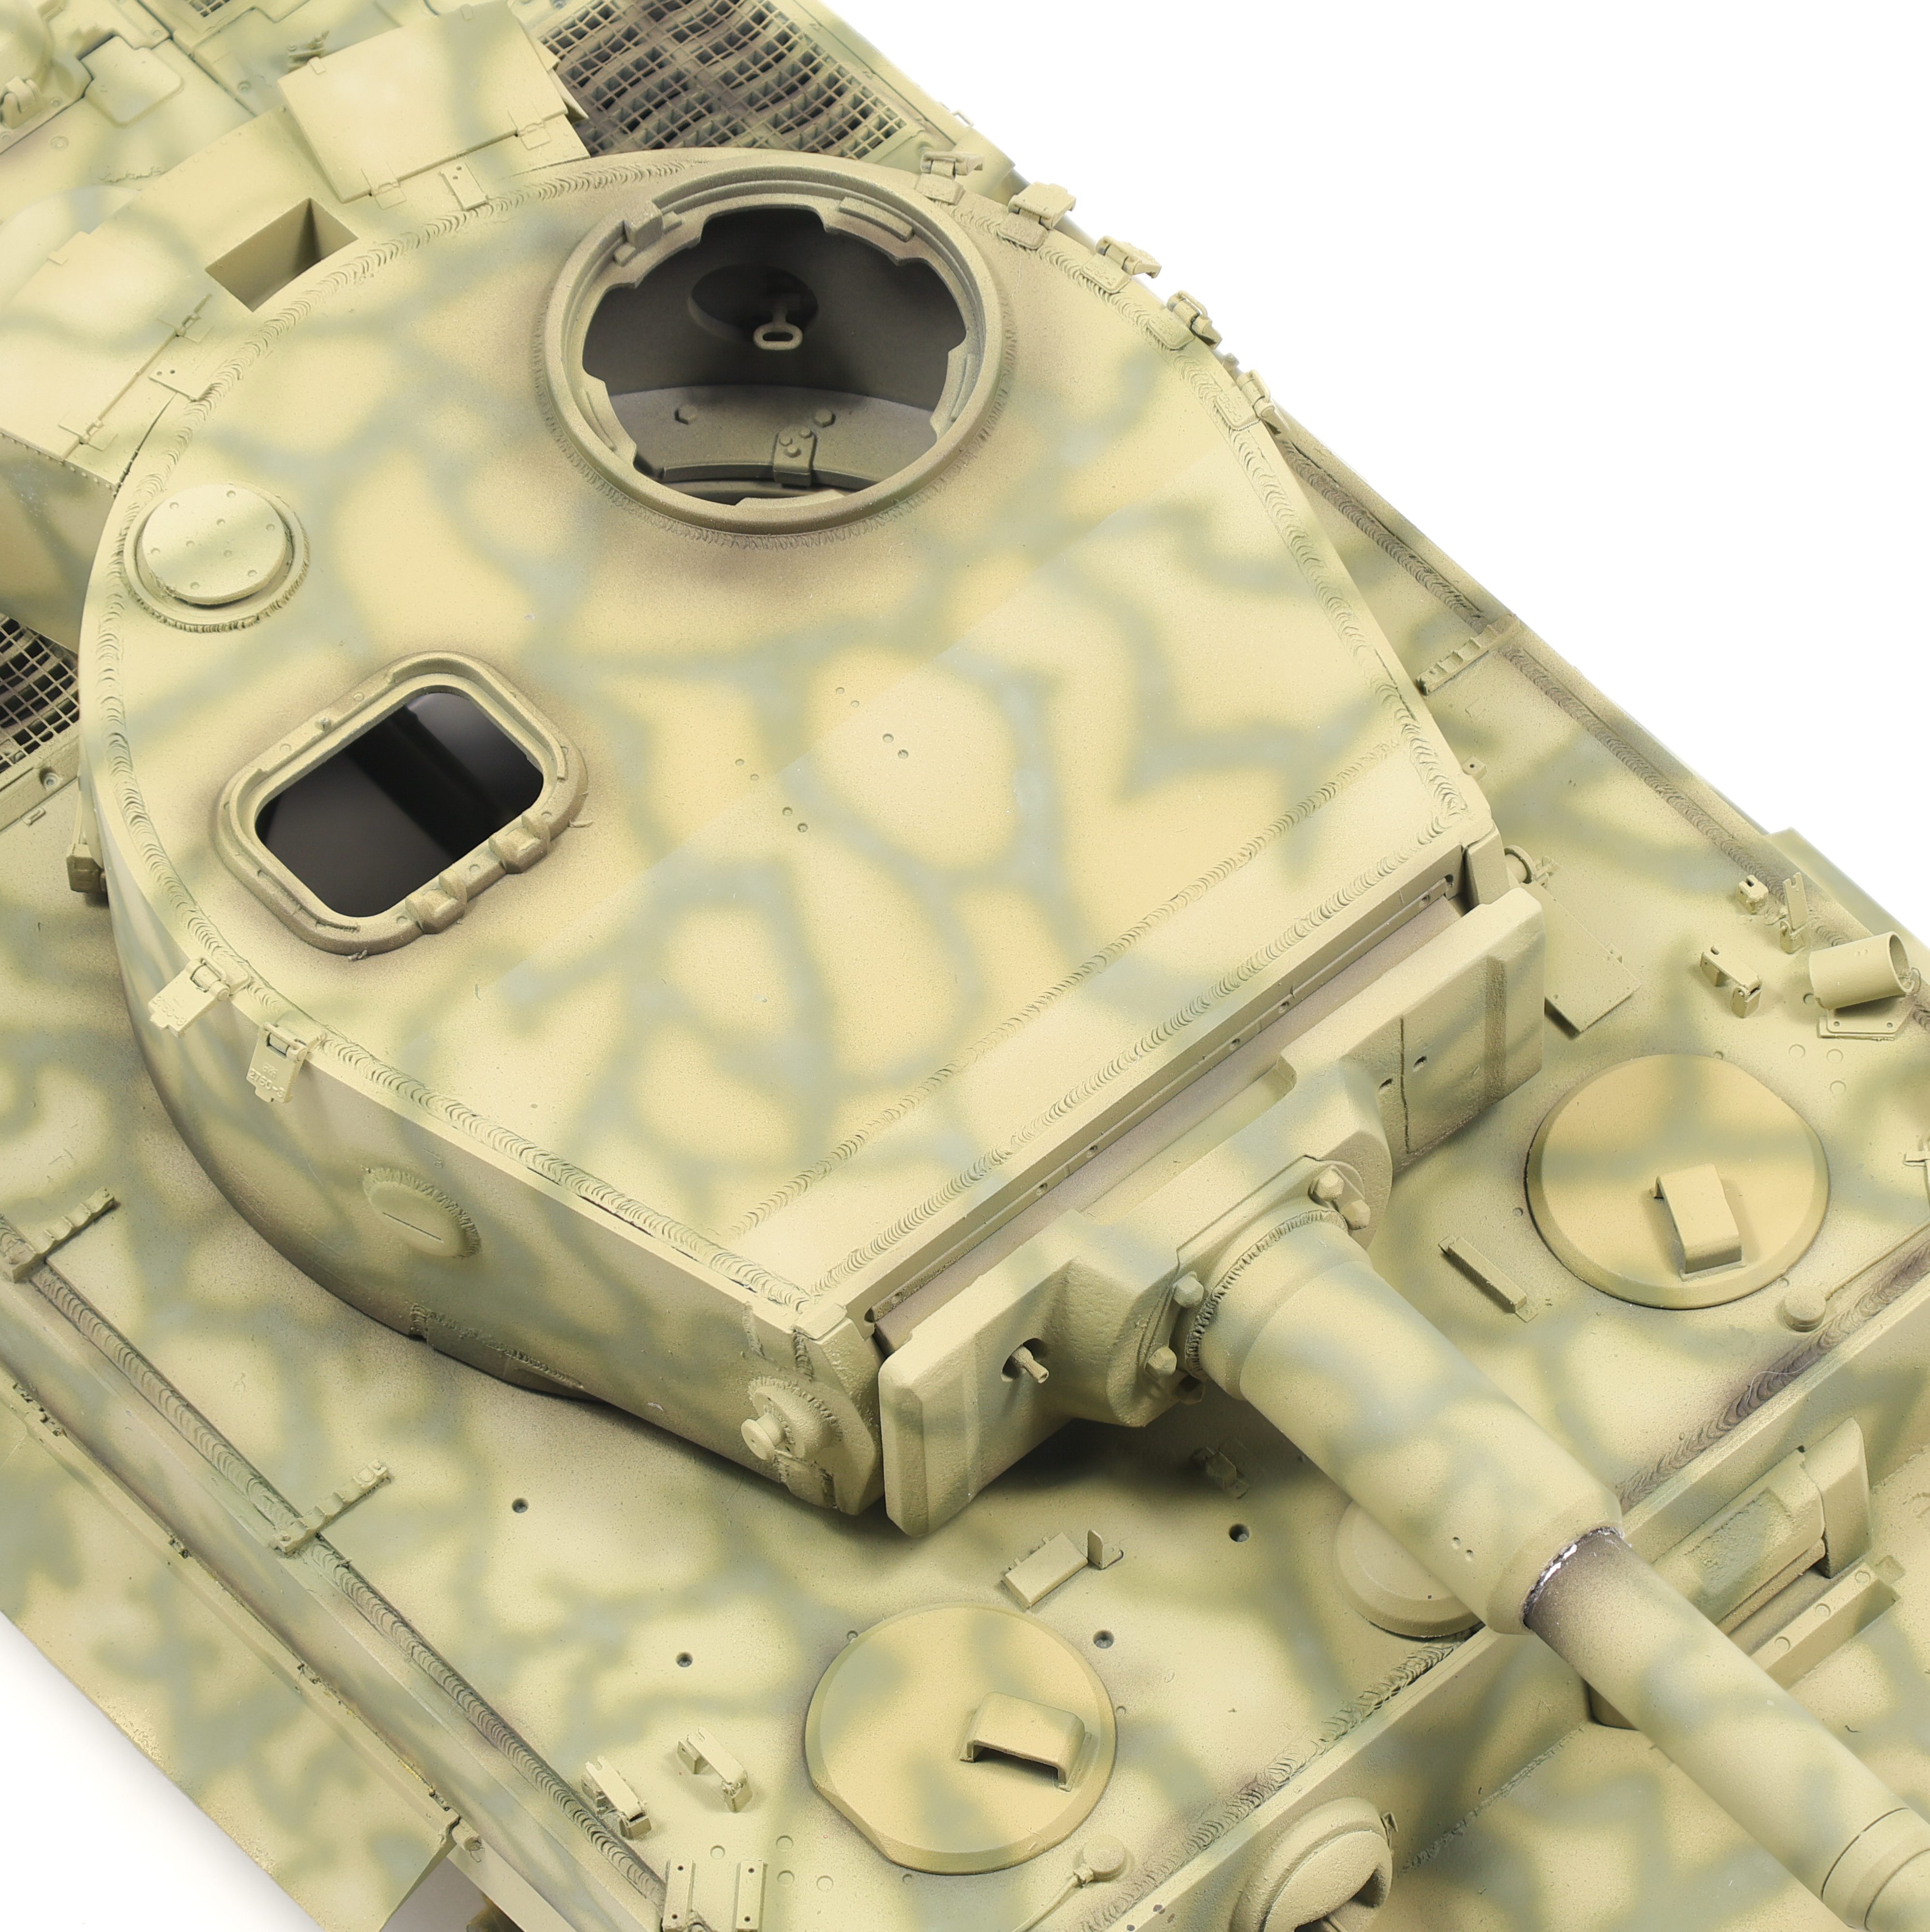
After sealing the model in a Satin varnish, the first effect I applied was a dark brown enamel wash from Ammo designed for dark yellow vehicles (A.MIG-1000). This really helped to bring out the small details that I had spend time creating, specifically the custom weld details.

Next, I turned my focus to the engine deck with the intention of adding significant oil, fuel and grime deposits. I have three products I use religiously for effects like these, all of which are from MIG productions. “Oil and Grease stain mixture”, Engine grime effect” and “Fuel stains” are all fantastic products and I use them on almost every AFV I build. I used several methods to apply them to the model, including as a diluted wash colour, stippled onto the surface, and as a streaking effect as well.

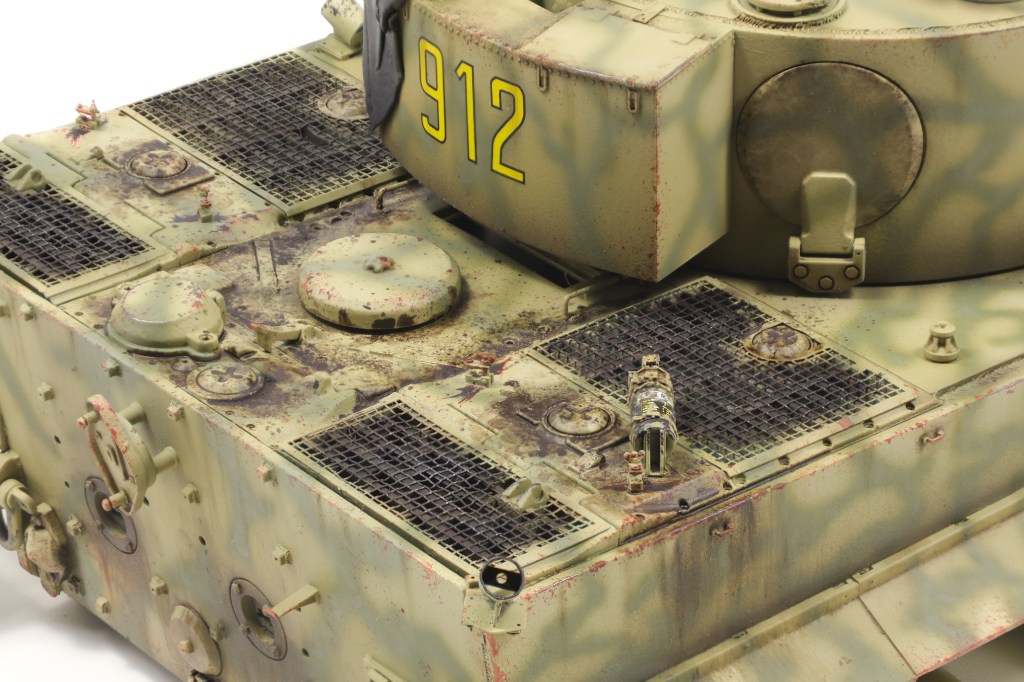

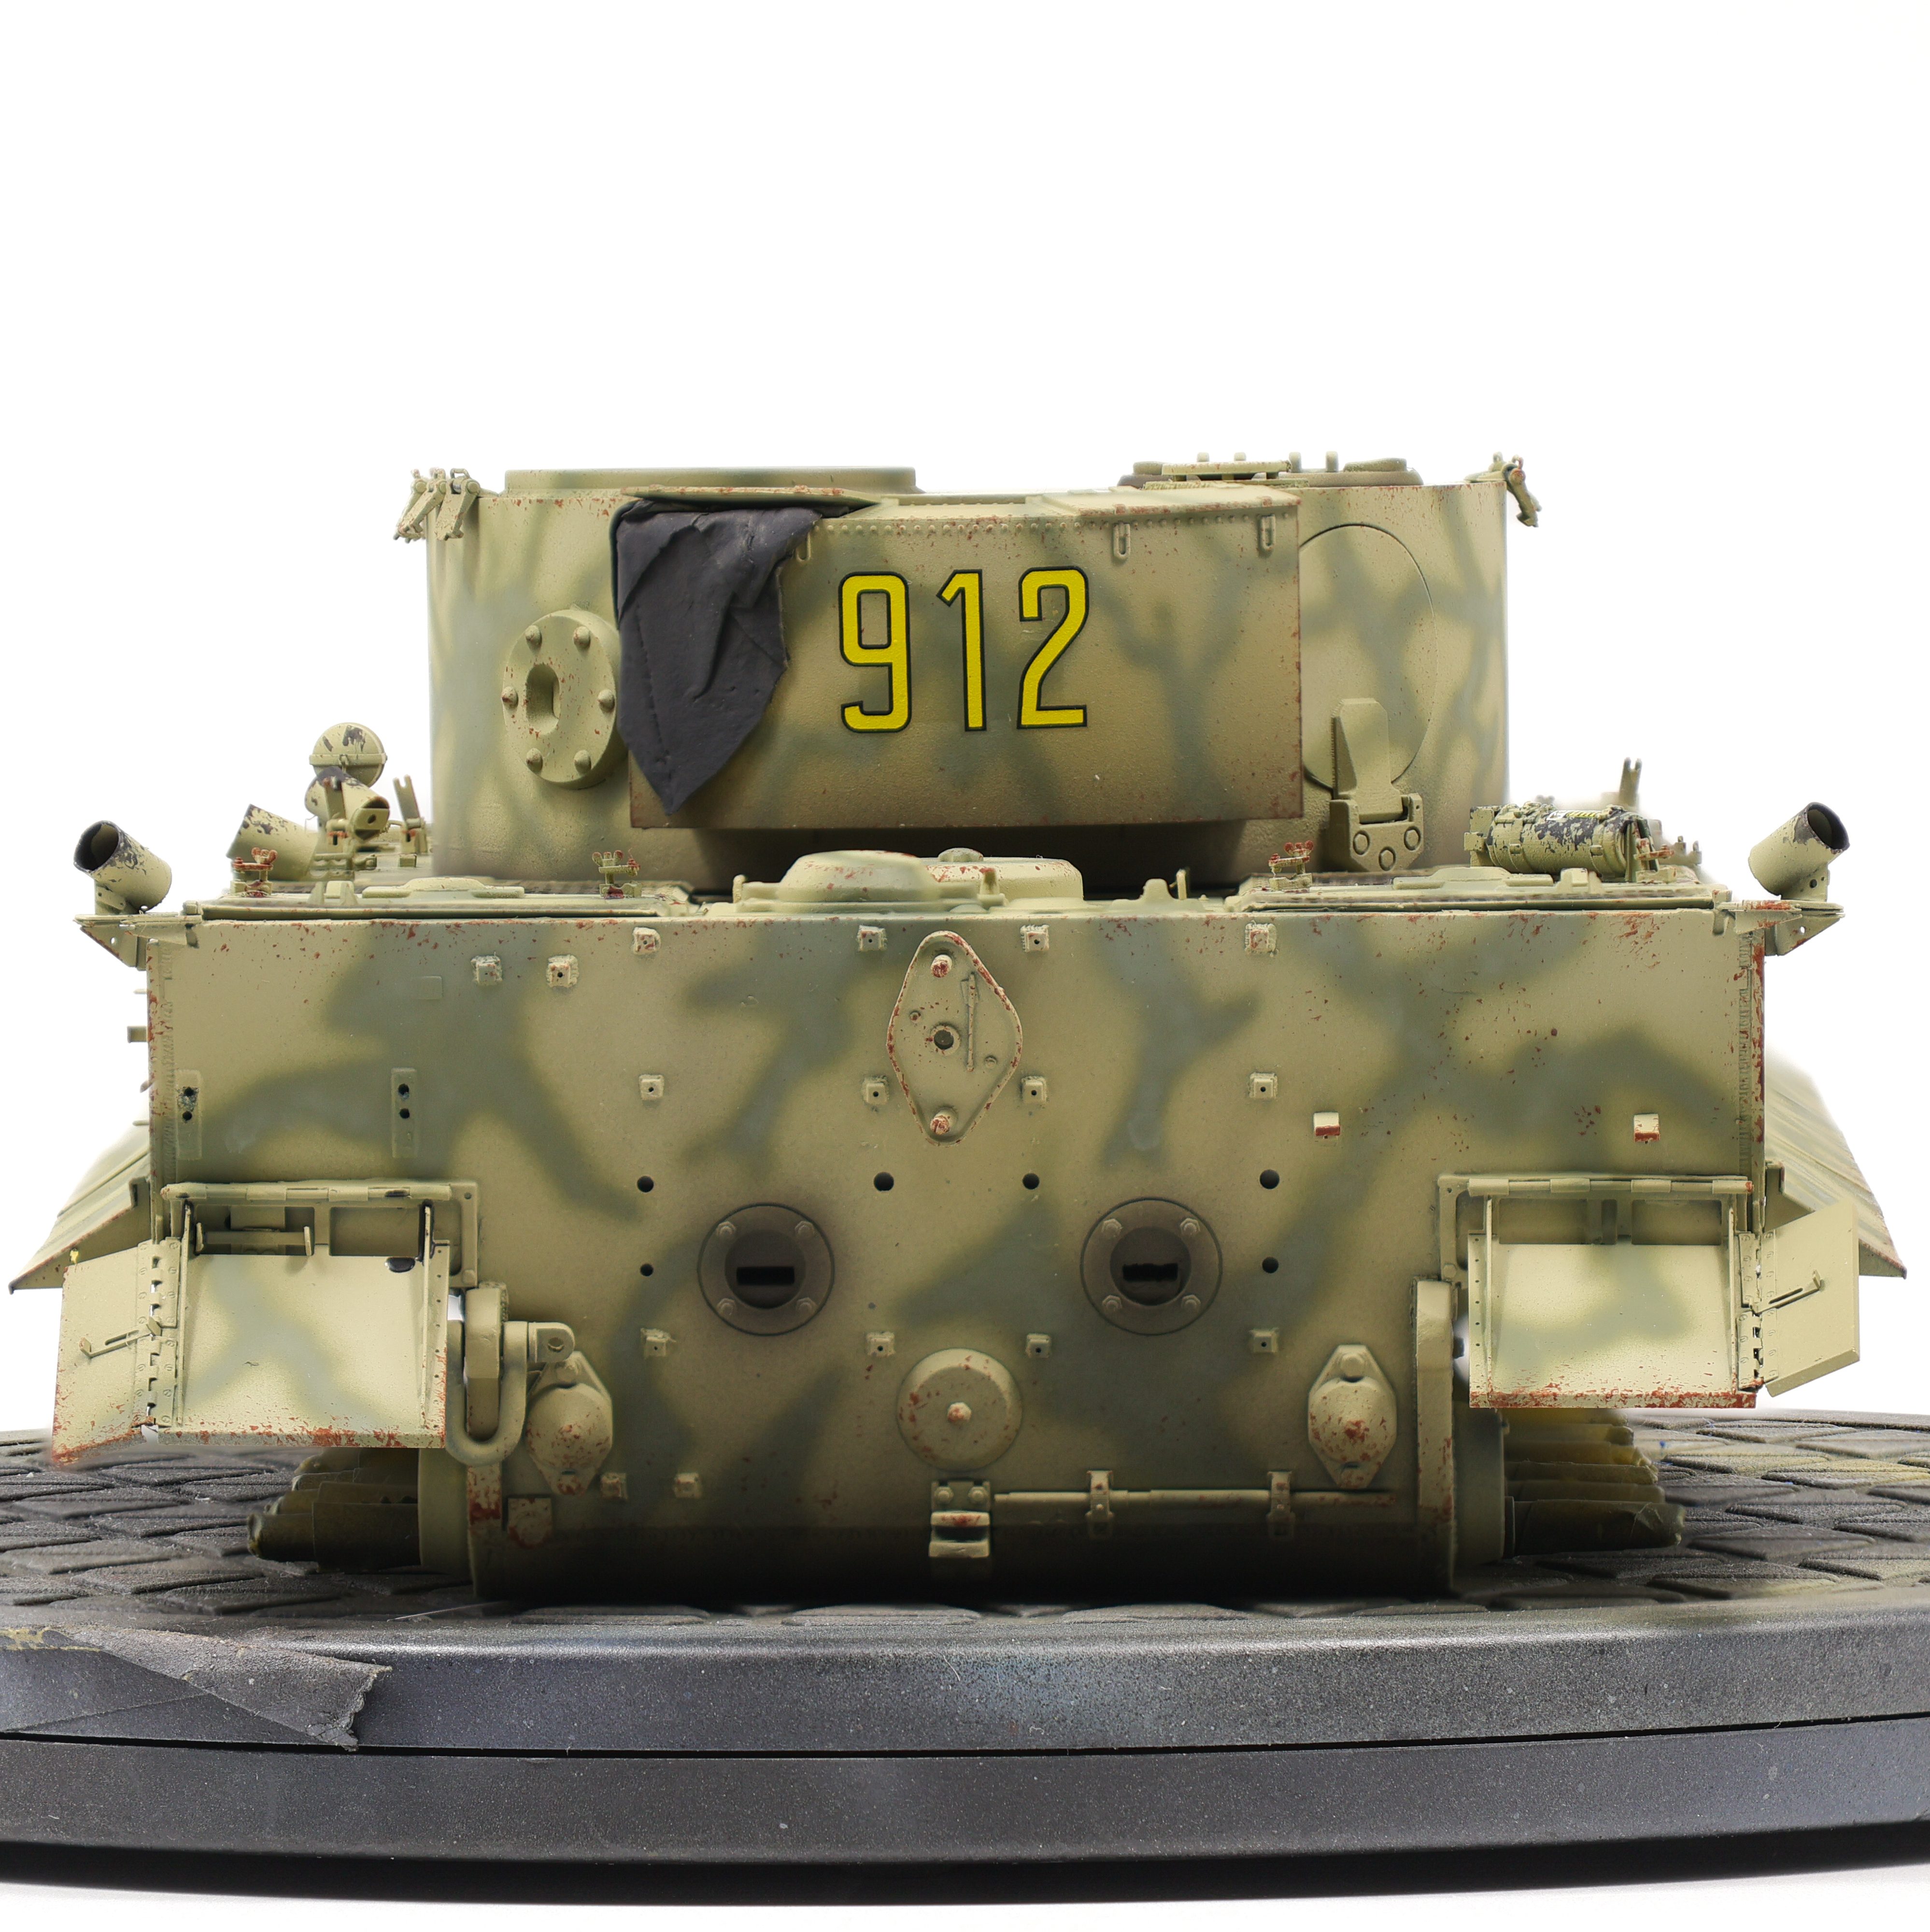
Enamel dusting is rapidly becoming one of my favourite effects and I utilized it on this build as well. The technique involves airbrushing highly diluted enamels onto the model before using a brush dampened with enamel thinner to create downward streaks. This effect is great at replicating dirt and dust that has settled on the vehicle naturally but has begun to wash away due to rain and other activity on the vehicle. I used two shades on this project, XF-10 Flat Brown and XF-52 Flat Earth as my dirt and dust shade respectively. XF-10 is a very dark, muddy colour and as such I limited it to the lower, shaded areas of the vehicle. XF-52 is a lot lighter and does a better job at depicting kicked up dust that falls onto the vehicle as it moves. This colour is also good for fading markings. On the Tiger, you can compare the colour of the balkenkreuz to see how this effect is able to depict general dust and dirt buildup on the vehicle.


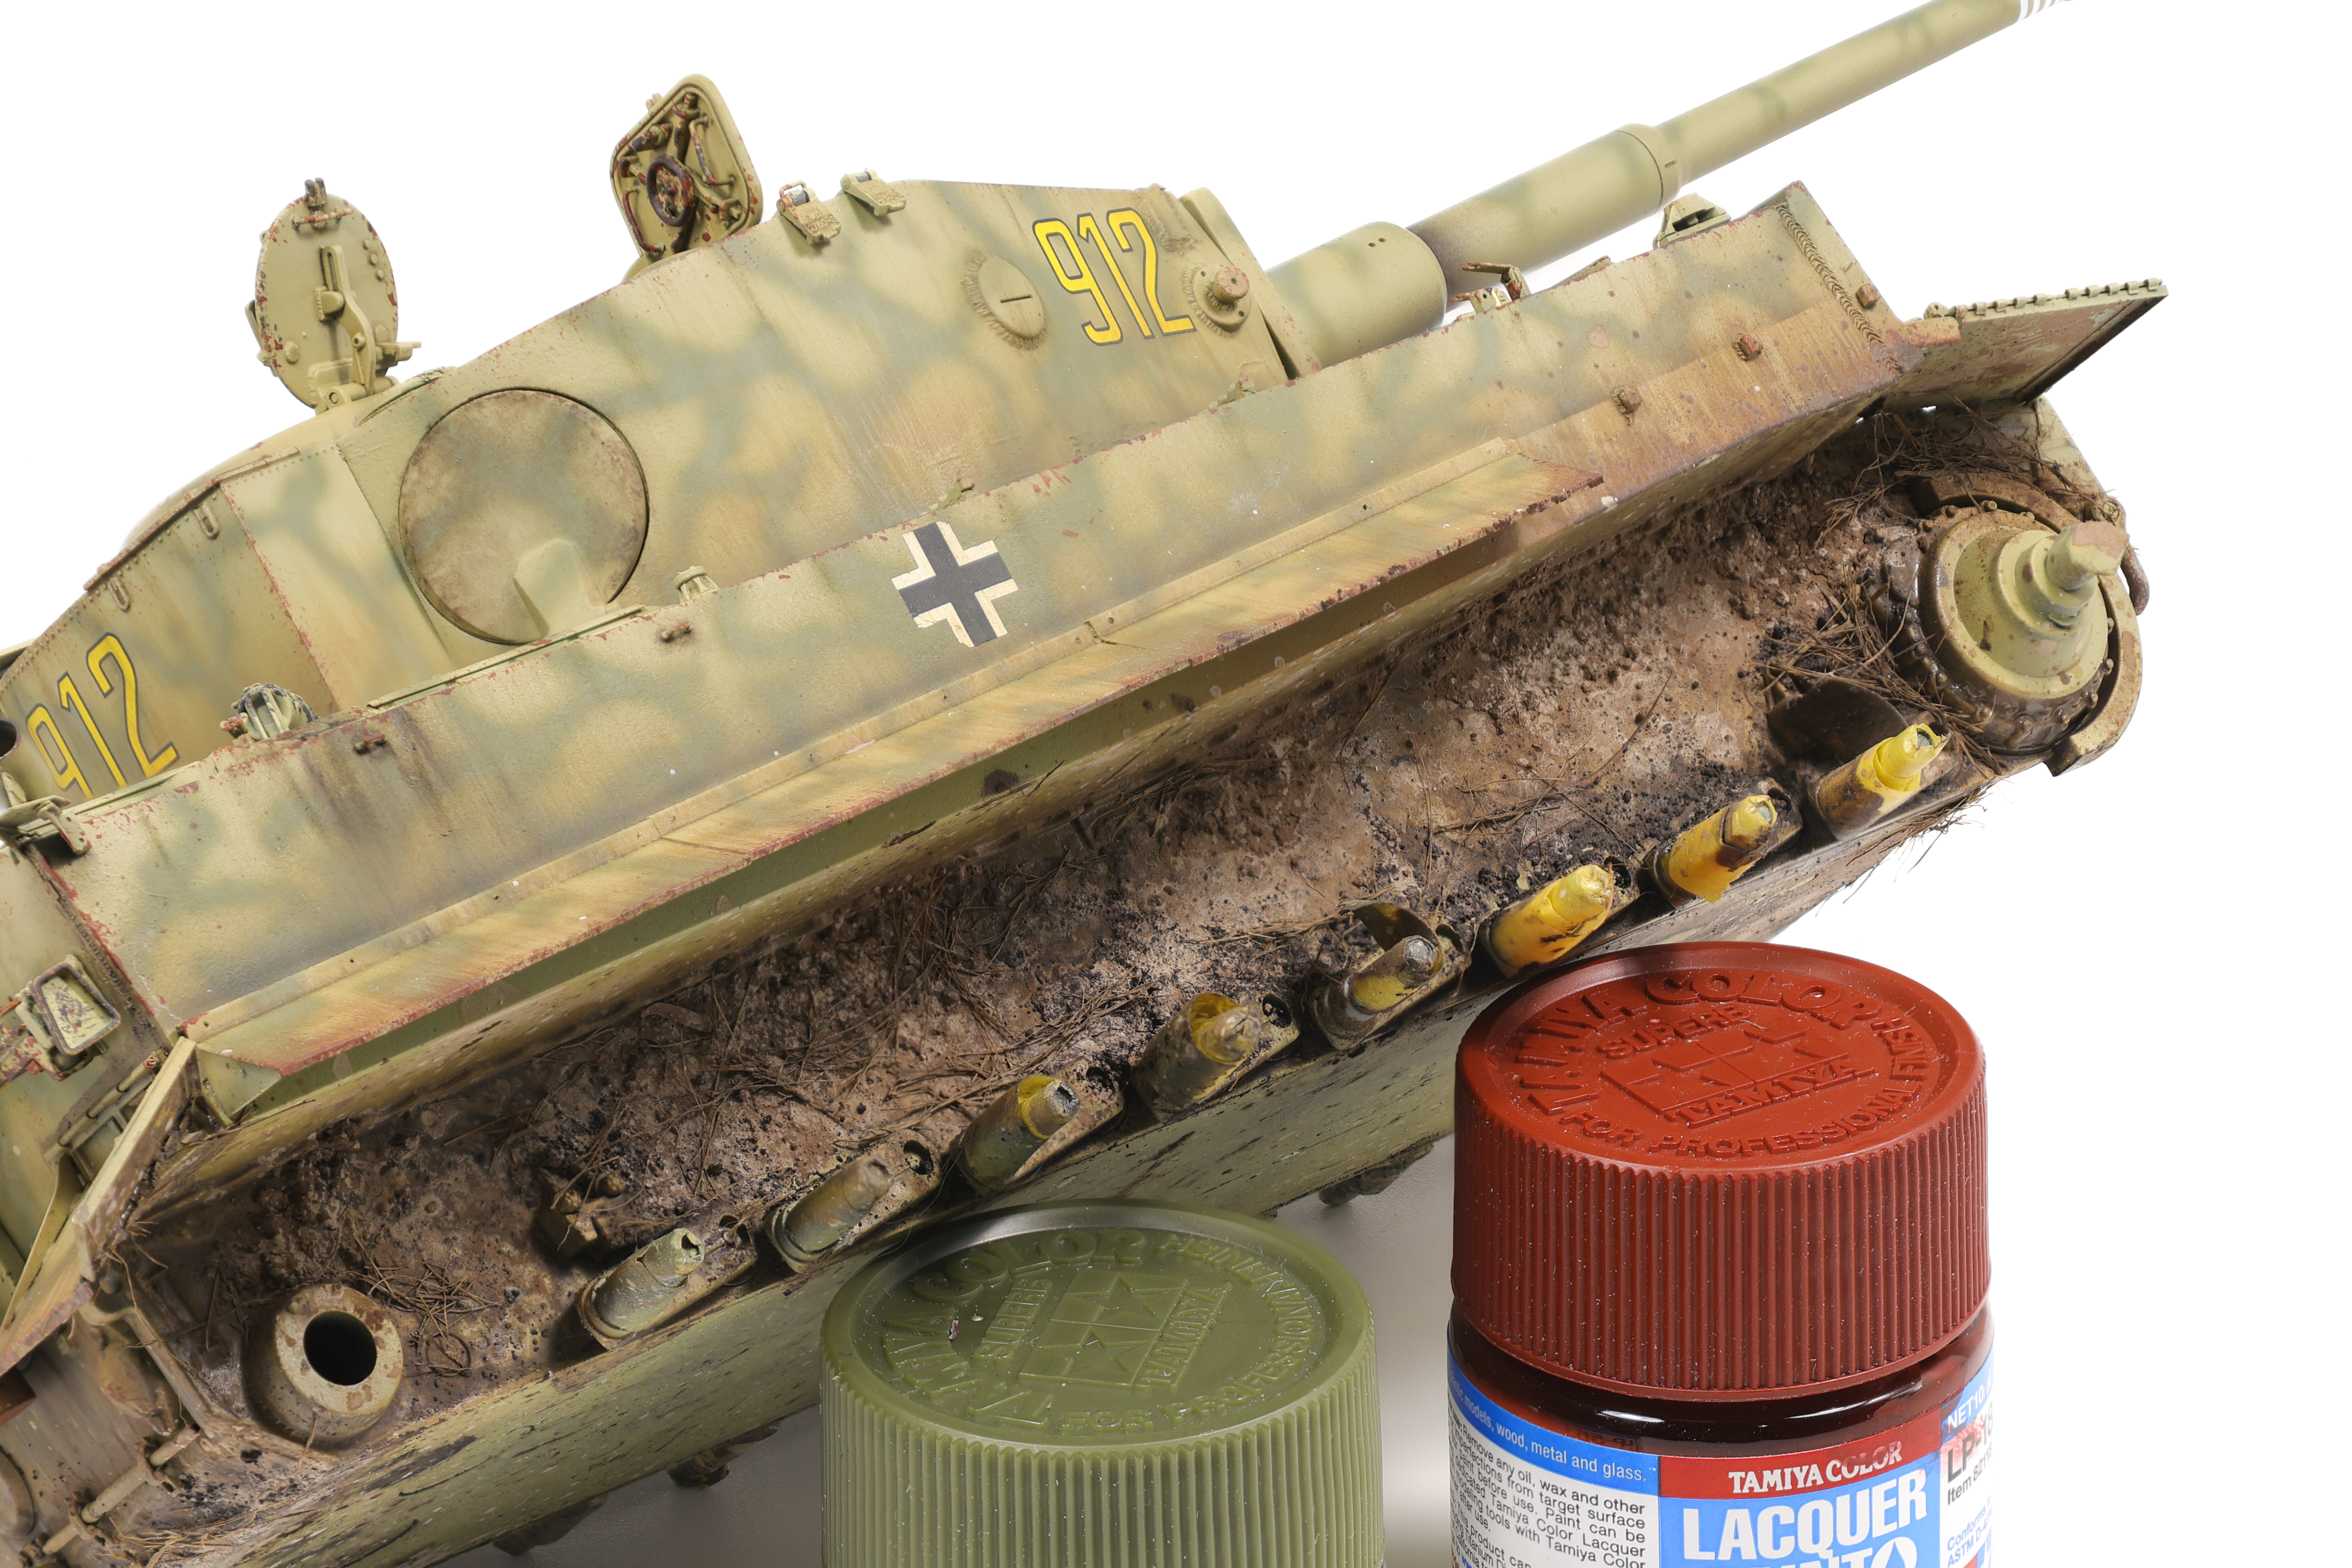
Next, I began working on the more involved dirt and mud application on the model. To start I applied some enamel nature effects from Ammo, namely “Kursk Soil ” (A.Mig-1400), “Loose Ground” (A.Mig-1752), along with “Fresh Mud” (A.Mig-1402) and “Damp Earth” (A.Mig-1406) to a lesser extent. These products were roughly brushed onto the lower areas of the model and allowed to somewhat mix with each other in limited areas. 5-10 minutes after application I then began pigment application over top the still wet enamels. I chose four shades of pigments to use. From Abteilung 502 I used “Light European Earth” (ABTP415), “Rubbel Dust” (ABTP234), and “Russian Earth” (ABTP034) along with Mig Productions’ “Track Brown” (P414). To apply pigments to the model, I loaded them onto a wooden stir stick and gently tapped it to cause the pigments to fall onto the model in medium sized clumps. Because the enamel are still wet, this causes the pigments to stick to the model and stay in place. I repeat this process for the four shades, taking care to apply them in the correct area. I used the “Rubbel Dust” and “Russian” Earth” shades as my primary colours here with “Light European Earth” and “Track Brown” serving as highlight and shadow shades.
At this stage the pigments will be very loosely applied to the model and not stay in place for the remainder of the build. To solve this issue, I applied small amounts of enamel thinner to the dry pigments causing them to dampen. This has the effect of binding them to the model when they dry and makes them a lot more durable.
As a side note, you can get very creative with this technique. By varying the amount of thinner you add you can change the texture of the final dried pigment. By adding a lot of thinner, the pigment will almost completely liquify which will look as if liquid mud has splashed onto the vehicle. An alternative approach is to use as little thinner as possible, causing the pigments to dampen, but not liquify fully. This in turn creates an effect that looks like semi-solid clumps of mud and dirt has been flung onto the vehicle and dried in place.


Next, I created a pigment mixture consisting of pigments and pigment fixer in a dish. I loaded up a brush with this mixture and stippled it all over the surface This is done to recreate small pieces of mud and dirt that has been flung onto the vehicle and is more subtle than the previous pigment application. I applied a coat of the four shades listed earlier. This also has the effect of really fixing all the pigments in place.
After letting them model dry out completely for a few days (It takes a long time for all the pigments to dry completely!) I then decided to add some grass effects to the lower surfaces of the model. To do this I whipped up a new mixture of “Loose Ground” along with AK “dried sea grass” (AK8045). I am a huge fan of this grass product, it looks incredibly realistic and there’s a ton of it so it lasts a long time. To apply it to the model, I throughly mixed the grass with the enamel product before grabbing clumps of it and applying to the model with tweezers. Because the grass has been soaked in the enamel effect, it sticks to the model and will dry in place.


The last effect I applied to the model was the addition of some oil stains over top of the dirt and grass effects. To do this I added some of the “Oil and grease stain mixture” mentioned earlier to recessed areas where I wanted oil leaks to show through. I kept this effect focused on the road wheels to depict seals that had been worn down, causing an oil leak. Using a very fine brush, I dragged out small amounts of the stain mixture to the rim.

After completing the main work on the hull, I then moved on to painting and weathering the tracks. I have my workflow for tank track pretty nailed down by this point and this build was no exception. To start, I painted the track with Mr. Metal Color MC212 “Iron”. this is a fantastic base colour for tracks I’ve found. It finishes as a very flat dark grey, however after it’s buffed, it shines very nicely. After applying the base colour, I then added a very messy coat of Vallejo Sienna Claro pigment with a brush. I do this with no fixer or binder, and my goal is to get started working pigments into the track crevices.

Next, I then stippled various enamel earth effects and pigments (mixed with fixer) onto the tracks with no specific pattern. This creates an effect in which the tracks look live they’ve been run through lots of different types of dirt and mud and creates a nice overall weathered effect. I then took a paper towel and dragged it over the track cleats, removing the weathering effects from this area. This also polishes the underlying MC212, causing the paint to shine and creates a nice contrast with the dirty parts of the track. As a final effect, I drag a graphite stick over to of the cleats as well.
Next, I moved on to the tracks that would be fitted to the sides of the turret. Since these would not have seen as much wear as the running tracks, they would need to be weathered in a different way as previously described. As before, I painted them with a MC212 base coat before conducting further weathering. I then utilized two different rust shades to weather these tracks. I utilized a dark rust streaks and light rust wash colour as my two tones that I would work with. The dark rust streaks colour appeared more so like a dark brown and would serve as the basis for future work. I applied it fairly liberally over the tracks, making sure that it flowed into recesses. I then speckled on the light rust wash colour taking care not to overflow the surface. This approach would create highlights in specific areas and create a fairly convincing rust effect in my opinion.
As a final touch, I then polished the exposed edges to simulate rust being worn away on exposed surfaces, creating a nice contrast with the rust tones.
And with that, that’ll be it for this update! A final update of the completed build will be out shortly!