
This past week I was able to finish Kinetic’s 1/48 CF-18 and just in time for the holidays! (currently finishing this write-up out of Toronto Pearson) This build took around 3 months to complete and although I’m definitely happy with the end result (probably my best result to date!), the build itself was challenging to be completely honest.
The kit was plagued with rough fit and unclear instructions. The infamous nose/windshield assembly lived up to its reputation and fought me the entire way.
As I had been thinking about this build for the better part of this year, I spent the months leading up to it gathering various aftermarket pieces to enhance the build. The full list is as follows:
- Leading edge “Combat Hornets” decal set
- Aries Resin ejection aeat
- Flying Leathernecks 3d printed accessories
- Wheels
- Hud
- Pitot tubes
- Weapon pylons
- Eduard Resin Aim-9 Sidewinder and Aim-7 Sparrow missiles
- Anyz decals and 3d printed parts
- Various scratchbuilt wiring and tubing

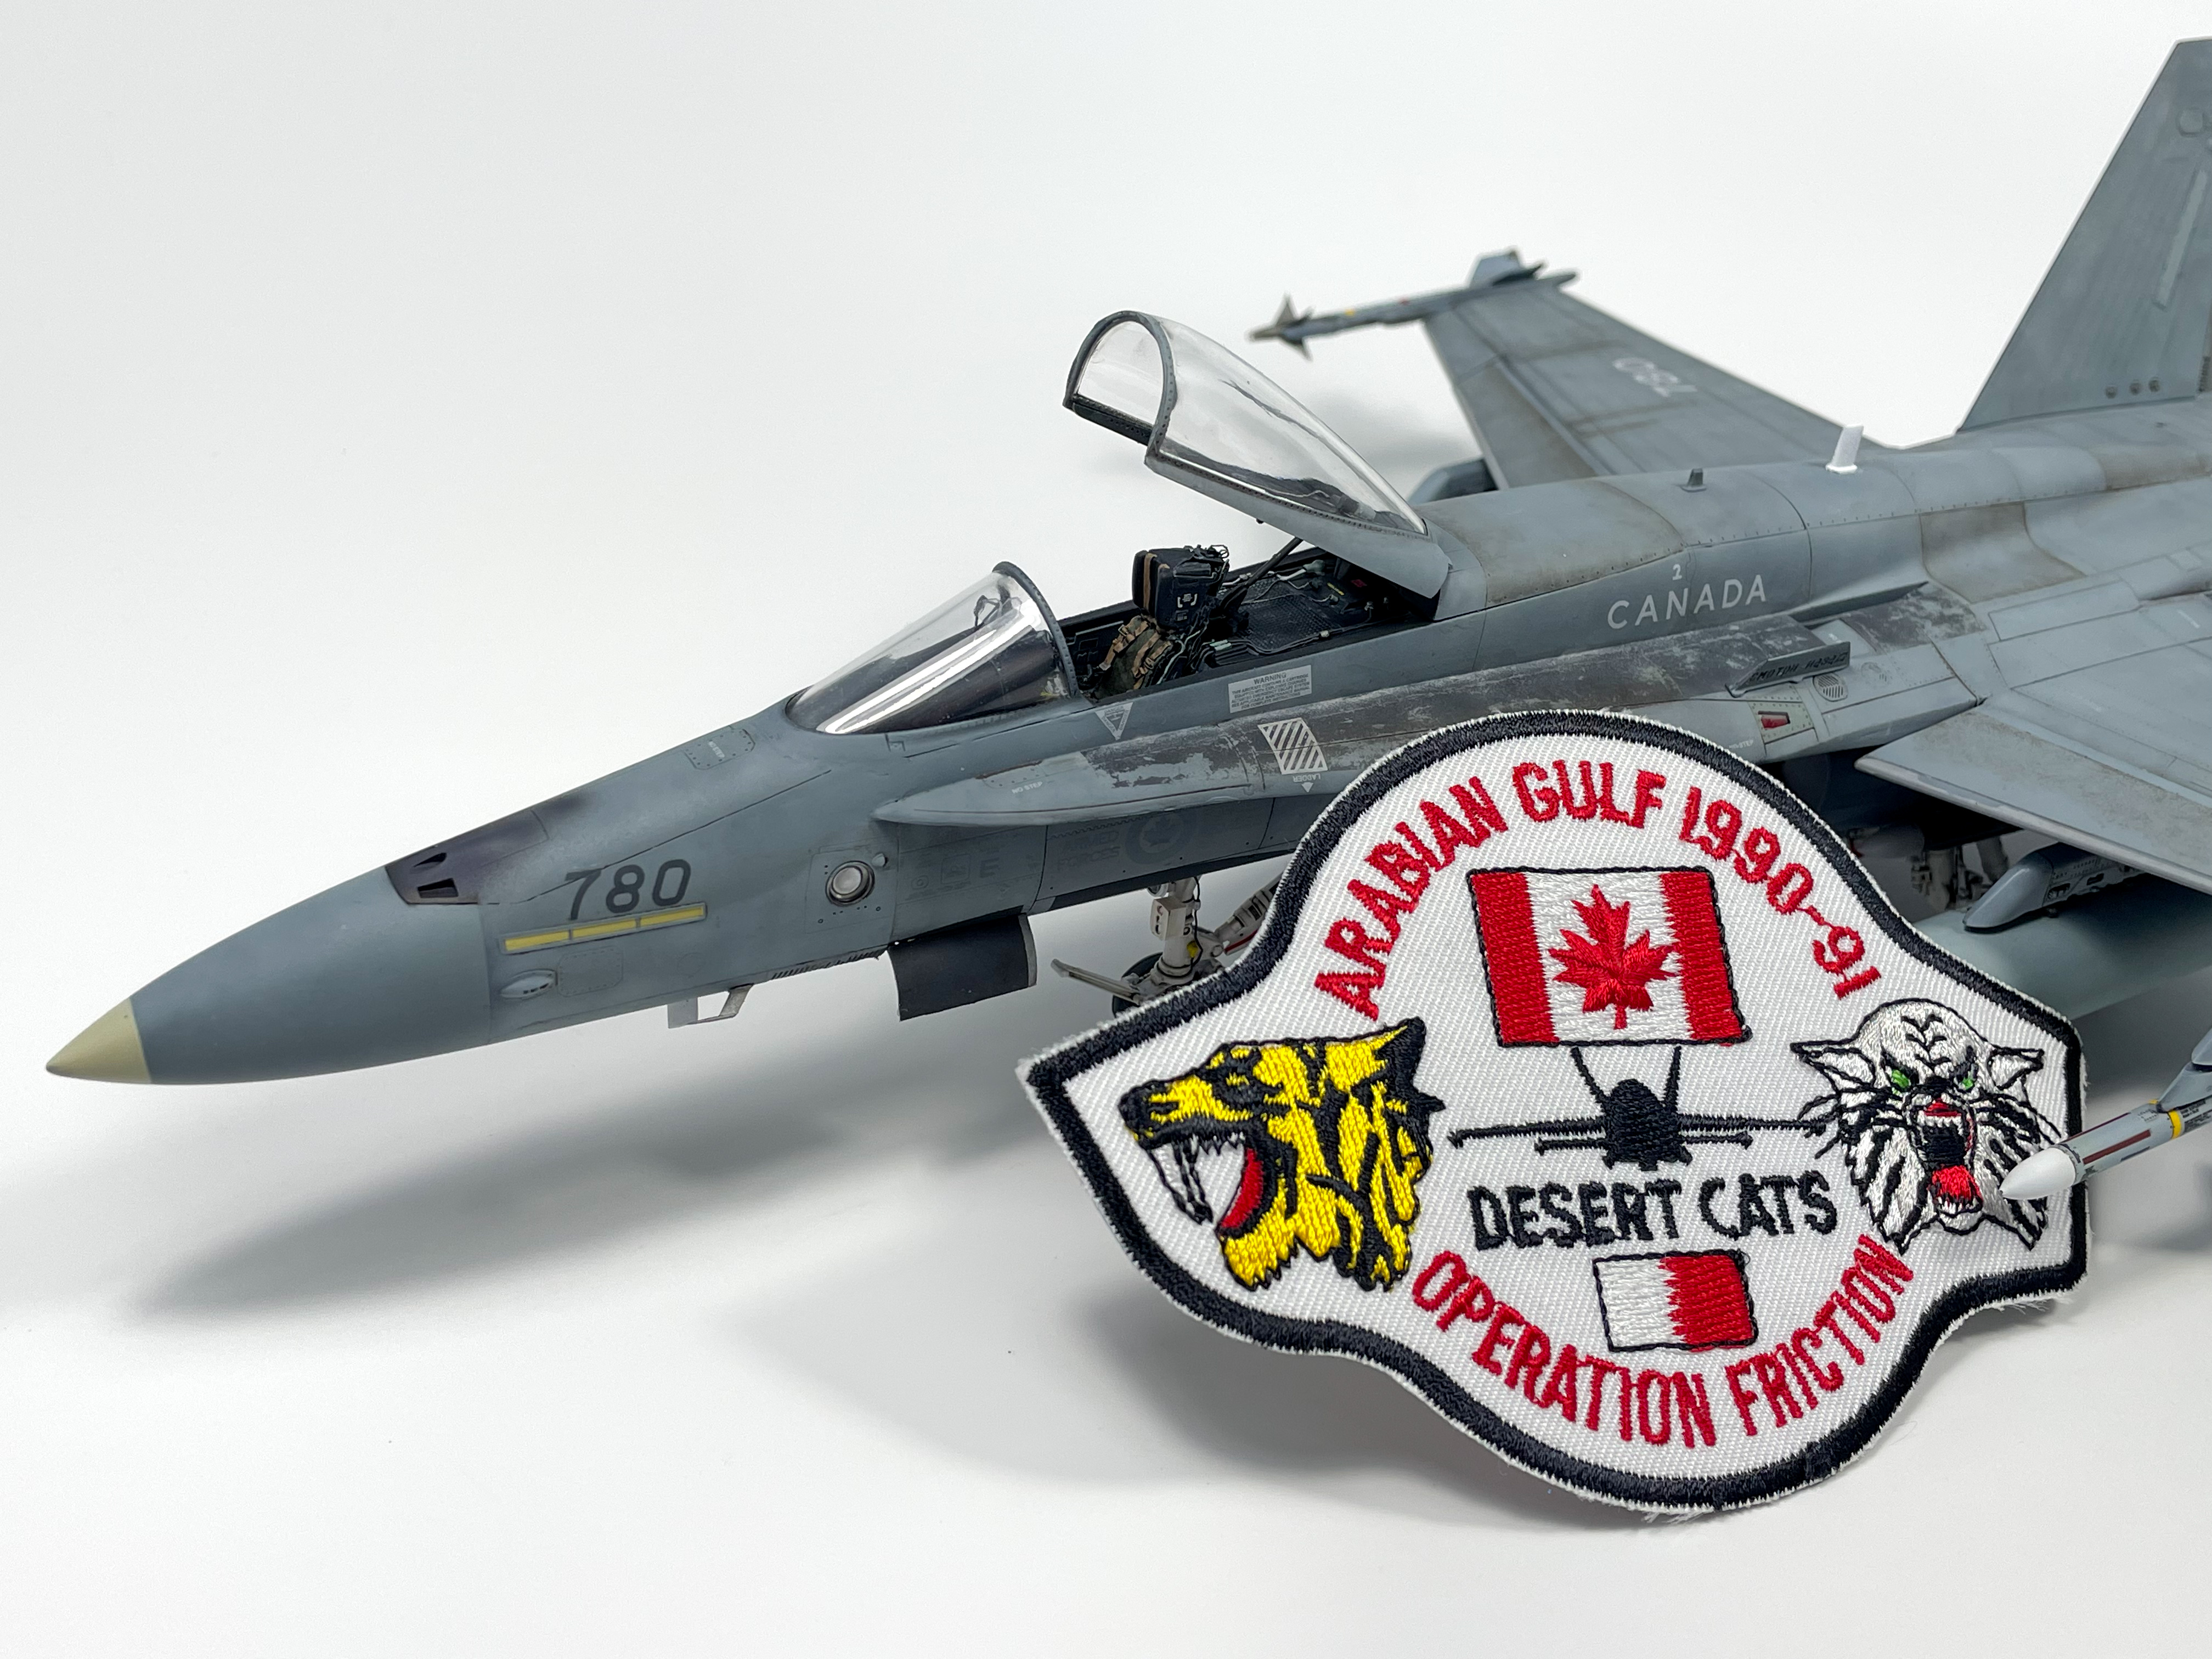
The Leading Edge decals really were the catalyst for the build, I knew I wanted to build a Canadian Hornet but that I also wanted build a specific aircraft, No. 188780, one of the participants of Operation Friction, Canada’s contribution to the 1991 Gulf War. This aircraft stood out because of the Cyrillic writing “oсмотри назан” on the Lex fences, with some sources translating the text as “check six”. This marking was specific to aircraft based at CFB Cold Lake which were responsible for “greeting” Russian aircraft over the arctic. As far as I can tell 780 was the only aircraft with the Cyrillic writing present in Desert Storm.


Refocusing back to the build, I tried to scribe my own panel lines for the first time along with adding rivet details. While I feel my scribing skills need improvement, I think that the rivet details I added really stand out and were a worthwhile addition to the model. Kinetic is missing some pretty prominent rivet details on the wing and vertical stabs and the custom detail really enhances the area IMO.

A more detailed breakdown of the painting and weathering stage can be found on that phases’ separate post but the basic overview is as follows. I primed the model in black, added an initial marble coat, followed by a blend coat and detail coat before tying the entire finish together with a final blending coat. I really do enjoy this technique, the method of slowly raising the opacity of paint layers comes very natural to me and is a straightforward (if time consuming) process. That said I do think I need to experiment in this area, and possibly start to add more post-shading to my workflow. As it stands now I see two distinct disadvantages to my current process, the first is that this is a very “dark” method in that since the model is being primed black I often need to finish the model in a shade lighter so that the end result is tinted the correct shade. The second issue is that the best gloss varnishes like to burn hot and will reduce the opacity of the paint by about 5% or so which needs to be taken into account when spraying the final blend coat.

One area I wanted to pay specific focus on was the cockpit, and took extra care and time to get it looking how I wanted. Of immense help was Kris Sieber’s book, “Superdetailing the F-14 Tomcat” which is a must buy for anybody serious about building modern jets. Even though the book is about the process of detailing a Tomcat the techniques can be applied to any ghost grey jet.


All in all however, I really do feel that this is the best kit I’ve built so far and I was able to use everything I’ve learned over the past year or so to really enhance both the building process and the painting/weathering process. Enjoy the final build photos below!


Leave a Reply