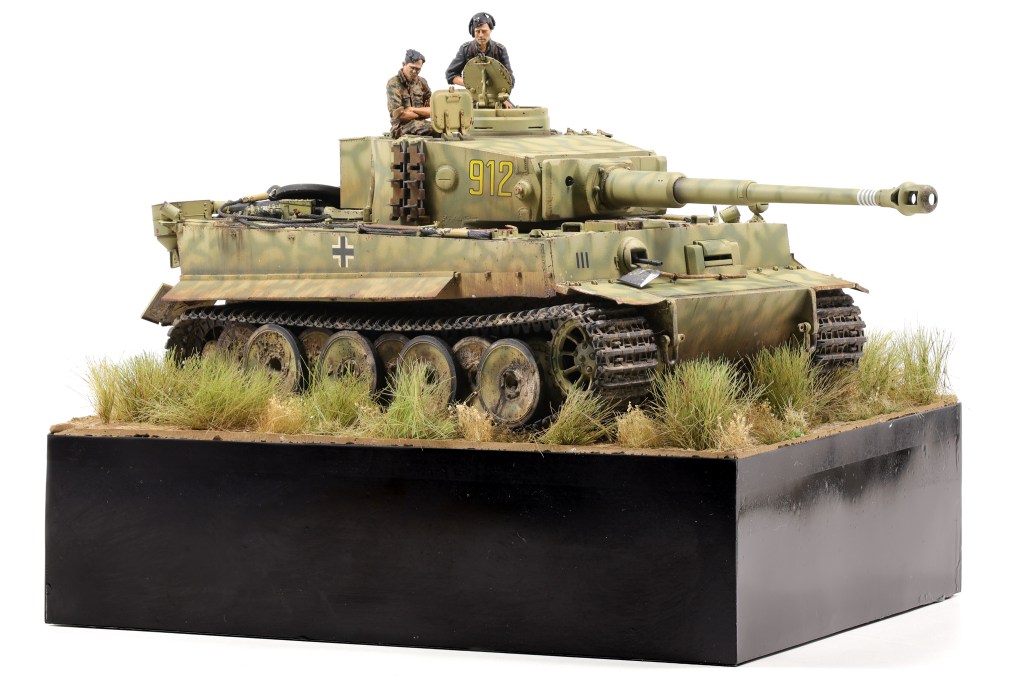
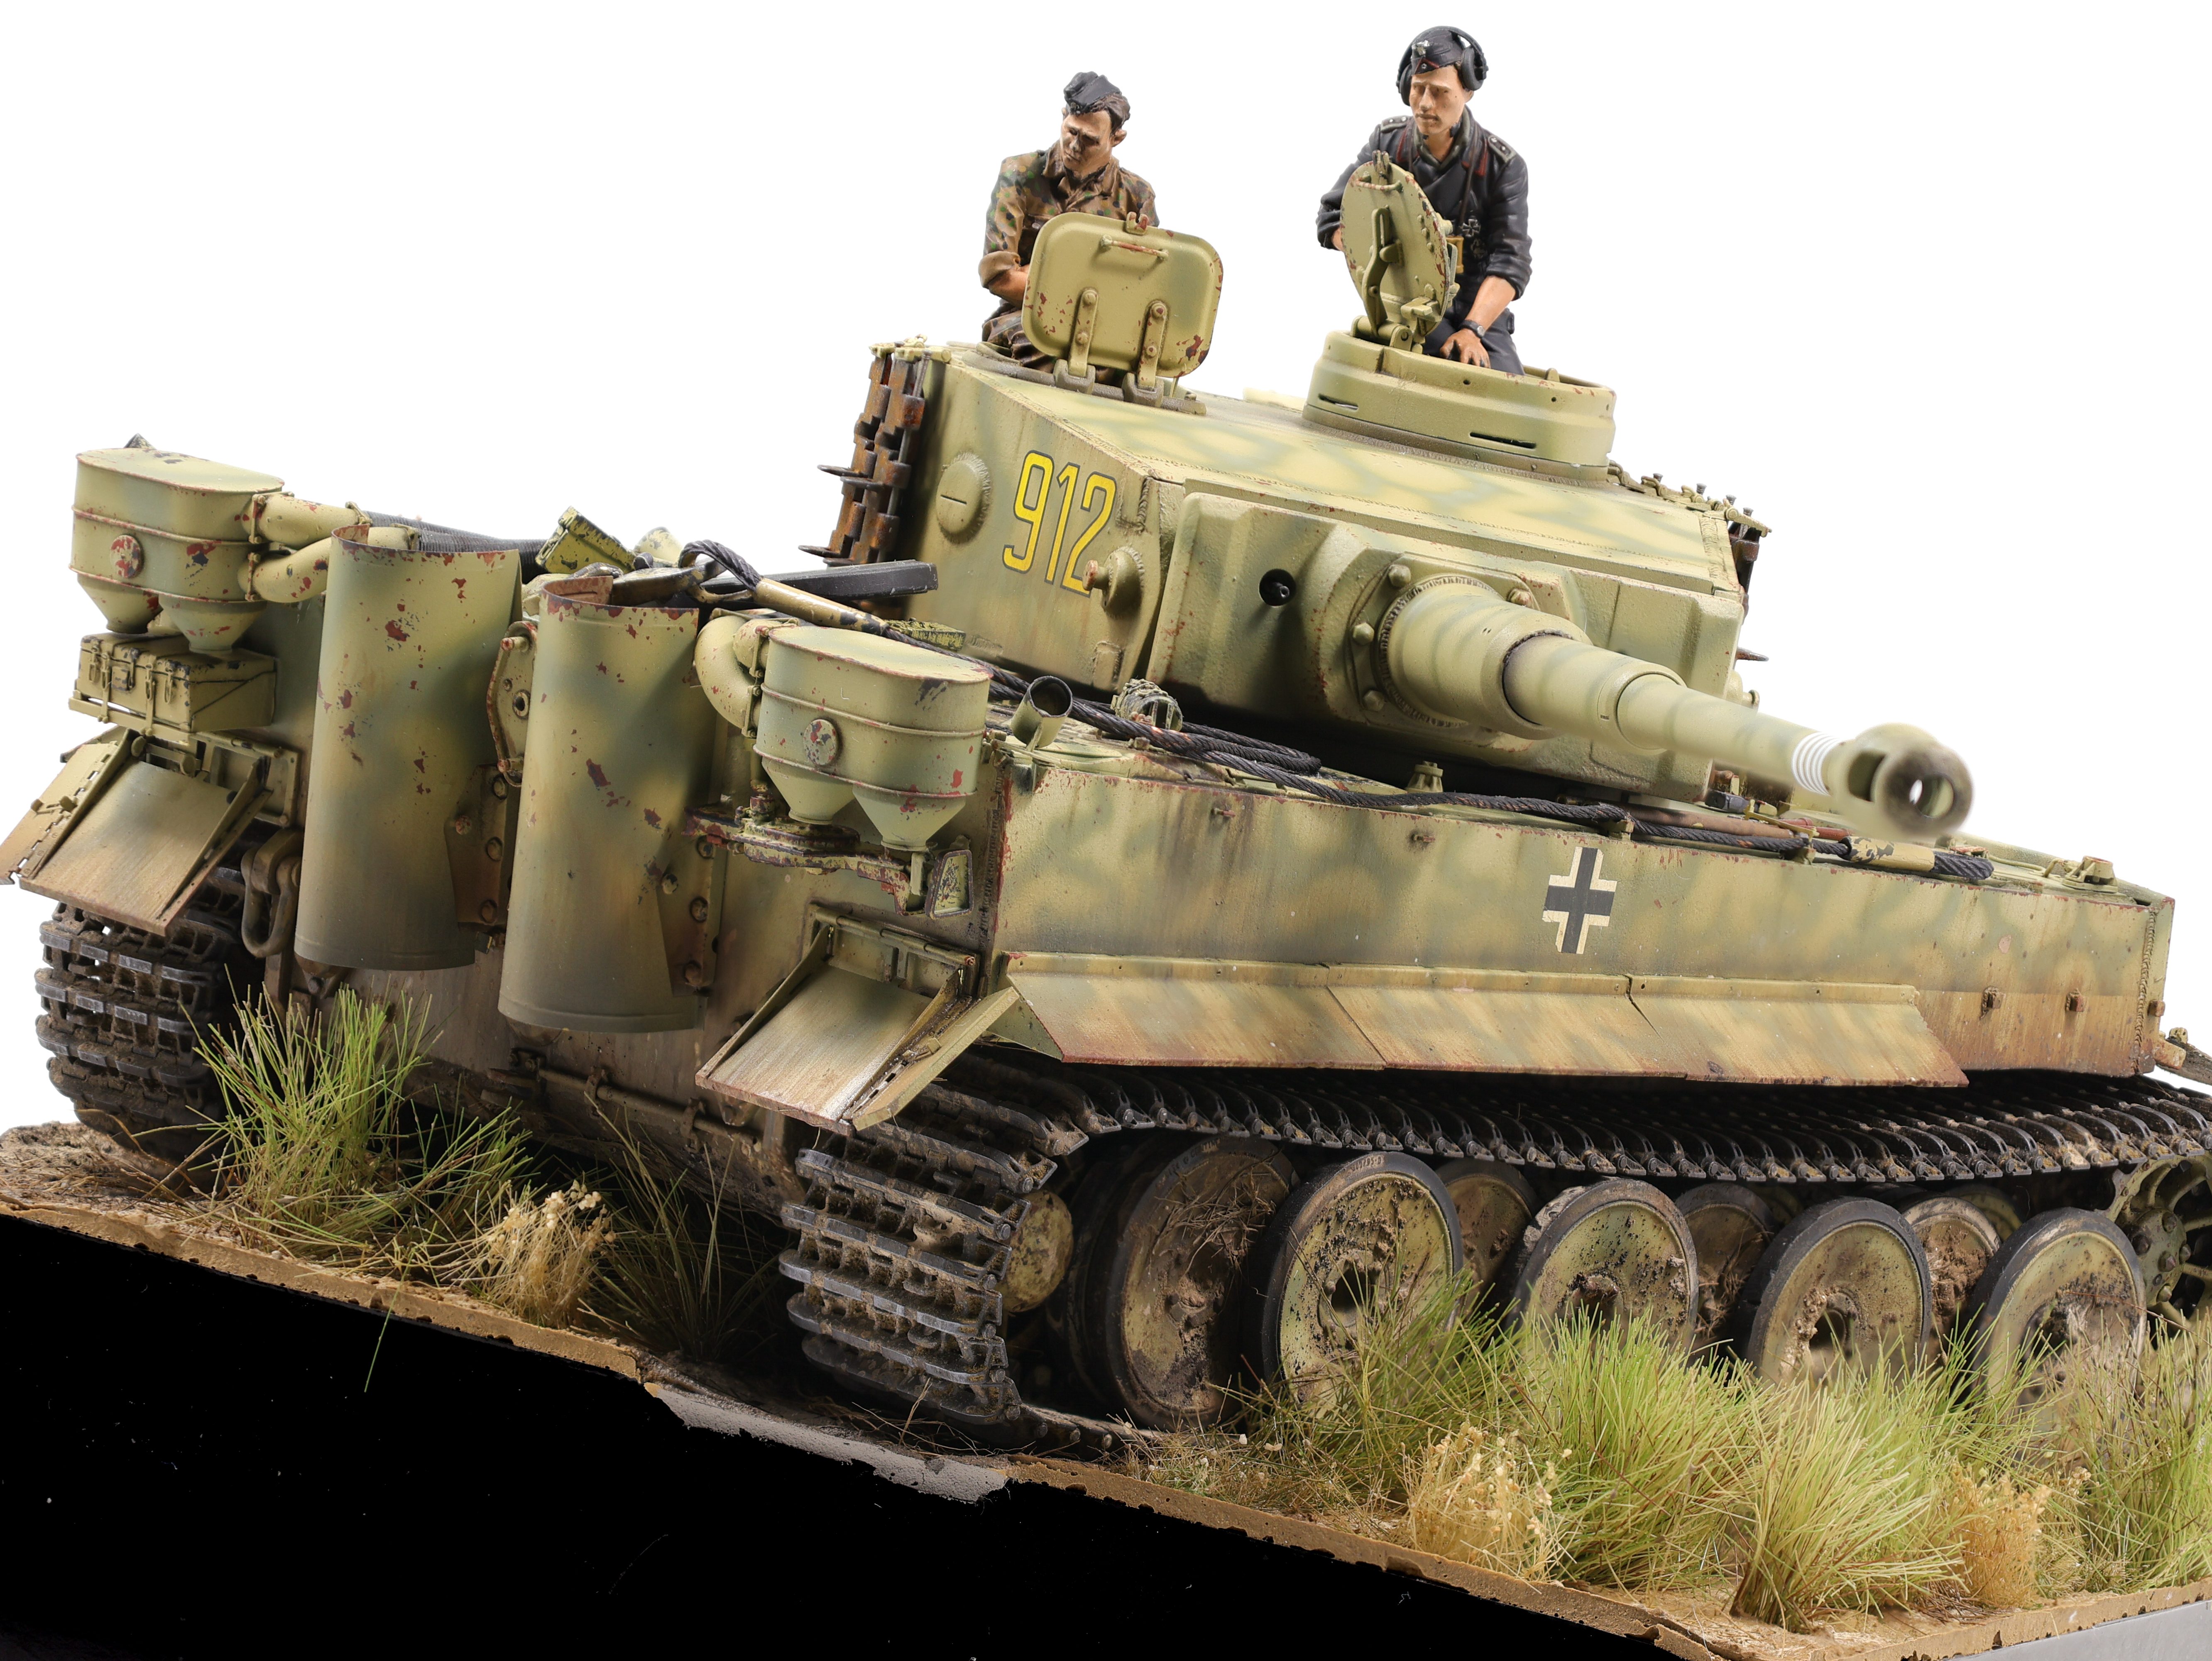
I recently completed my Tiger 1 and what a project it has been! I started this build in late May and it’s probably been my longest continuous build I’ve completed. After completing the weathering process (link below) I got to work on the final touches, namely building the figures and base.

For the base, I knew from the start that I wanted to convey that this vehicle was set on the Kursk battlefield. To do so, I picked a grassy setting, with the Tiger plowing through a field.

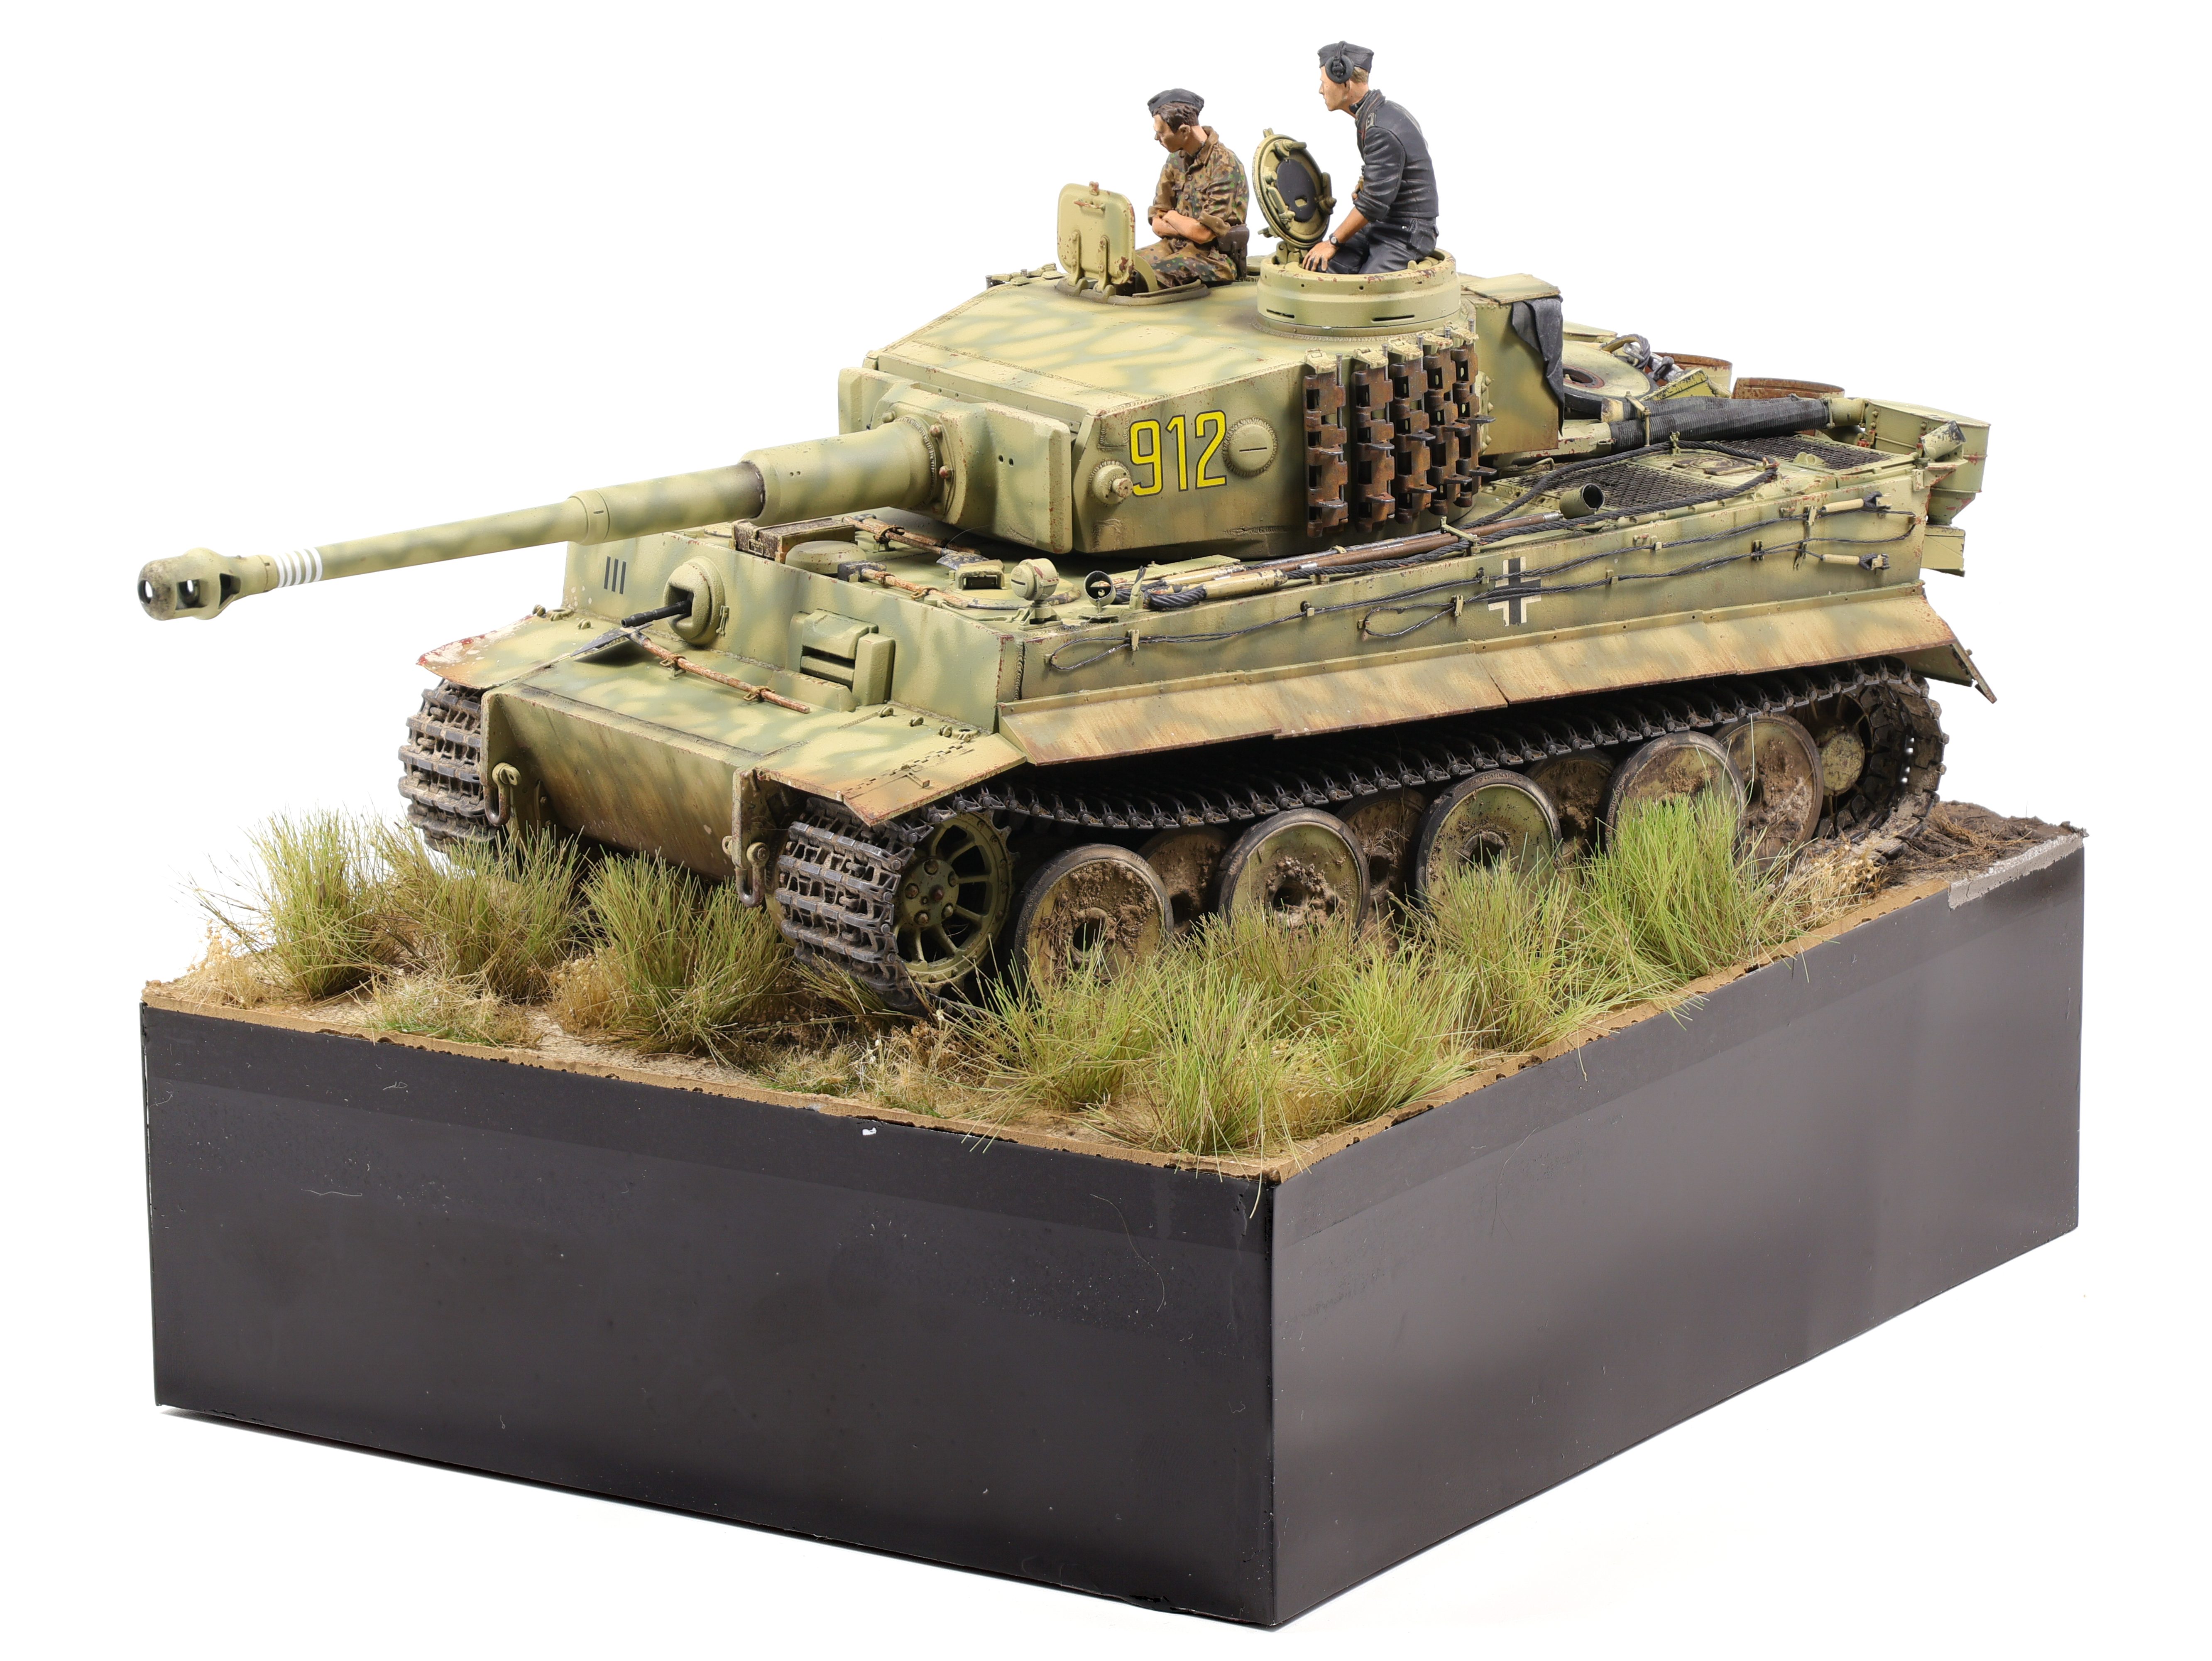
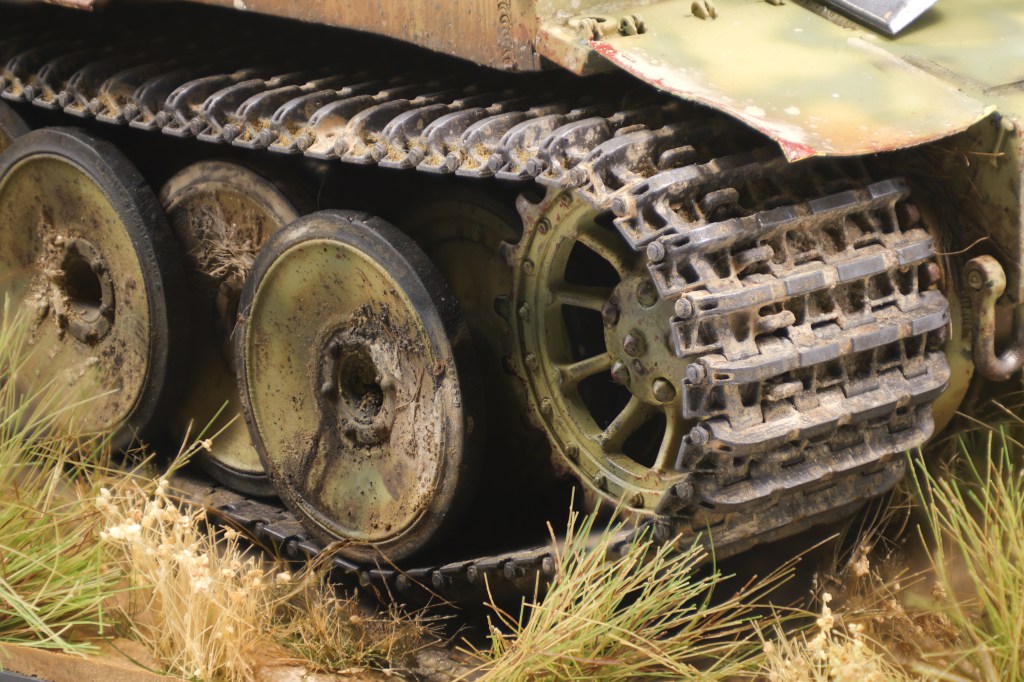
In the end, I think I ended up with a more “marshy” look than a dusty field but I’m still quite happy with the result here. To build the base, I stacked two insulation foam sheets on top of one another then glued styrene sheets on each of the four sides. I then painted each side in a gloss black finish before moving on to the groundwork. For the terrain, I used AK acrylic ground texturing paste. I’ve used this stuff for a few projects now and I’ve been able to get the hang of it and understand its properties better. For the undistrubed ground I settled on a rough texture paste with brown paint added. Conversely, I used a smoother paste for the areas in which the tank would sit and where the treads had upturned the ground. I did this because the rough paste would have a lot of bumps and ridges when dried and as such the tank would look like it would be floating. By using the smooth texture the tank settles down a lot more.

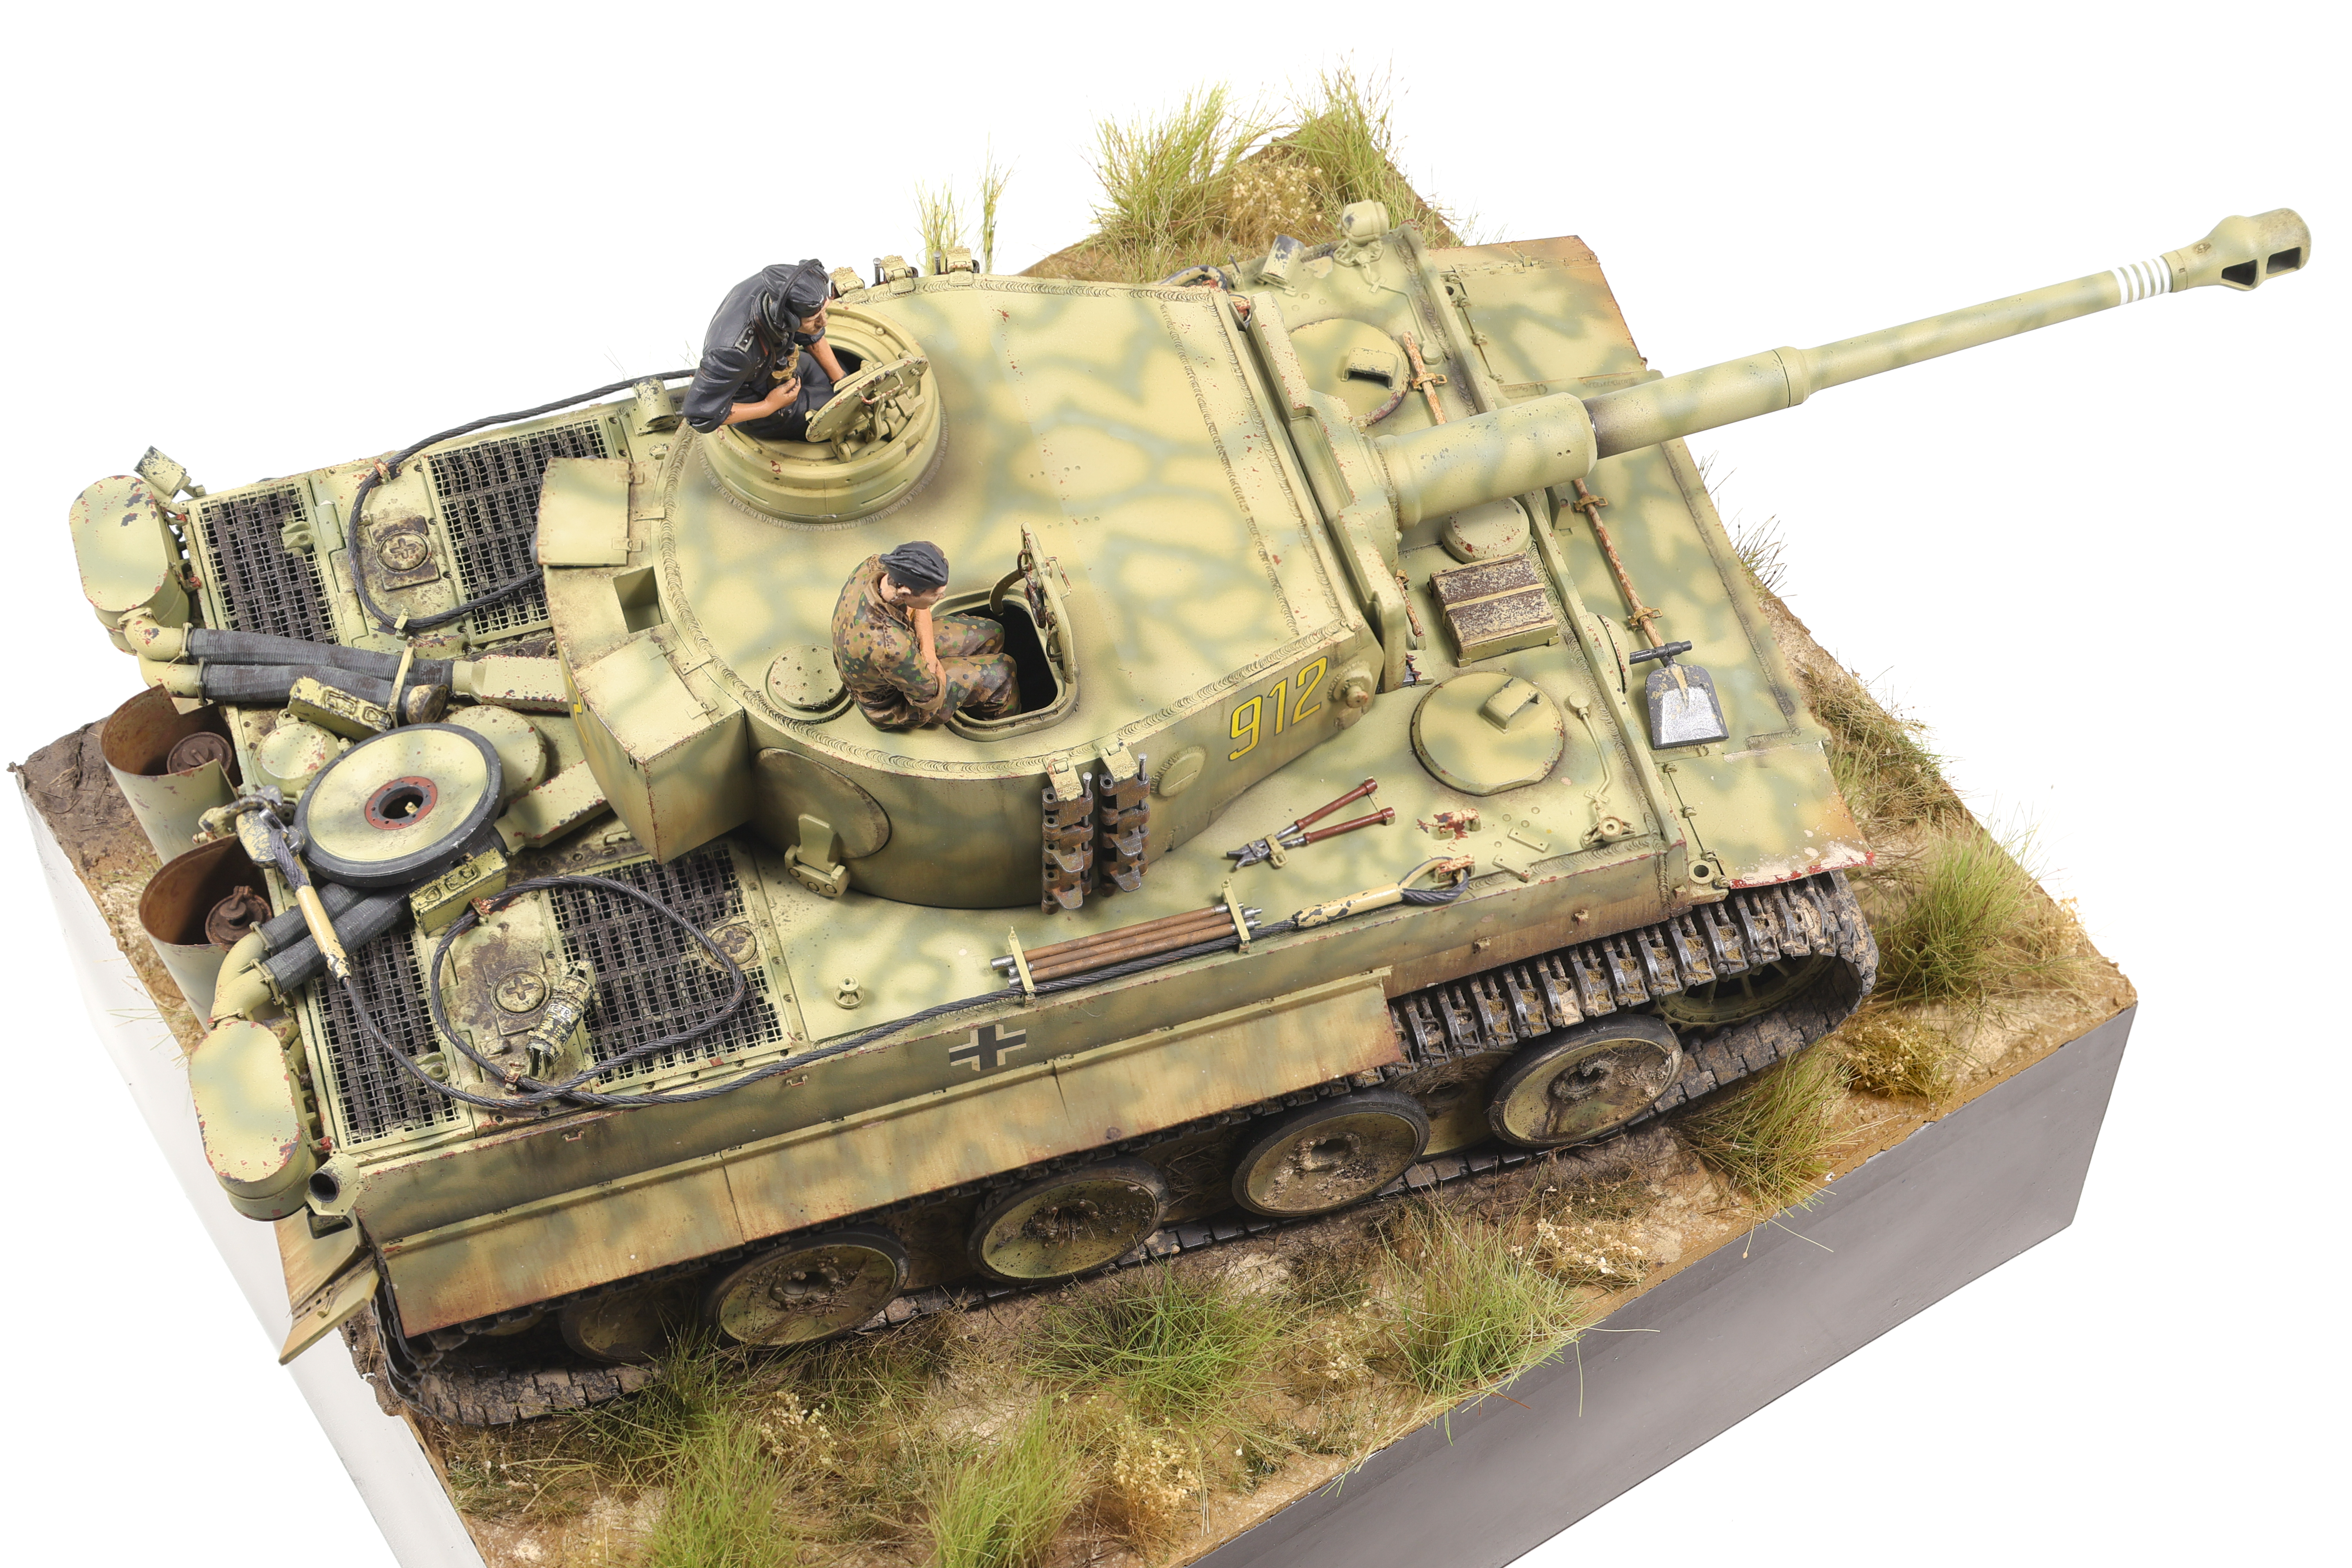


While the terrain paste was drying, I would then stick small grass tuffs into it which was an easy way of getting them attached to the terrain. I made sure to use different types of grass to create variation and ensure that there wasn’t too much uniformity in the ground. After the terrain had dried, I then airbrushed some brown shades onto the ground to hep further create some colour variation in the dirt. The terrain paste dries in a very uniform, unrealistic colour and it took some work to ensure it looked natural. After this was done, I then speckled different pigment shades onto the ground to create even further surface detail. I made sure to use pigments that I had used on the vehicle so that the colours would be consistent.
The Figures:
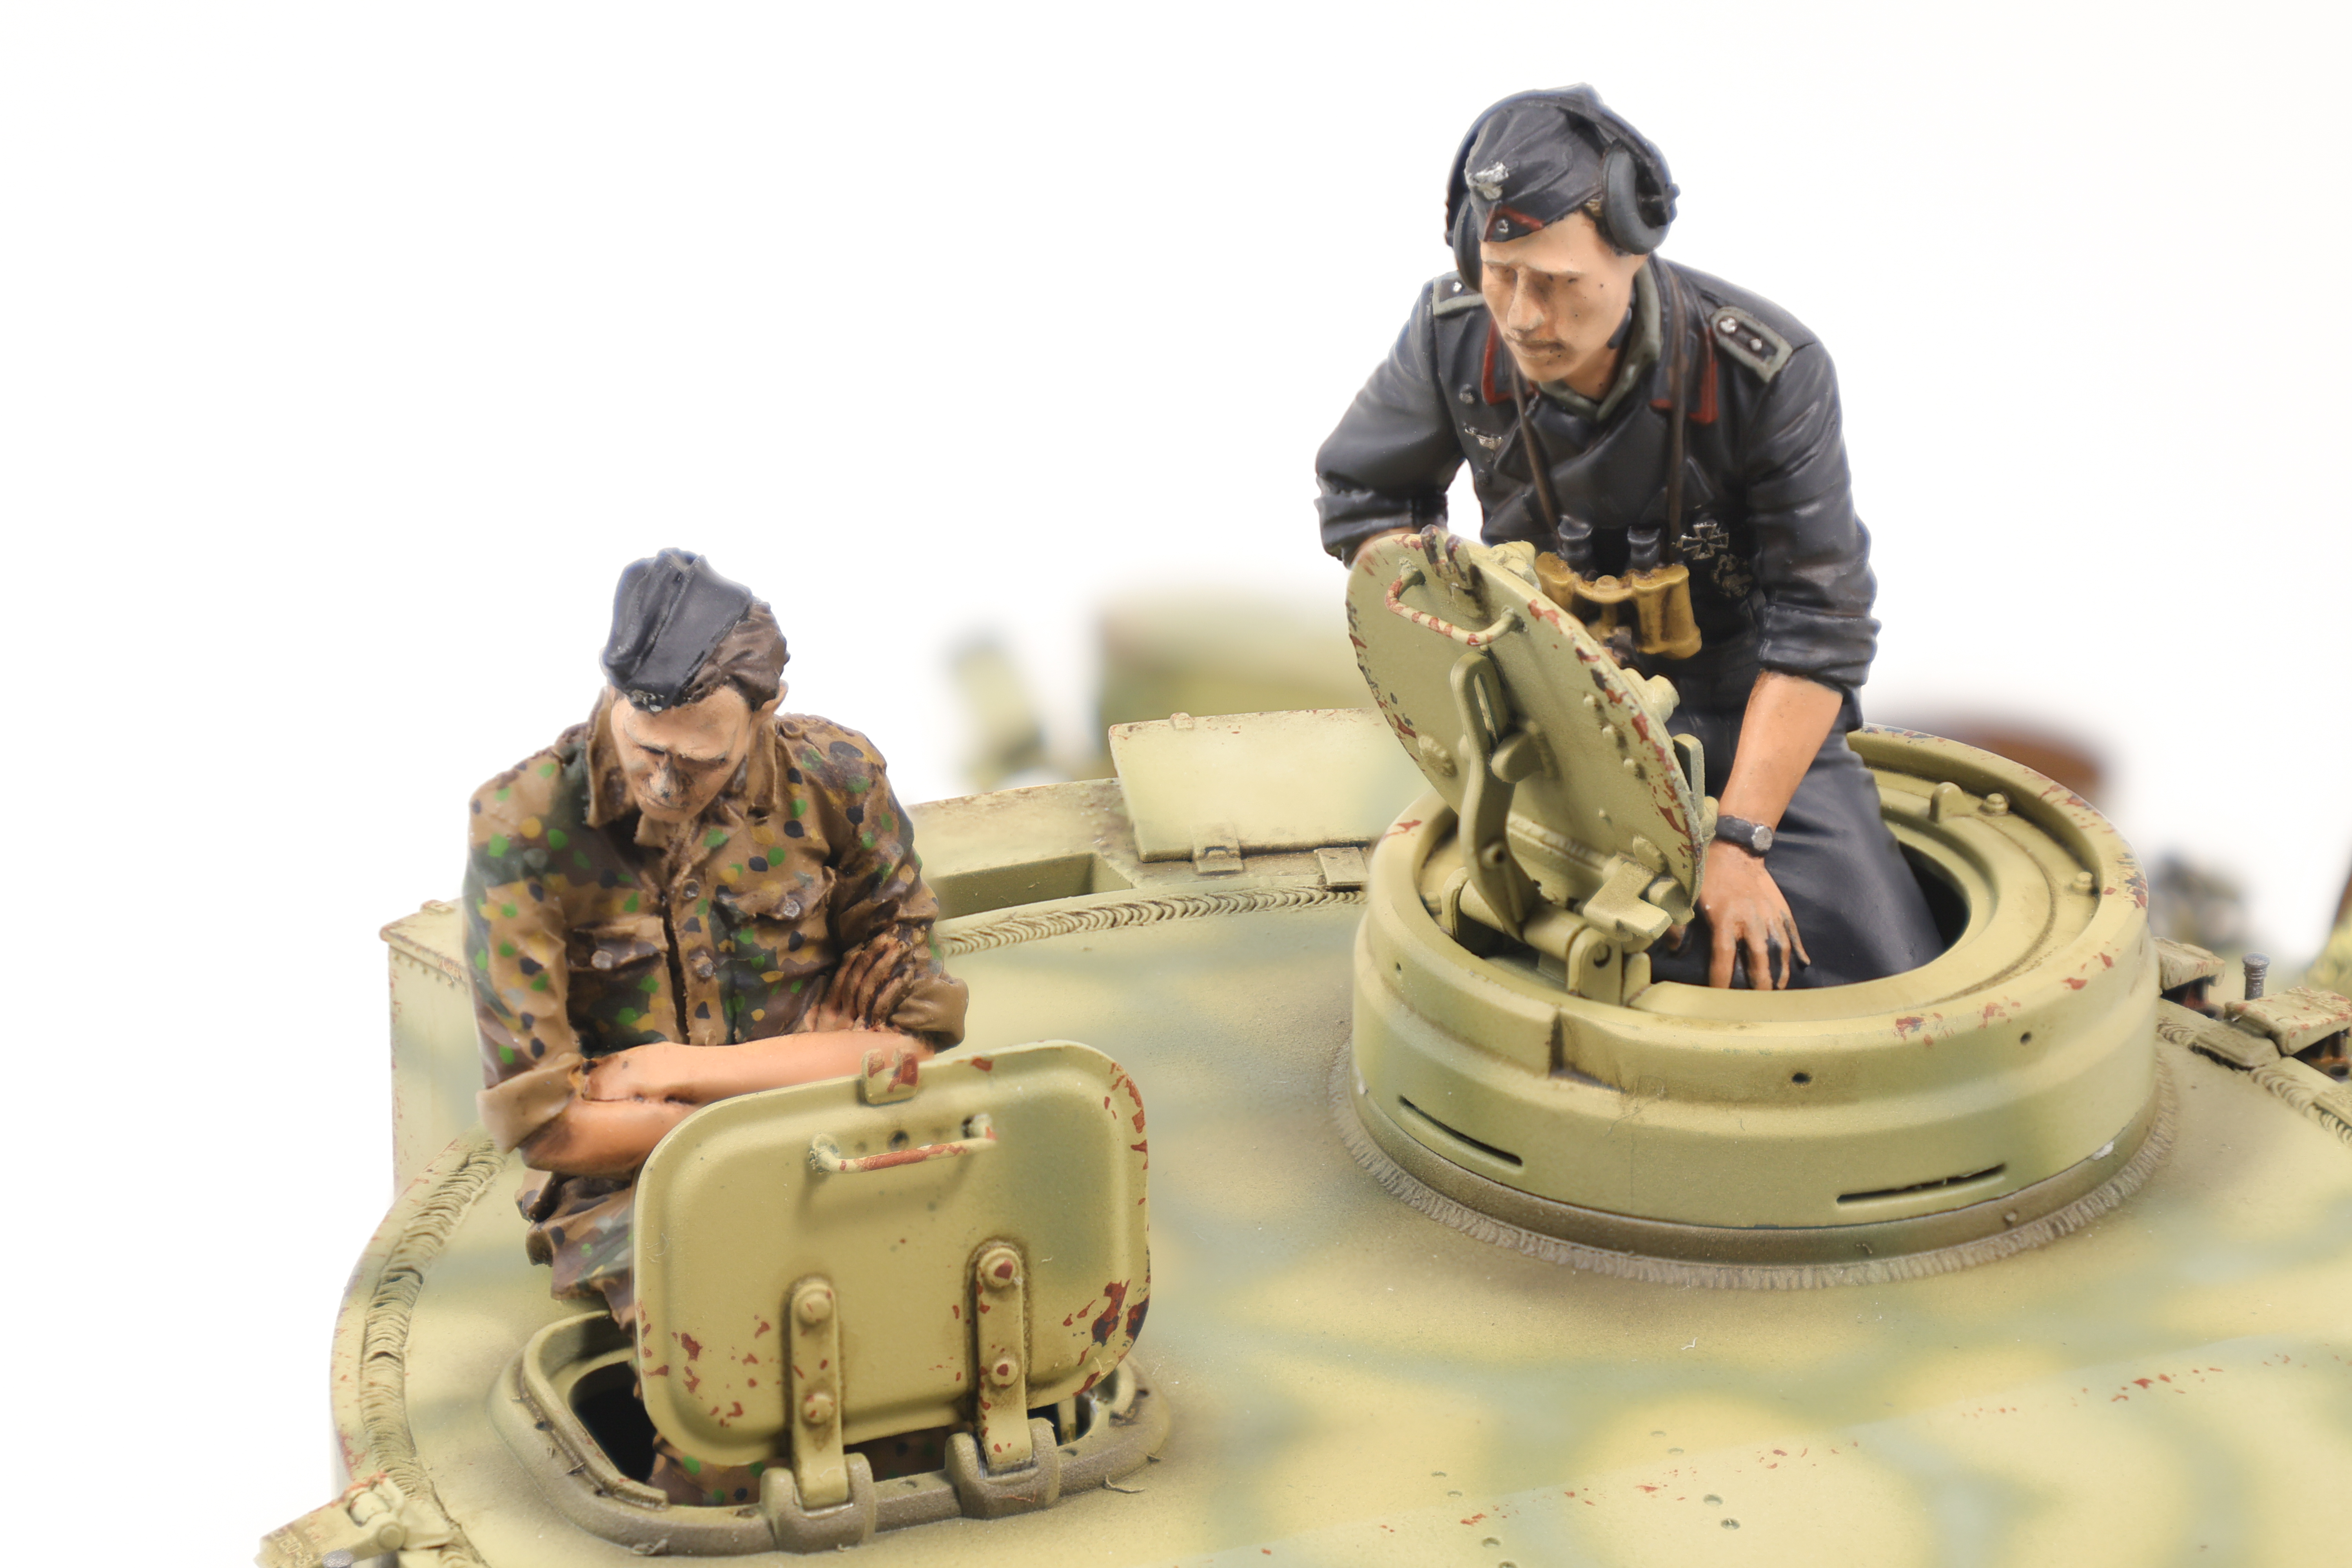
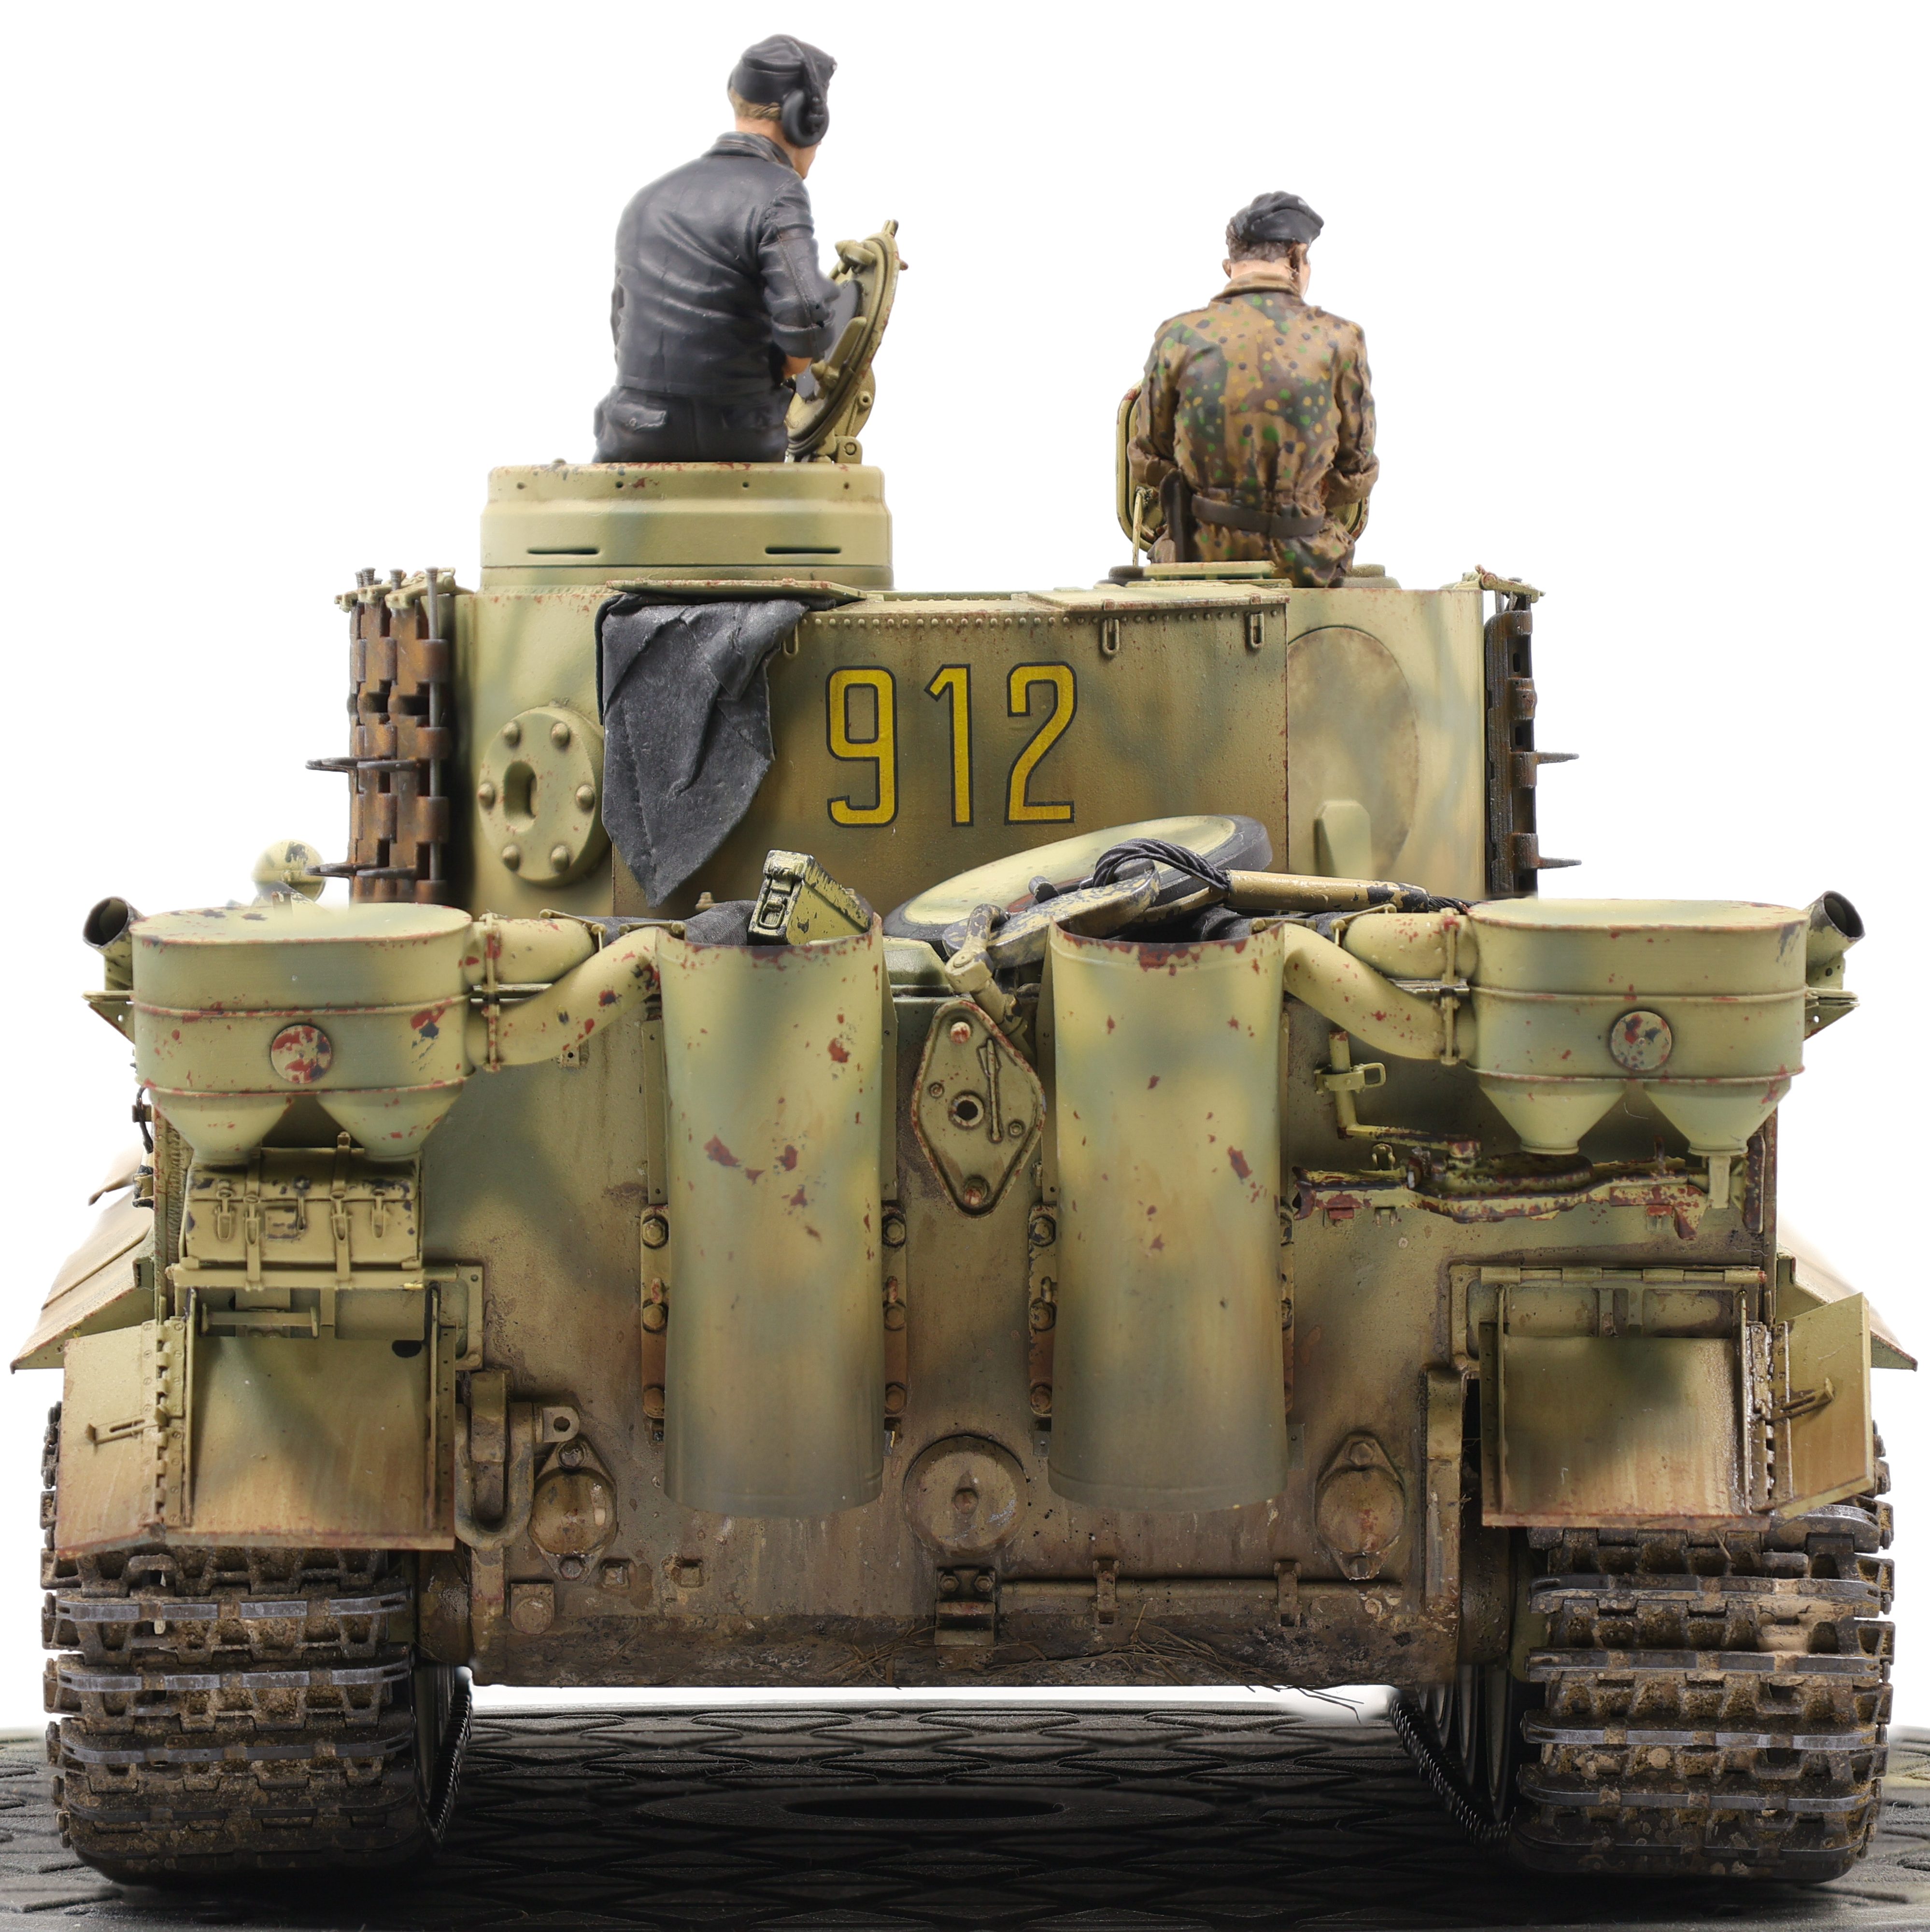
I then moved on to the figures and while I definitely feel that I need improvement in this area, I’m still fairly happy with how they turned out. With the addition of the figures, all that was left were some final paint touchups before moving everything into the Photo Booth.
Final Thoughts:
To summarize my thoughts on this project: What a build! This has undoubtedly been my most involved project to date and I couldn’t be happier with how it turned out. I knew going in that I wanted to spend the time to get this project right and I think that I’ve done that. Still, there are always things that I might have done differently and I’m looking forward to applying the lessons learned on this build on my future projects. Enjoy the photos below!