After completing the necessary work on the fuselage, I could turn my attention to the cockpit assembly. The OOB Hasegawa kit has very nice detail, however I would be replacing the majority of it with custom work.
To start, I began removing virtually all the molded on detail present so that I could drill out 0.4 mm holes for the Anyz switches and dials. I used these on my CF-18 Hornet I completed two years ago and was fairly happy with the result. Looking back now however, I felt that I didn’t commit enough to this strategy and did not drill enough holes to get a realistic cockpit.
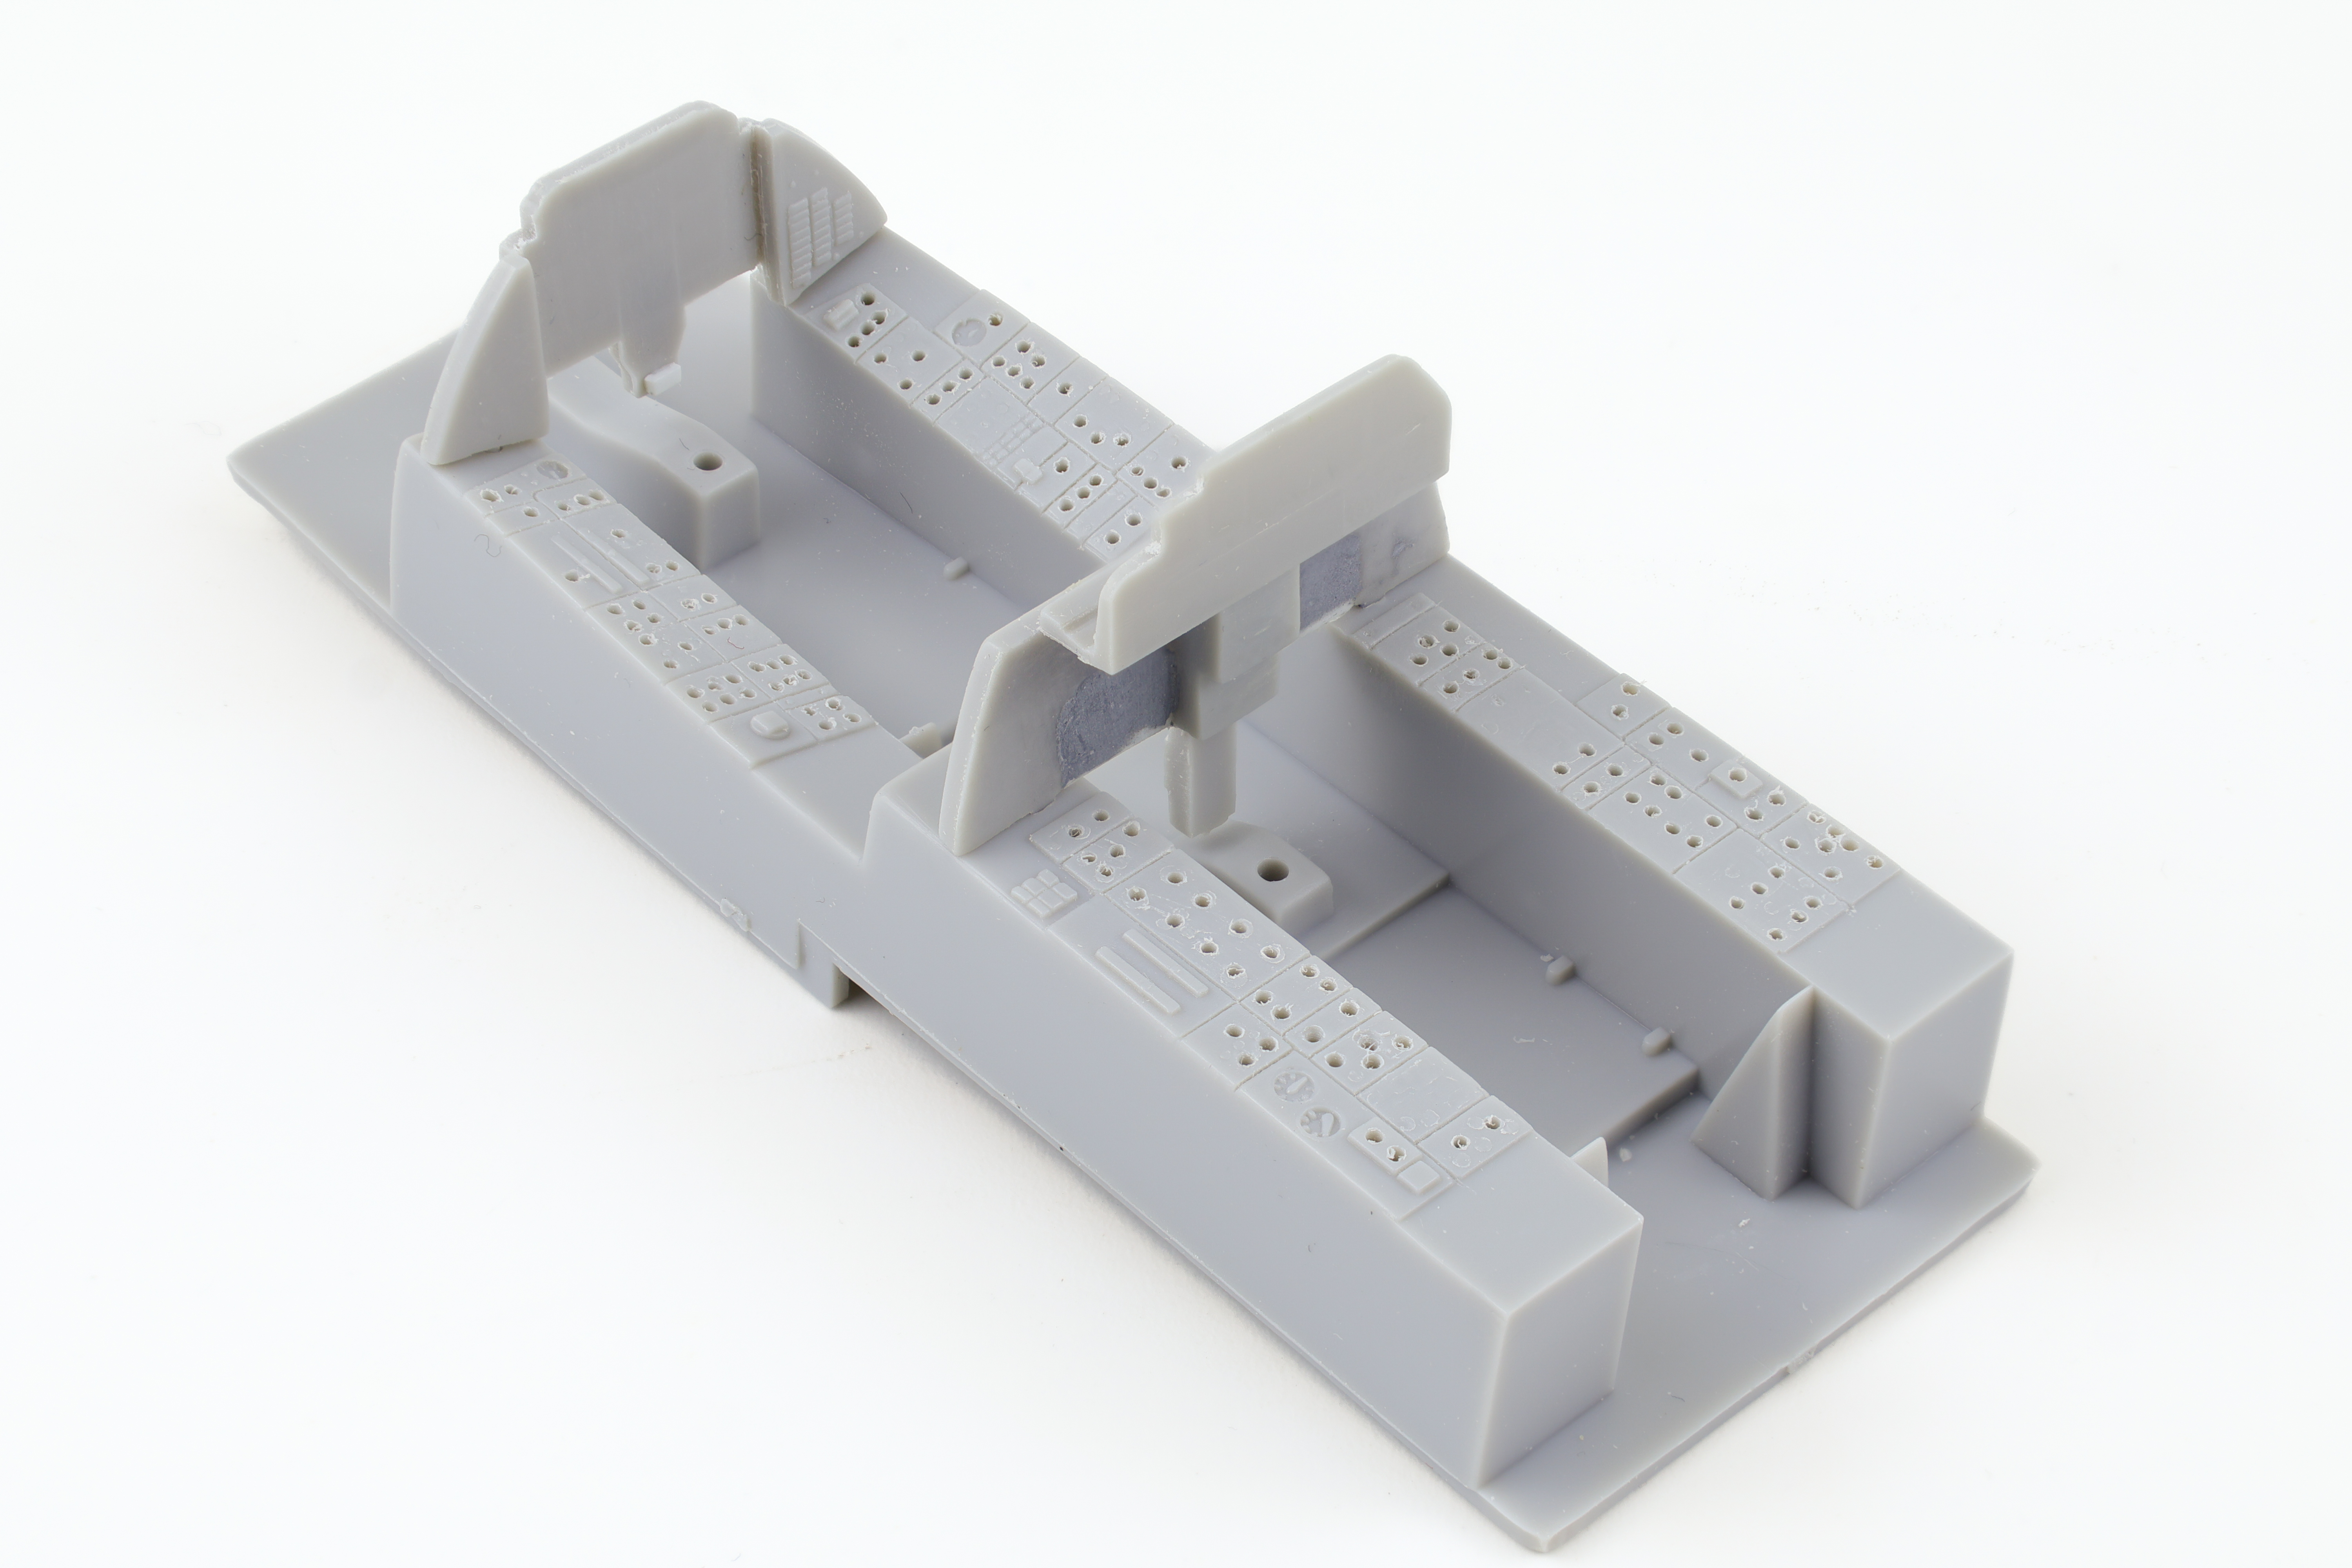
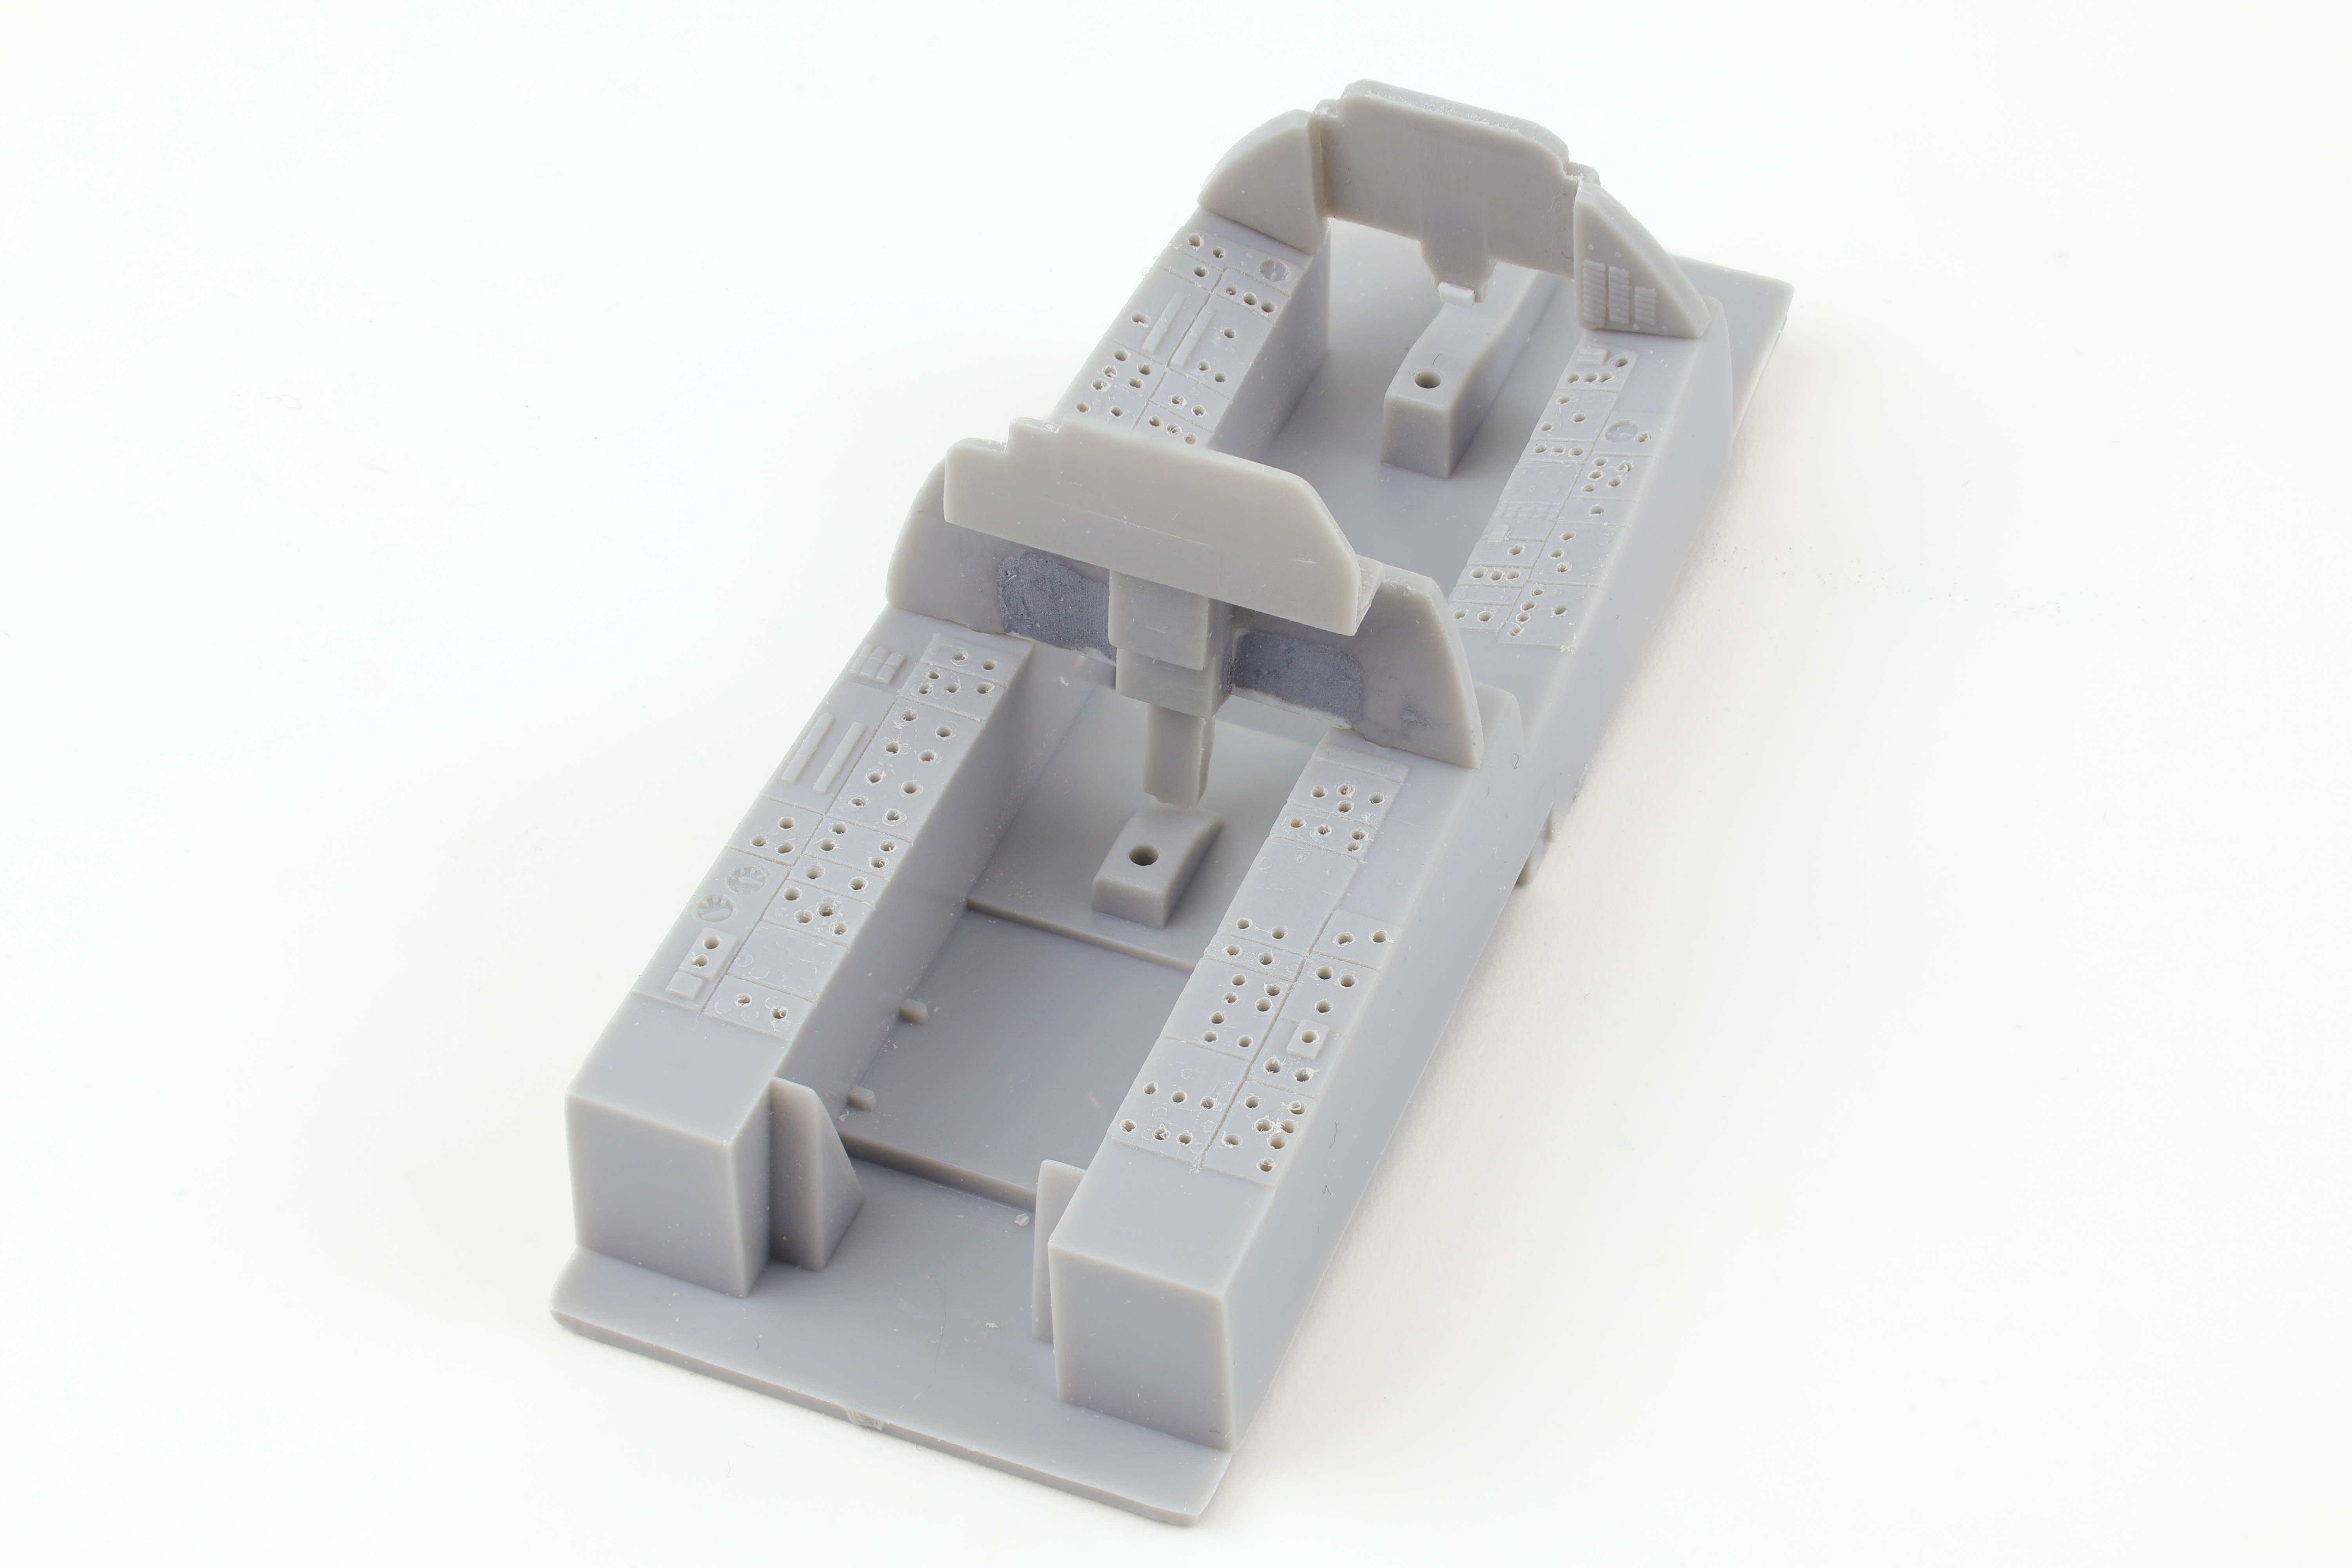
I also opted to remove the molded on detail from two of the included cockpit panels. The kit includes a total of 4 instrument panels, 2 for the RF-4E and 2 for a different phantom variant. I opted to use the panels for the different variant as it would allow me to revert back to the other pair if this process didn’t work out. Removing the molded on details from the panel was fairly straightforward although some modification was necessary. For the front seat I needed to adjust the shape of the lower panel right behind the control stick. The styrene piece is very triangular and the correct shape is more square. From my reference photos I could also tell that that it is angled back slightly and to represent this I glued a small piece of styrene to get the correct angle. I liked the breaker panel detail so I opted to leave it intact.

Work on the rear seat panel was a bit more involved. To start, the part I wanted to use was not shaped correctly for a RF-4E (rightly I’ll add). It included cutouts above the pilot’s legs which would need to be filled. To do this, I cut out a piece of styrene sheet that would fill this space. I then used sprue goo to cement this piece in place on the back side of the panel. This created a very somewhat rough surface on the face of the panel. I then went back over the area with Tamiya putty to create a uniformly smooth surface, ready for detailing.
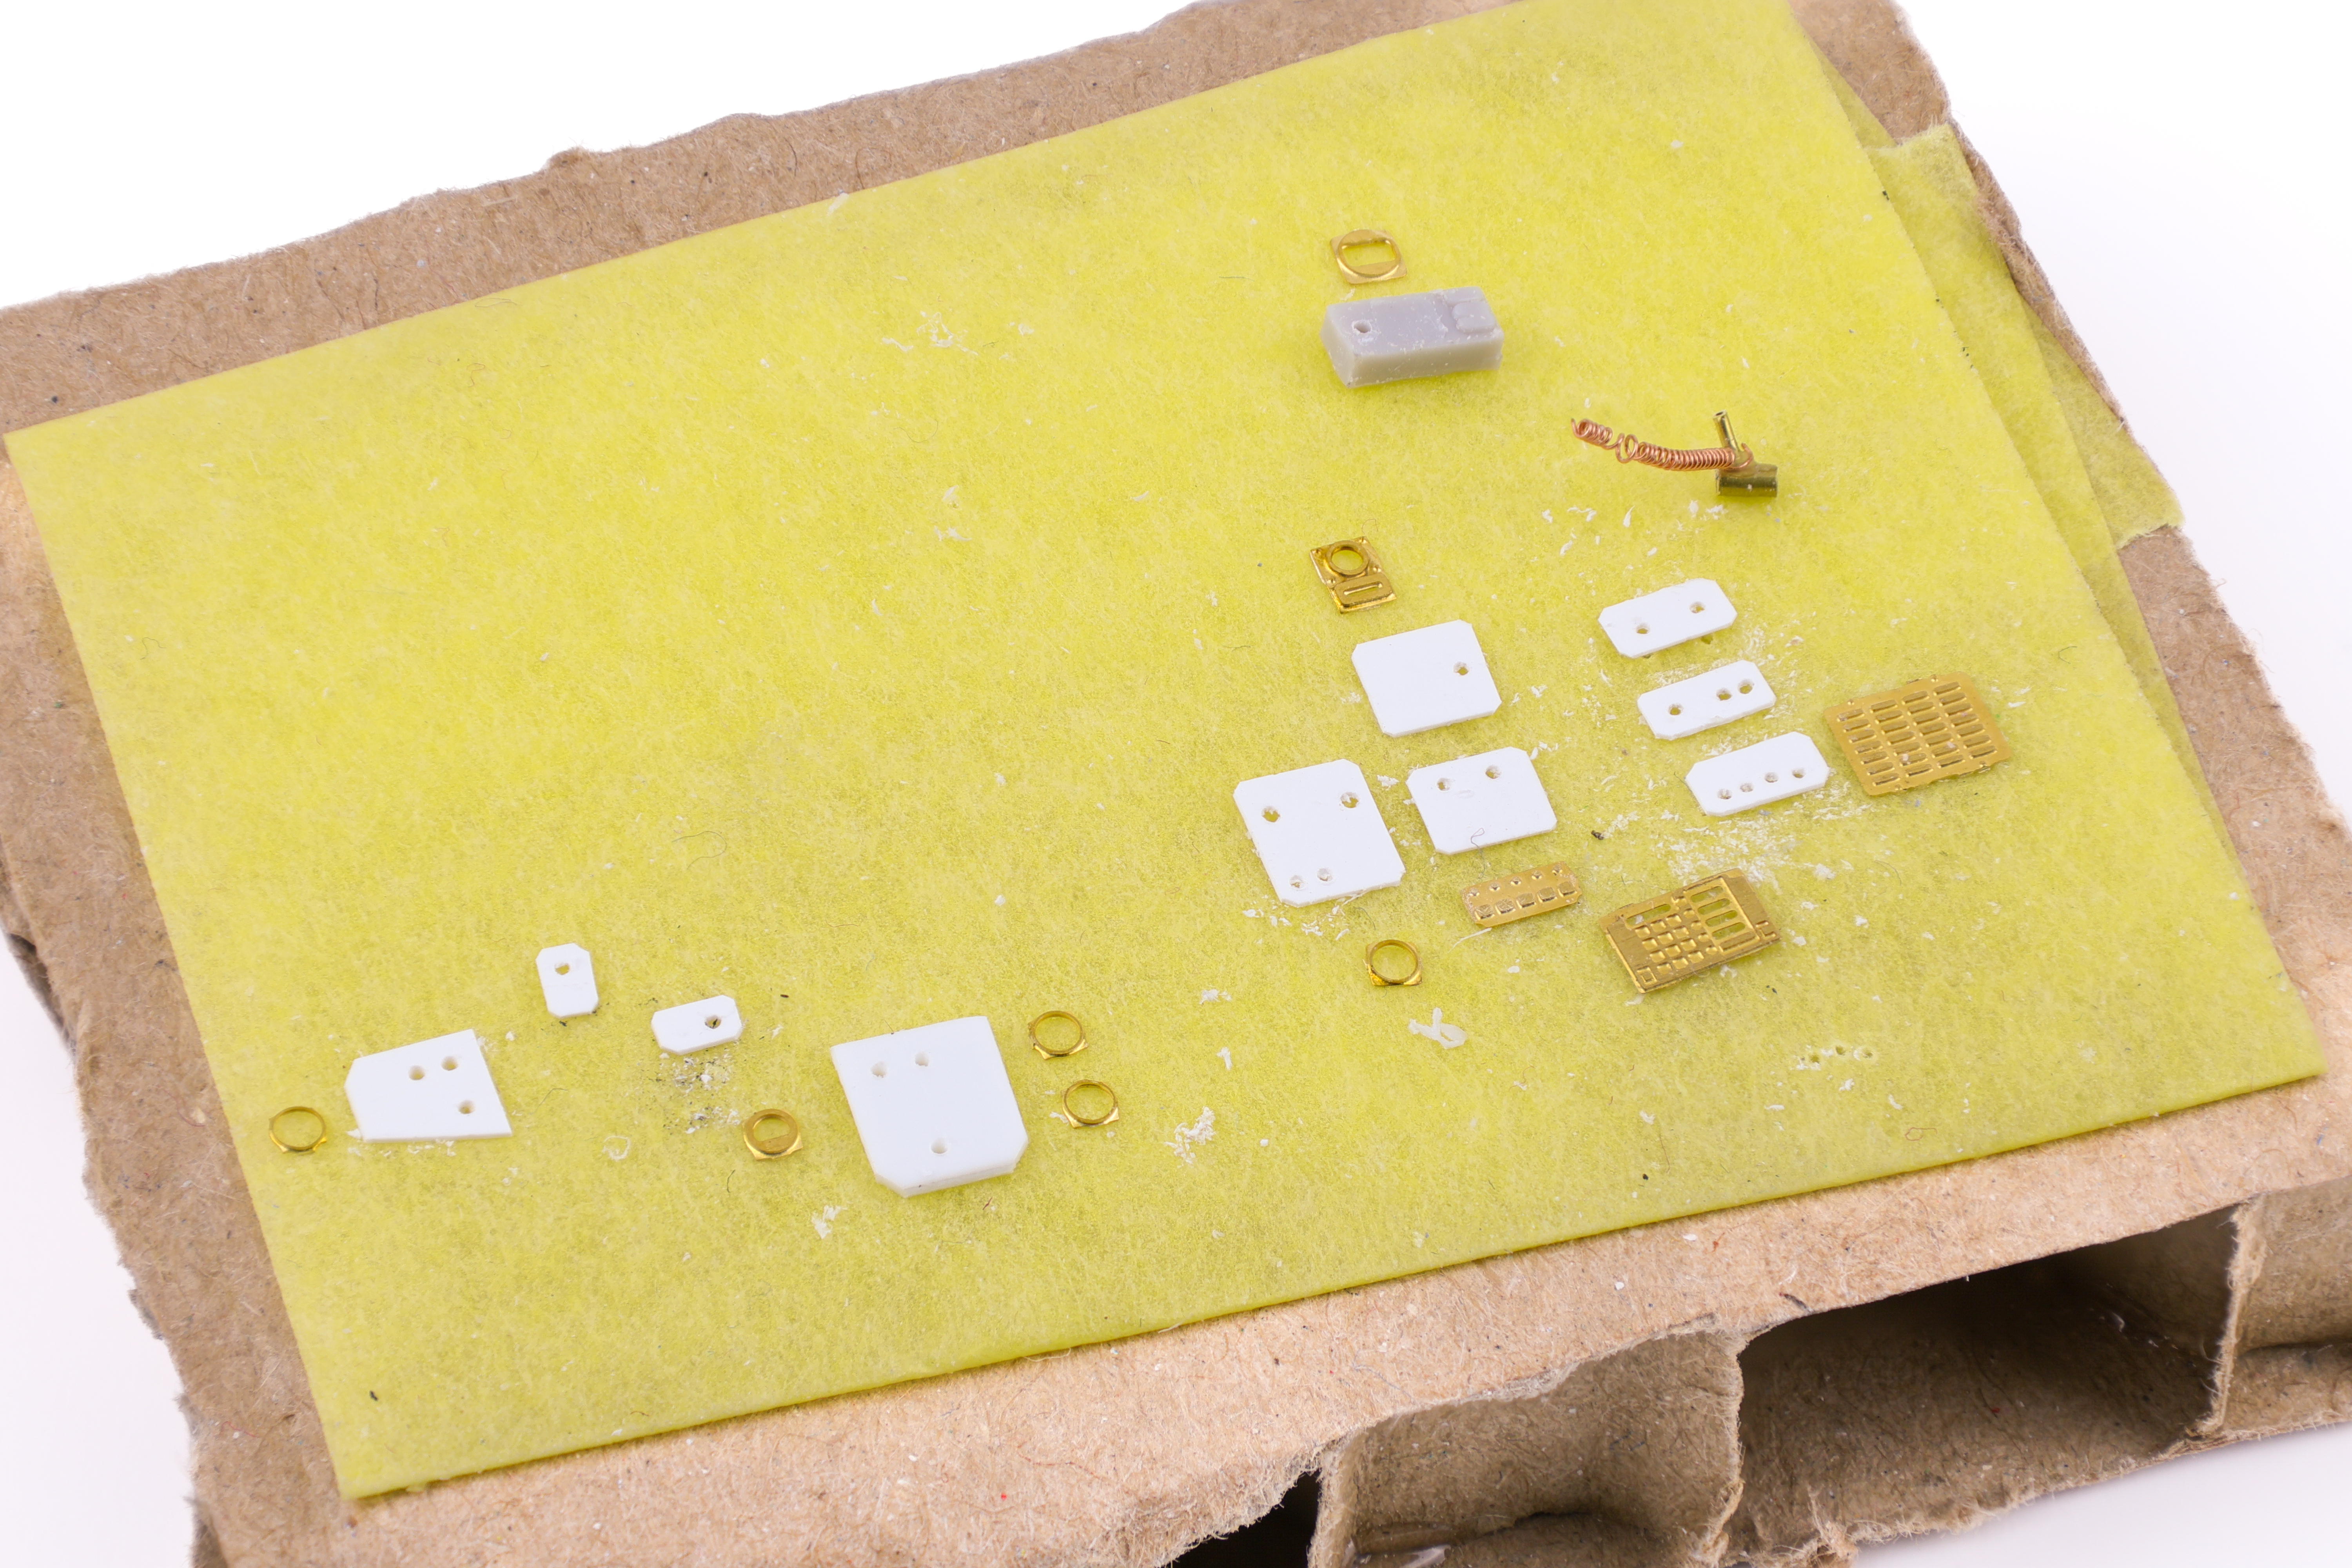
I then got to work making the various details for the cockpit. The idea was that I will paint the instrument panels in the appropriate gull grey while these additional details will be painted black, removing any need for masking during the painting process.
Next up was to move on to the cockpit tub and sidewalls. While the Hasegawa kit is fairly light on the details, this means it’s relatively easy to remove the existing plastic in preparation of adding custom work.
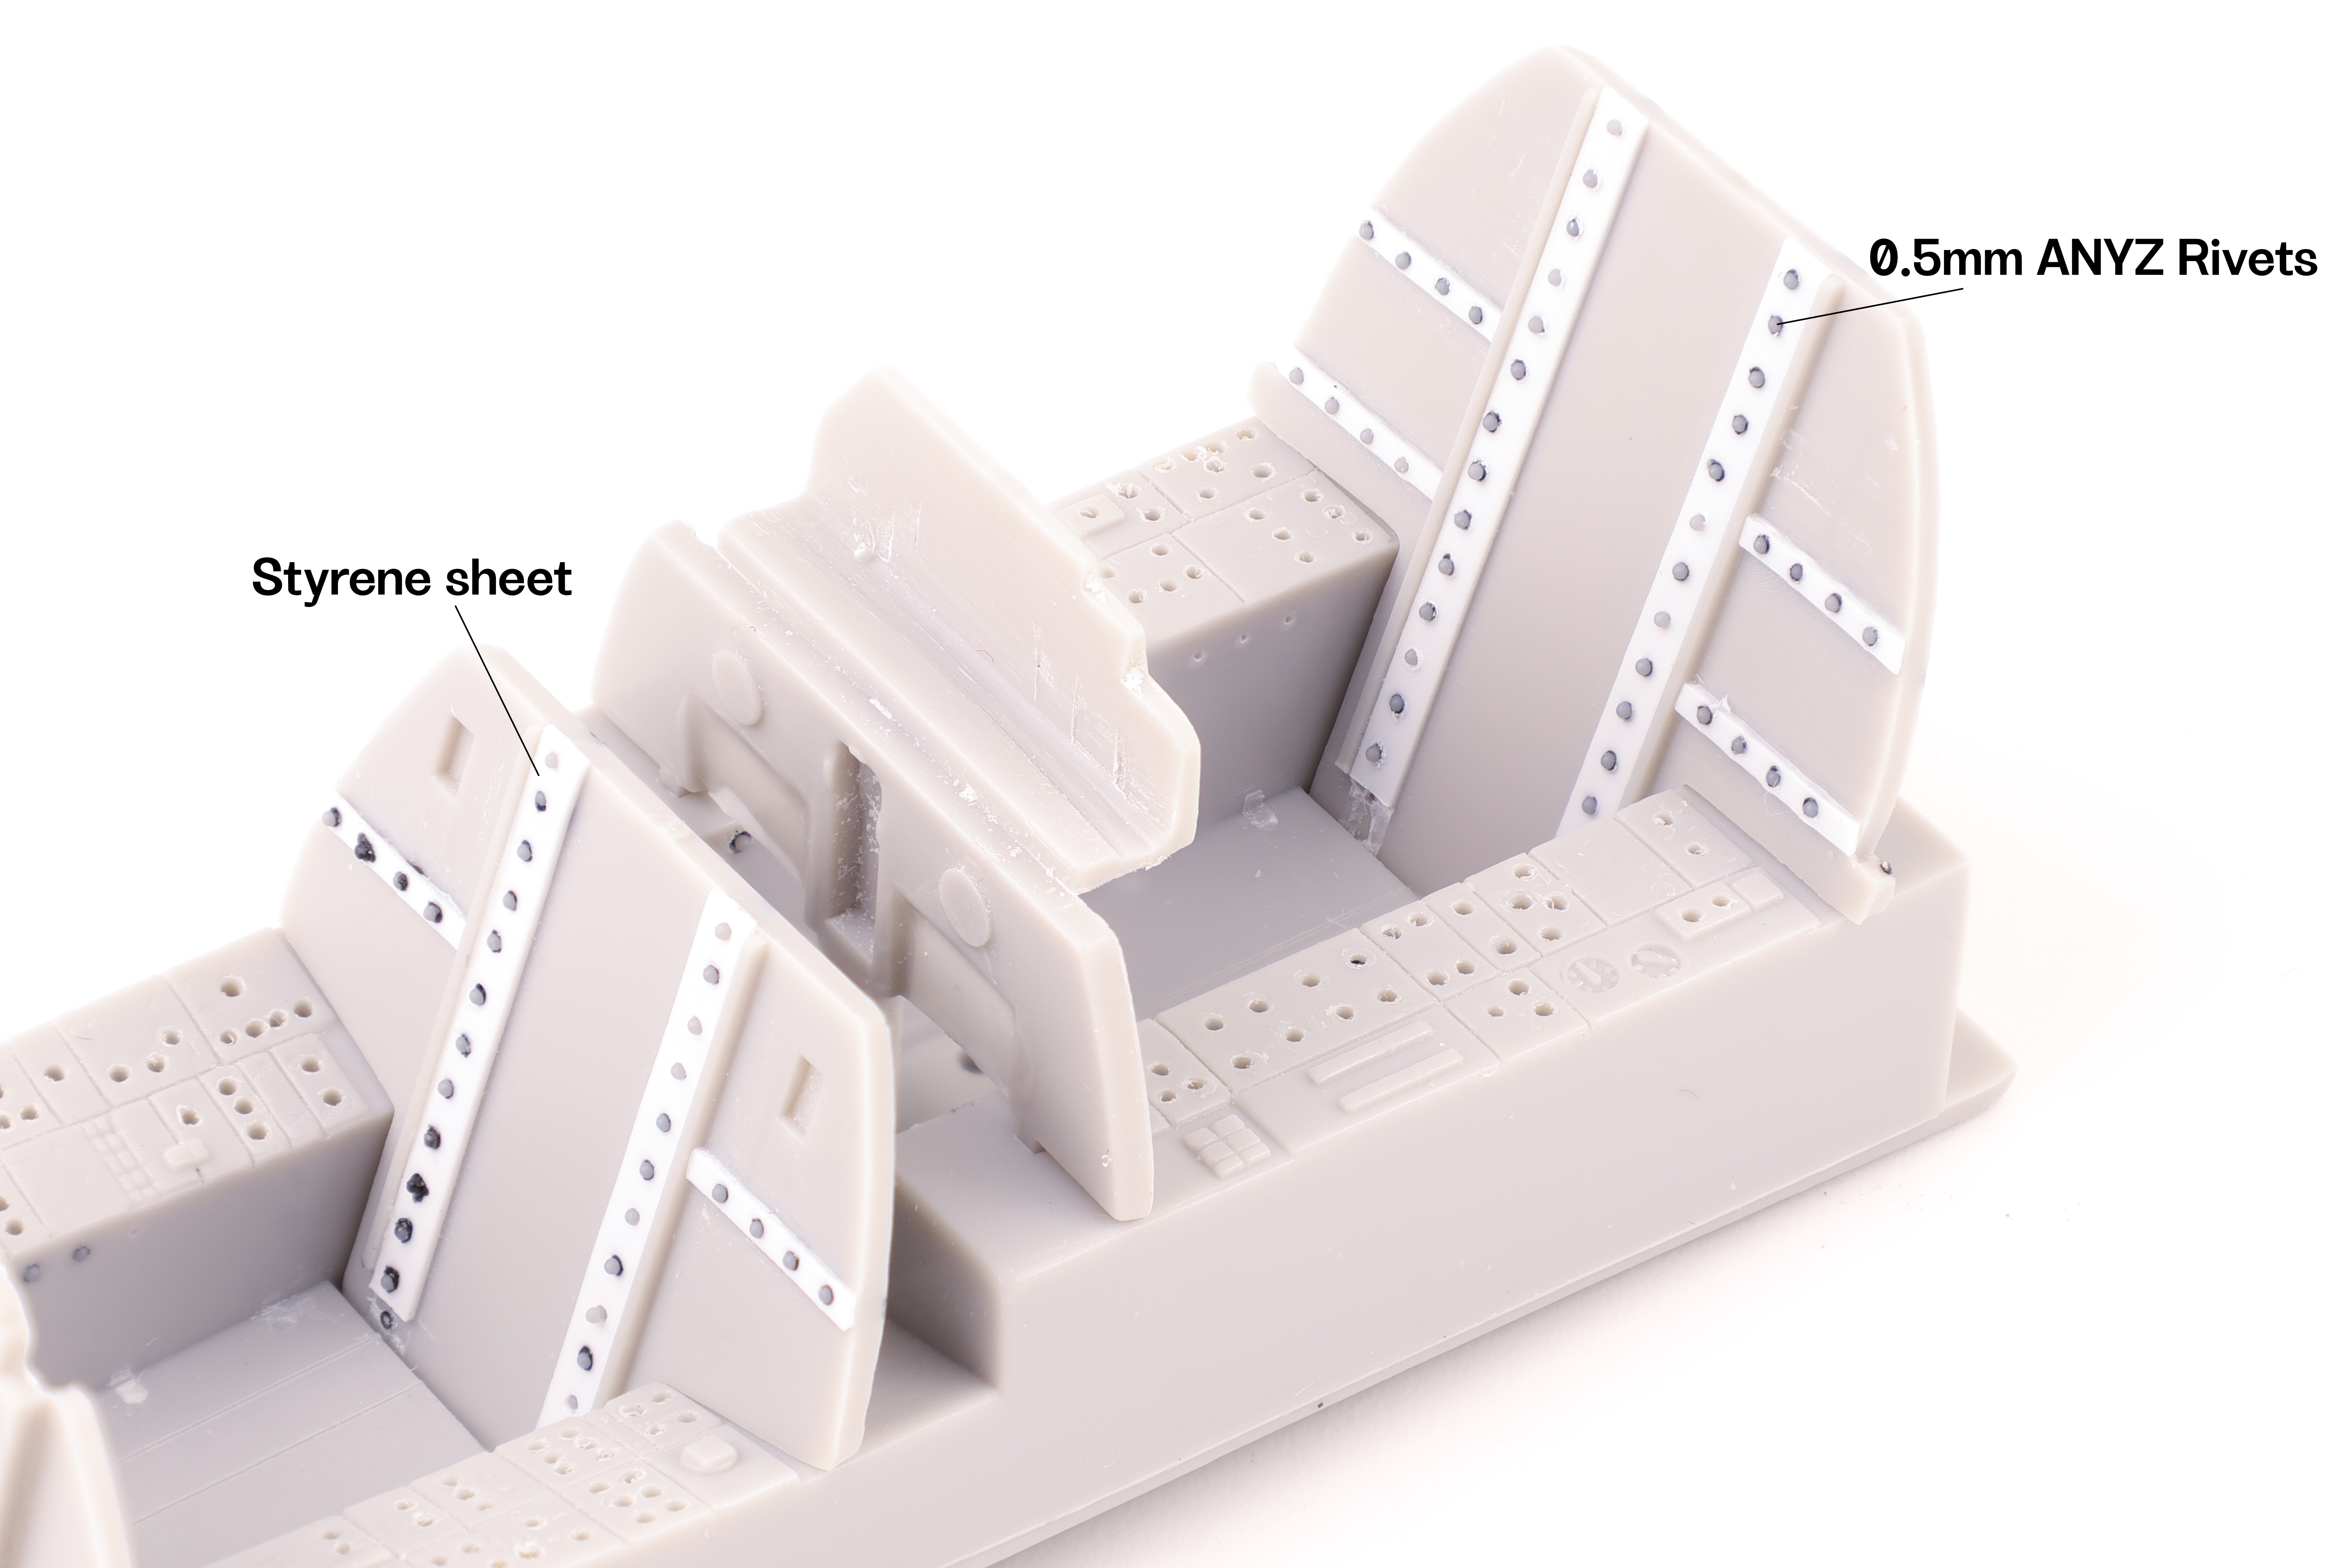
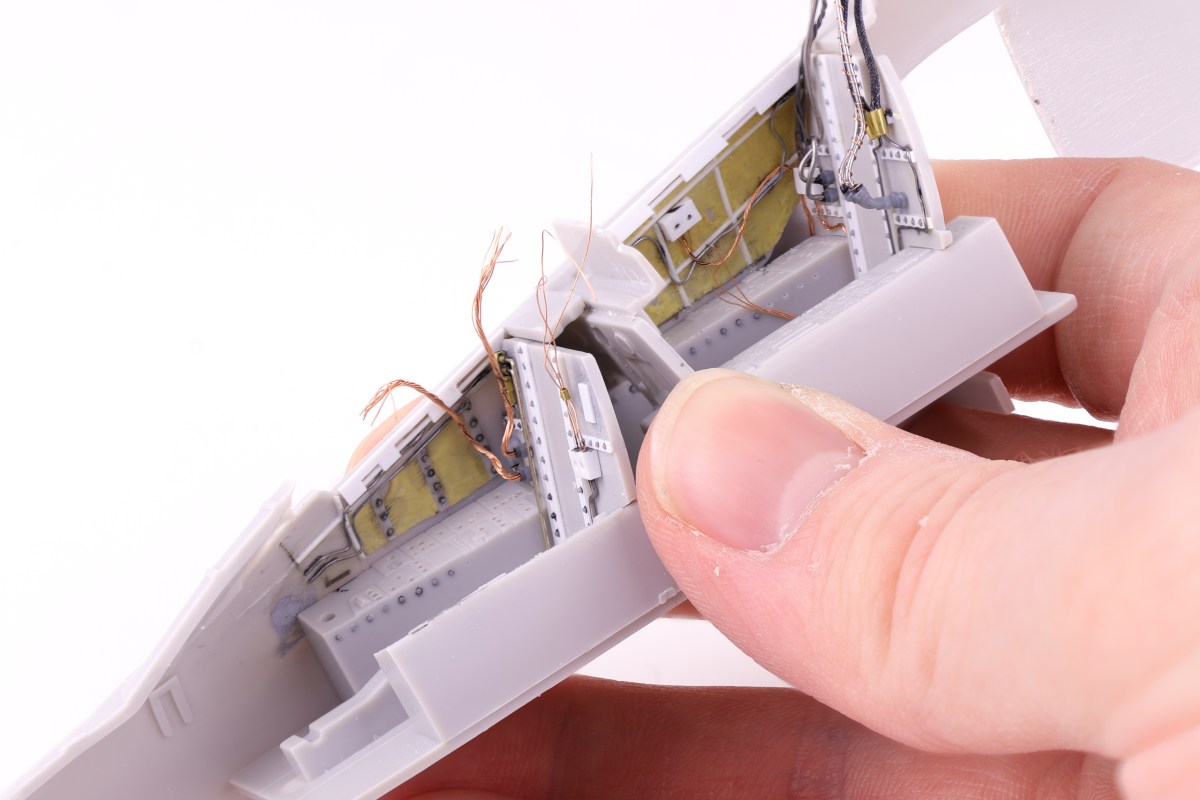
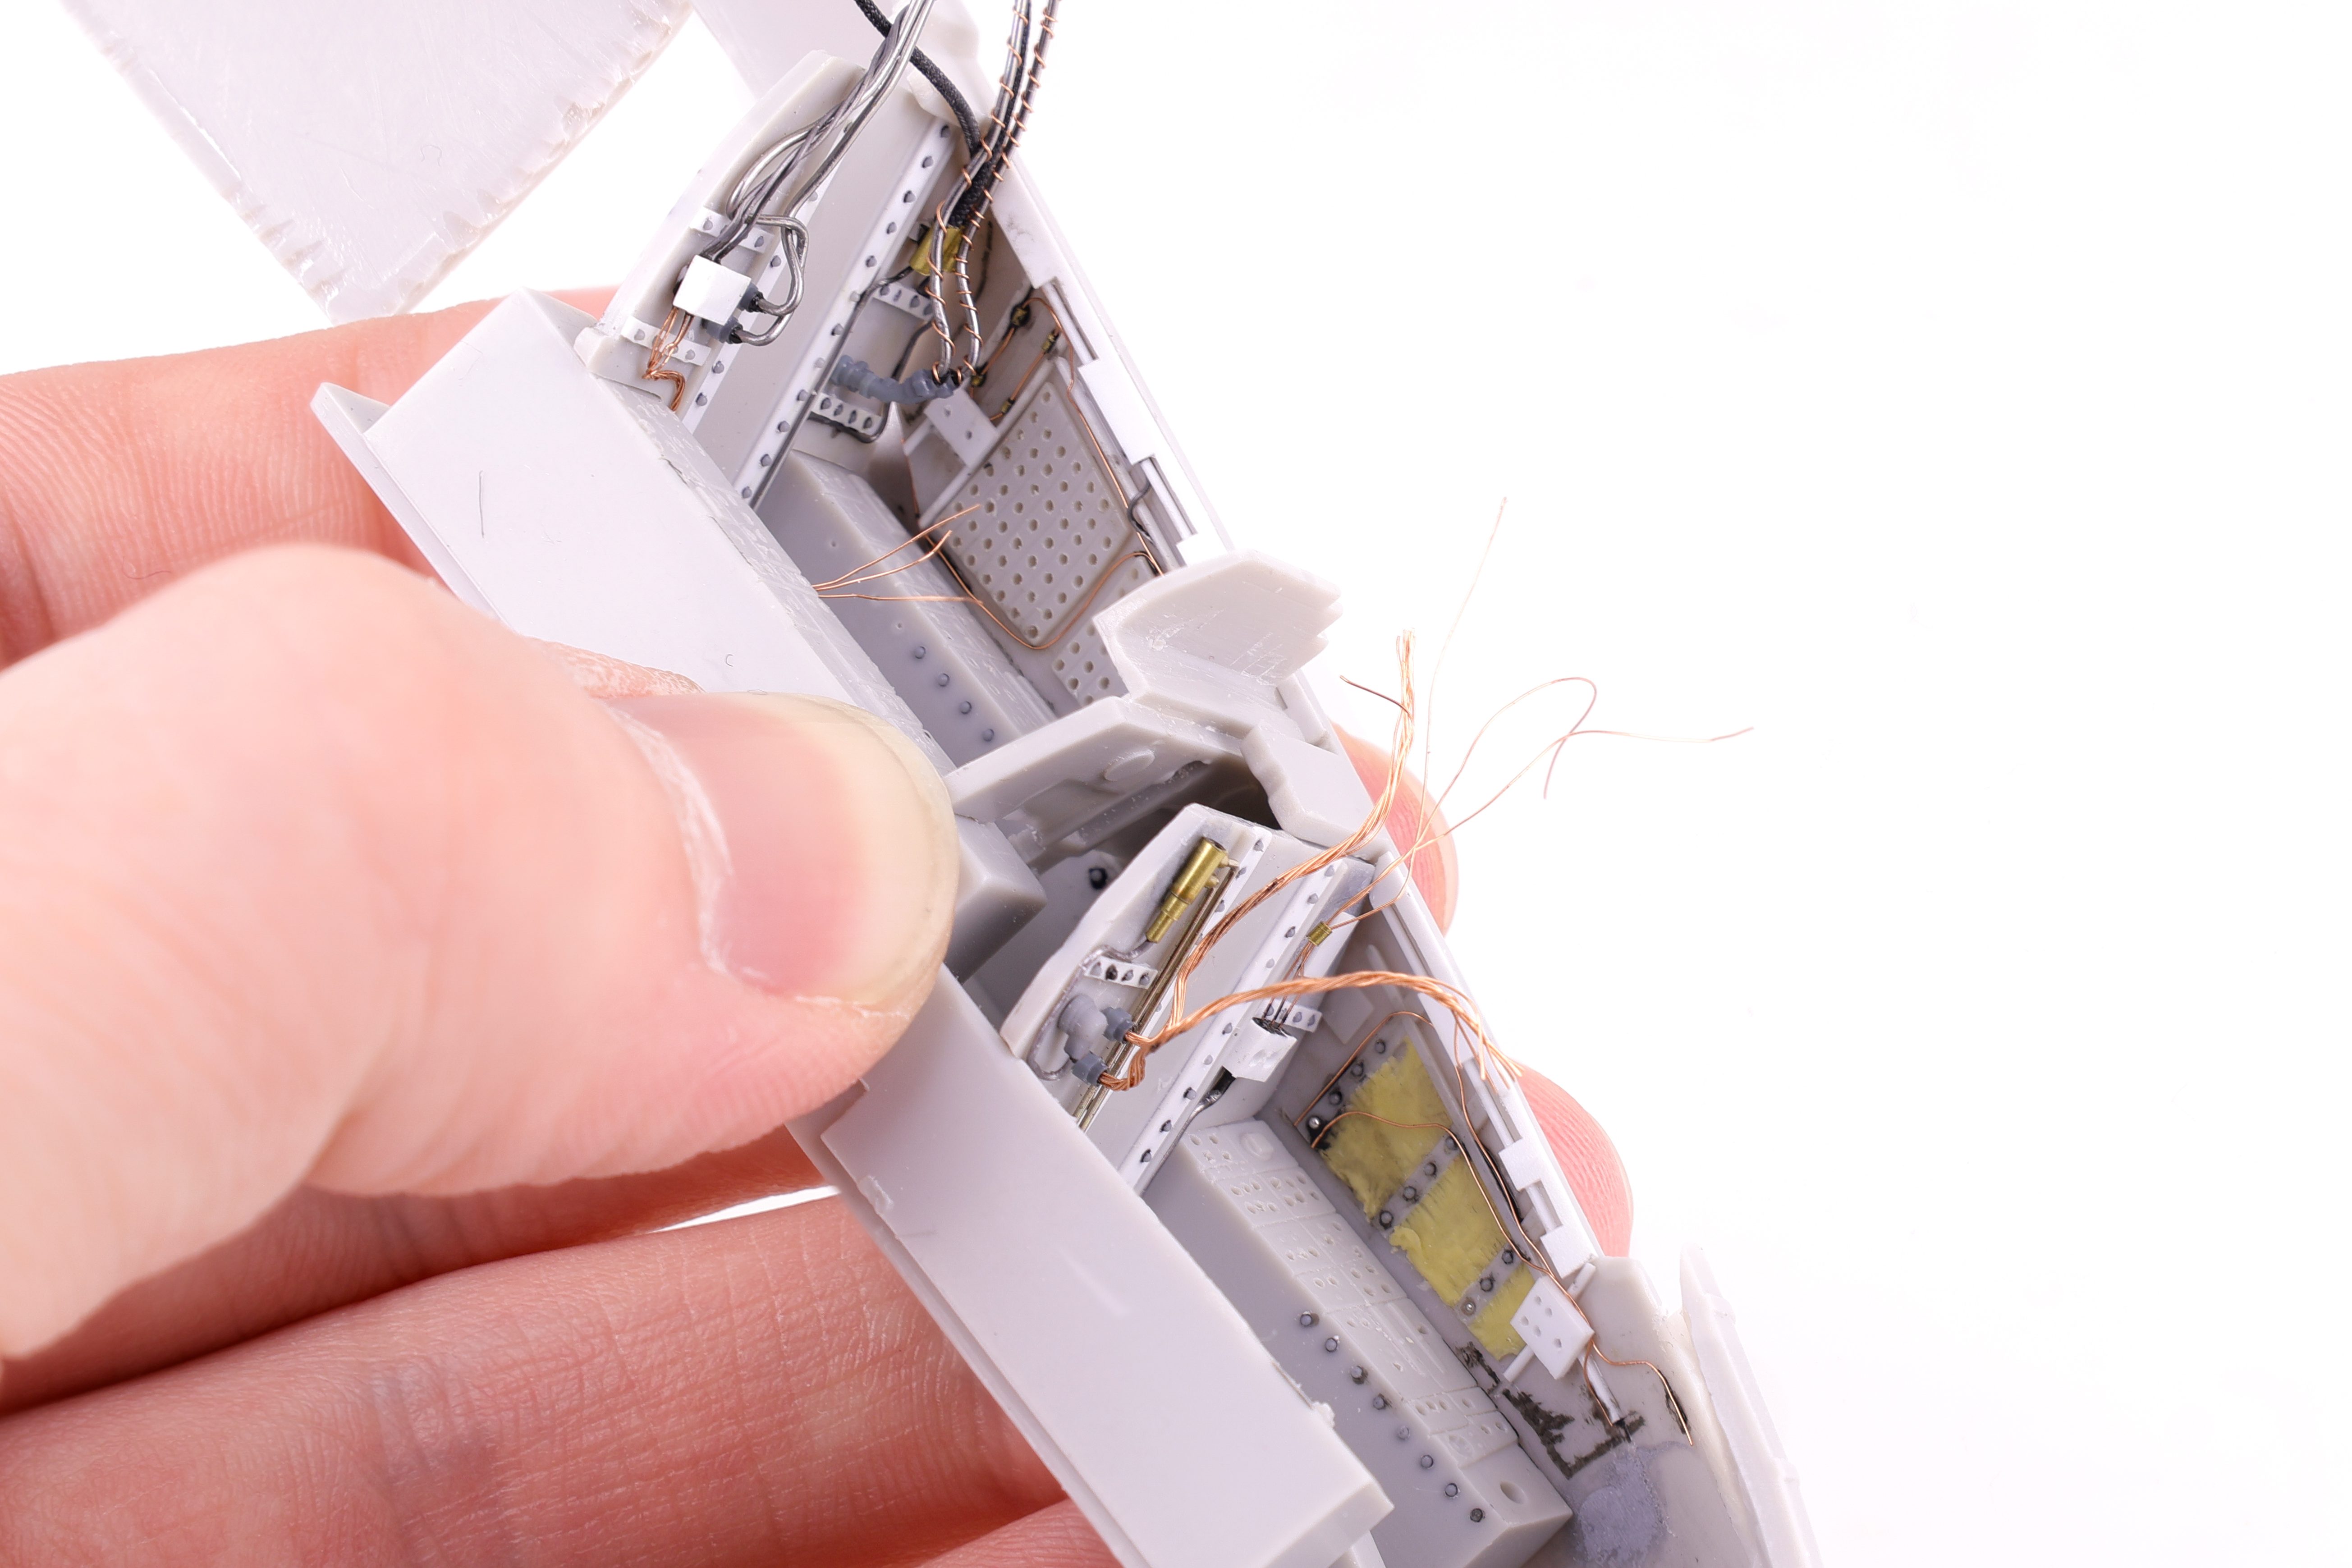
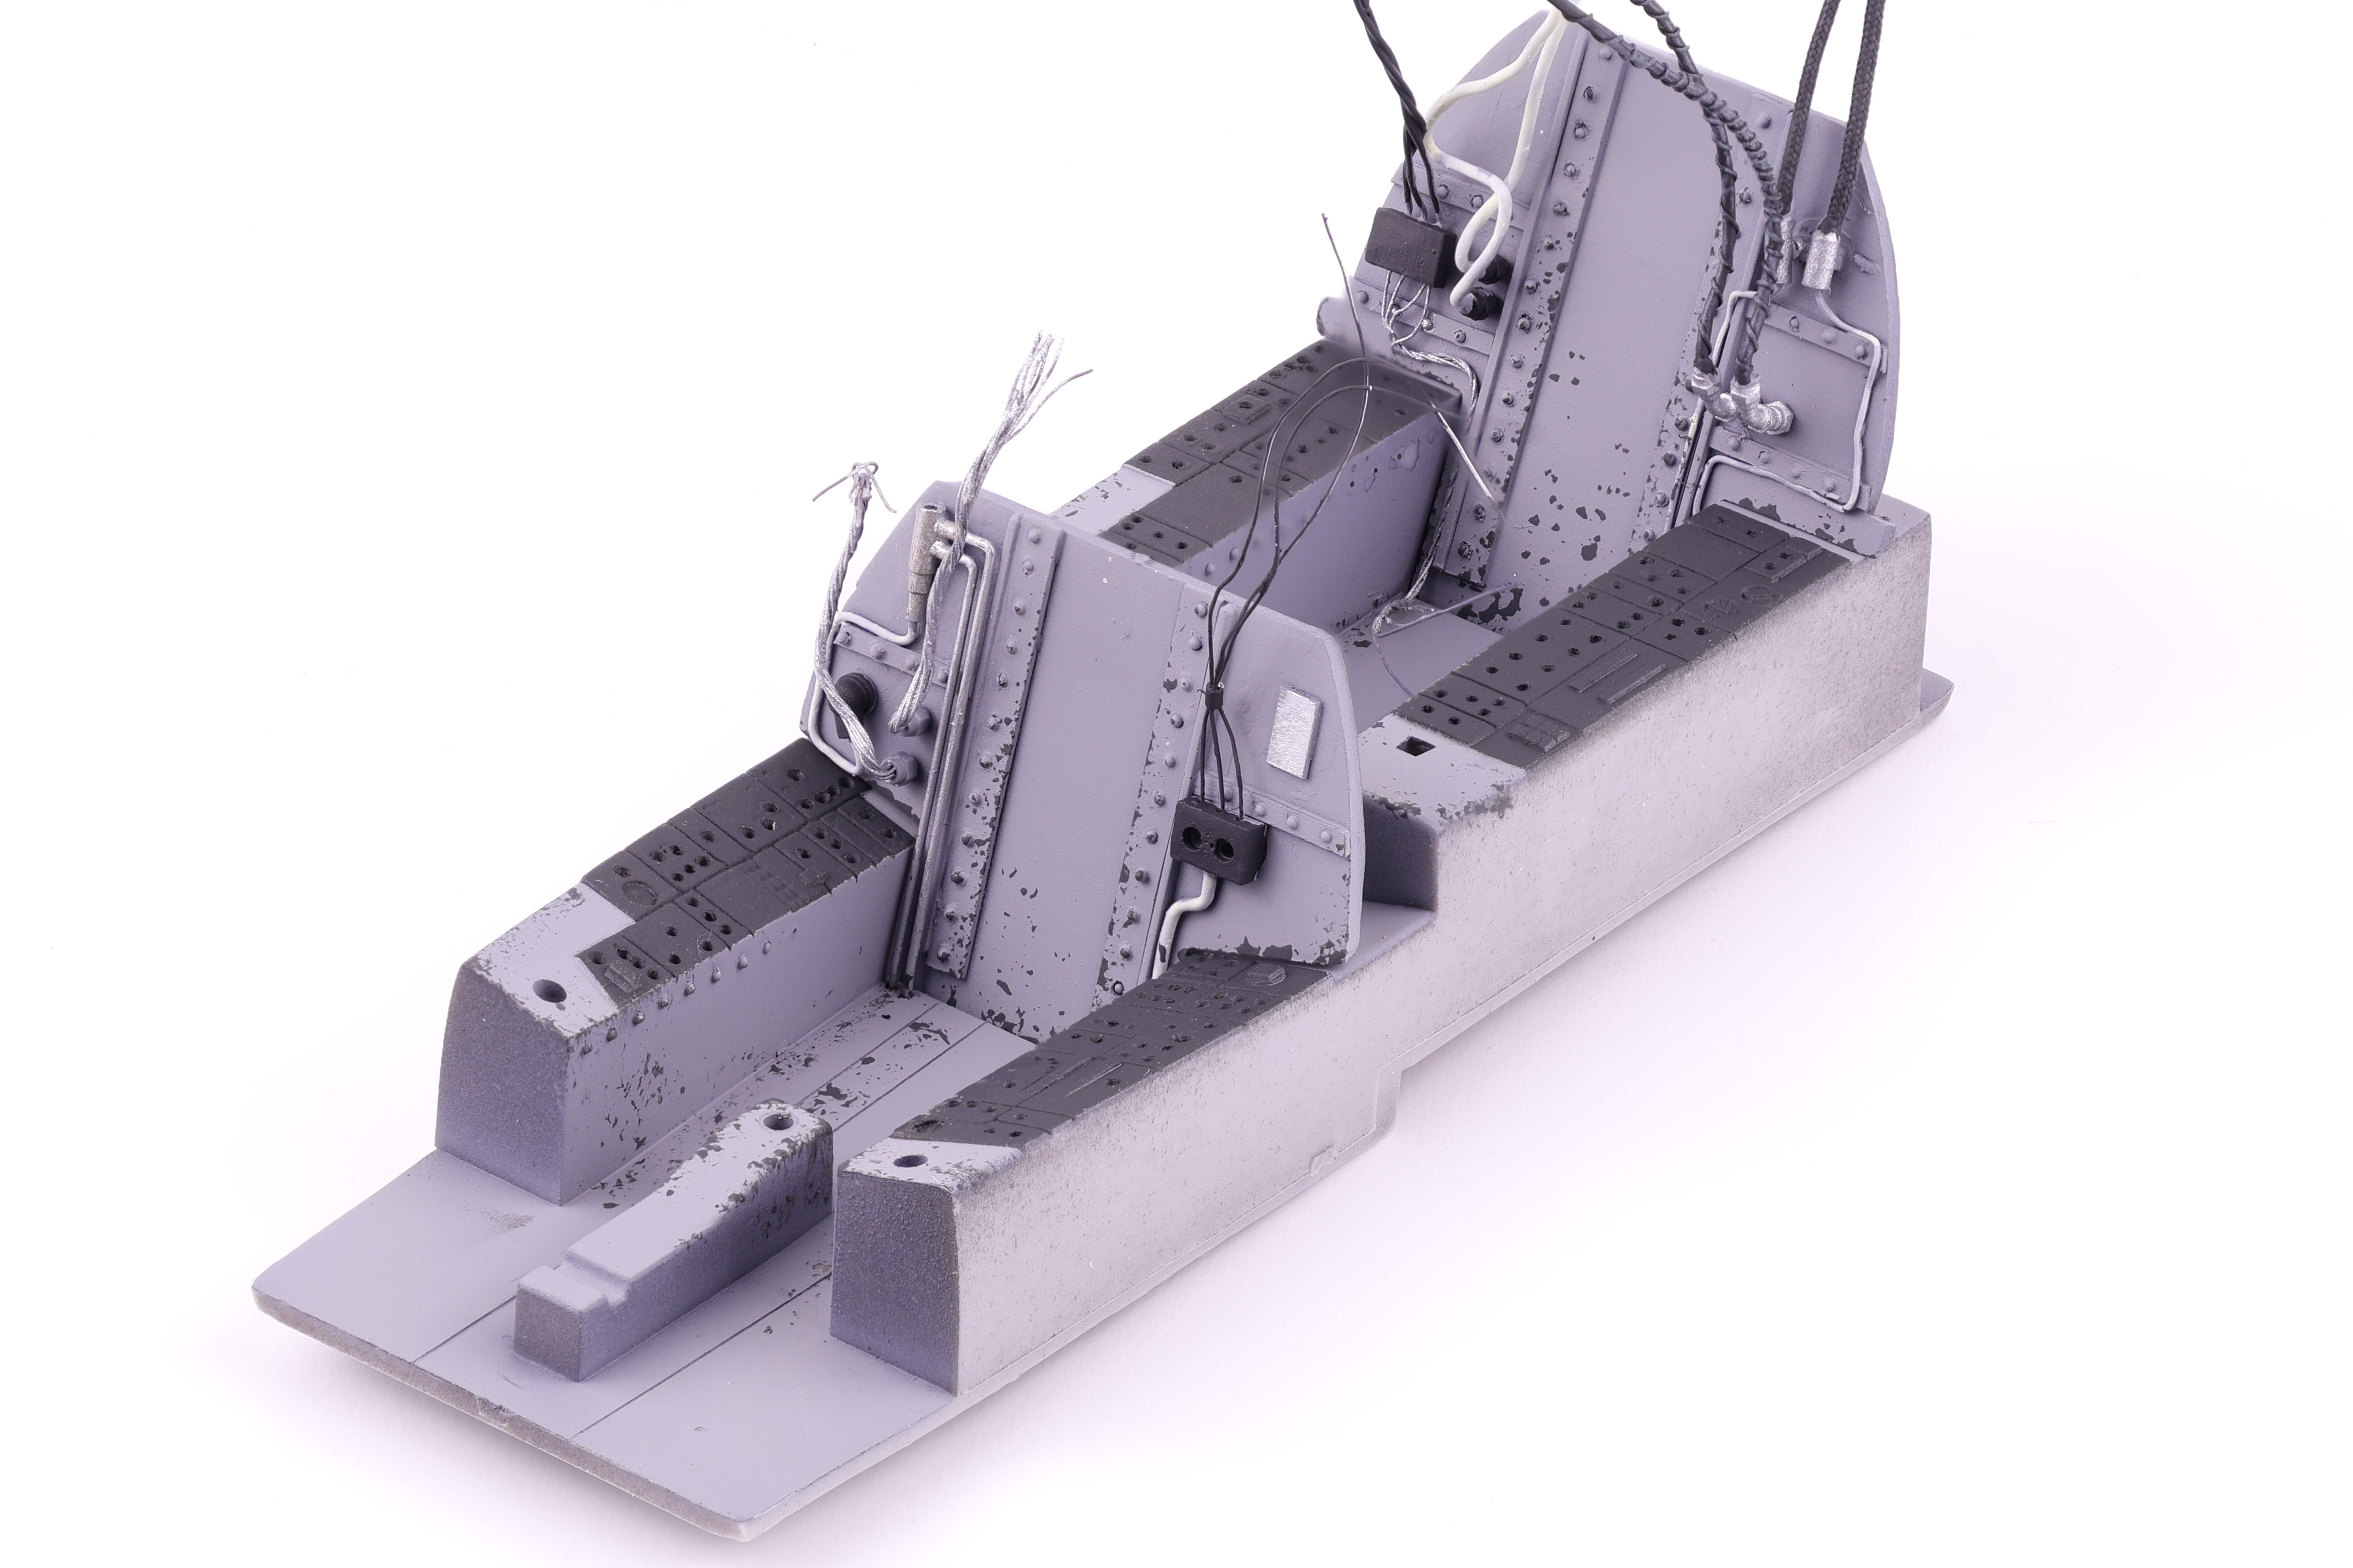
I started with the cockpit bulkheads. Reference photos showed that these areas were really quite busy with wiring and hoses and I wanted to replicate this madness. The first thing I added was some styrene sheet along with Anyz rivets as all subsequent wiring would rest over top these details.

For the rest of the added detail I used a mix of brass tubing, lead and copper wire along with Anyz 3d printed connectors. I think that I achieved my goal of having the area look busy why not being completely unwieldy during the painting and weathering phase.

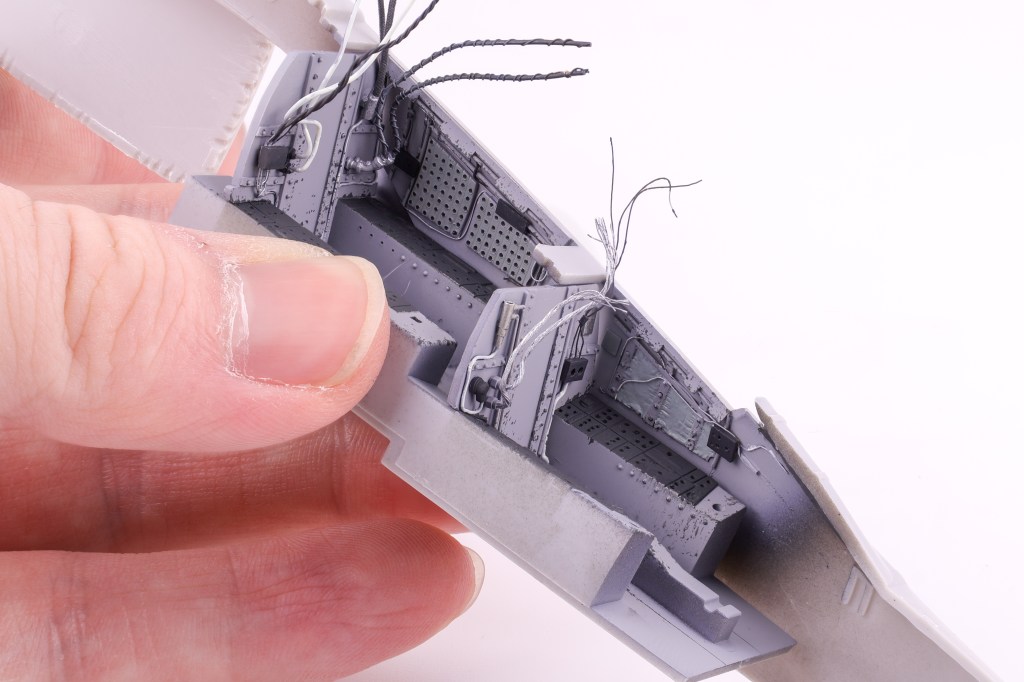
Like the bulkheads, the cockpit sidewalls needed some serious work to be presentable. While 3 out of 4 of the sidewalls have at least a minimal amount of detail, the right side of the rear cockpit is missing any molded on detail at all. This does present a nice opportunity however to add whatever kind of features I wanted. To start I added some styrene rod bracing to bring out some structural elements.
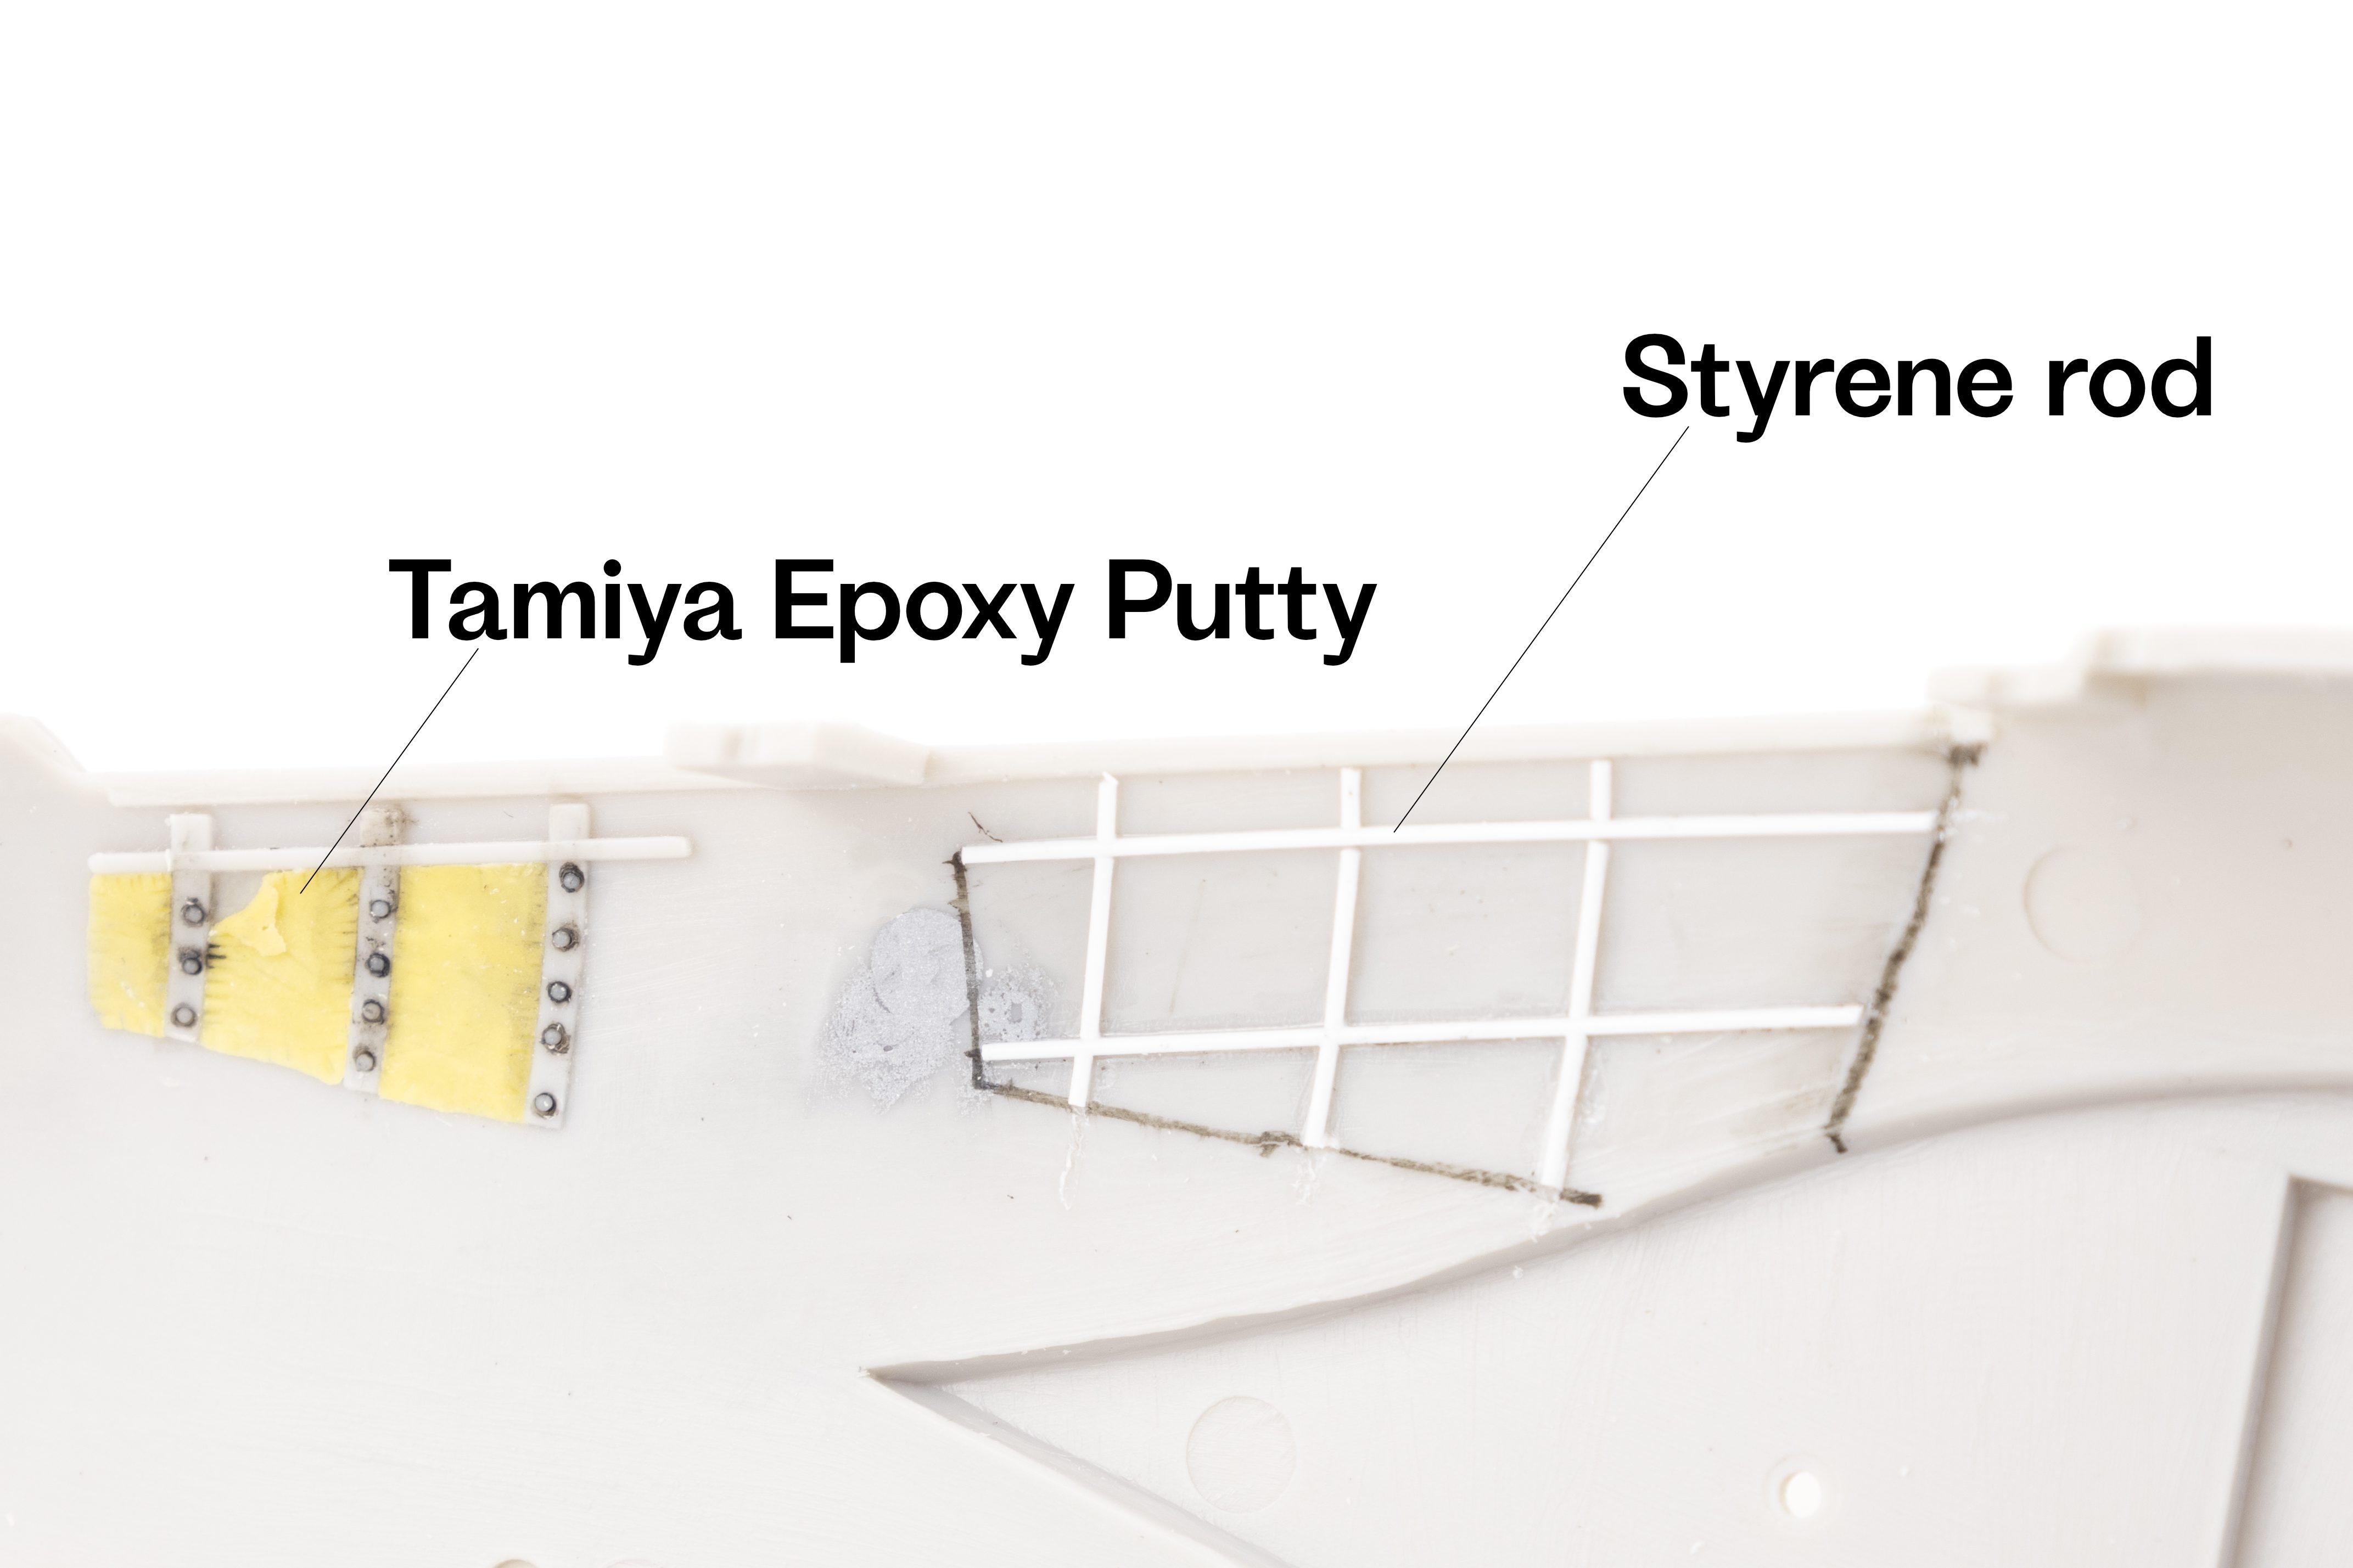
Next, I wanted to try to add some padded insulation material to the cockpit to help depict some interesting textures. I did this with Tamiya epoxy putty which I rolled out into very thin slices before applying it to the model. After a few minutes I then started to sculpt the putty and added creases near the edges. This technique went surprisingly well and I can’t wait to get a wash on the painted cockpit.


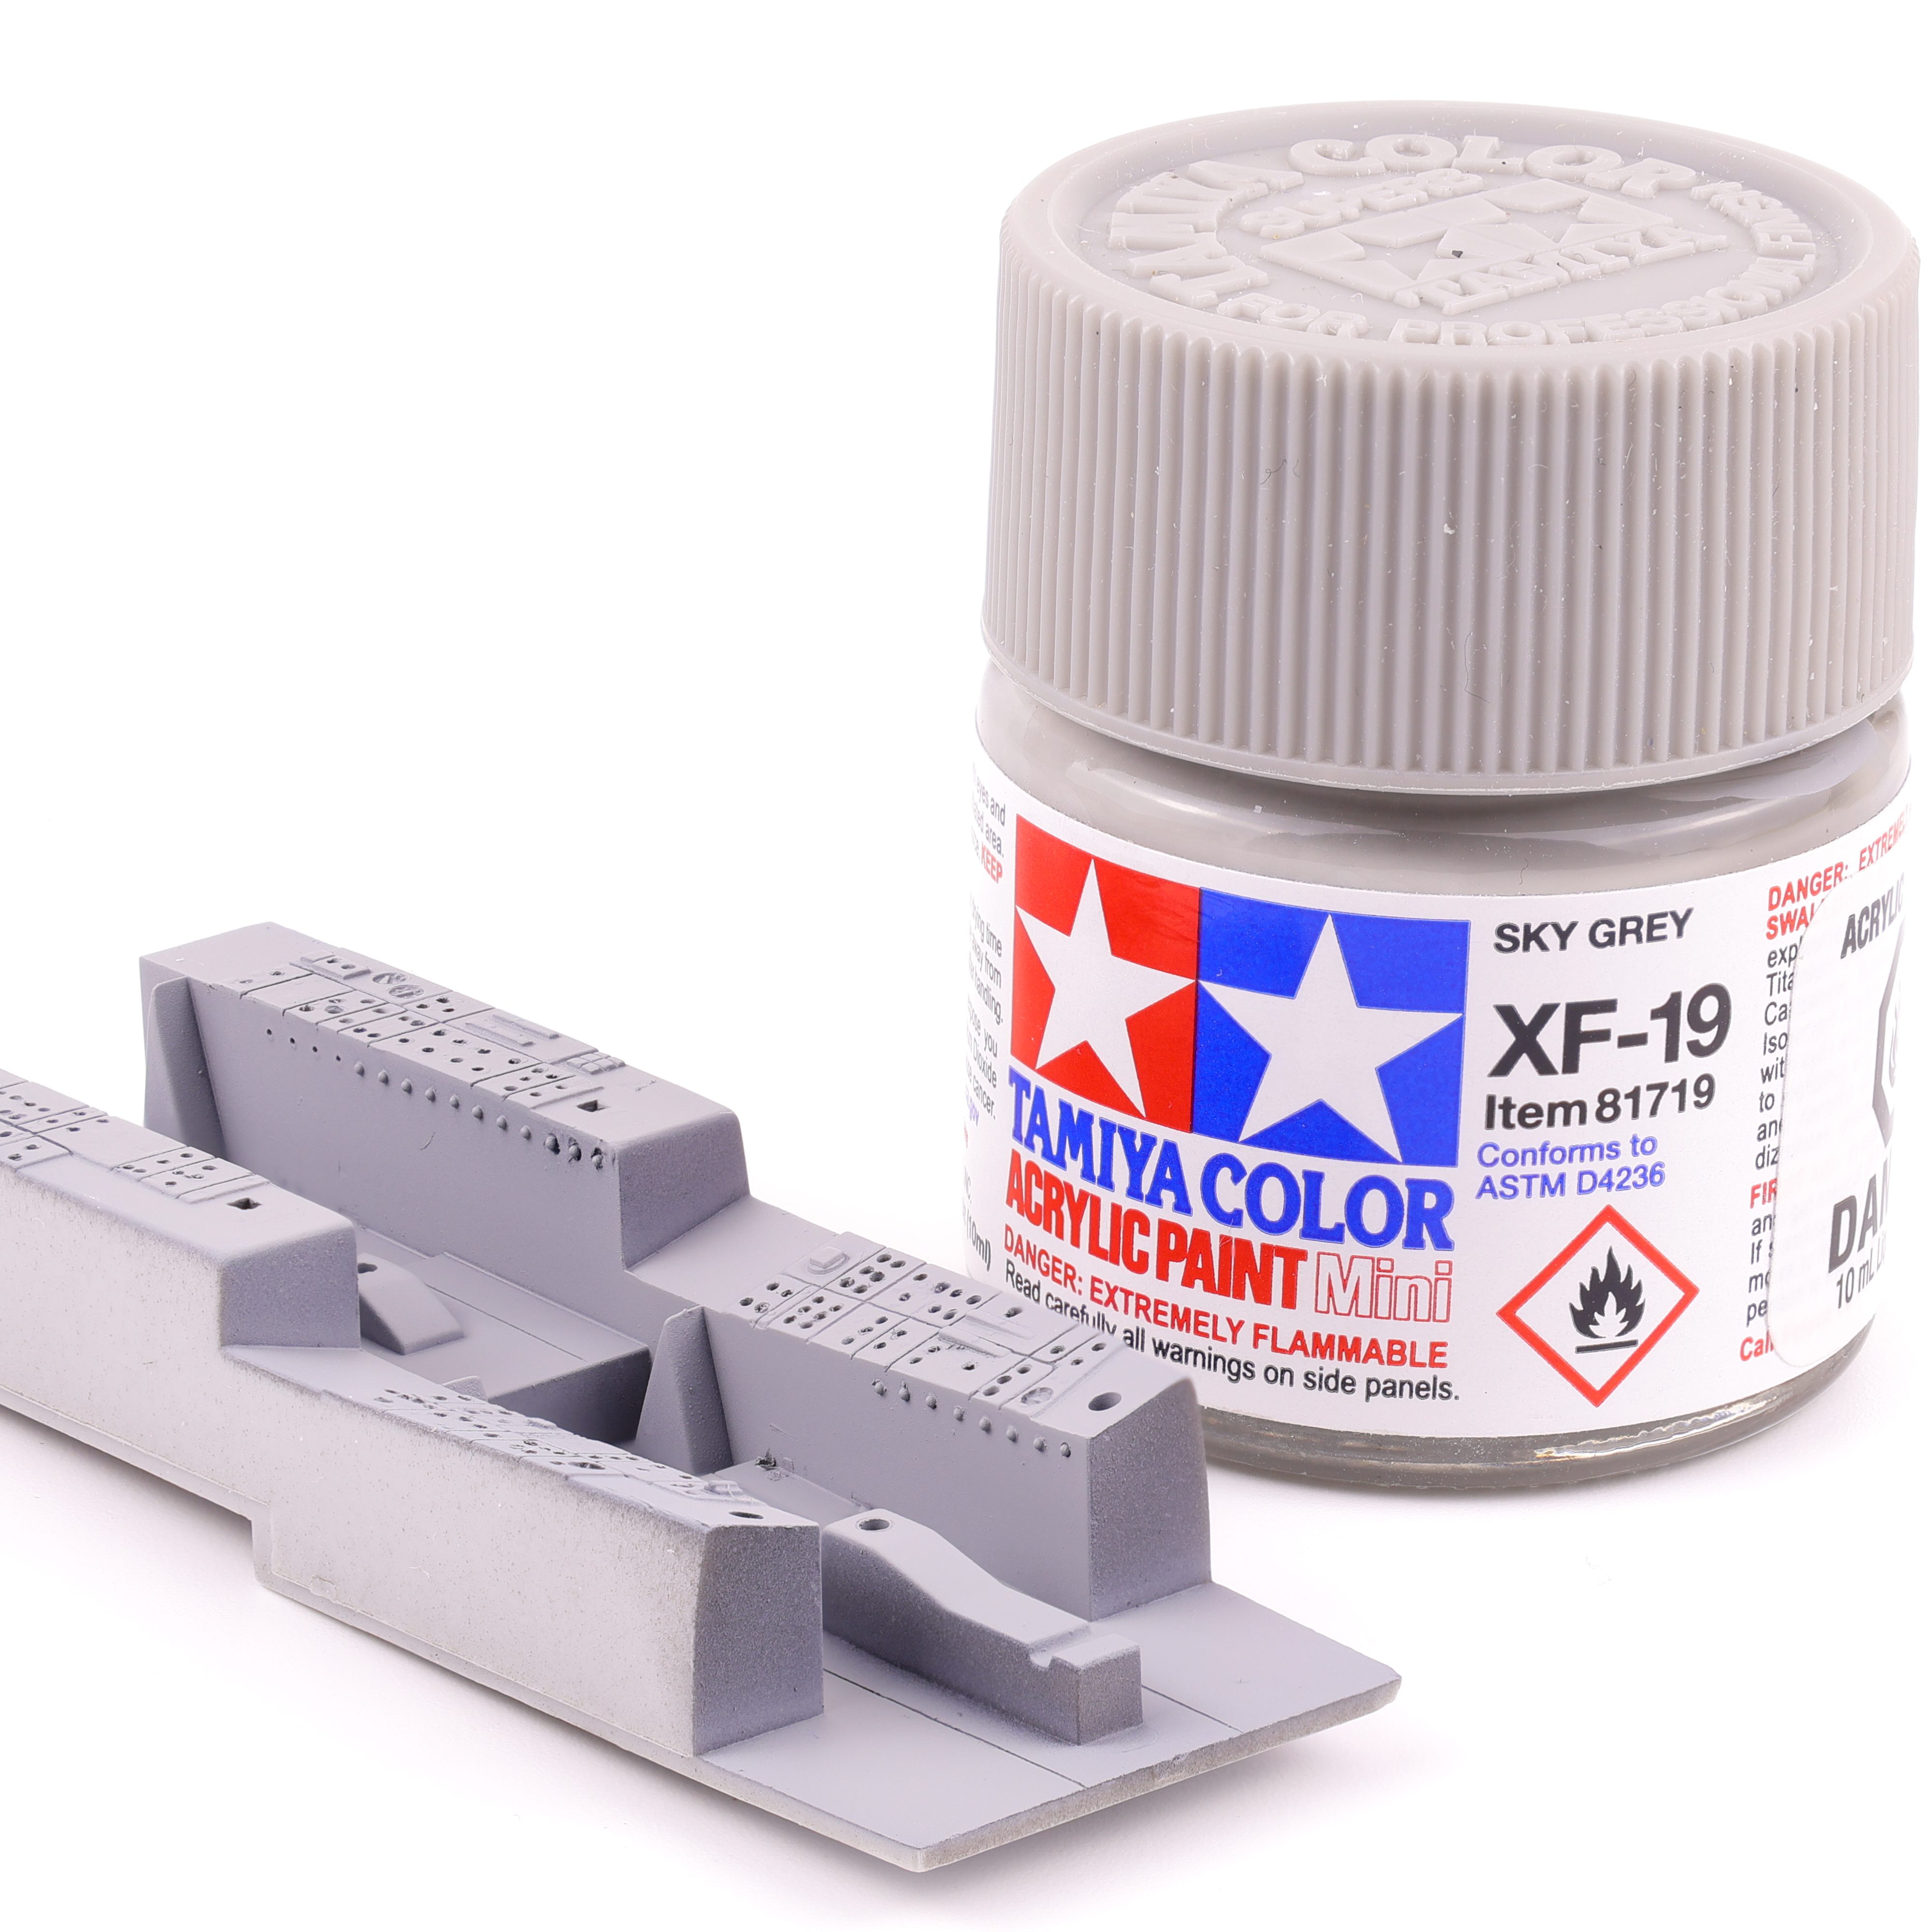
Painting of the cockpit predictably started with Mr. Surfacer 1500 Black followed by Tamiya XF-19 Sky grey. While not an exact match to the interior colour of a F-4 Phantom, this shade is close enough and was what I had on hand.
After the grey base colour had cured, I masked off the side consoles to airbrush them black. From reference photos I could tell that some of the switches and dials were gloss black which I wanted to replicate, even at the cost of being less visually striking. To compensate I painted these side panels in a dark grey. When next to the light grey they will appear black, but the gloss black switches should stand out at bit more. I also took this time to paint up the various wires and cables present on the rear bulkheads, painting them in a variety of black, white, and metallic colours.

Next up was work on the sidewalls, and I was pretty happy with how my scratchbuilt work had turned out. The padded material looked quite realistic and after picking out the necessary details, this area of the build was looking particularly sharp. I also took the time to complete some chipping effects to depict wear and tear on the cockpit area as these were old birds and saw a lot of flight hours. That said I do think I could have been a bit more reserved with the weathering but I think that as long as the wash and oil work is more muted, the end result will look appropriate.


This is where I’ll leave it for this update, even though this kit has been pretty sparse on the detail in areas, I really feel that adding the detail in myself has added to the enjoyment and not decreased it. We’ll see if this sentiment still rings true in a few months!
