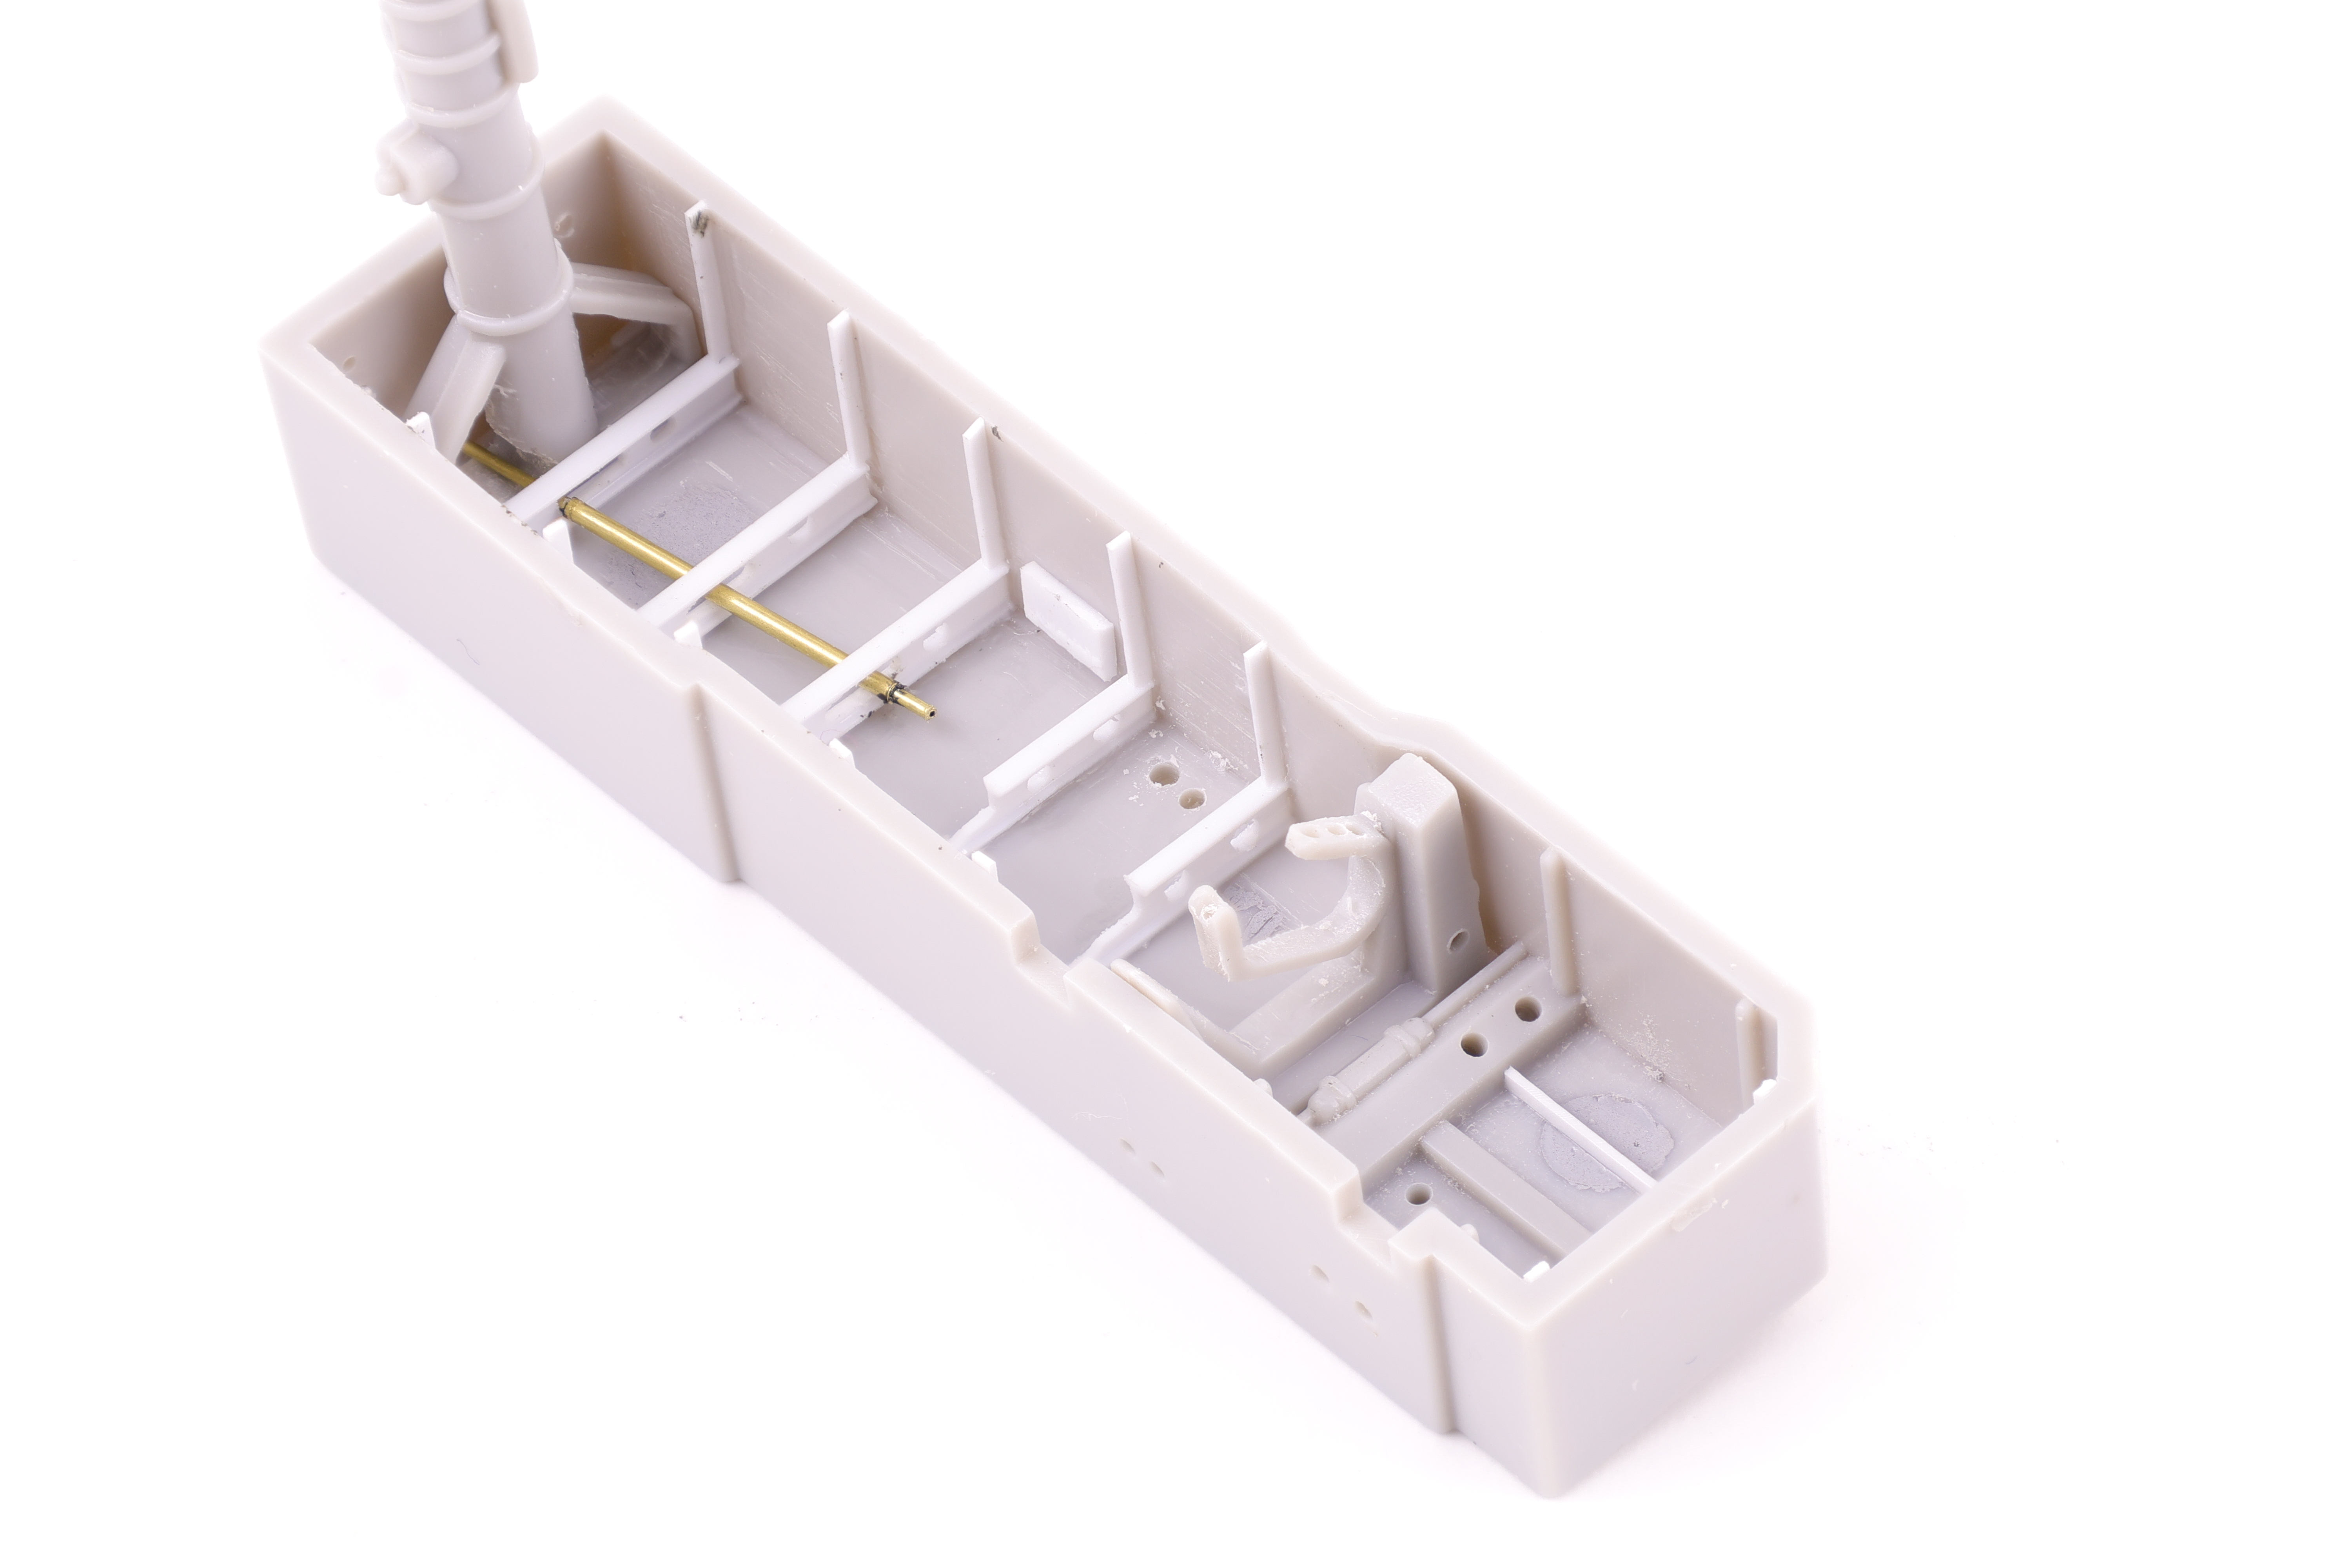
With the completion of the cockpit, next up was the nose gear bay. Like the cockpit, the gear bay was really lacking detail and not up to a modern standard. There was also the fact that there were several prominent sink marks that were unfixable without removing the molded detail. As such, I broke the chisel out and completely removed it all. I can’t lie, this was fairly nerve wracking as I wasn’t sure if I could pull off scratchbuilding something as complex as a gear bay. After a trip to my LHS, I was well armed with small pieces of styrene and got to work replacing the detail that I had hacked away.


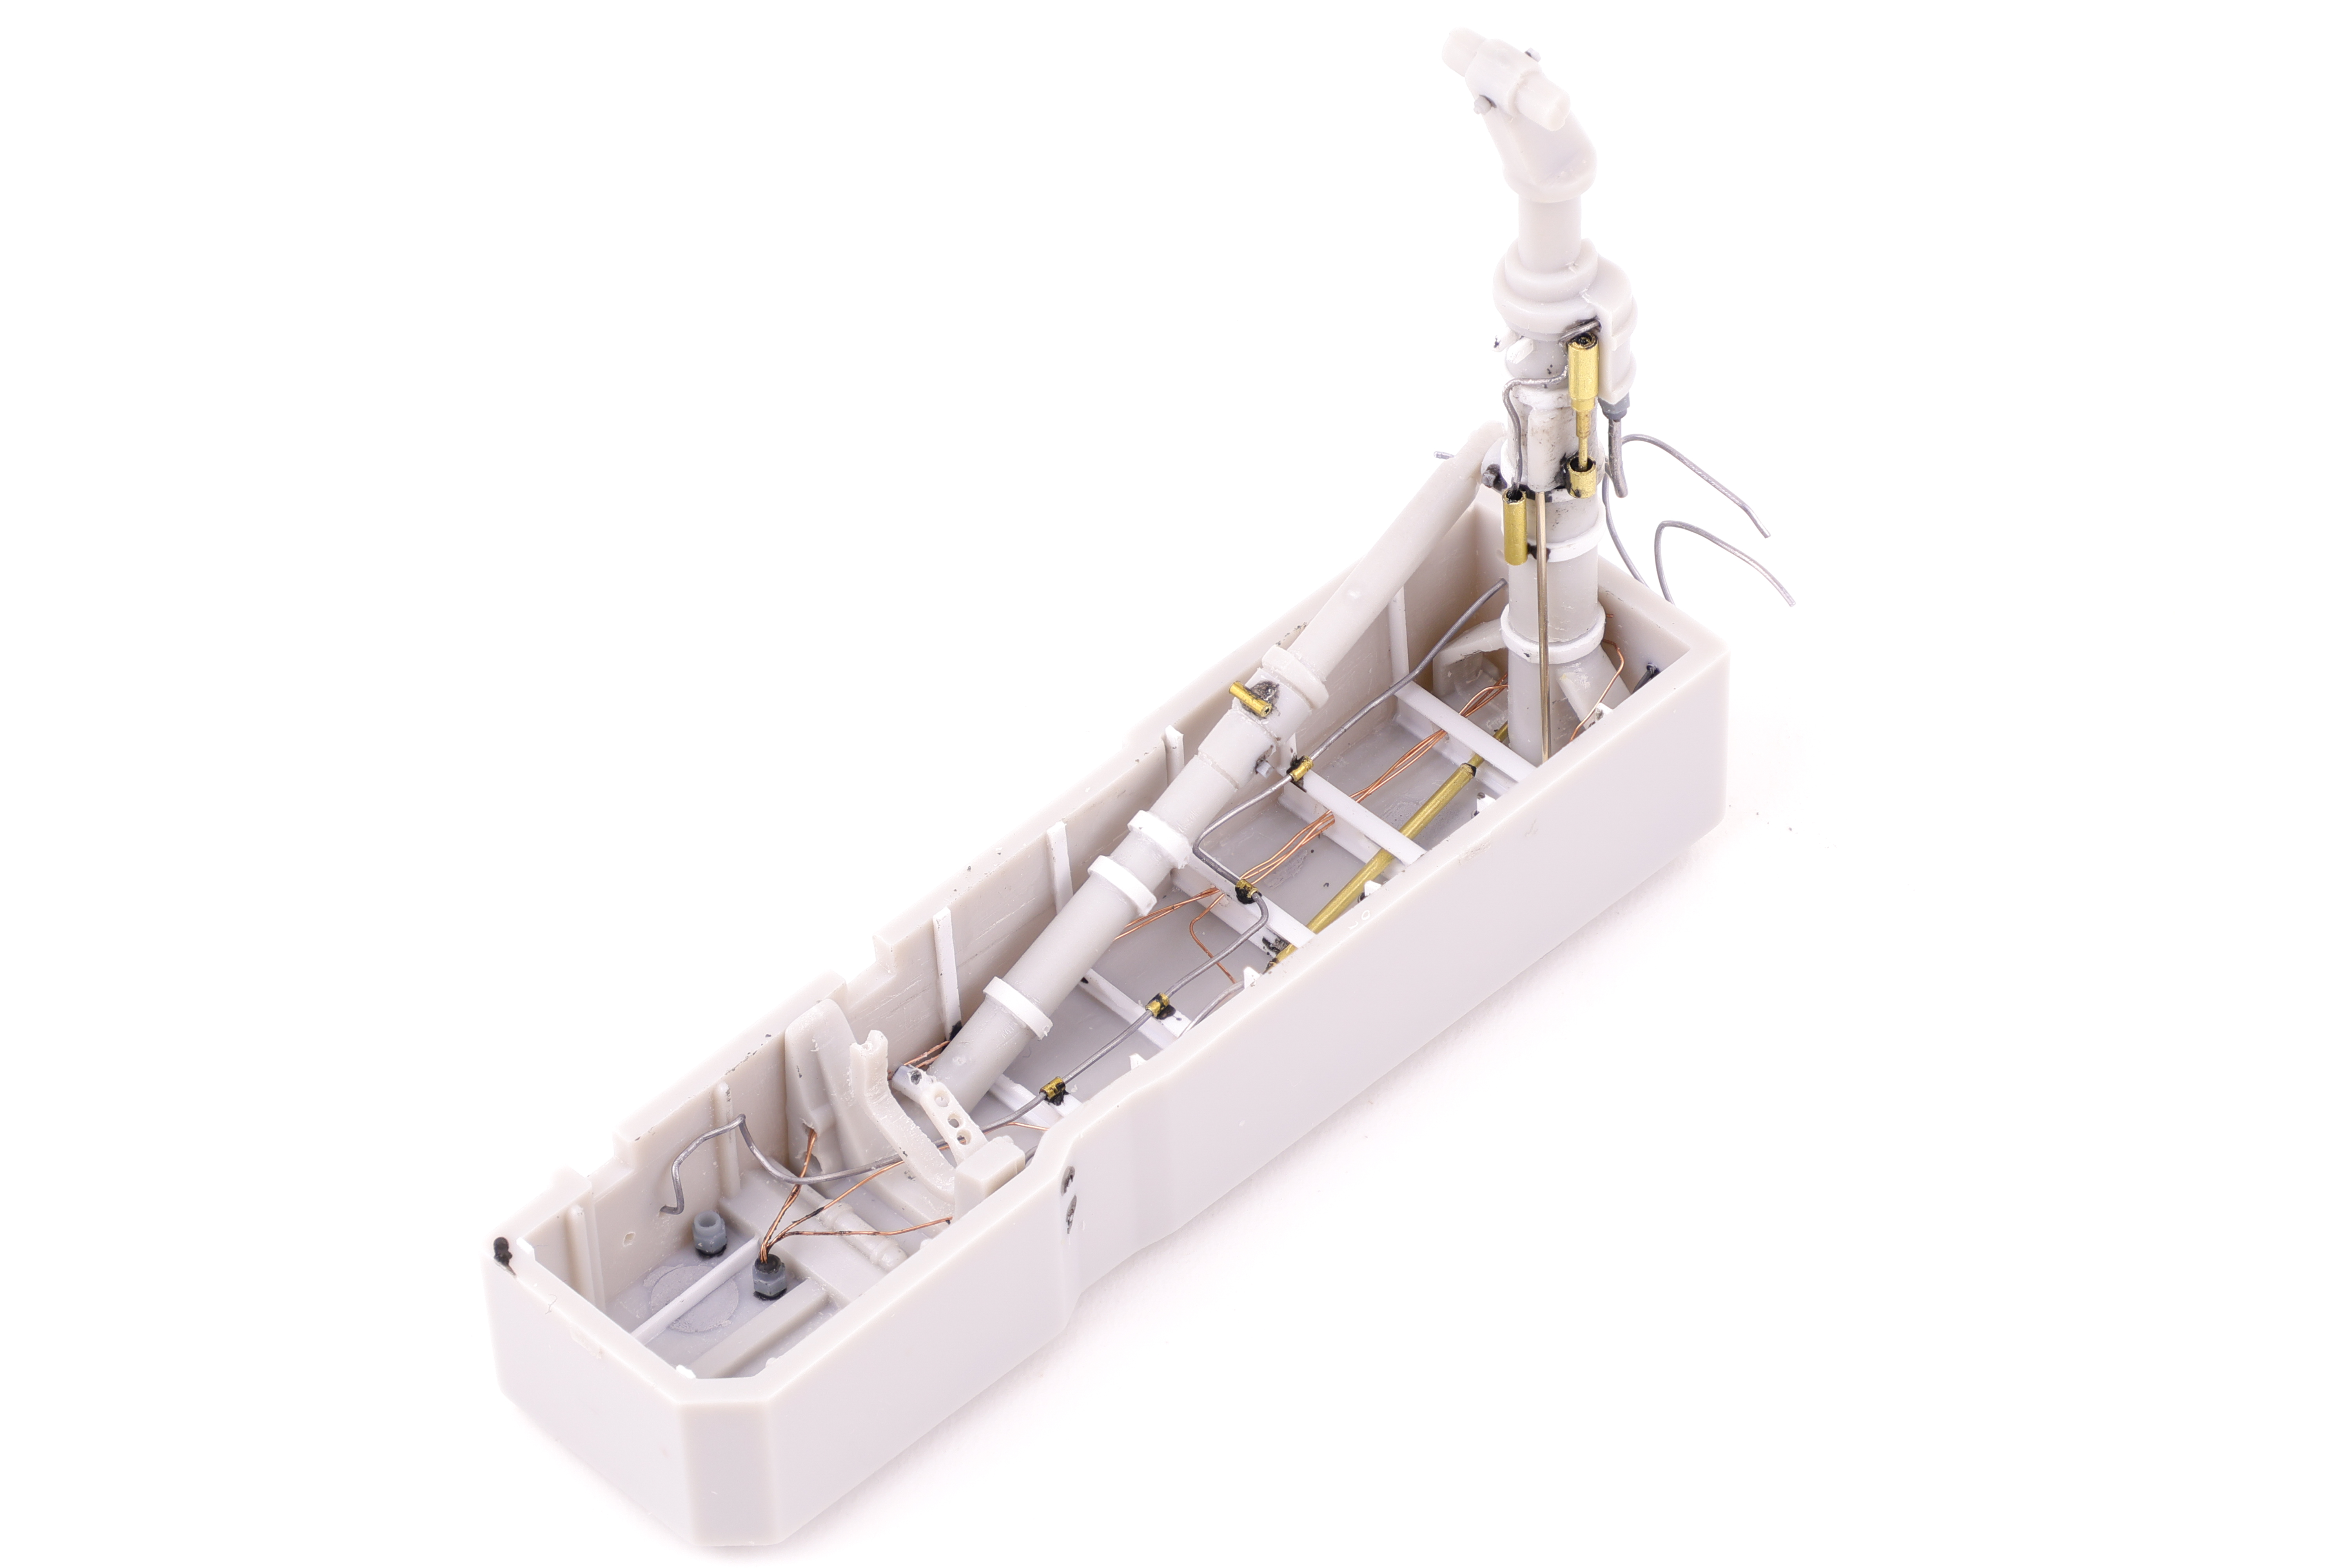
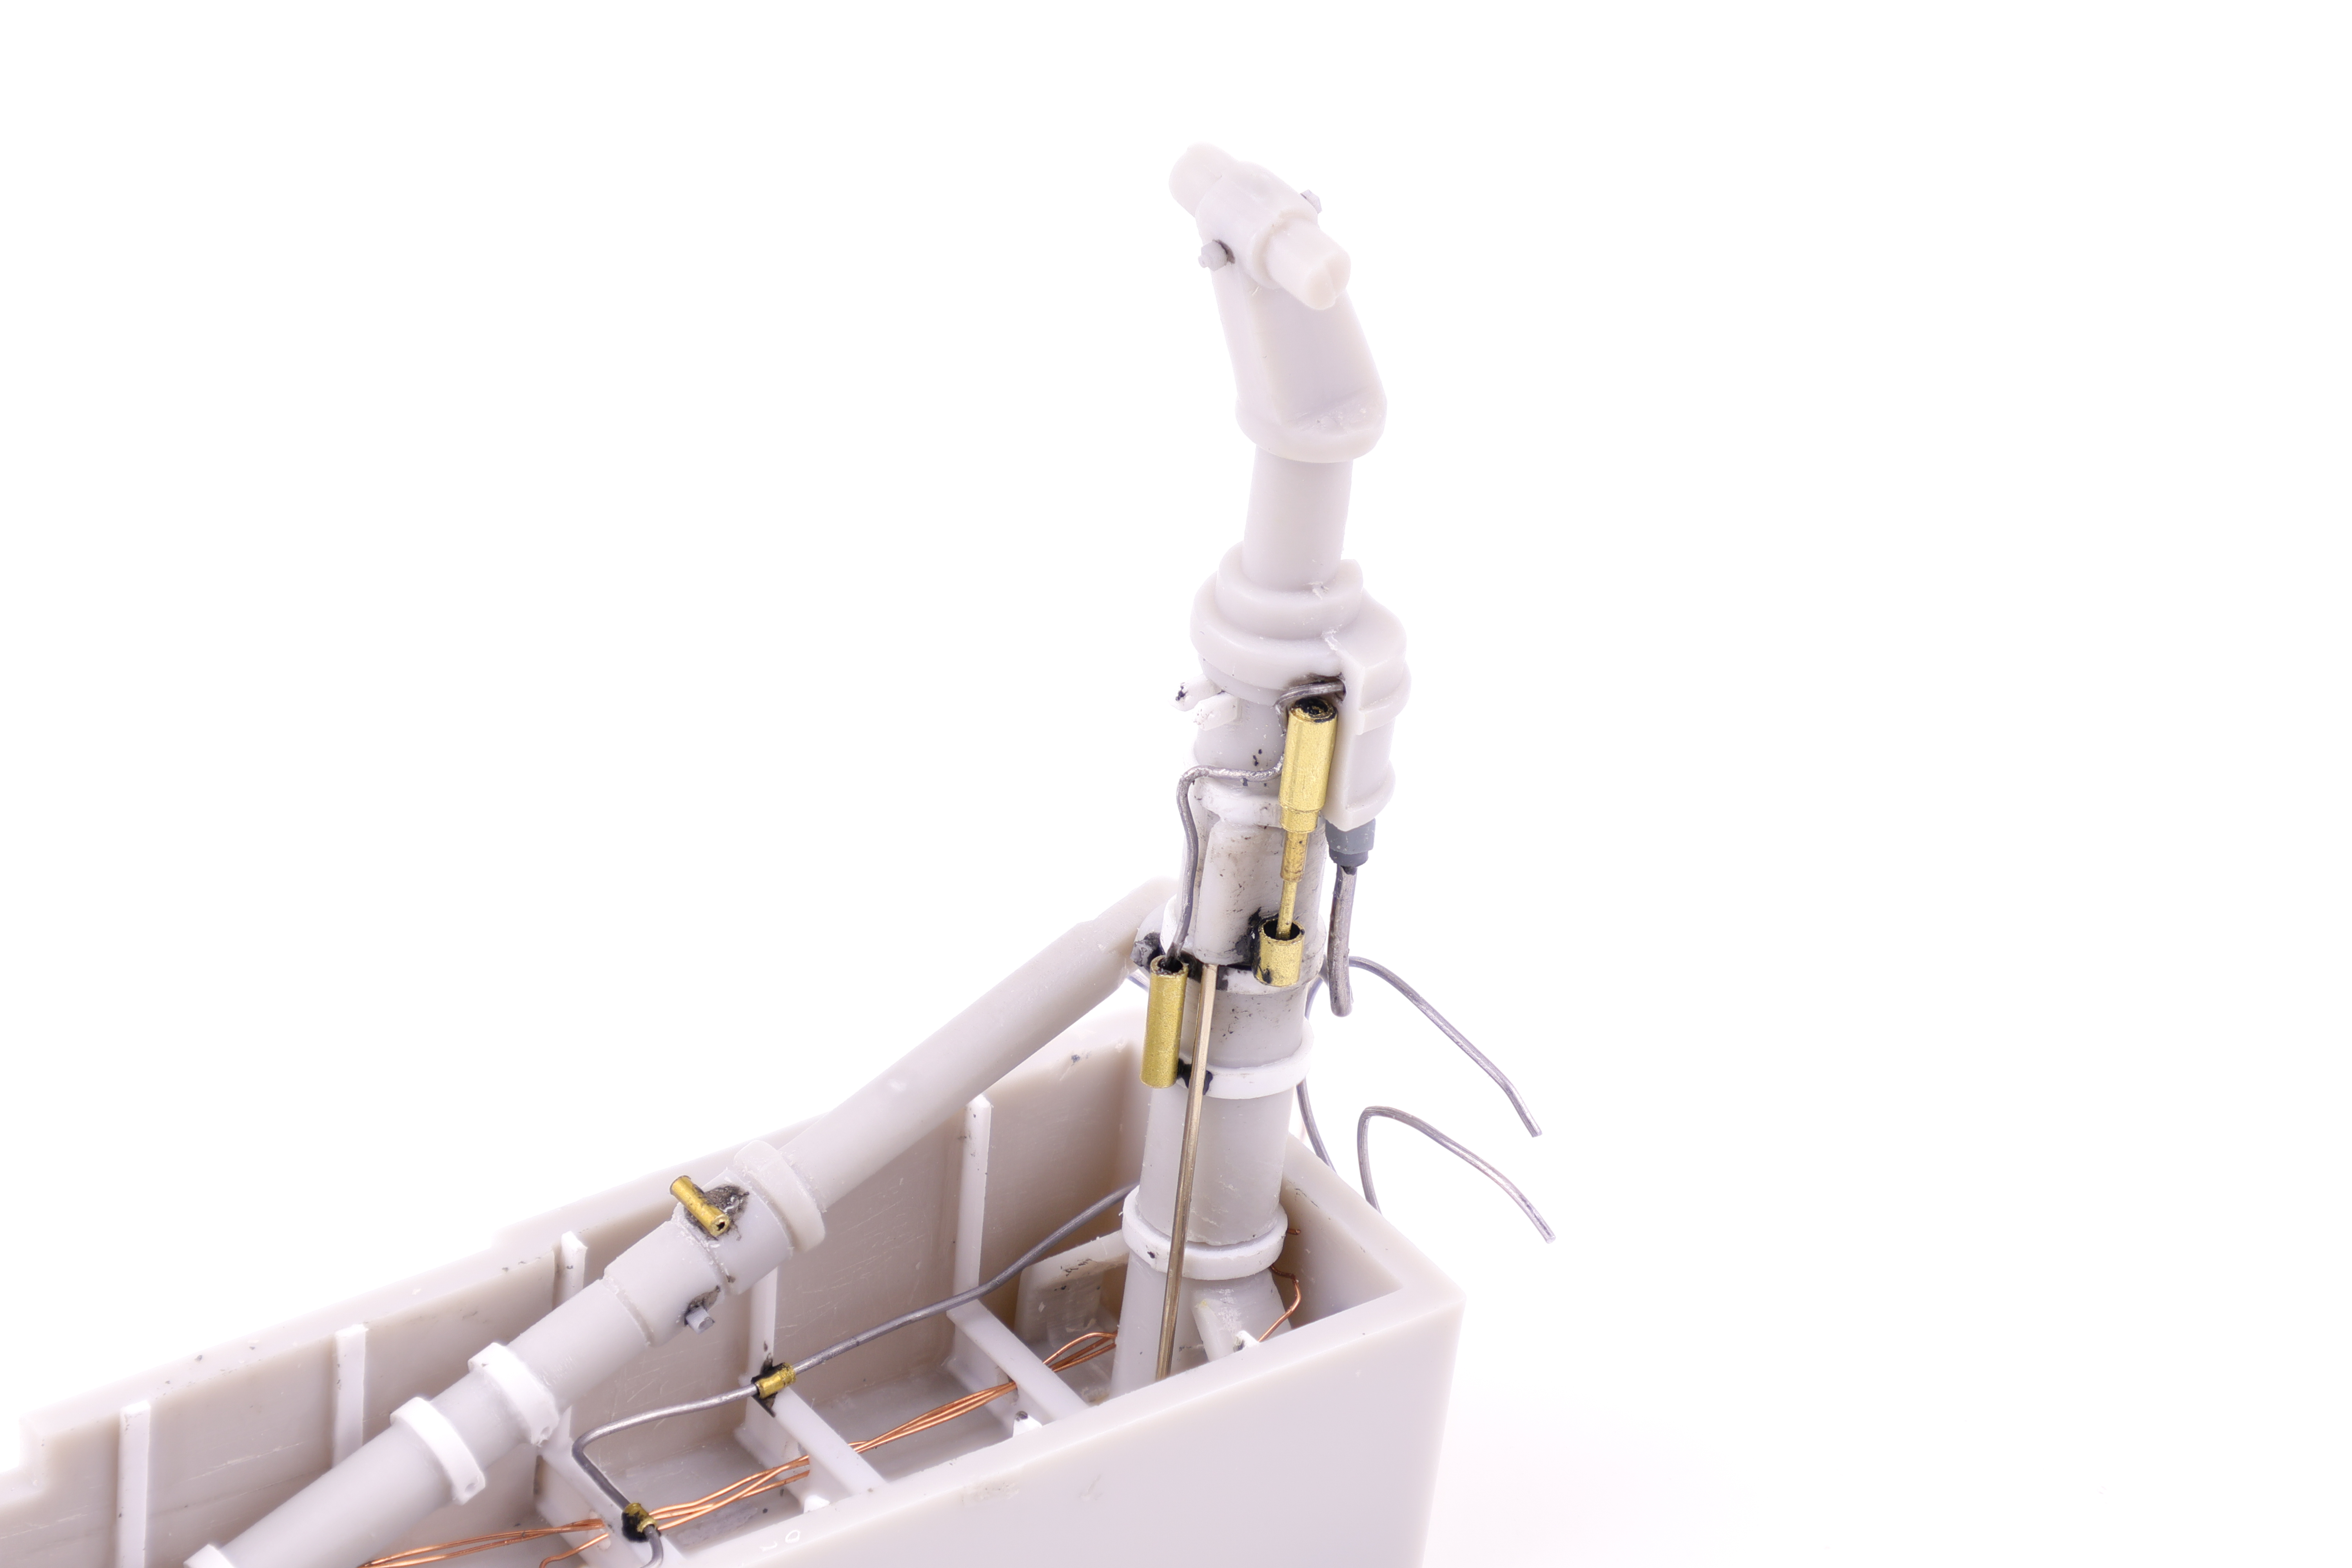
I started with replacing the substantial bracing structures with styrene replacements along with a brass tube to depict an actuator arm. After getting these initial pieces into place I was pretty confident that the end result would look acceptable and was pretty happy with these initial results. I was however, confronted with another problem that needed to be solved; the main gear strut. With the way I wanted to attach the brass actuator arm, it would require being fed through the main gear strut. The problem? The arm would then block the strut from being put in place later on in the build. I wanted to keep the strut off the built until later on in the painting and weathering phase as it being glued in place would interfere with the masking and painting of the gear bay. To solve this problem, I opted to cut the strut after gluing the lower section in place. I was sure to add a metal rod to help with the alignment down the line.


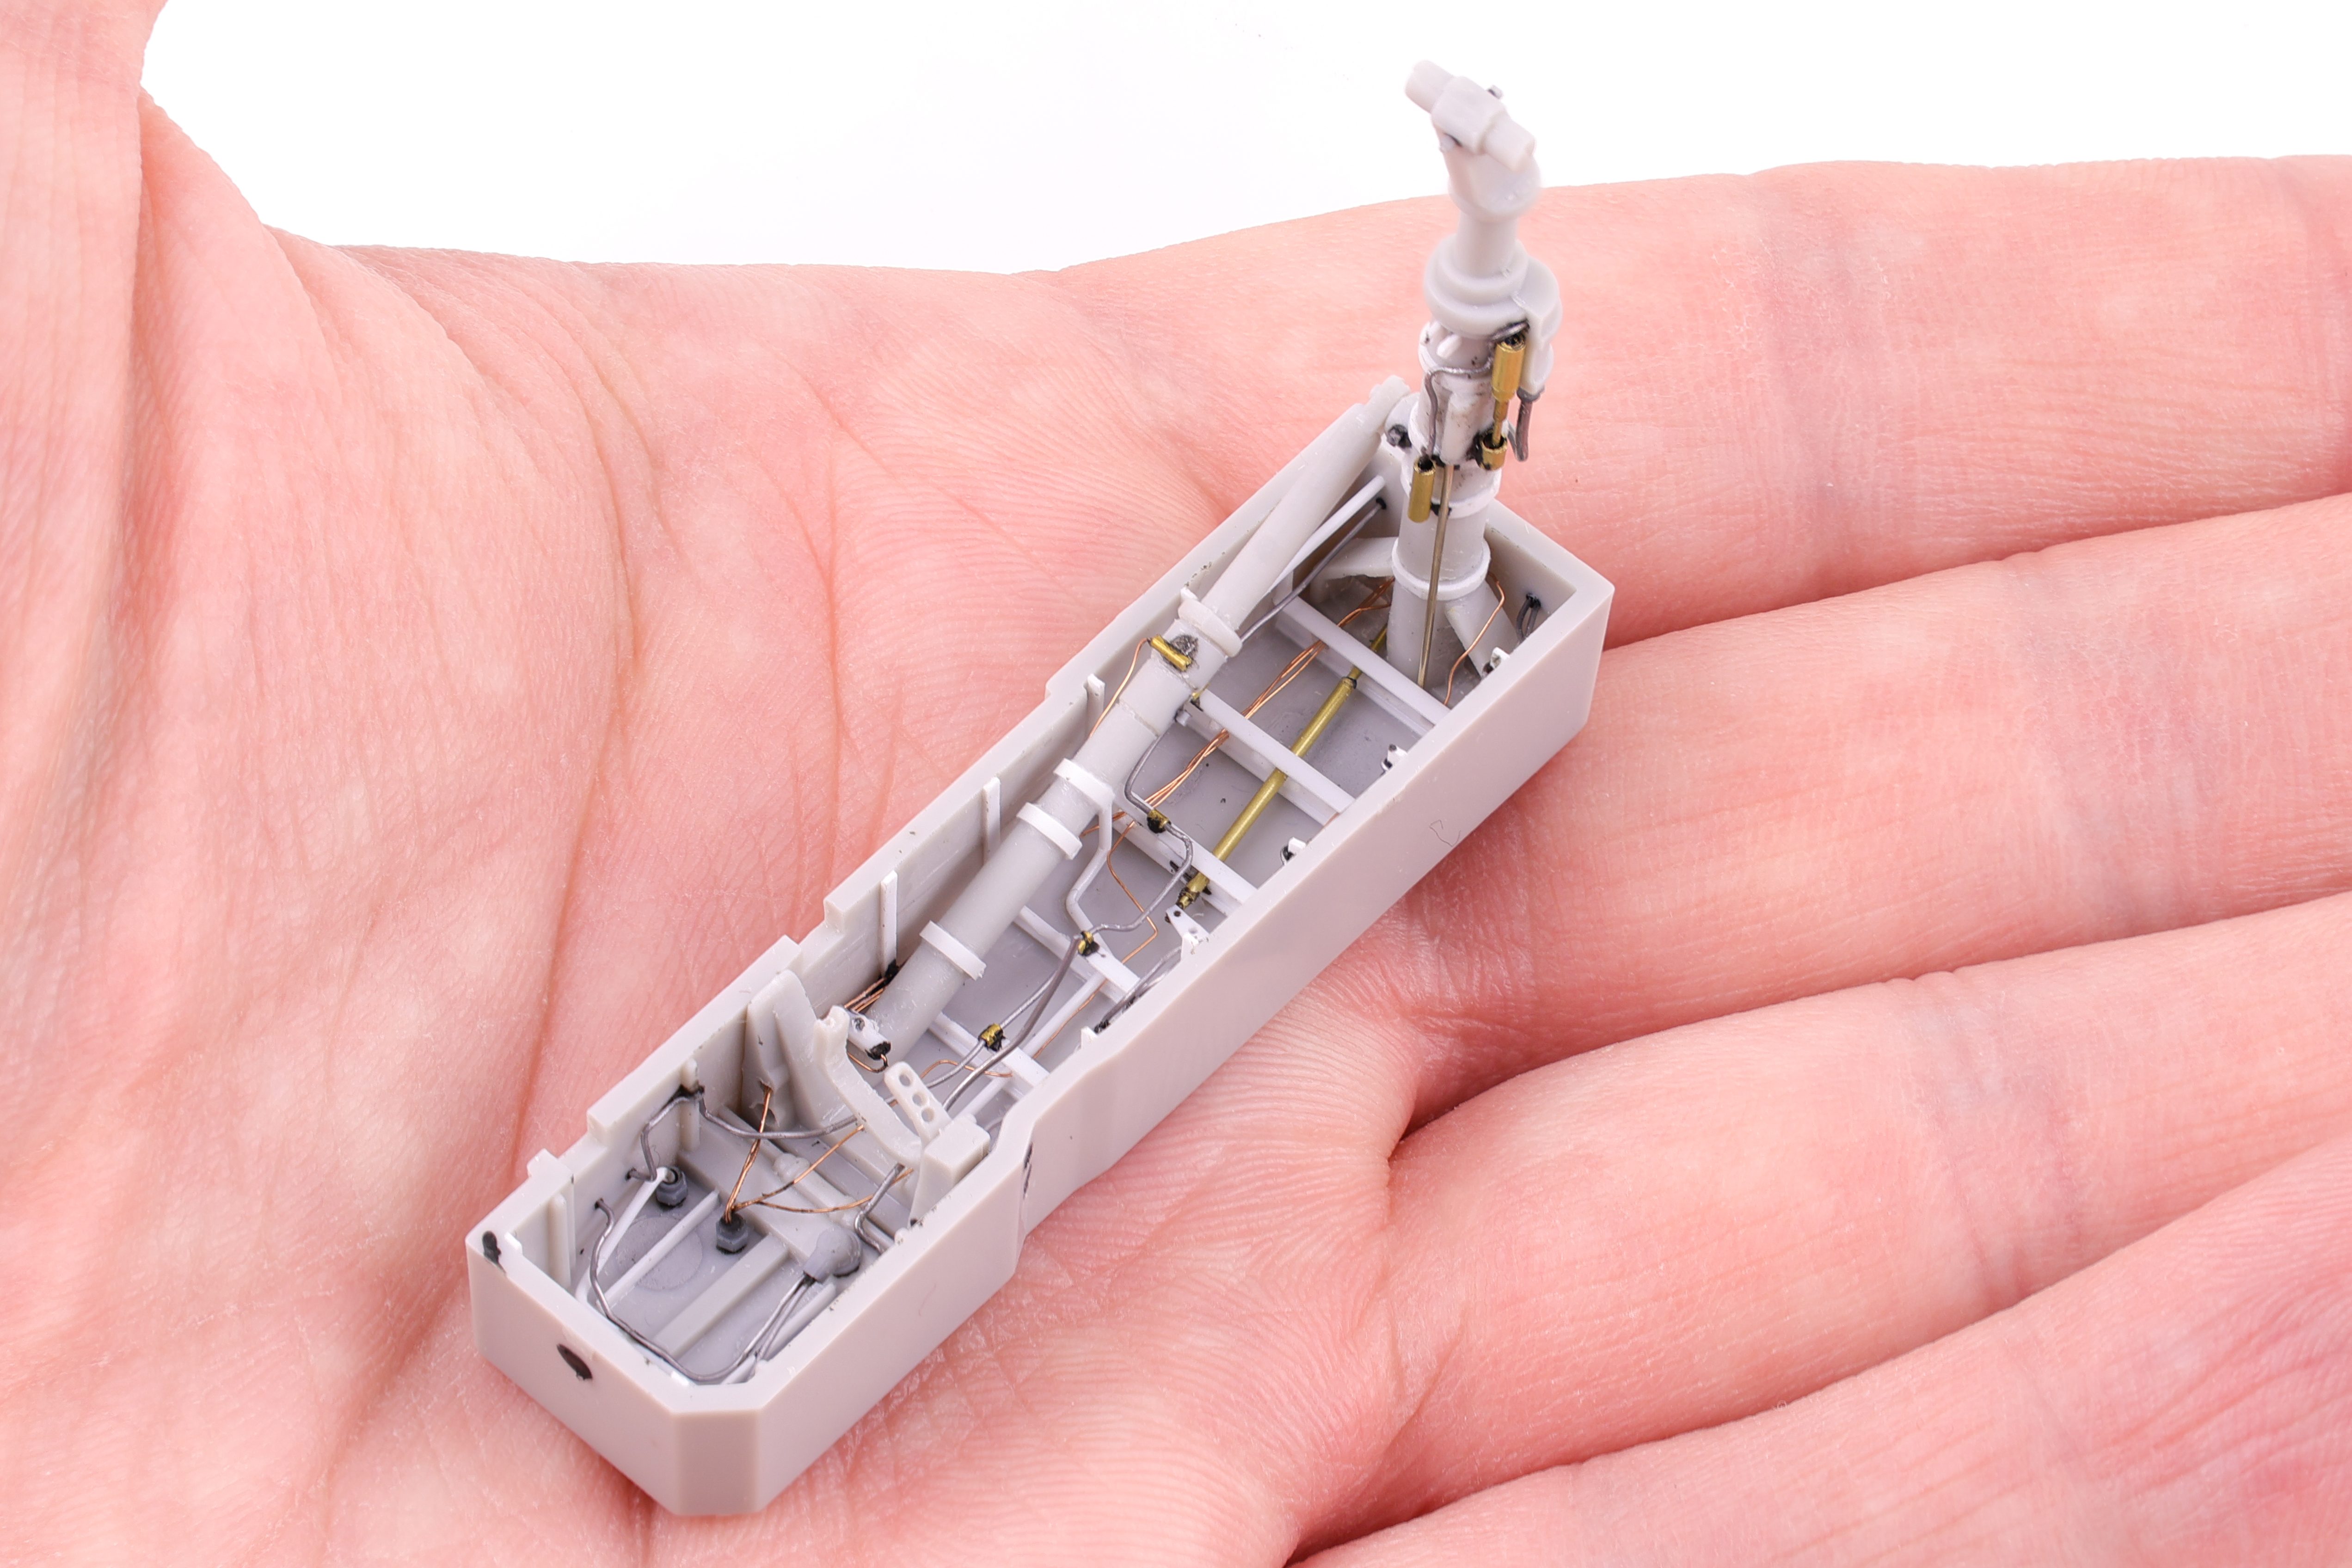
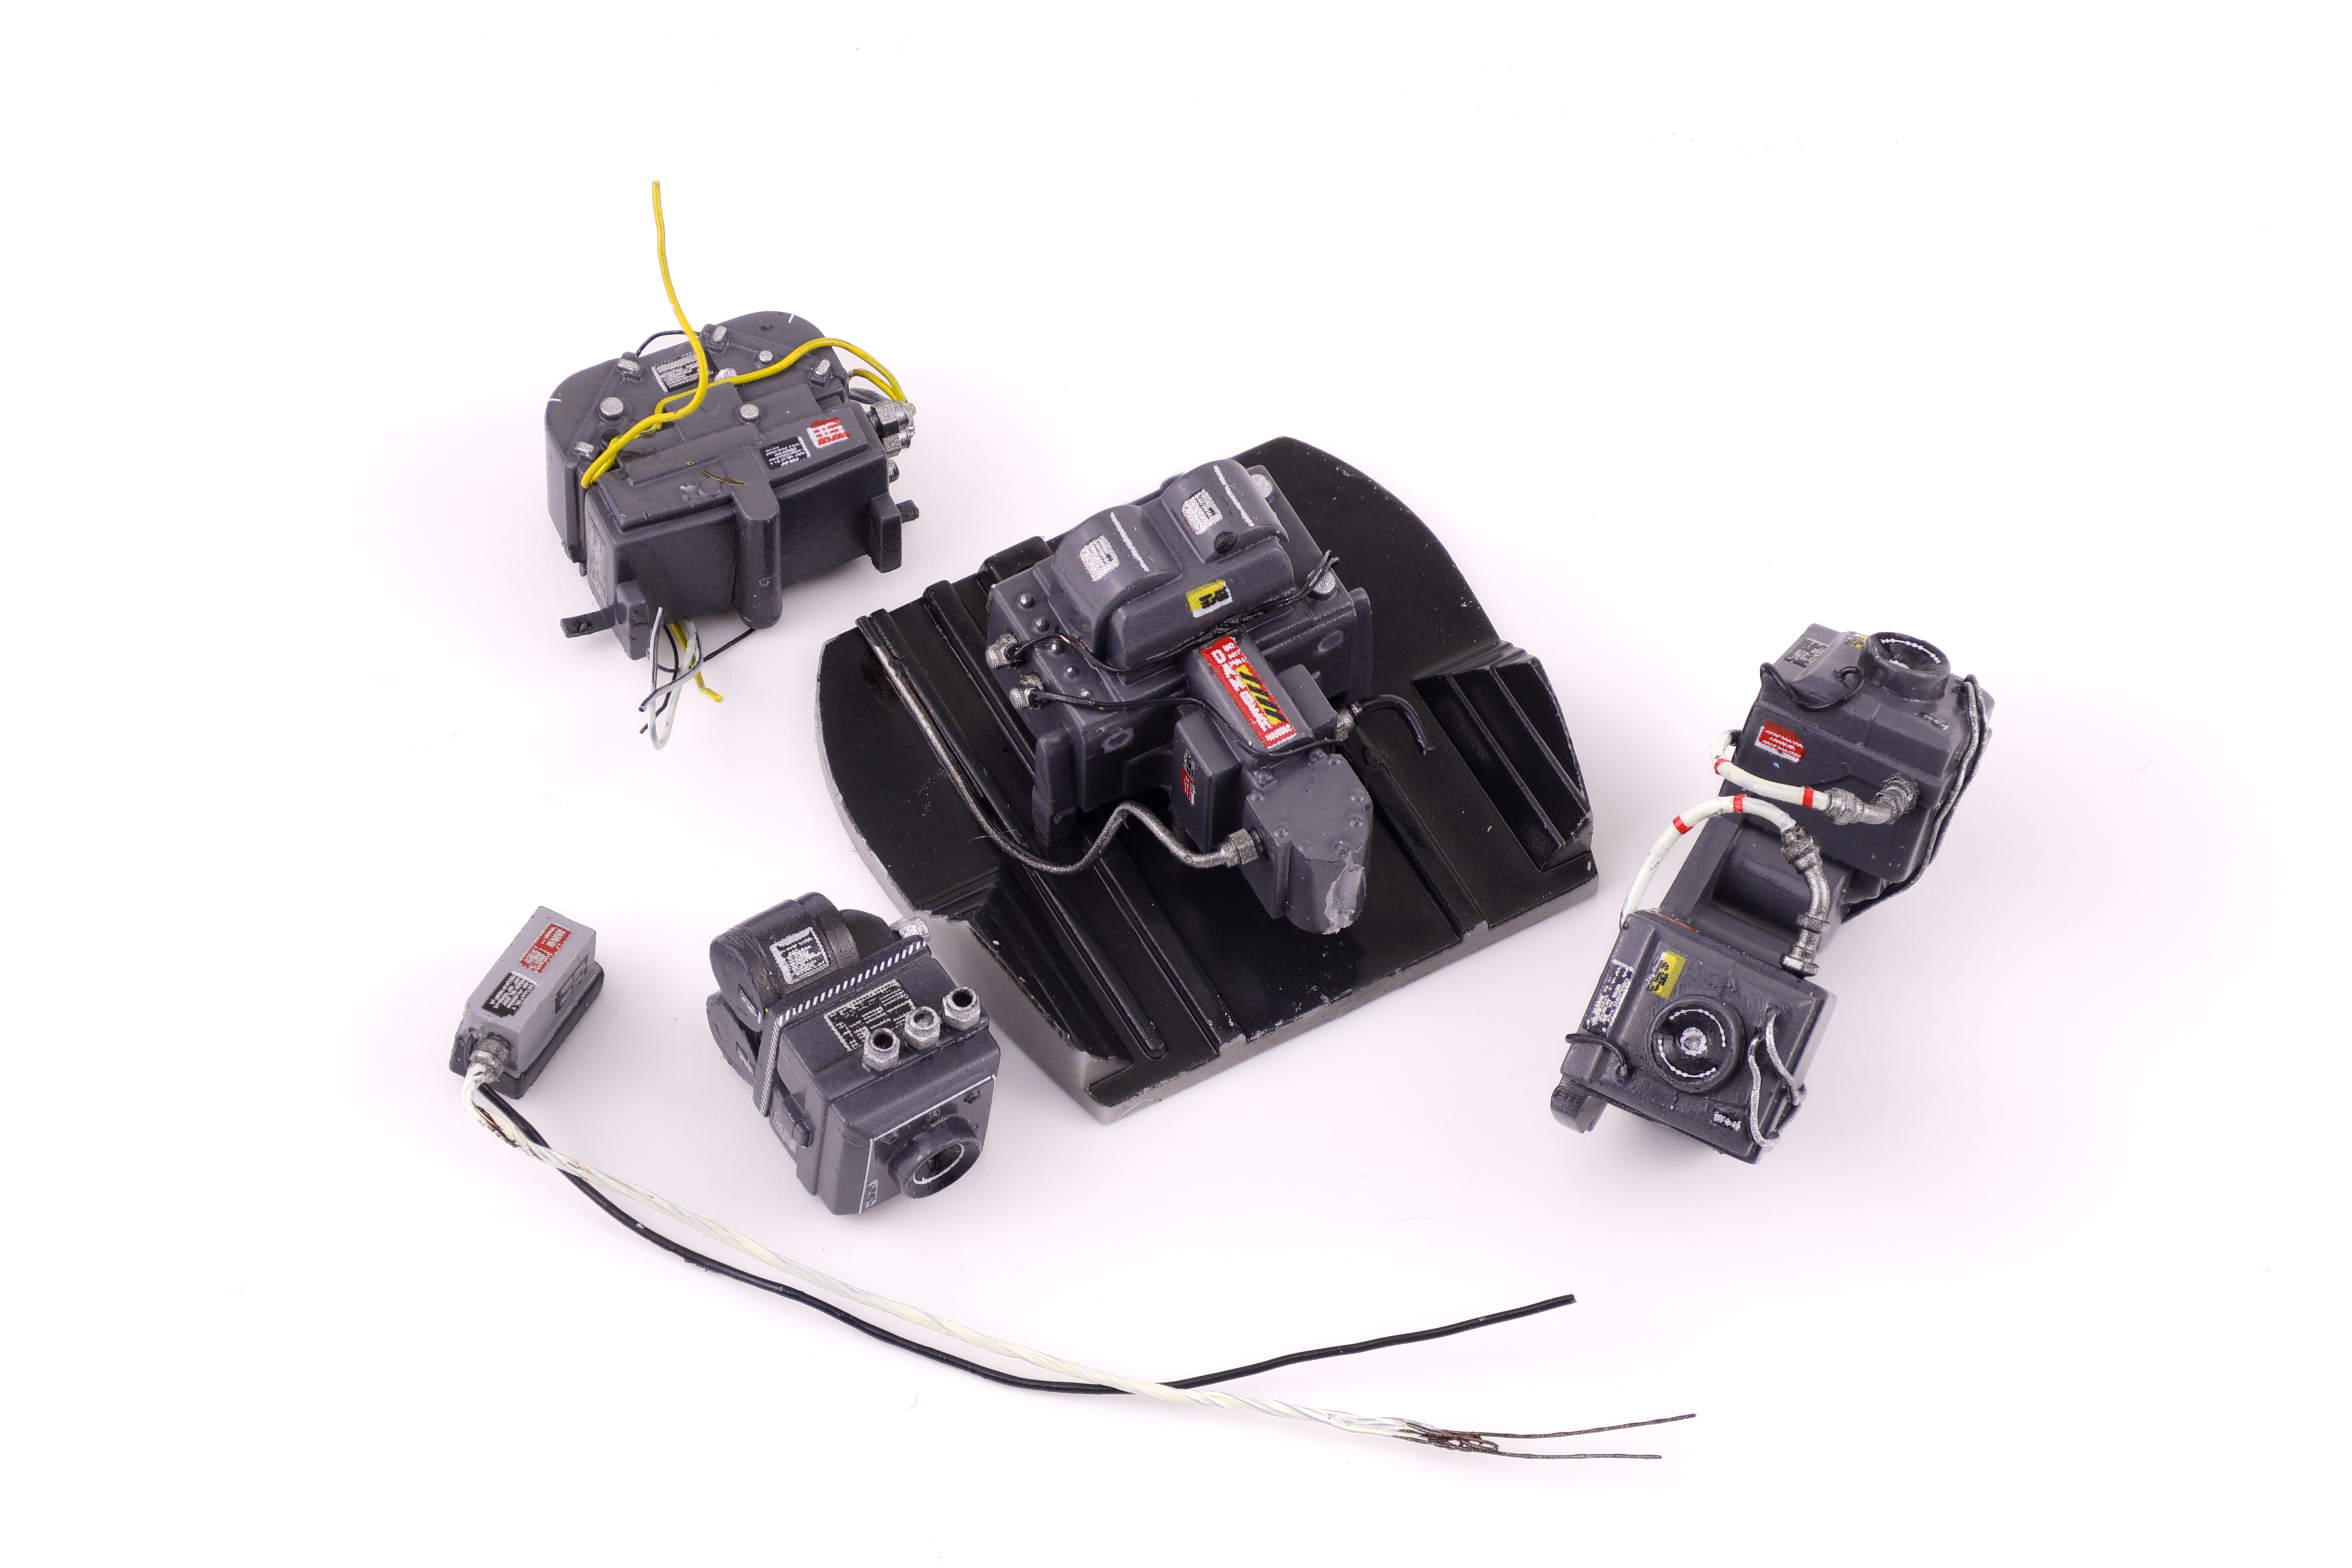
Next up was the camera bay. With this being a RF-4E variant, I wanted to do the extra work and open up the camera bay so that all the cameras would be visible. This required some additional scratchbuilding as the kit does not allow the bay to be opened out of the box. I started by adding some structural bracing to the interior of the bay along with the various computers that are stored in the nose. I also did some work to the cameras themselves and hollowed out the lenses to depict a more concave shape that you would see in an actual camera lens.


With the bay being posed open I really wanted the camera equipment to be well detailed. To make sure they were, I utilized lots of placard decals to make them look the part. I was particularly happy with how the lenses turned out as I used circular decals to depict different components of the lens. I also added some clear green and clear blue as it was clear from reference photos that the lenses had colour coatings when they hit the light right. With the completion of the camera bay it was time to seal up the fuselage!