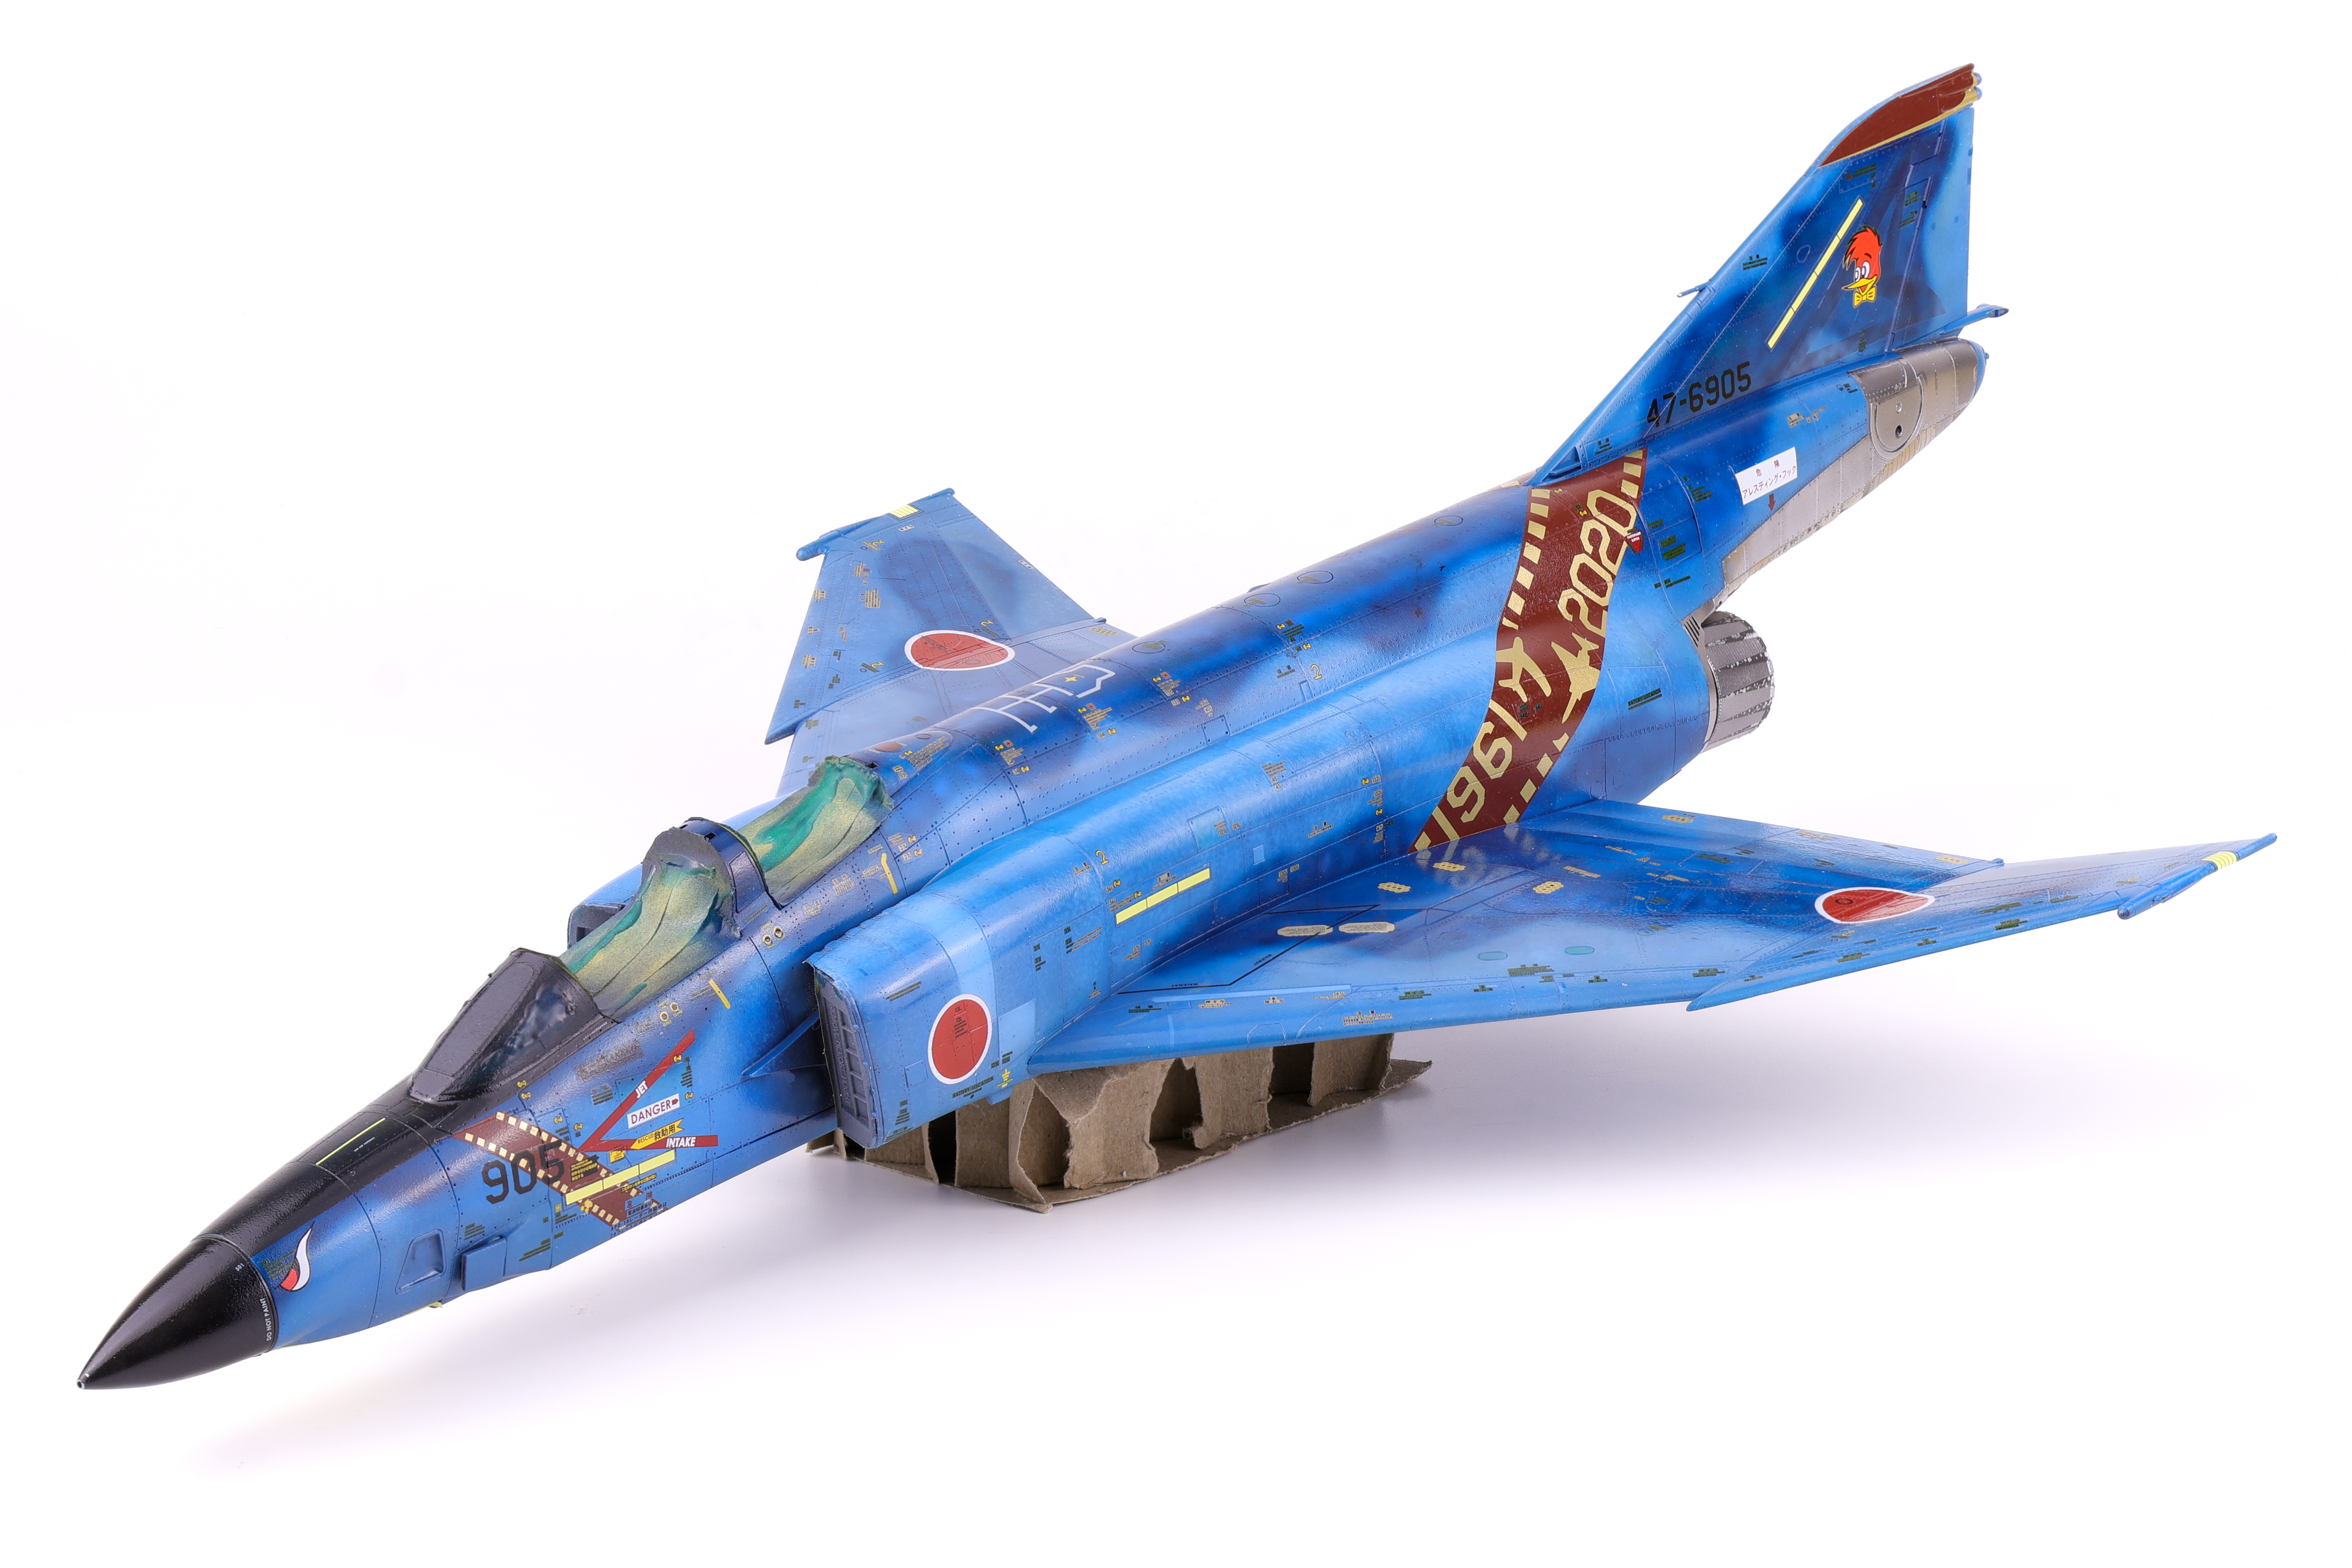
With the paintwork sealed under a gloss coat, I then was able to apply the scheme decals. With some of the markings being painted on with masks this phase of the build was fairly quick and proceeded smoothly. Where things bogged down was with the 200+ stencils that needed to be applied over top these markings. I can’t lie; this wasn’t a particularly enjoyable part of the build and I’m glad I’m past it!
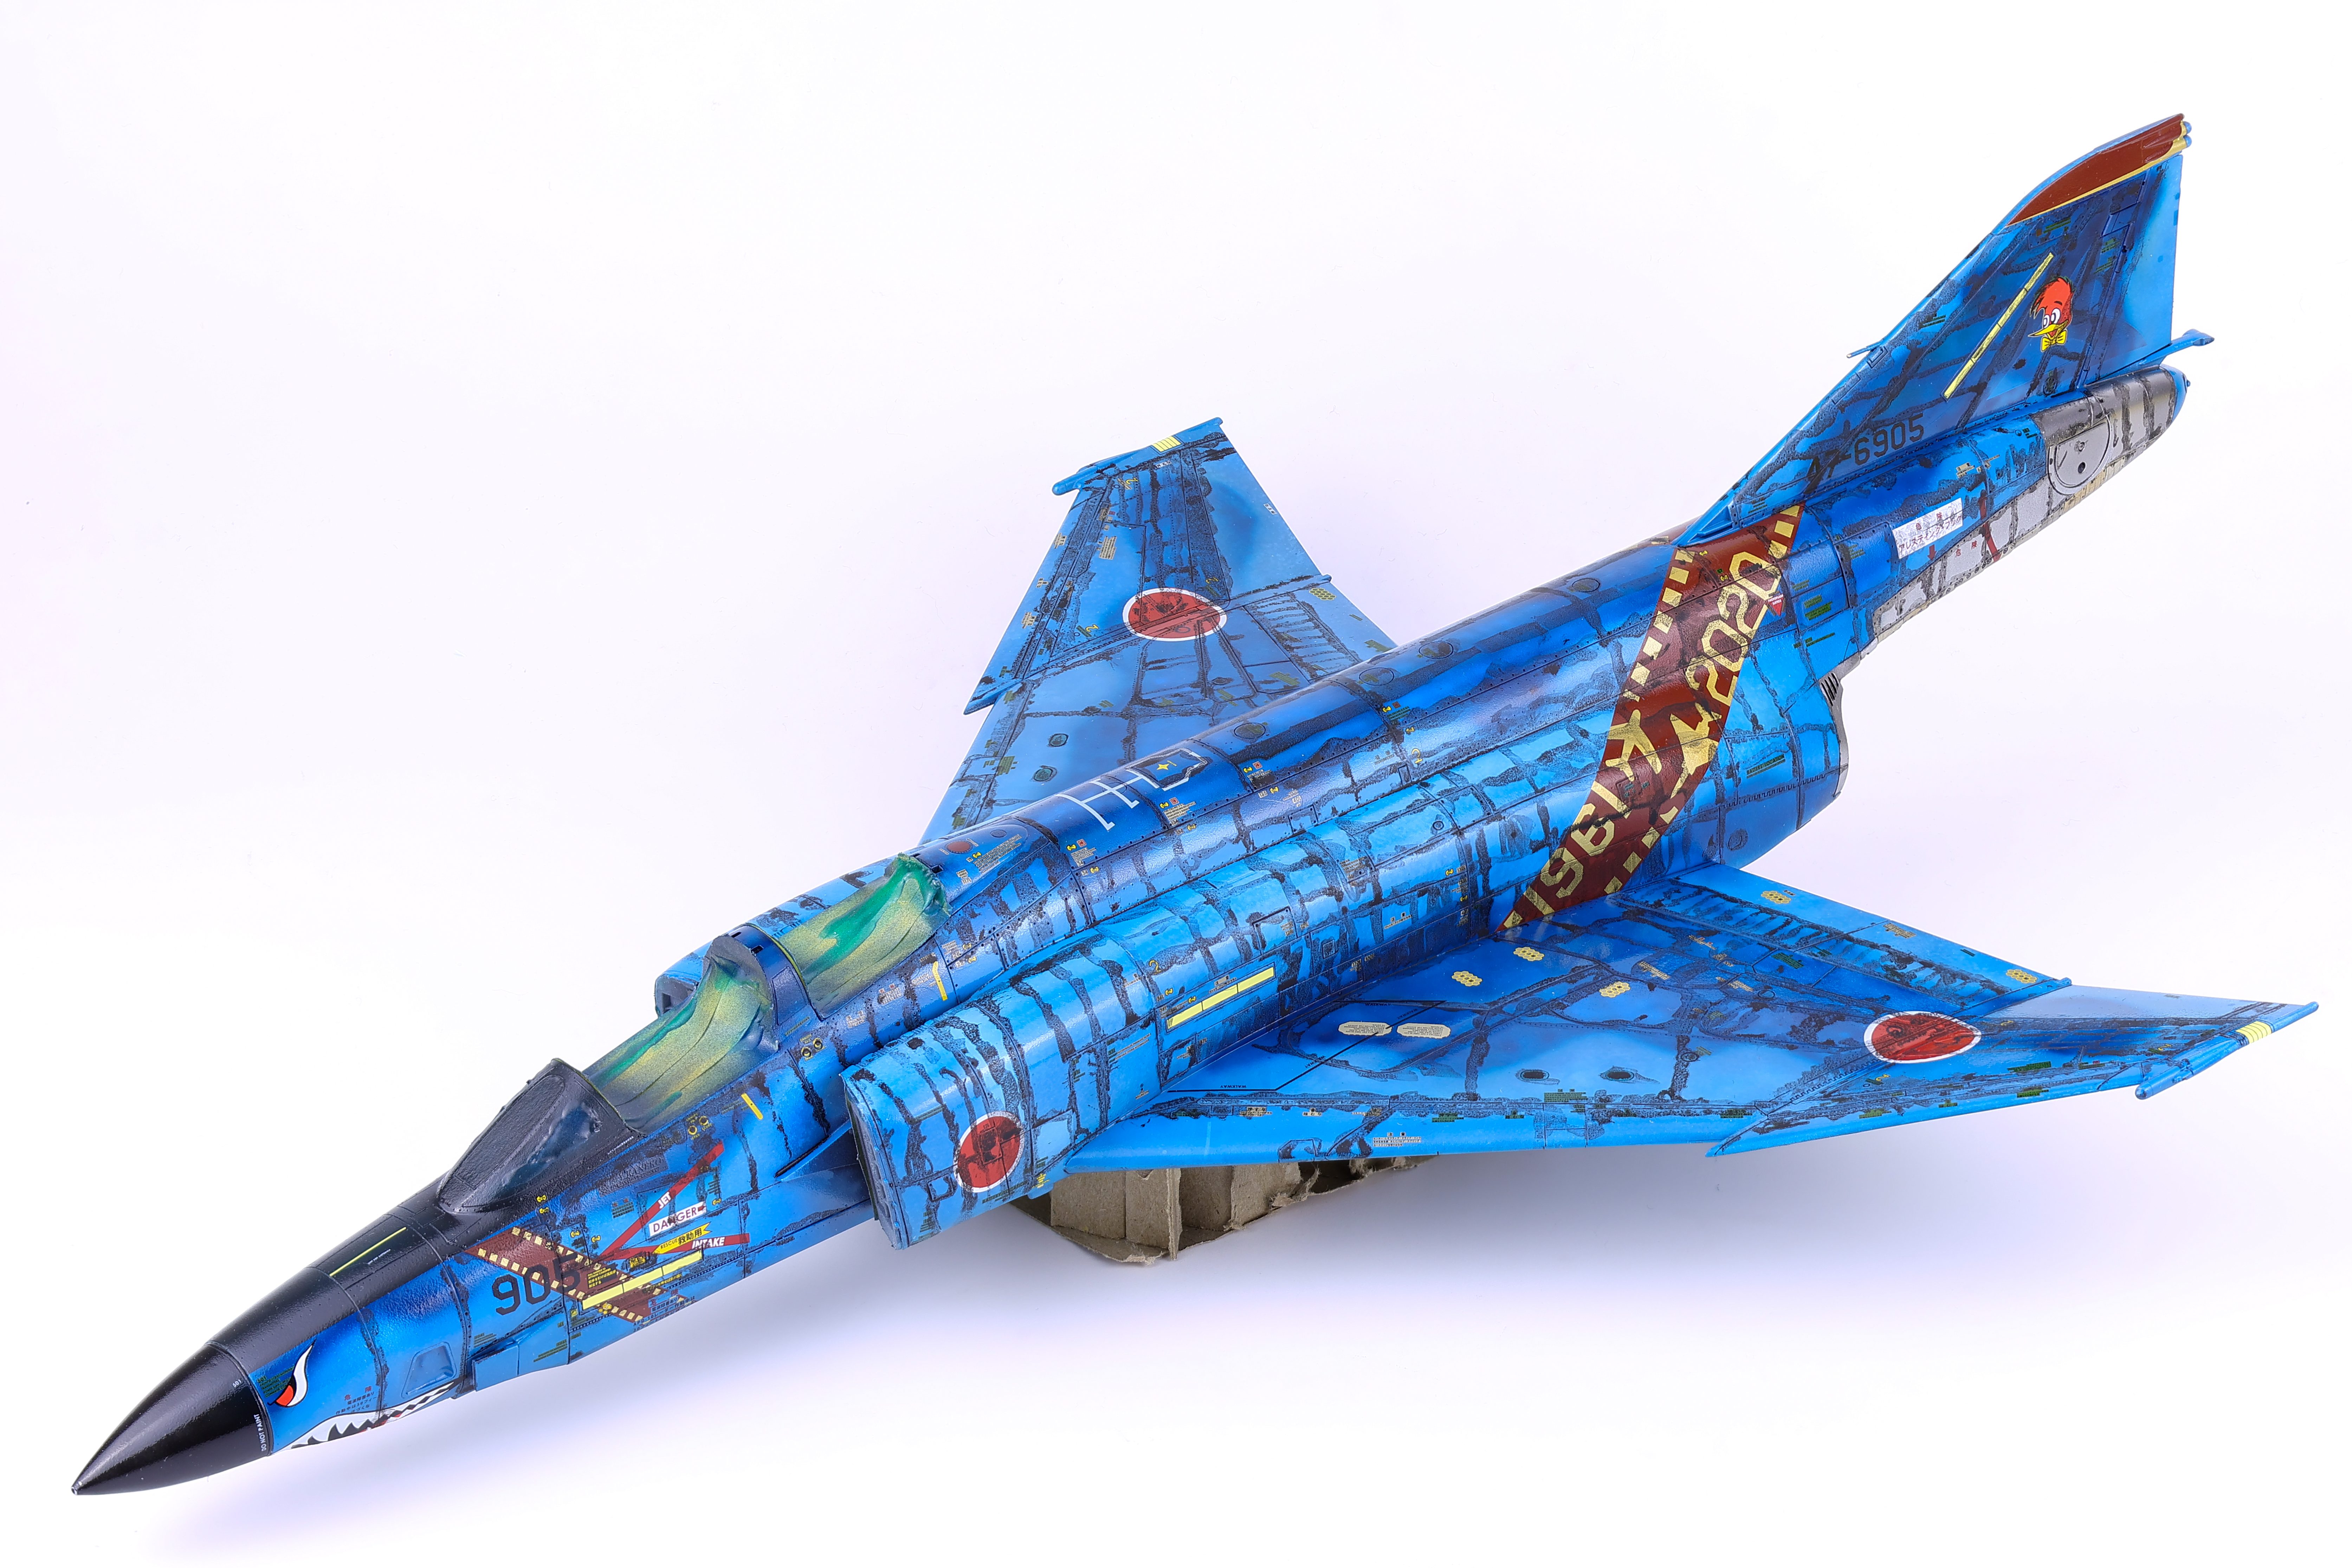
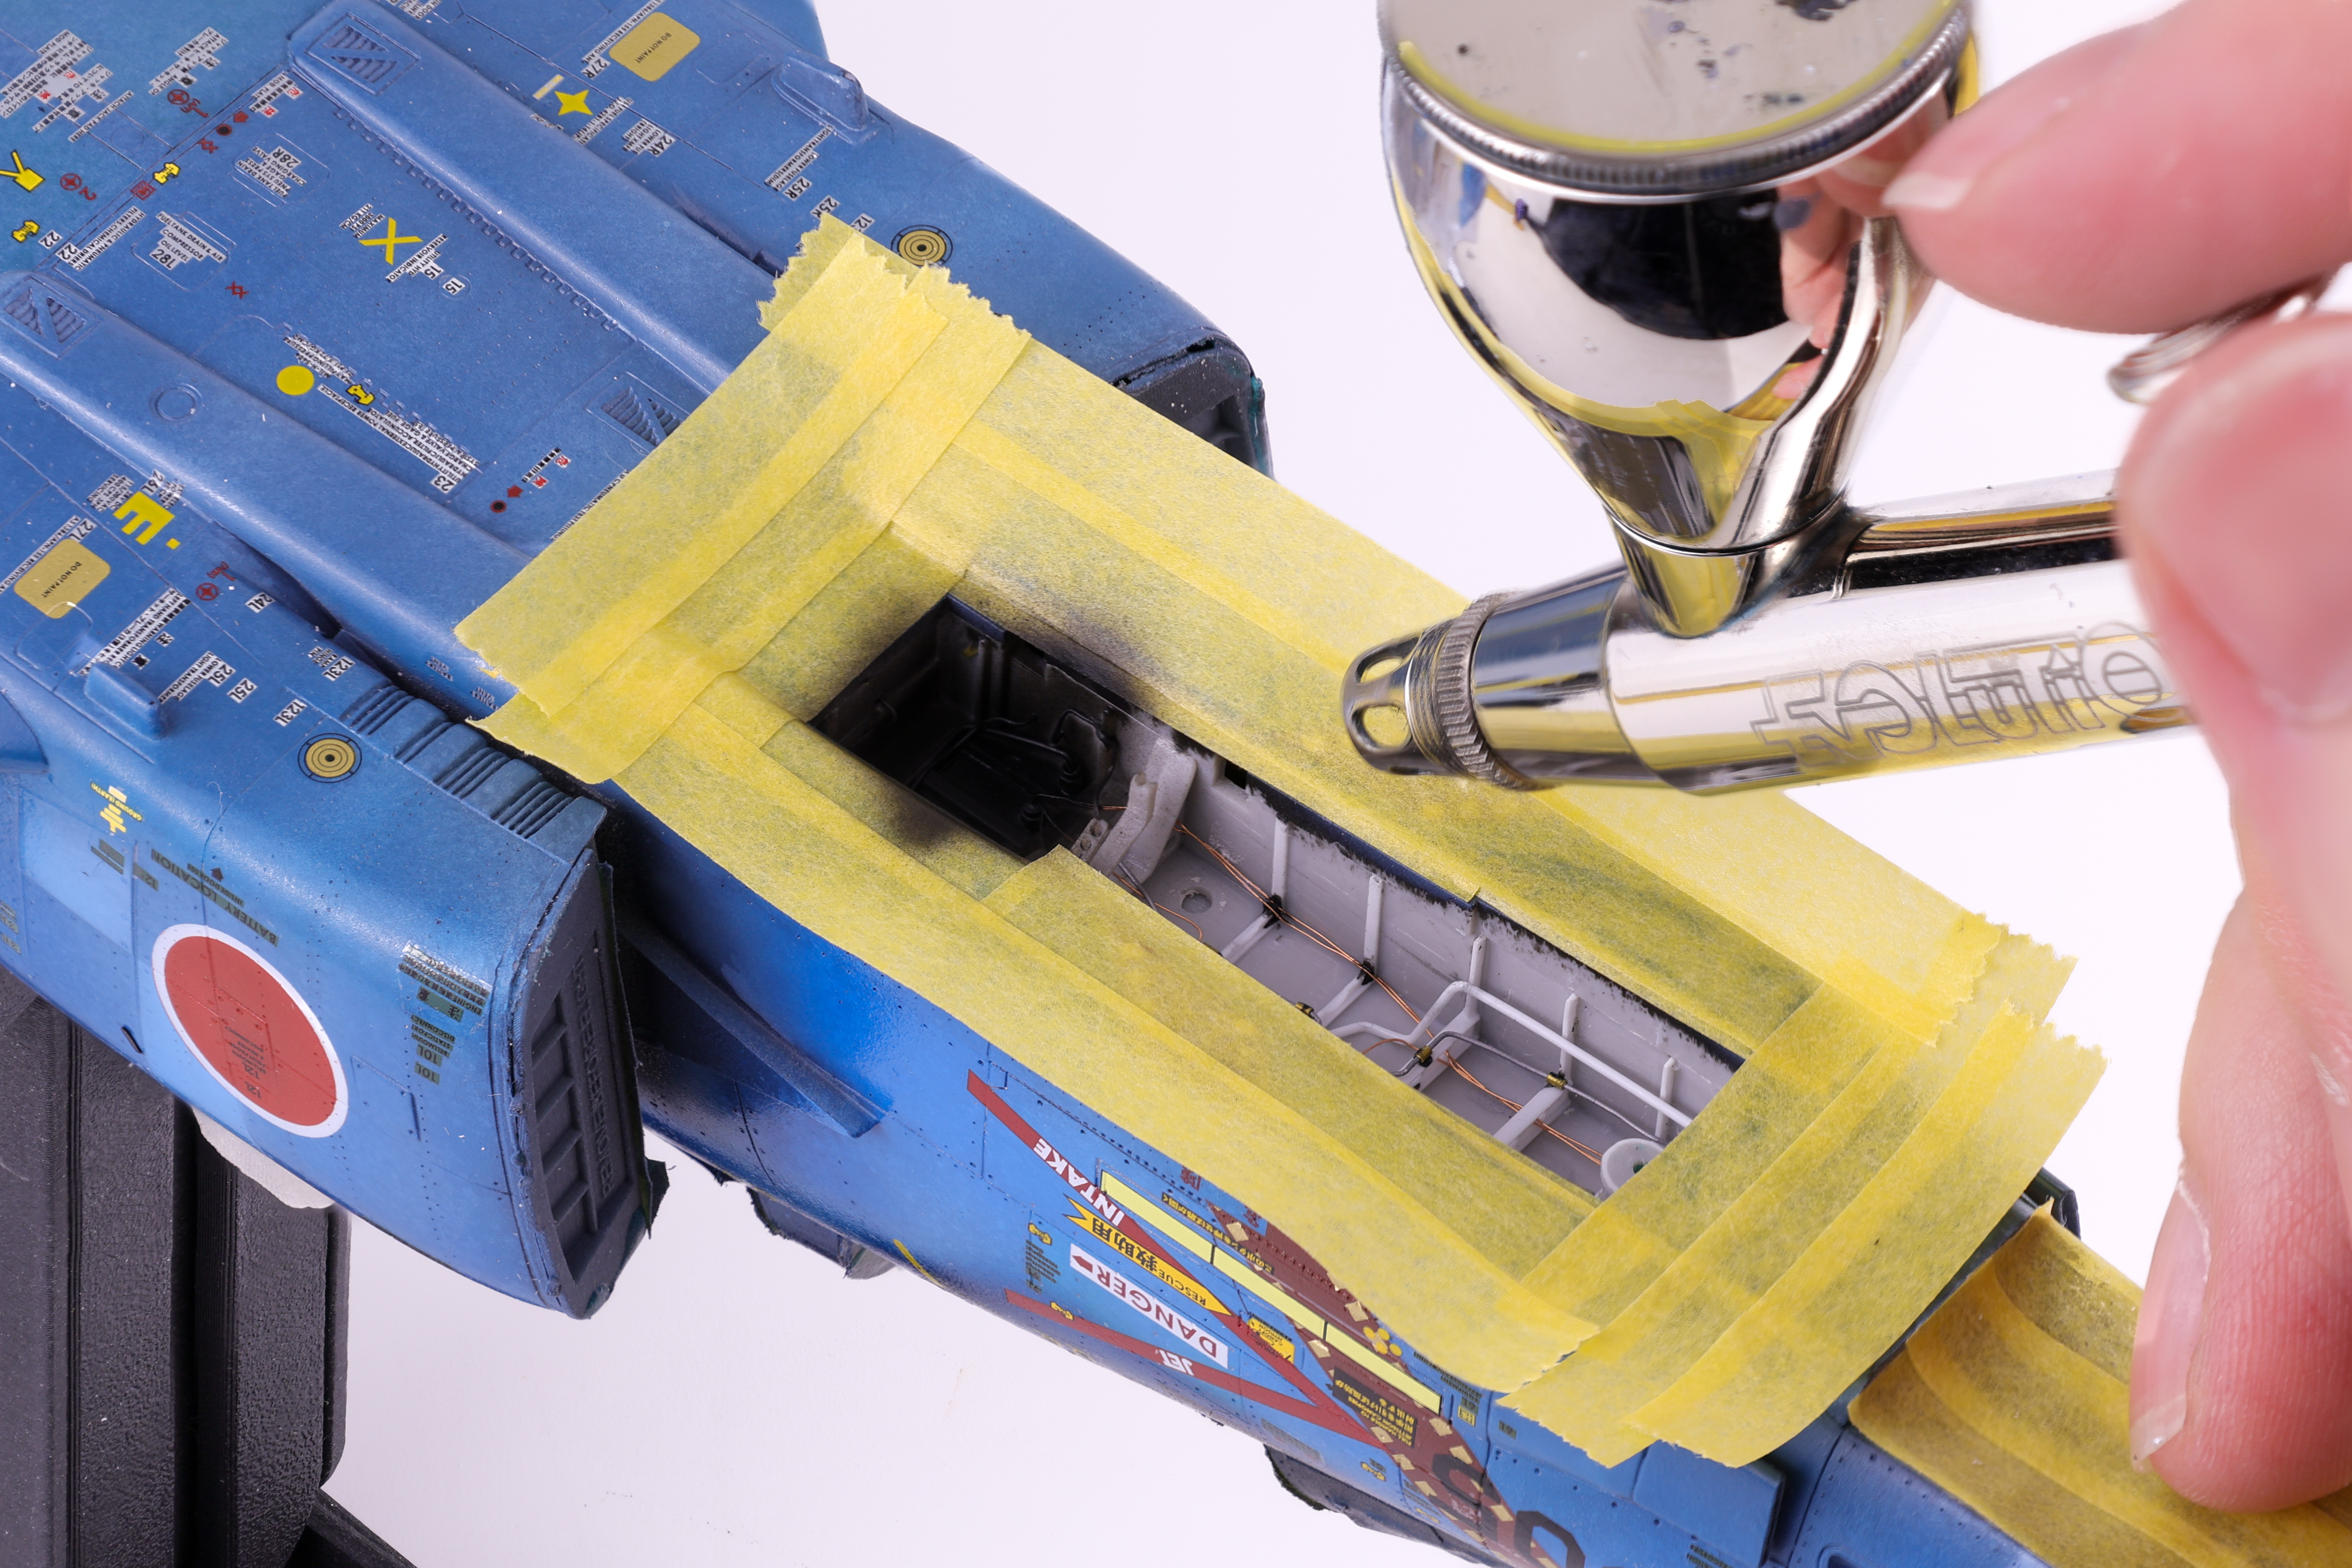
With the decals more or less completed I was able to move on to weathering. With the amount of pre-shading work completed, I knew that I wanted to keep the weathering light as to not overpower the paintwork. I opted for a simple dark wash and some light streaking effects. After these were applied, I applied a flat coat to keep everything together. With the flat coat done it was finally time to unmask the canopy and camera bay.
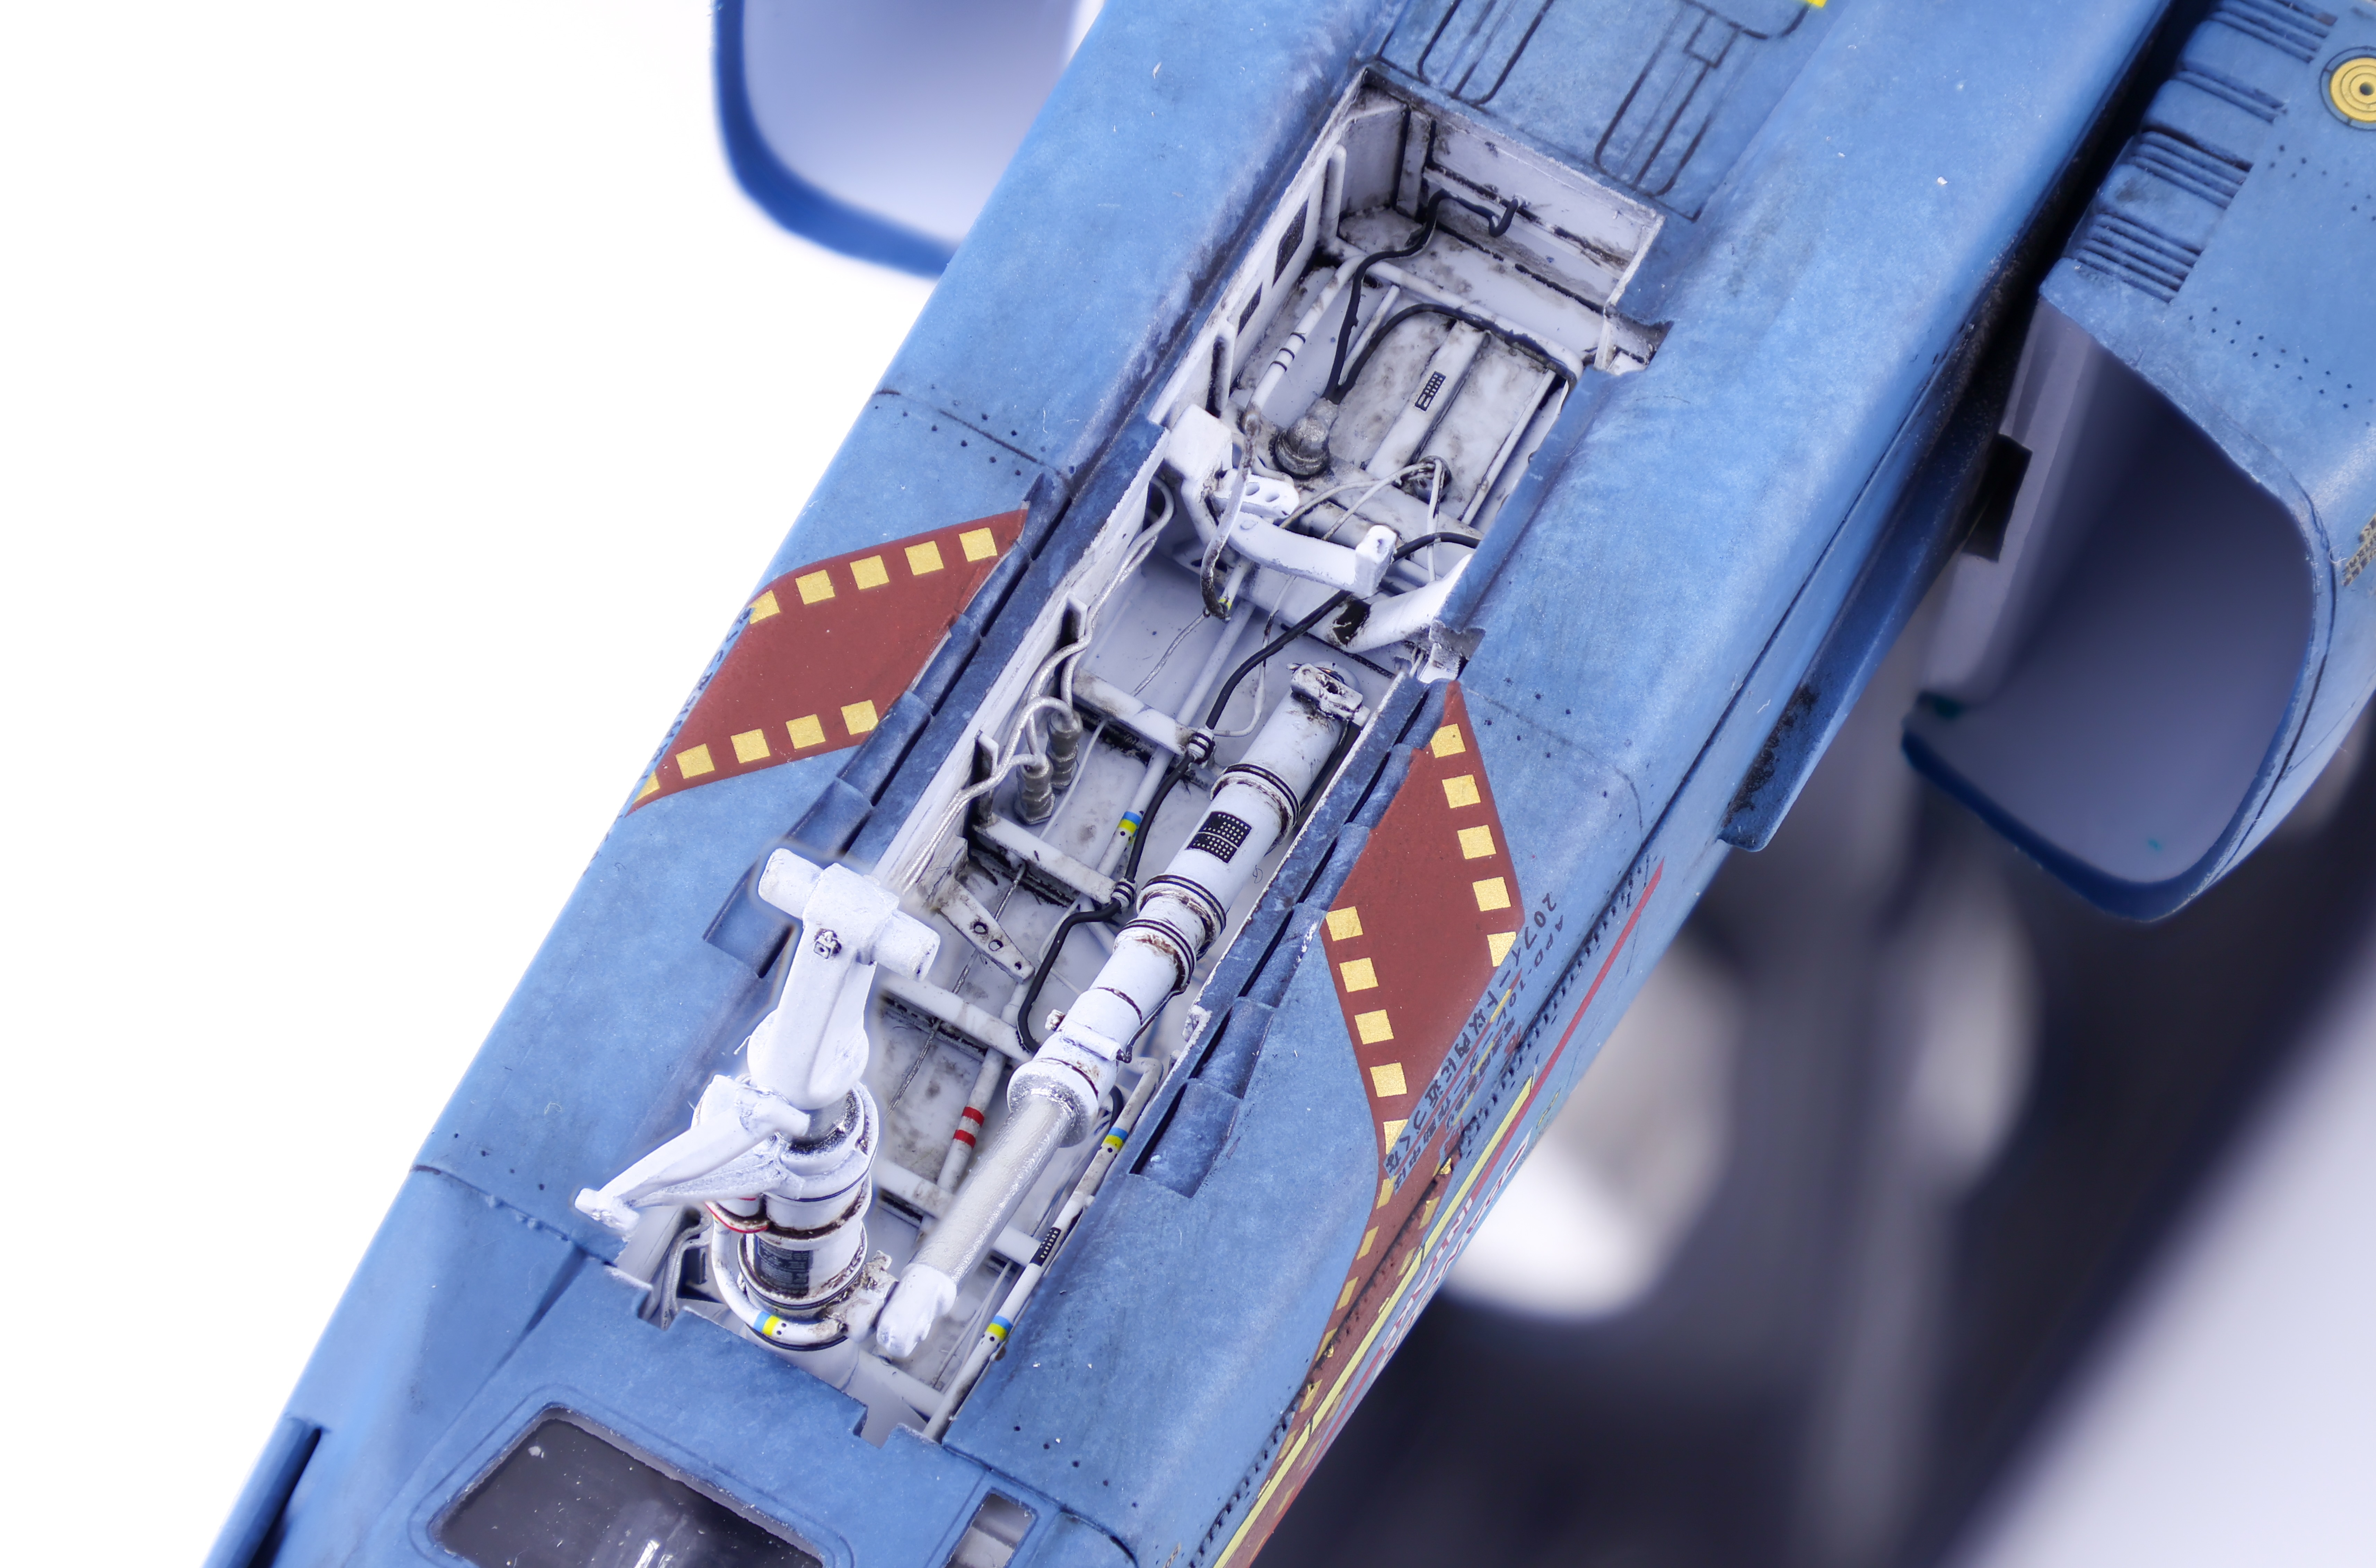
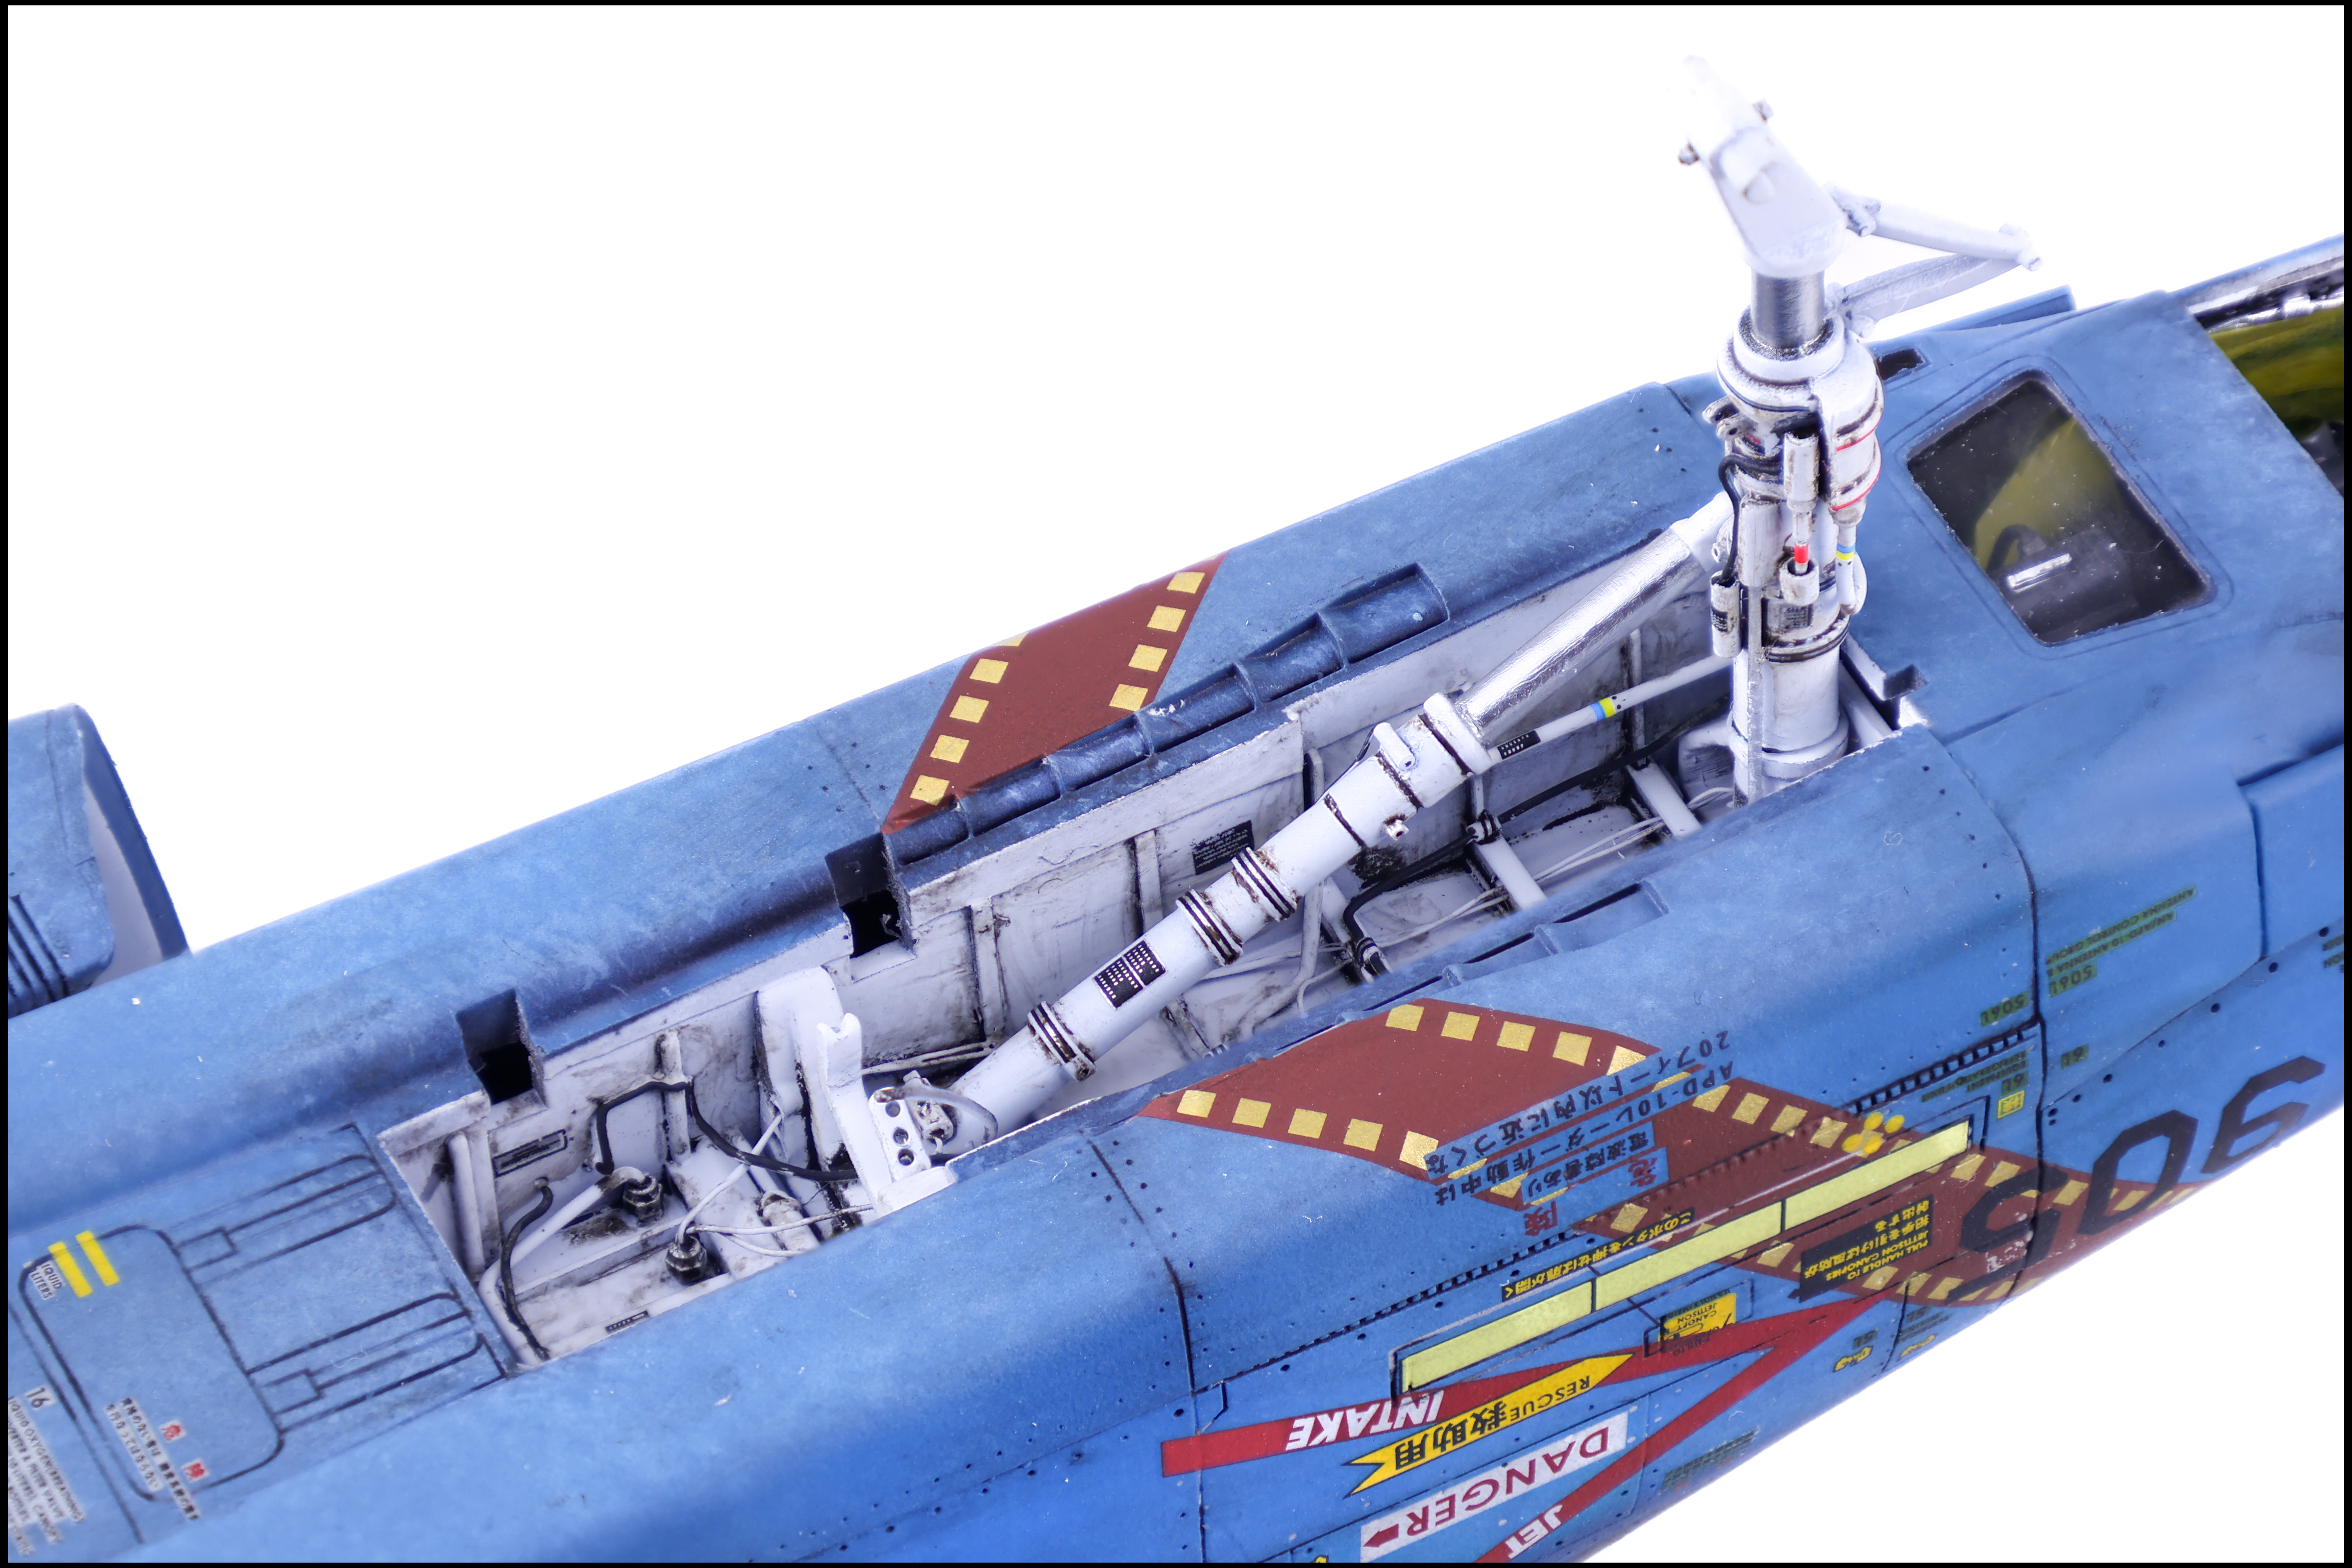
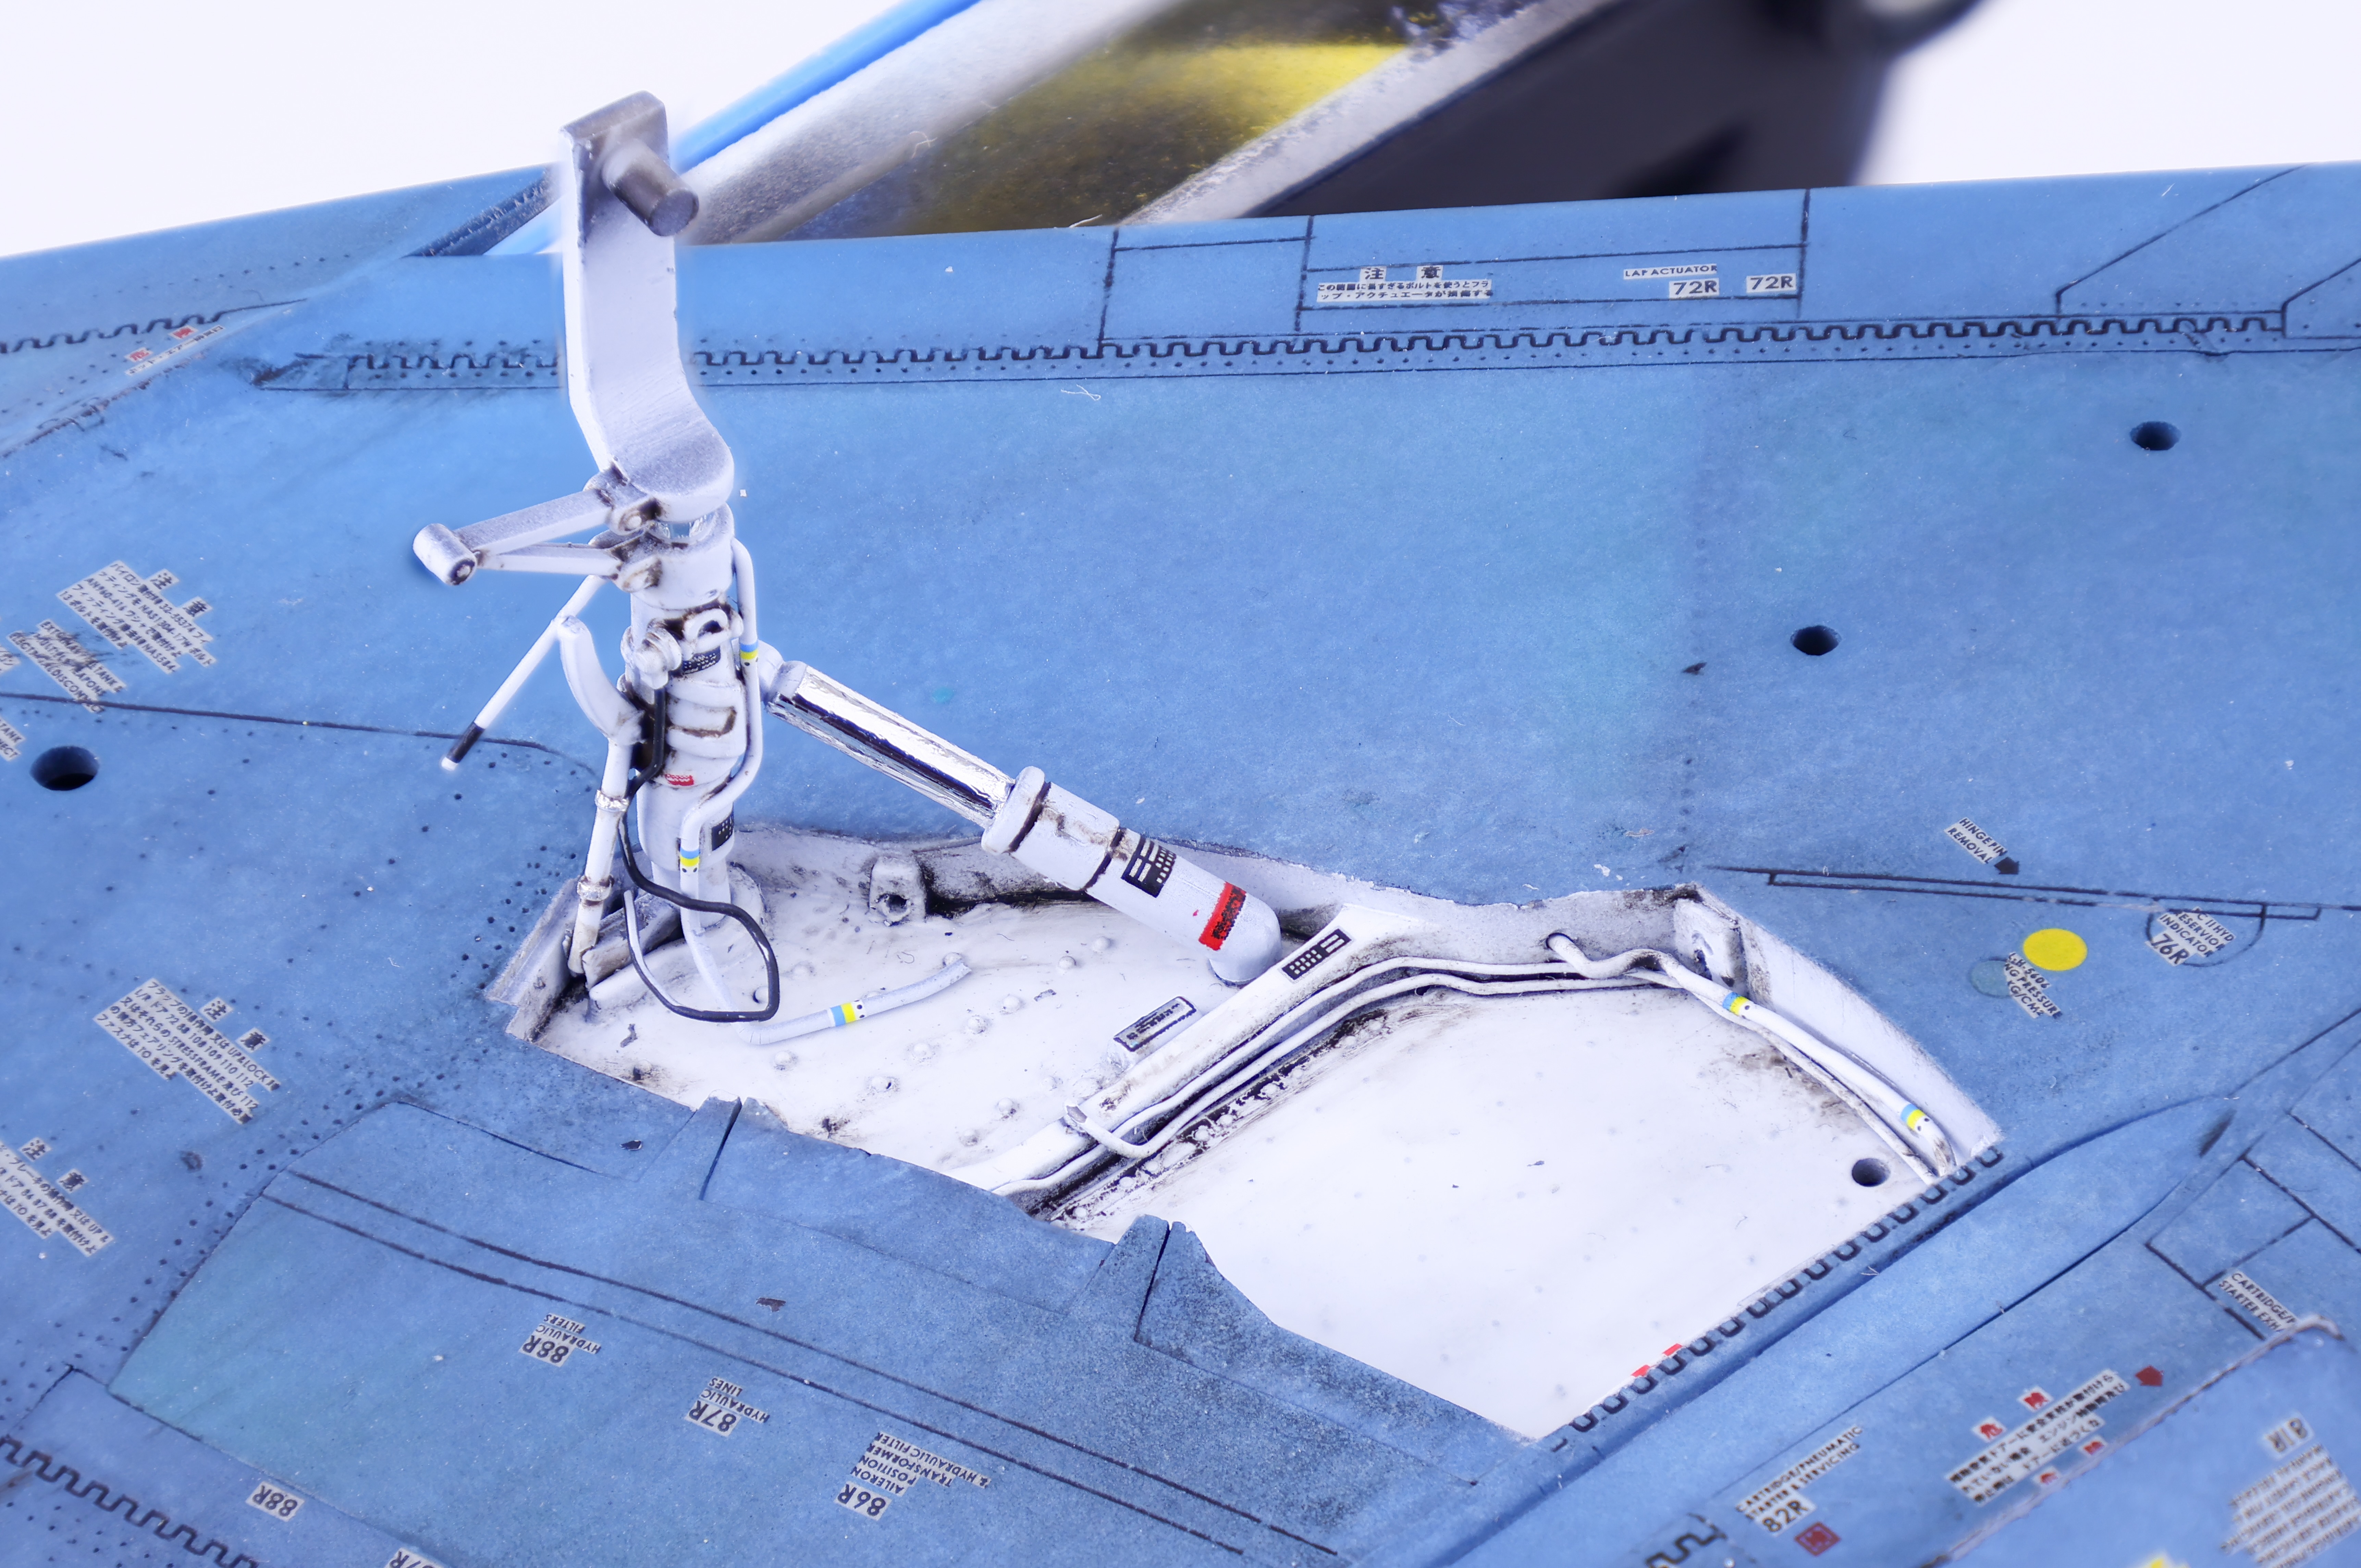
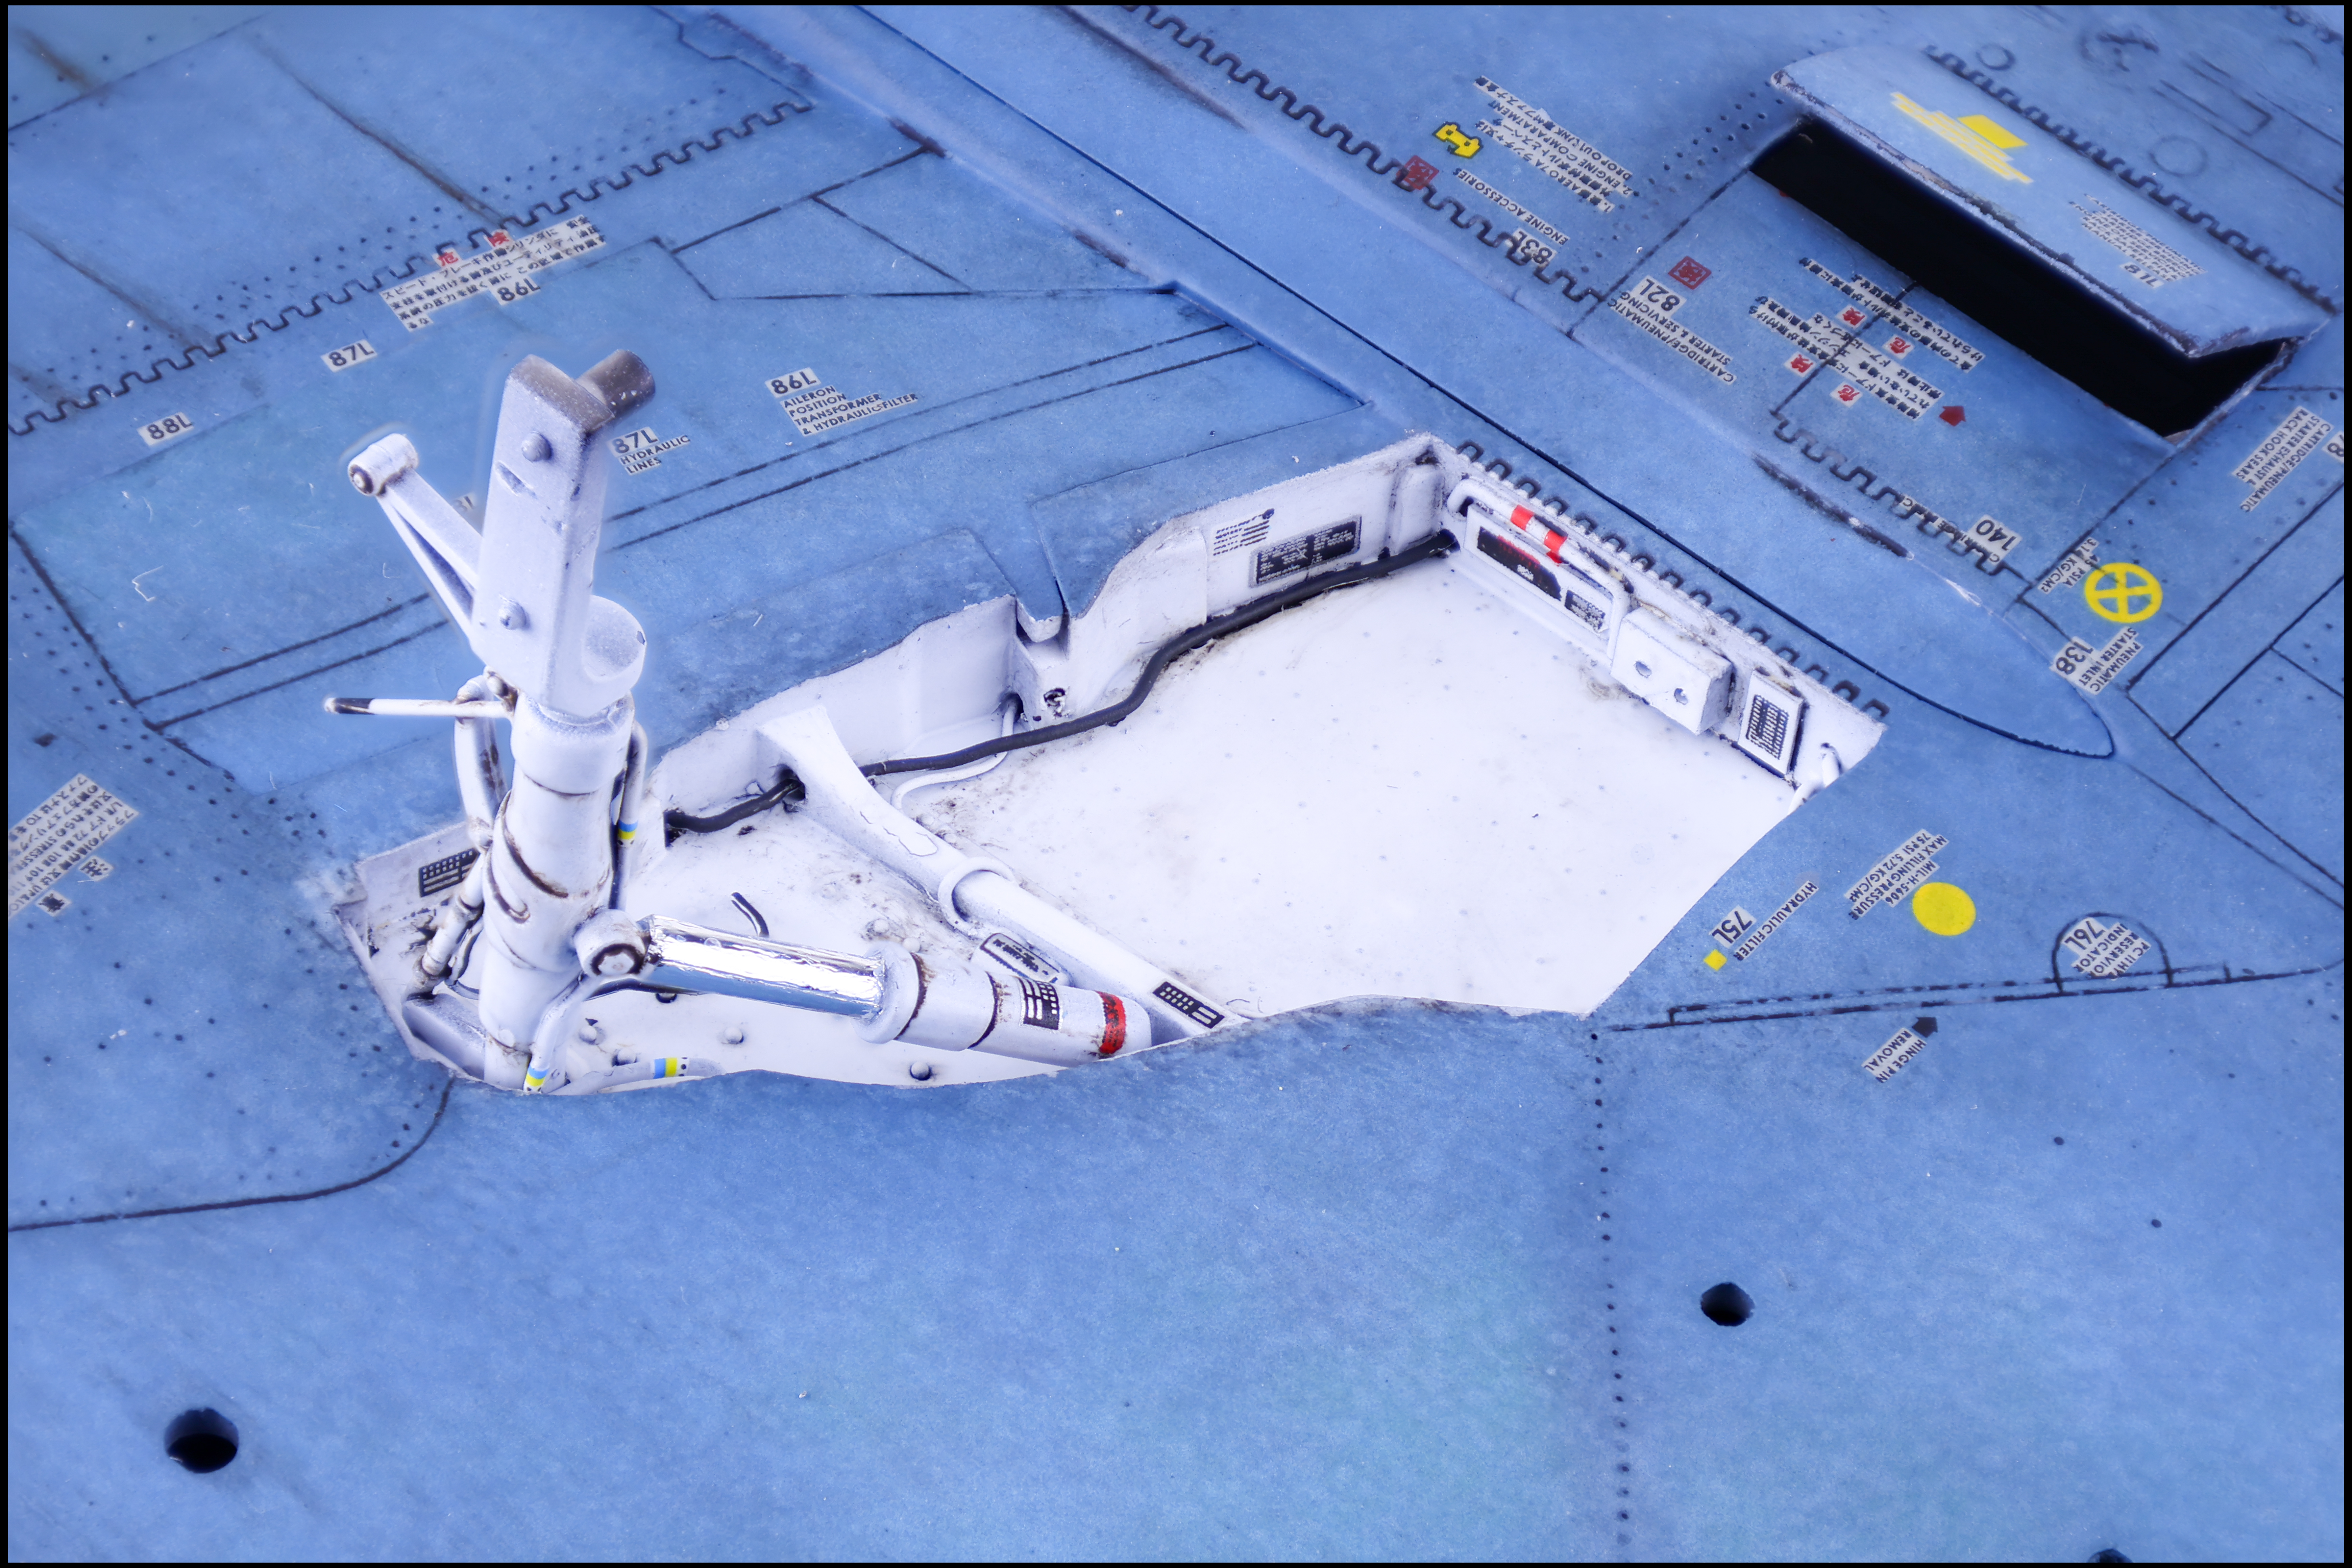
At this late stage of the build the last things left were the gear bays, the camera equipment and the canopy frames. I completed the gear and gear bays first so that I could get the model standing on its own legs. Painting and weathering were pretty straightforward in this area, just some Gloss white over black primer before adding some decals and weathering in the form of a brown oil wash.
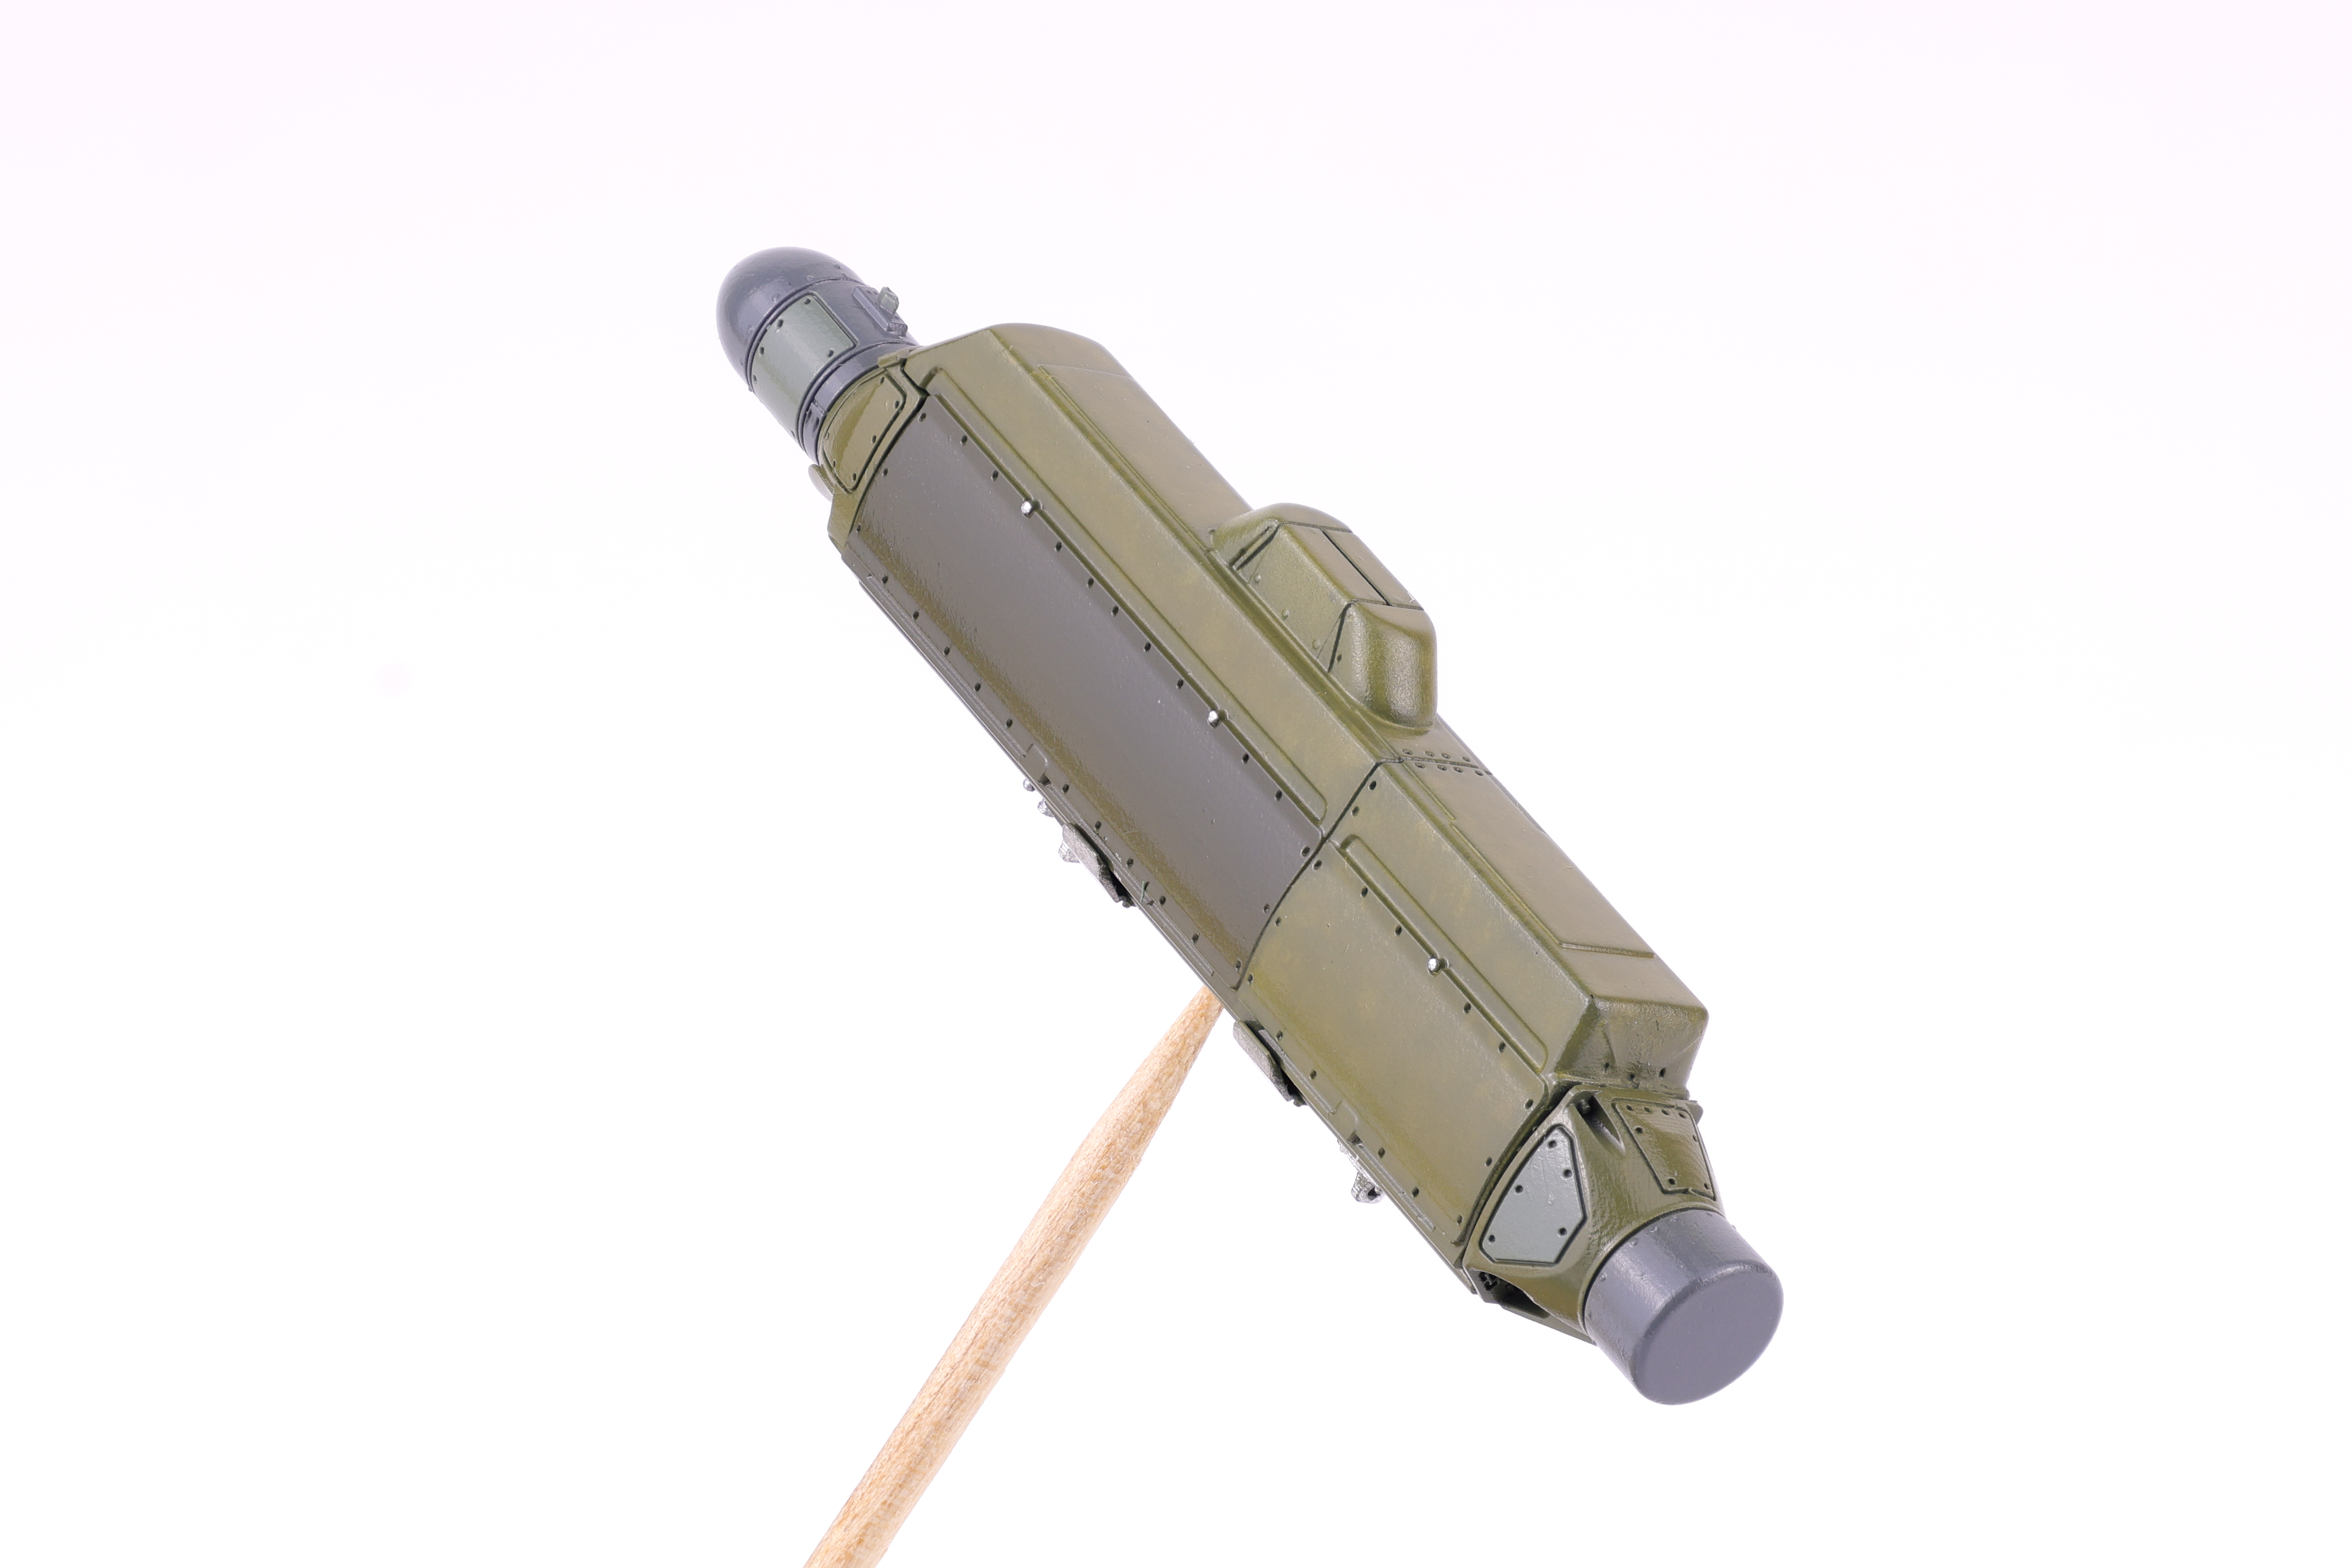
I also took this time to build up the pylons and the ECM pod. These were from Reskit and the detail was fantastic.
Last but not least was the canopies and their resin frames. The set from Hypersonic models really fills out the detail in this area and makes these parts look a lot more real in my option.
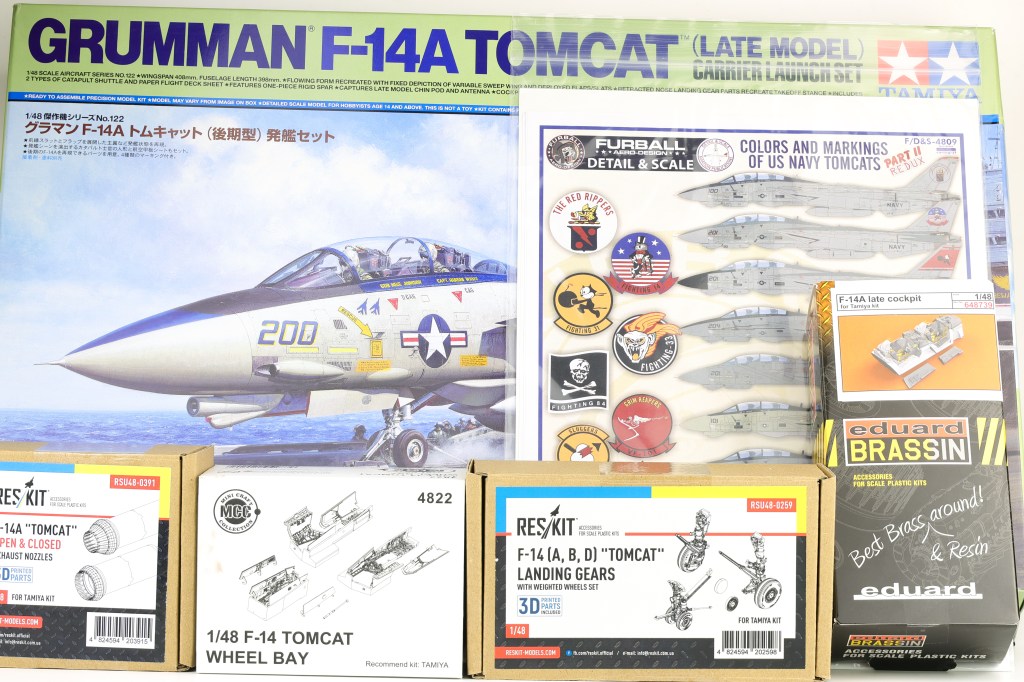
Tamiya’s F-14 has been on my Wishlist for some time now and only recently have I gotten the chance to build it. I decided to go all out for this build and opted to pickup a load of aftermarket for this project.
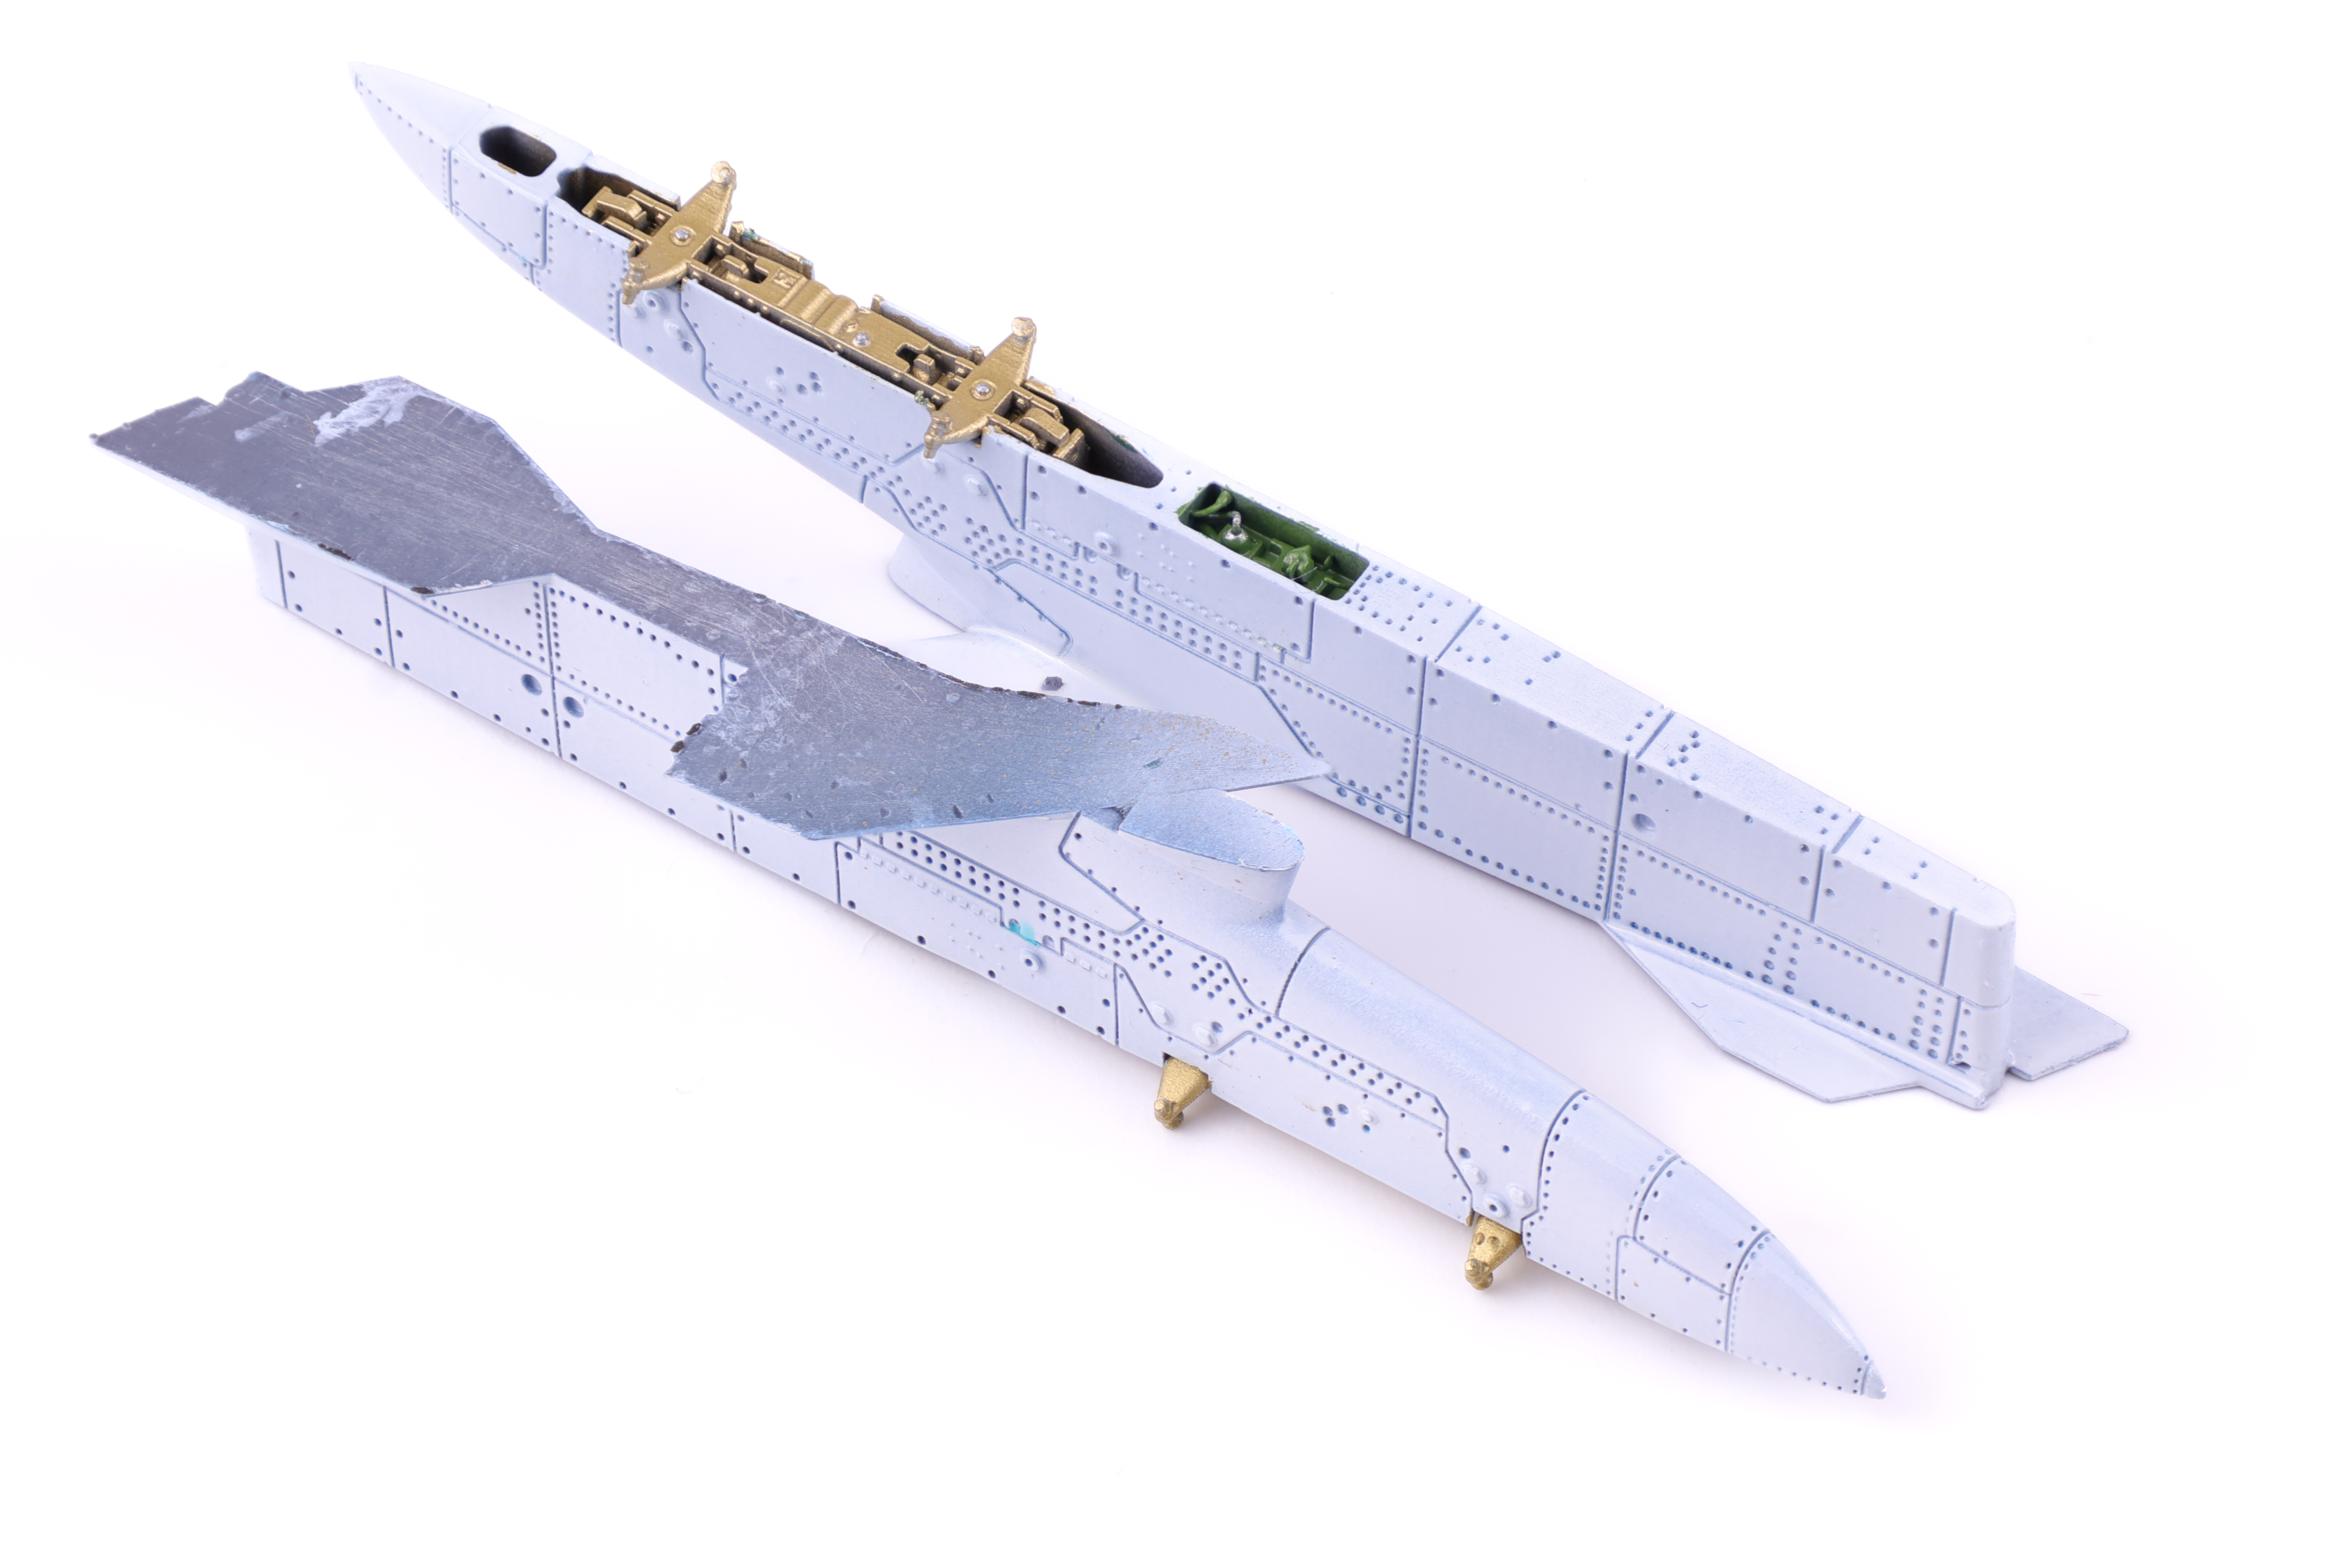
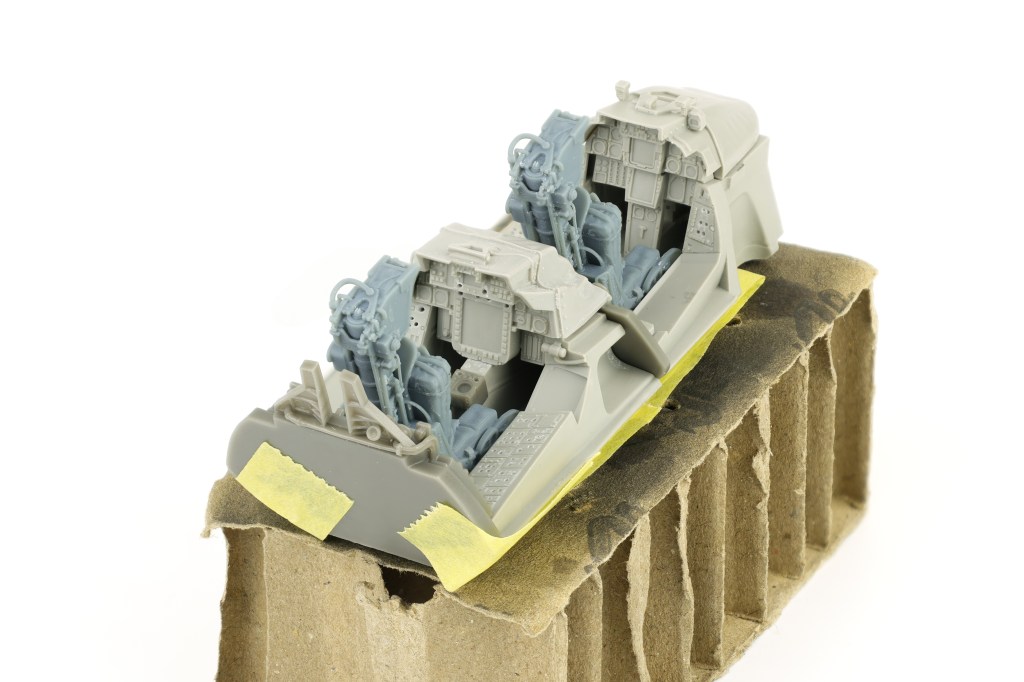
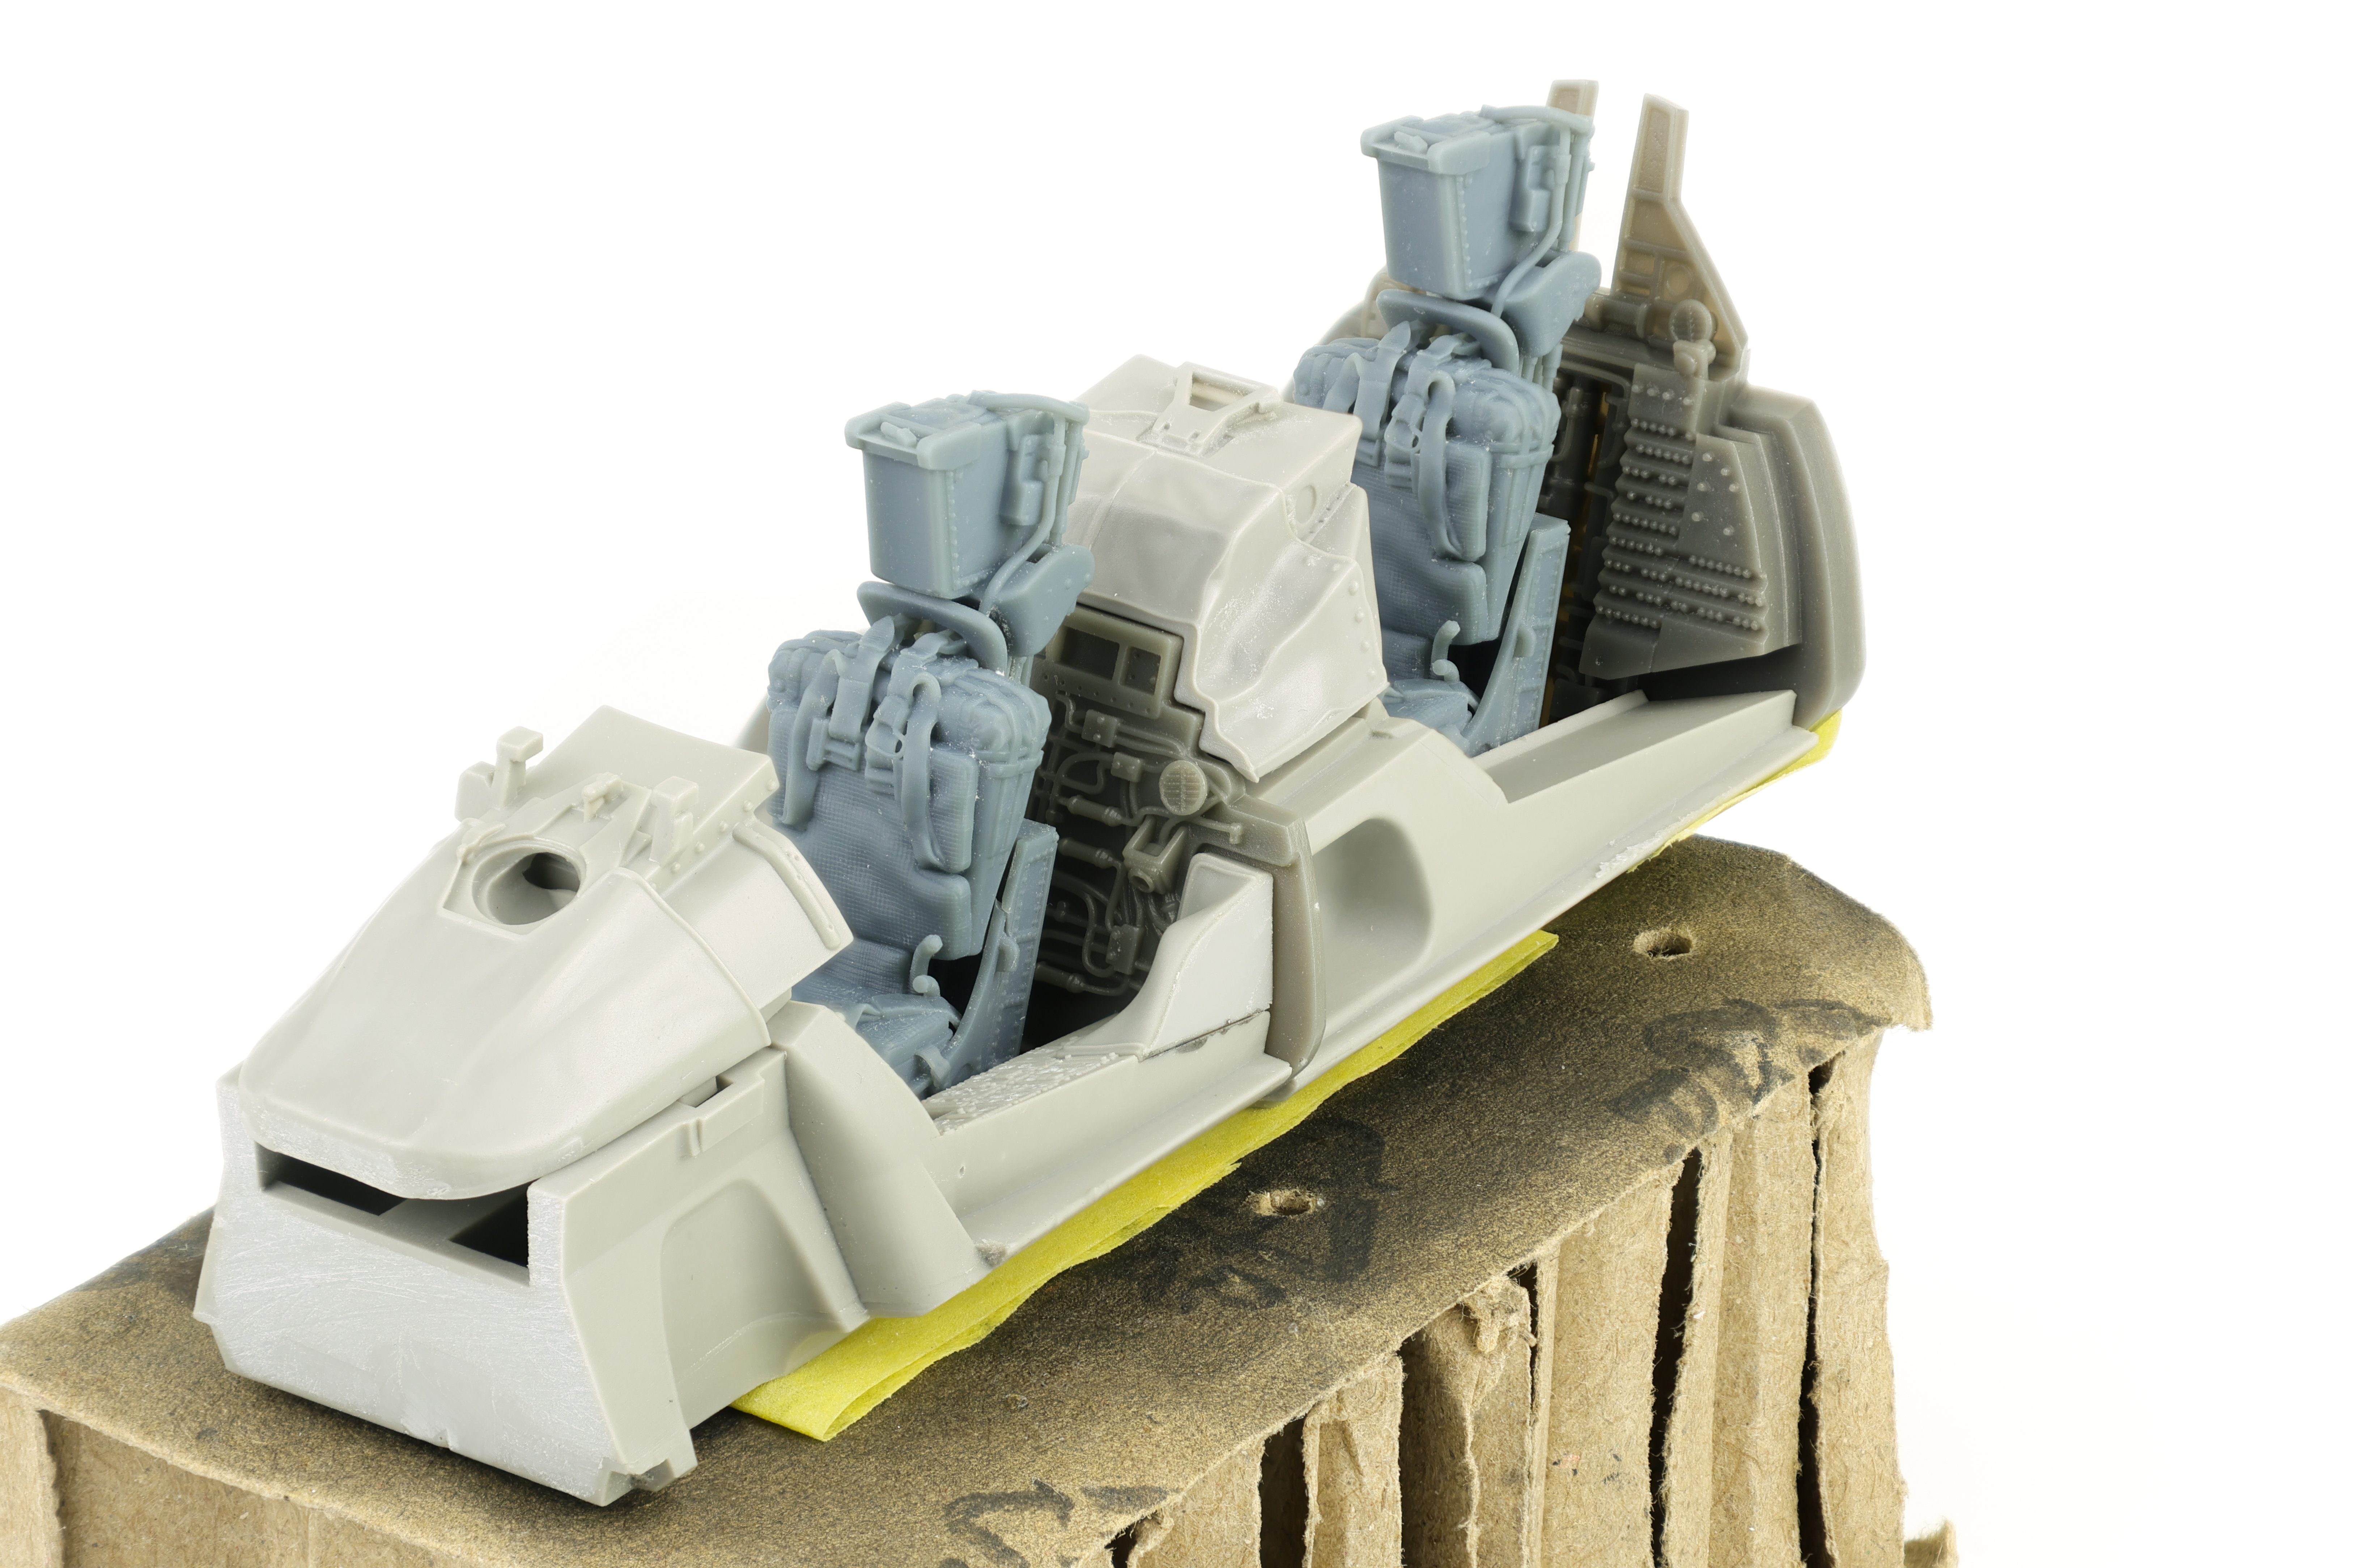
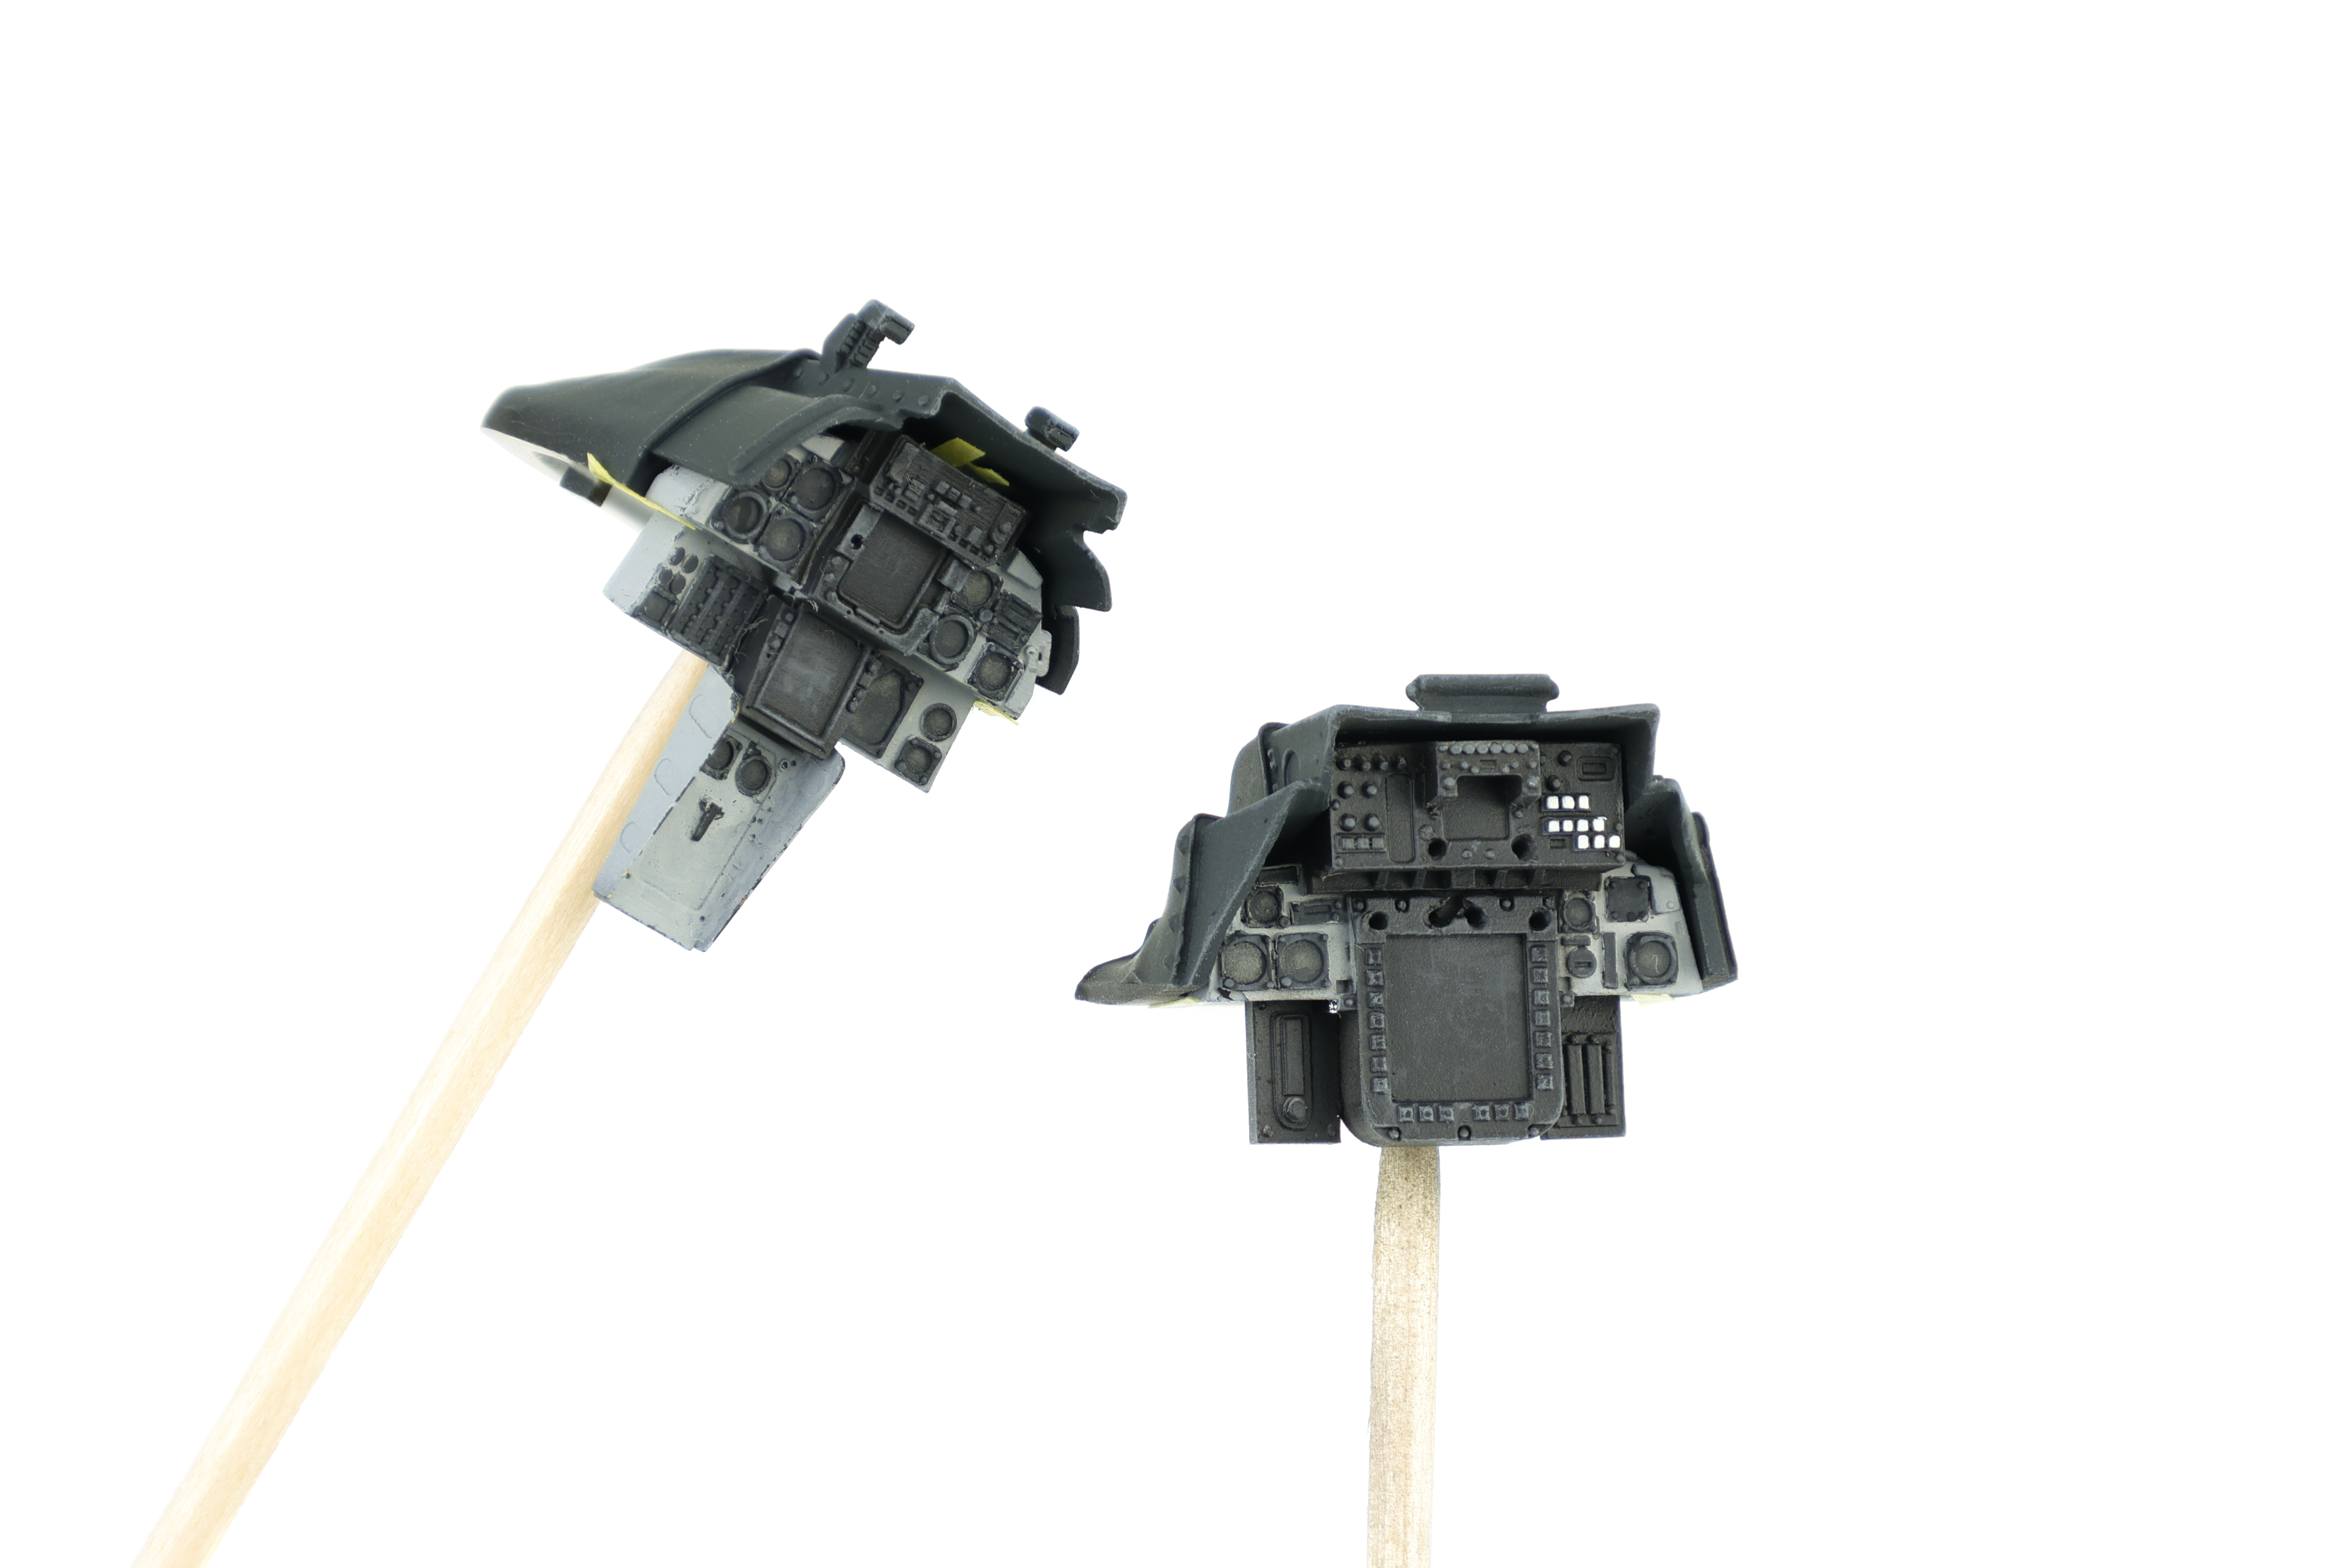
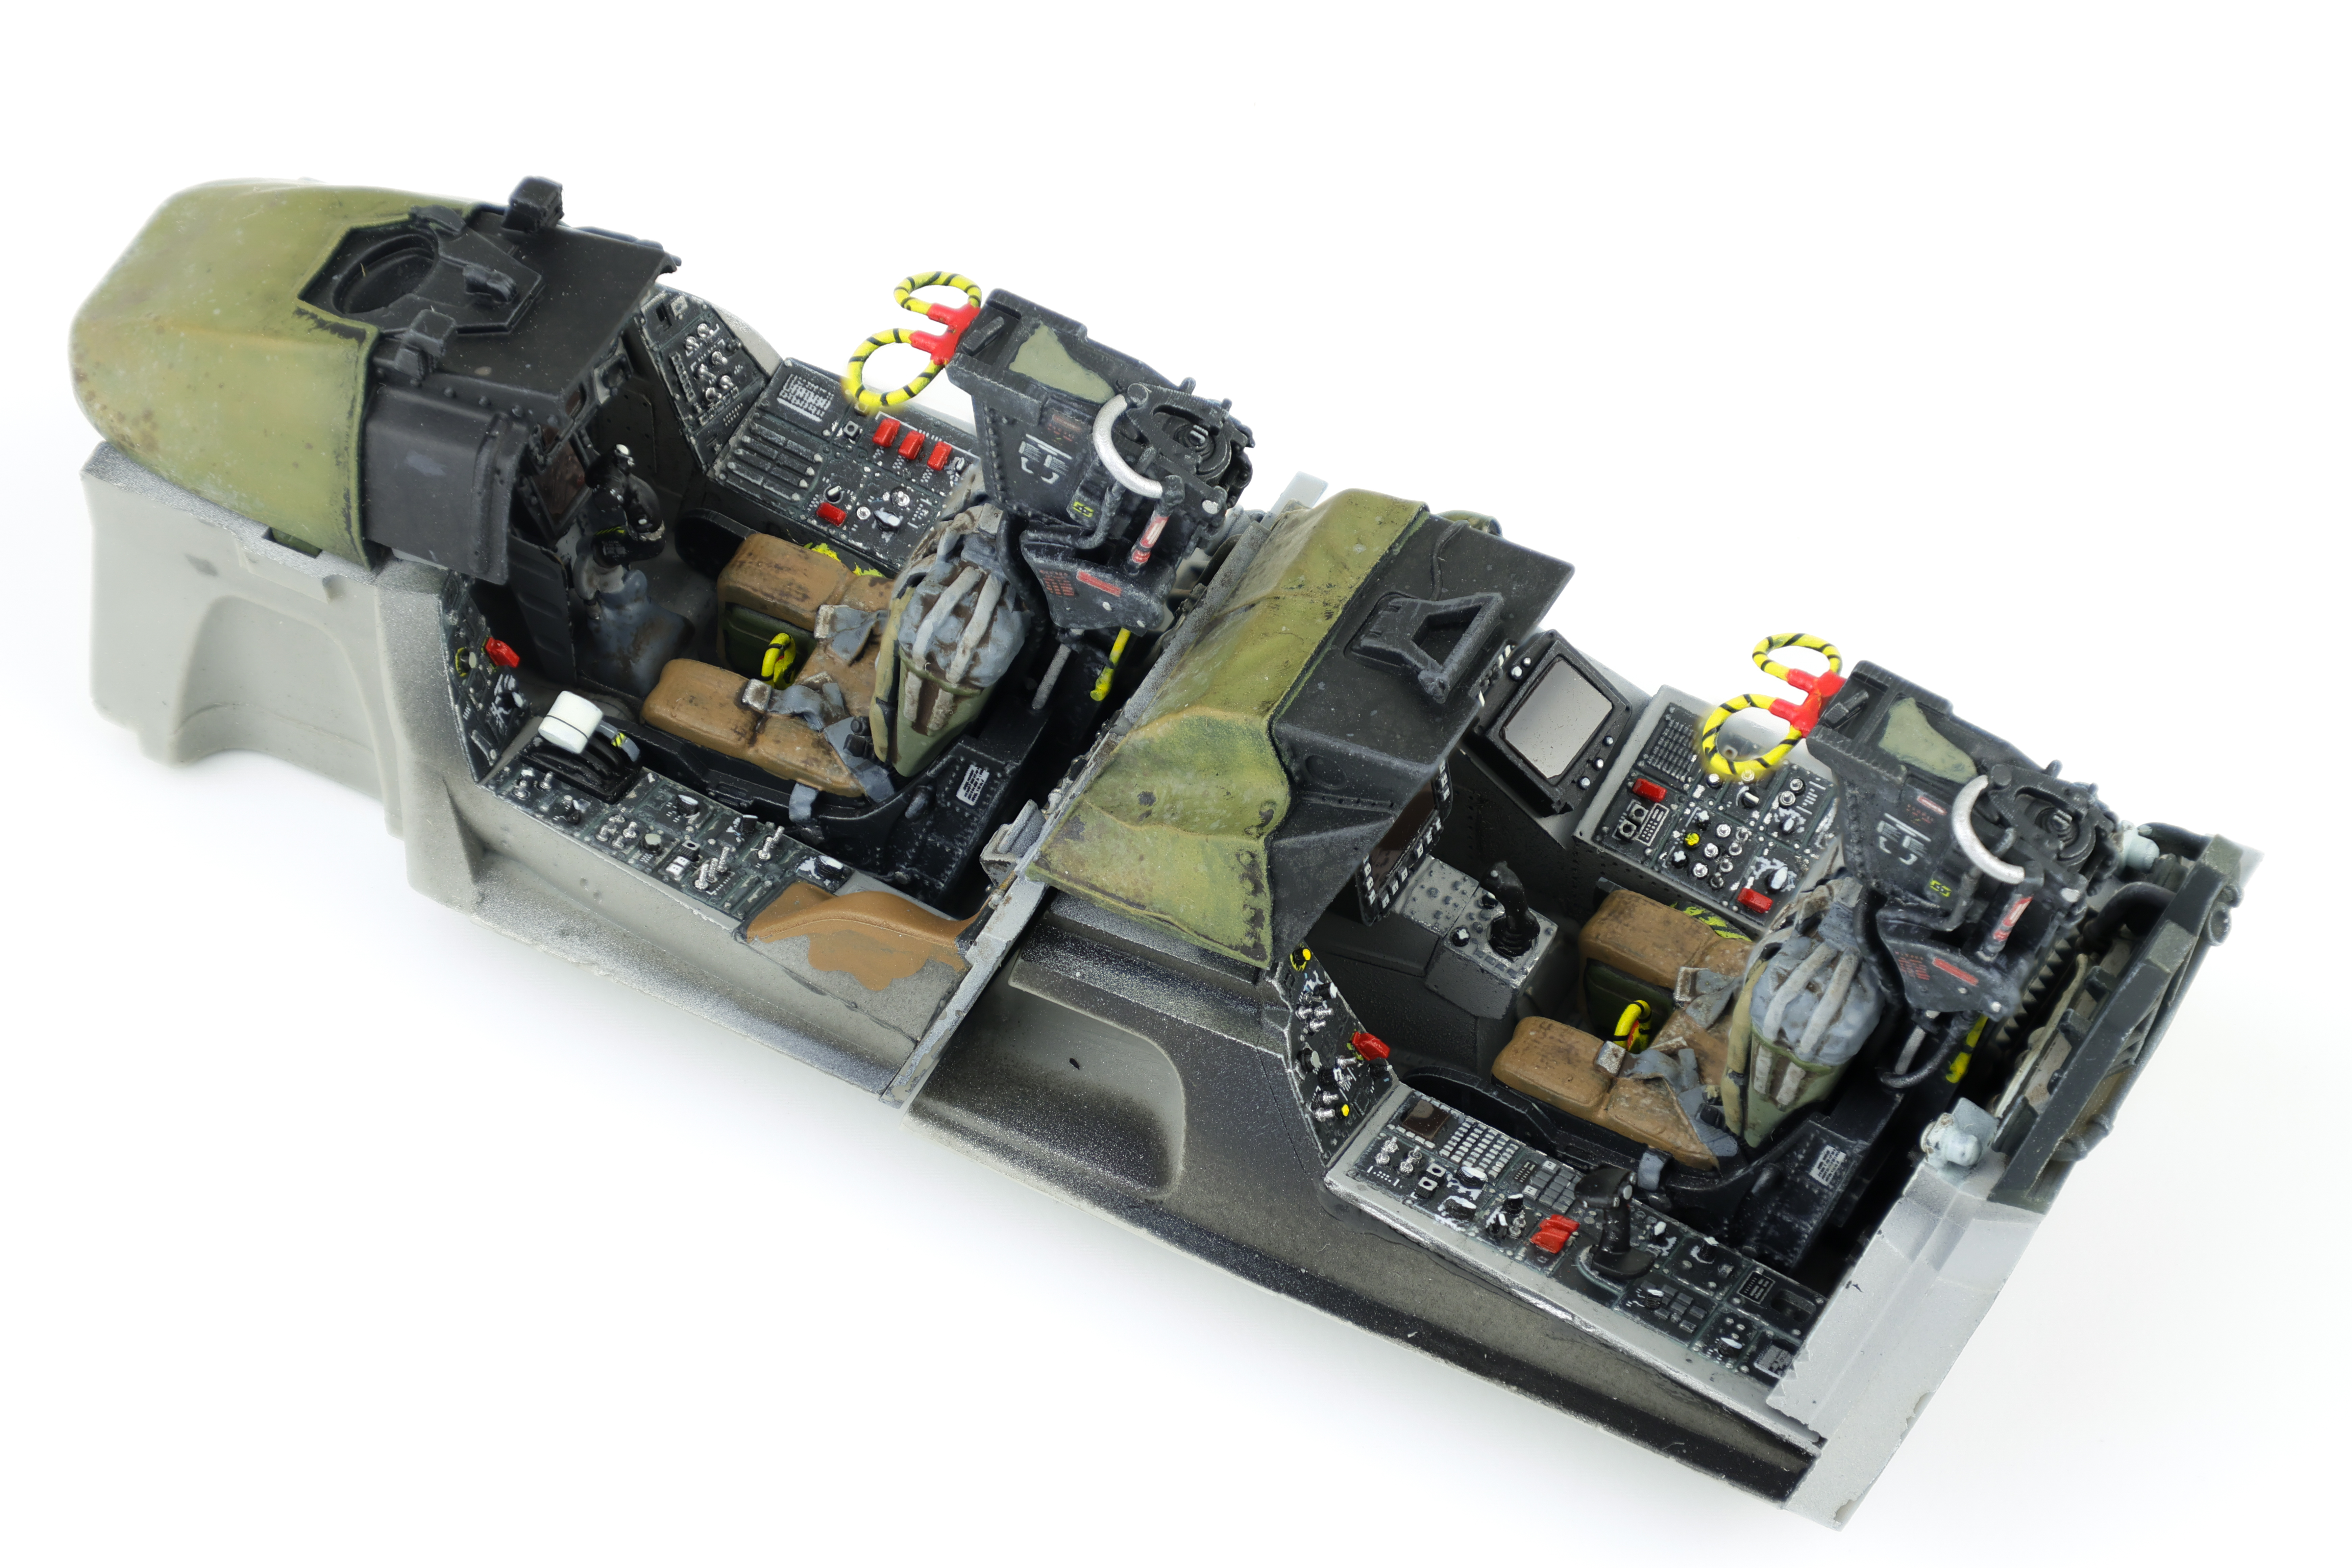
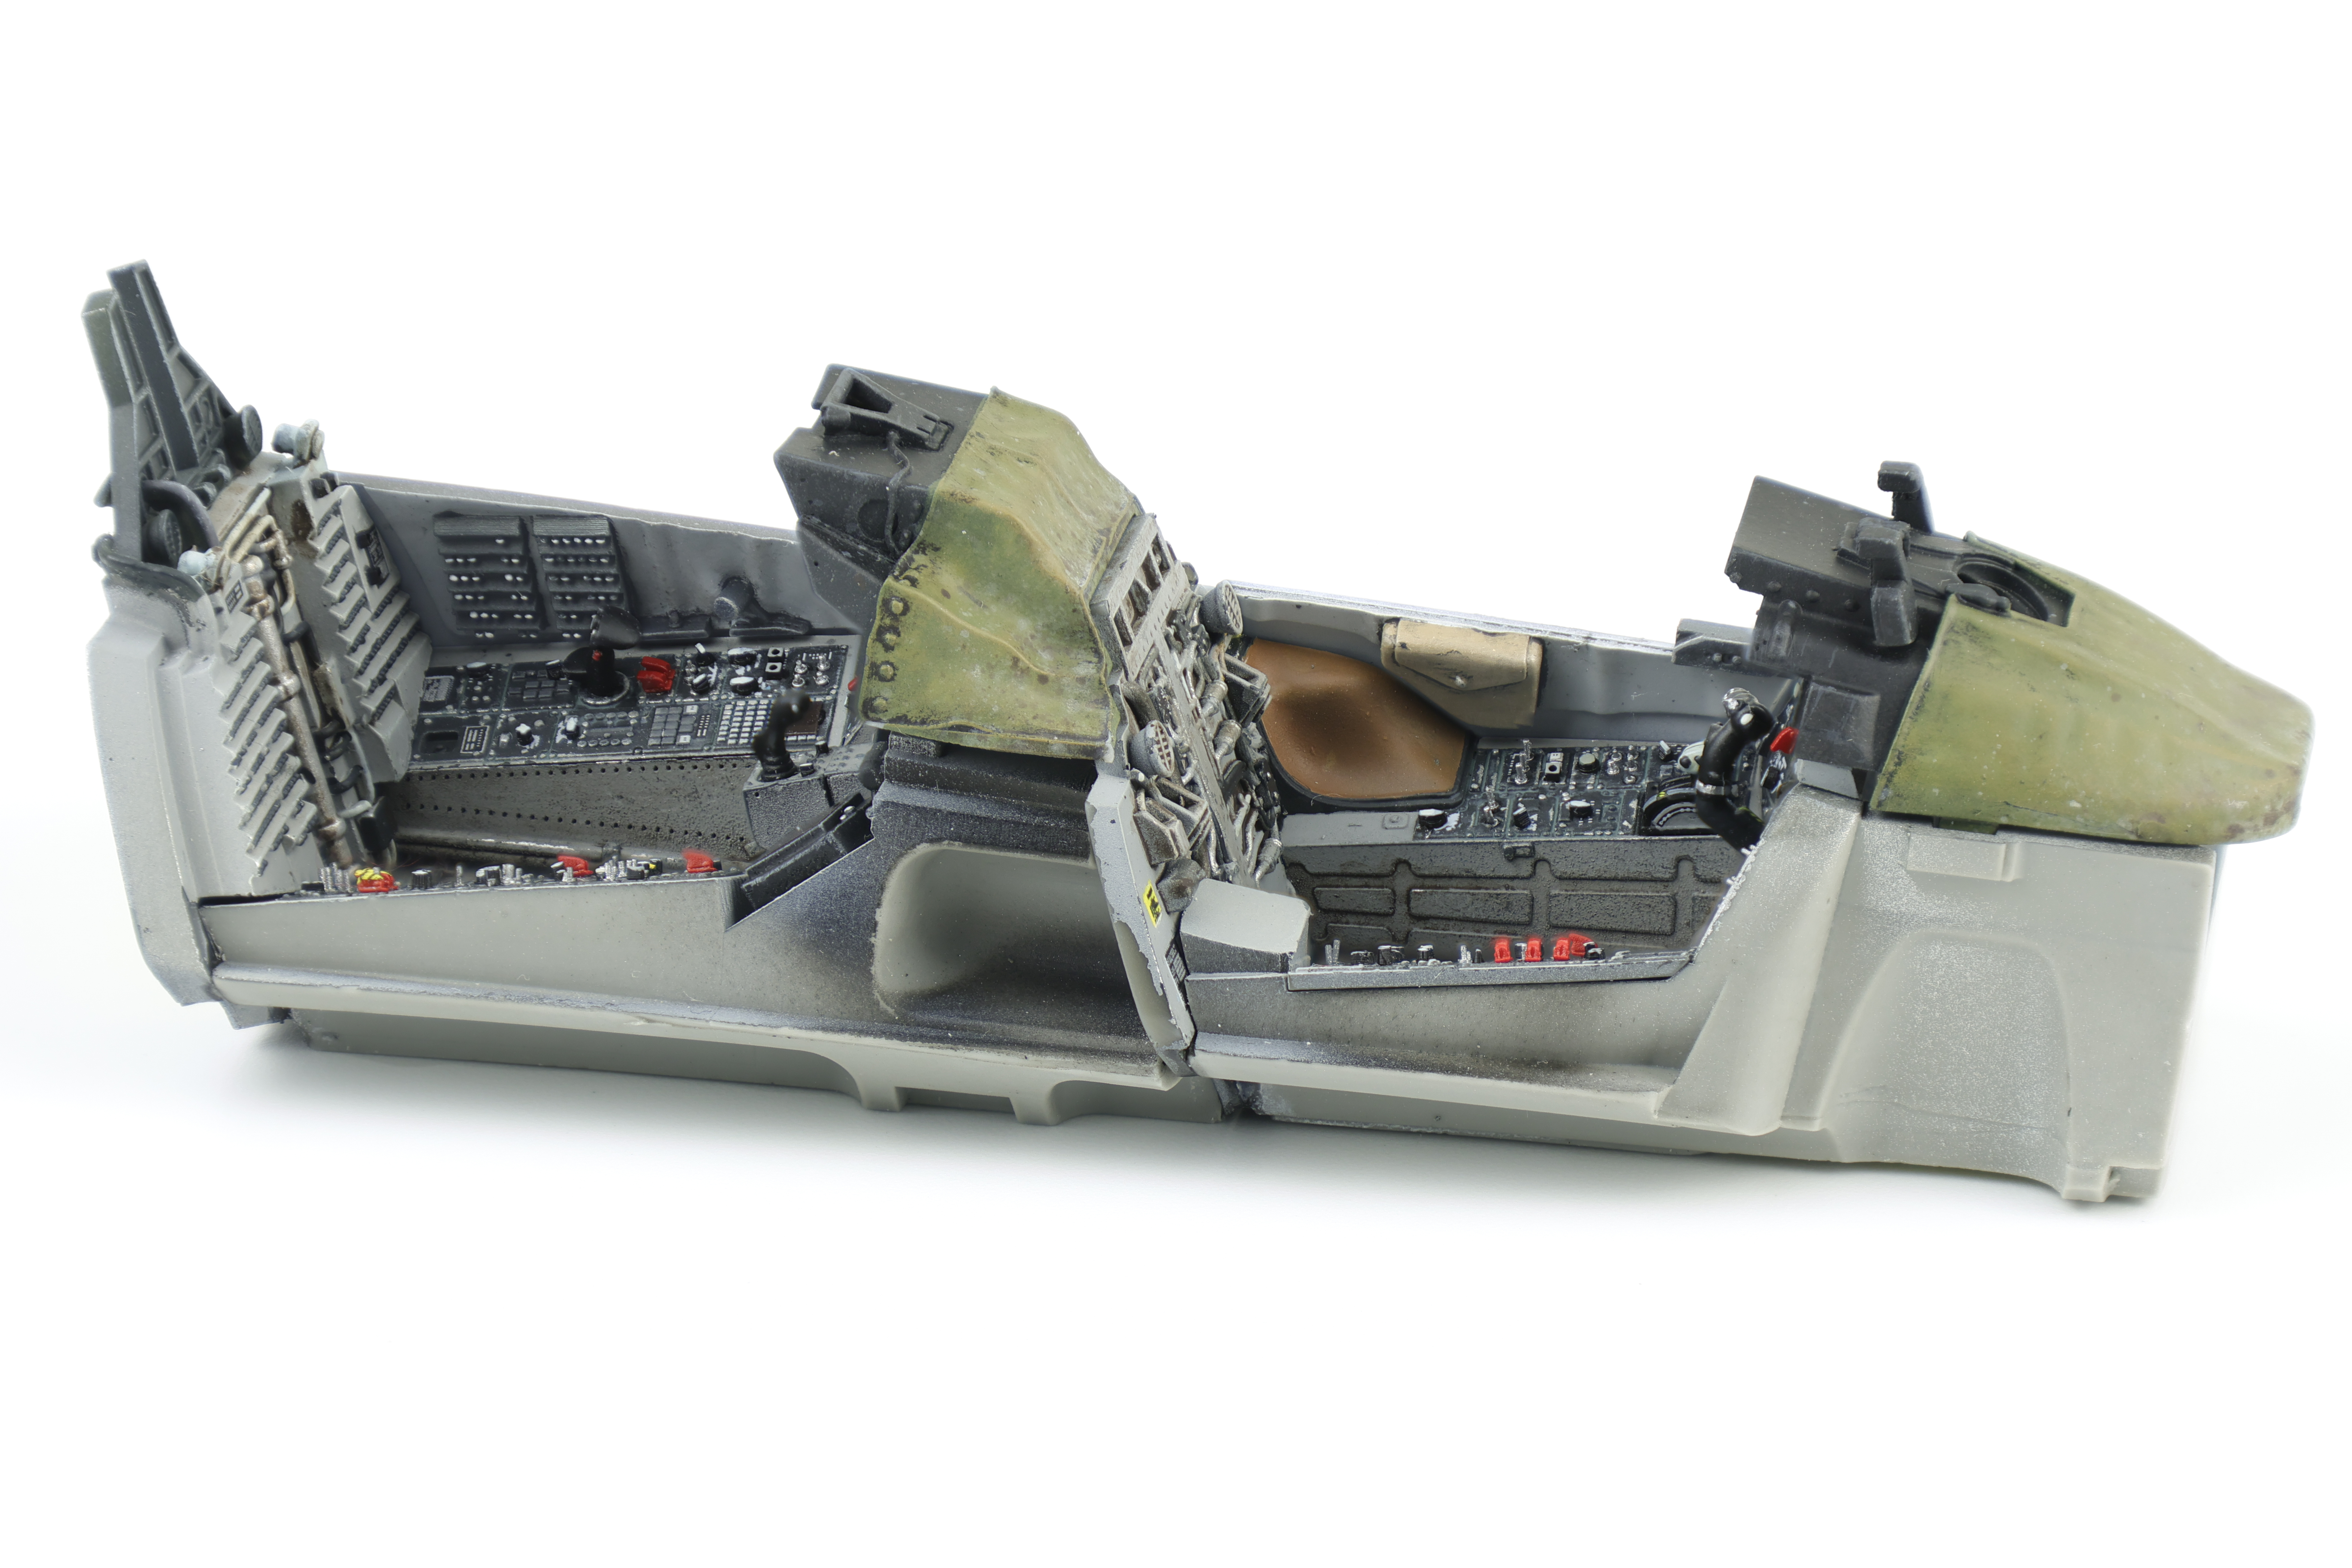
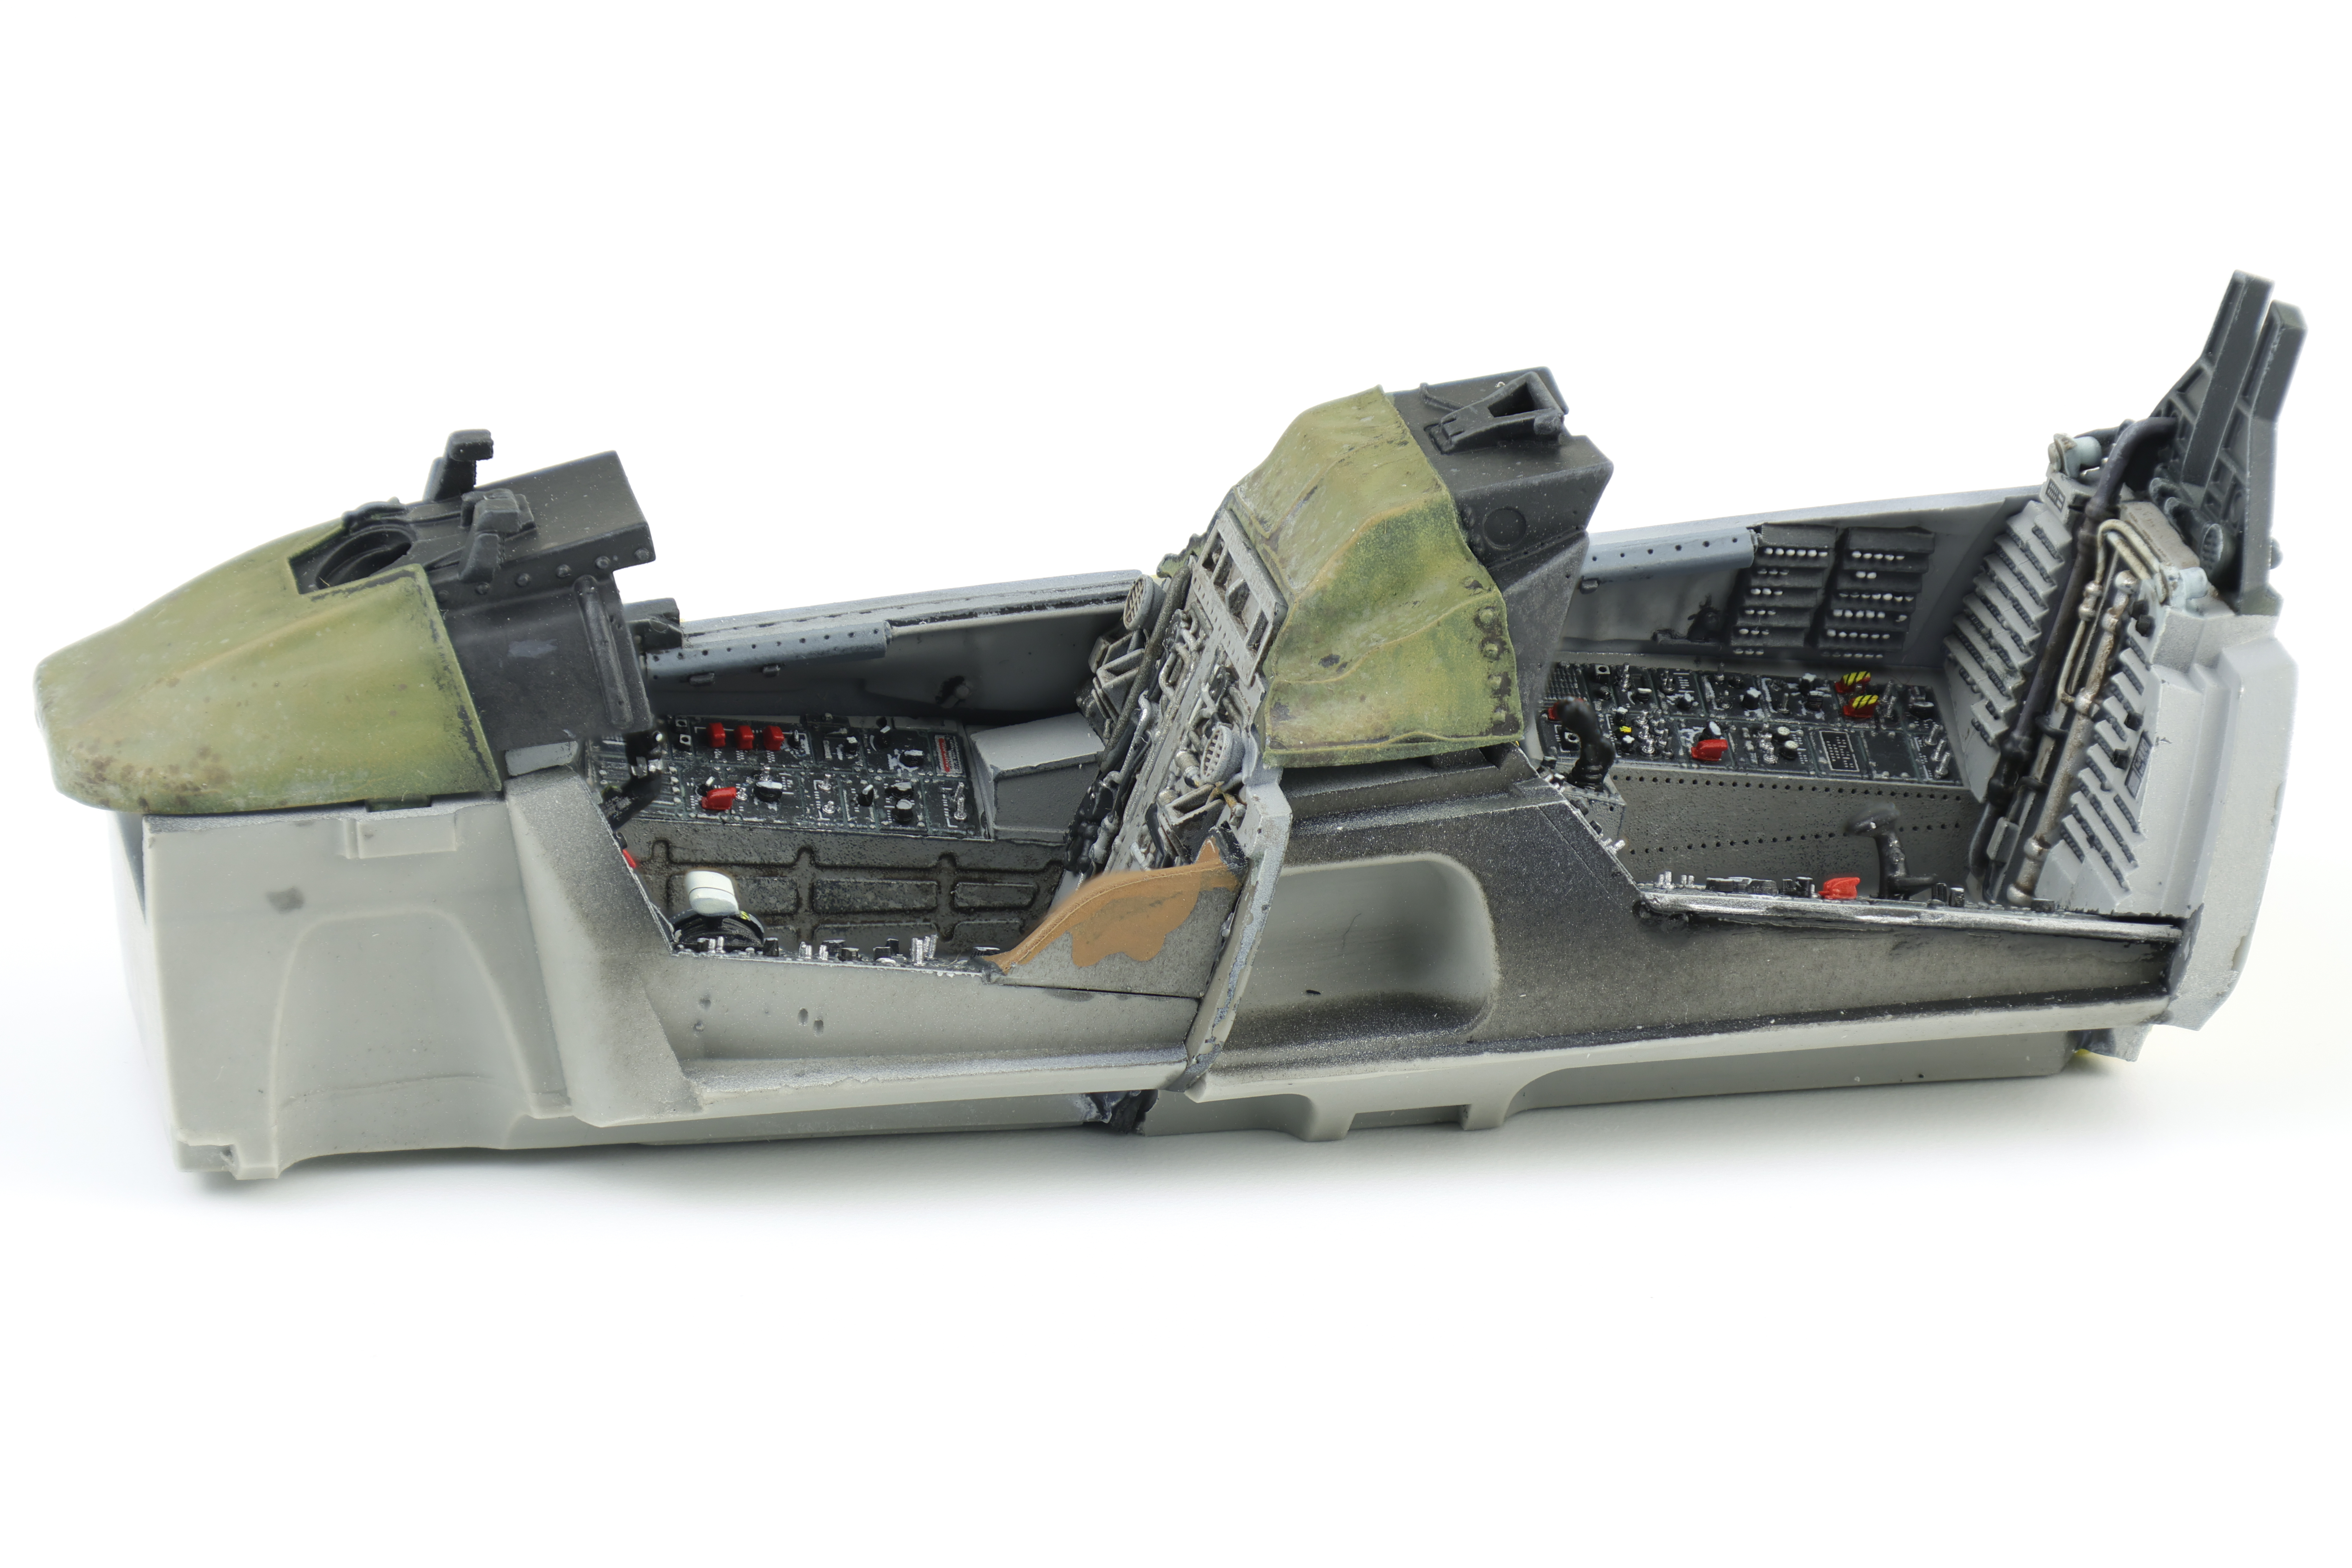
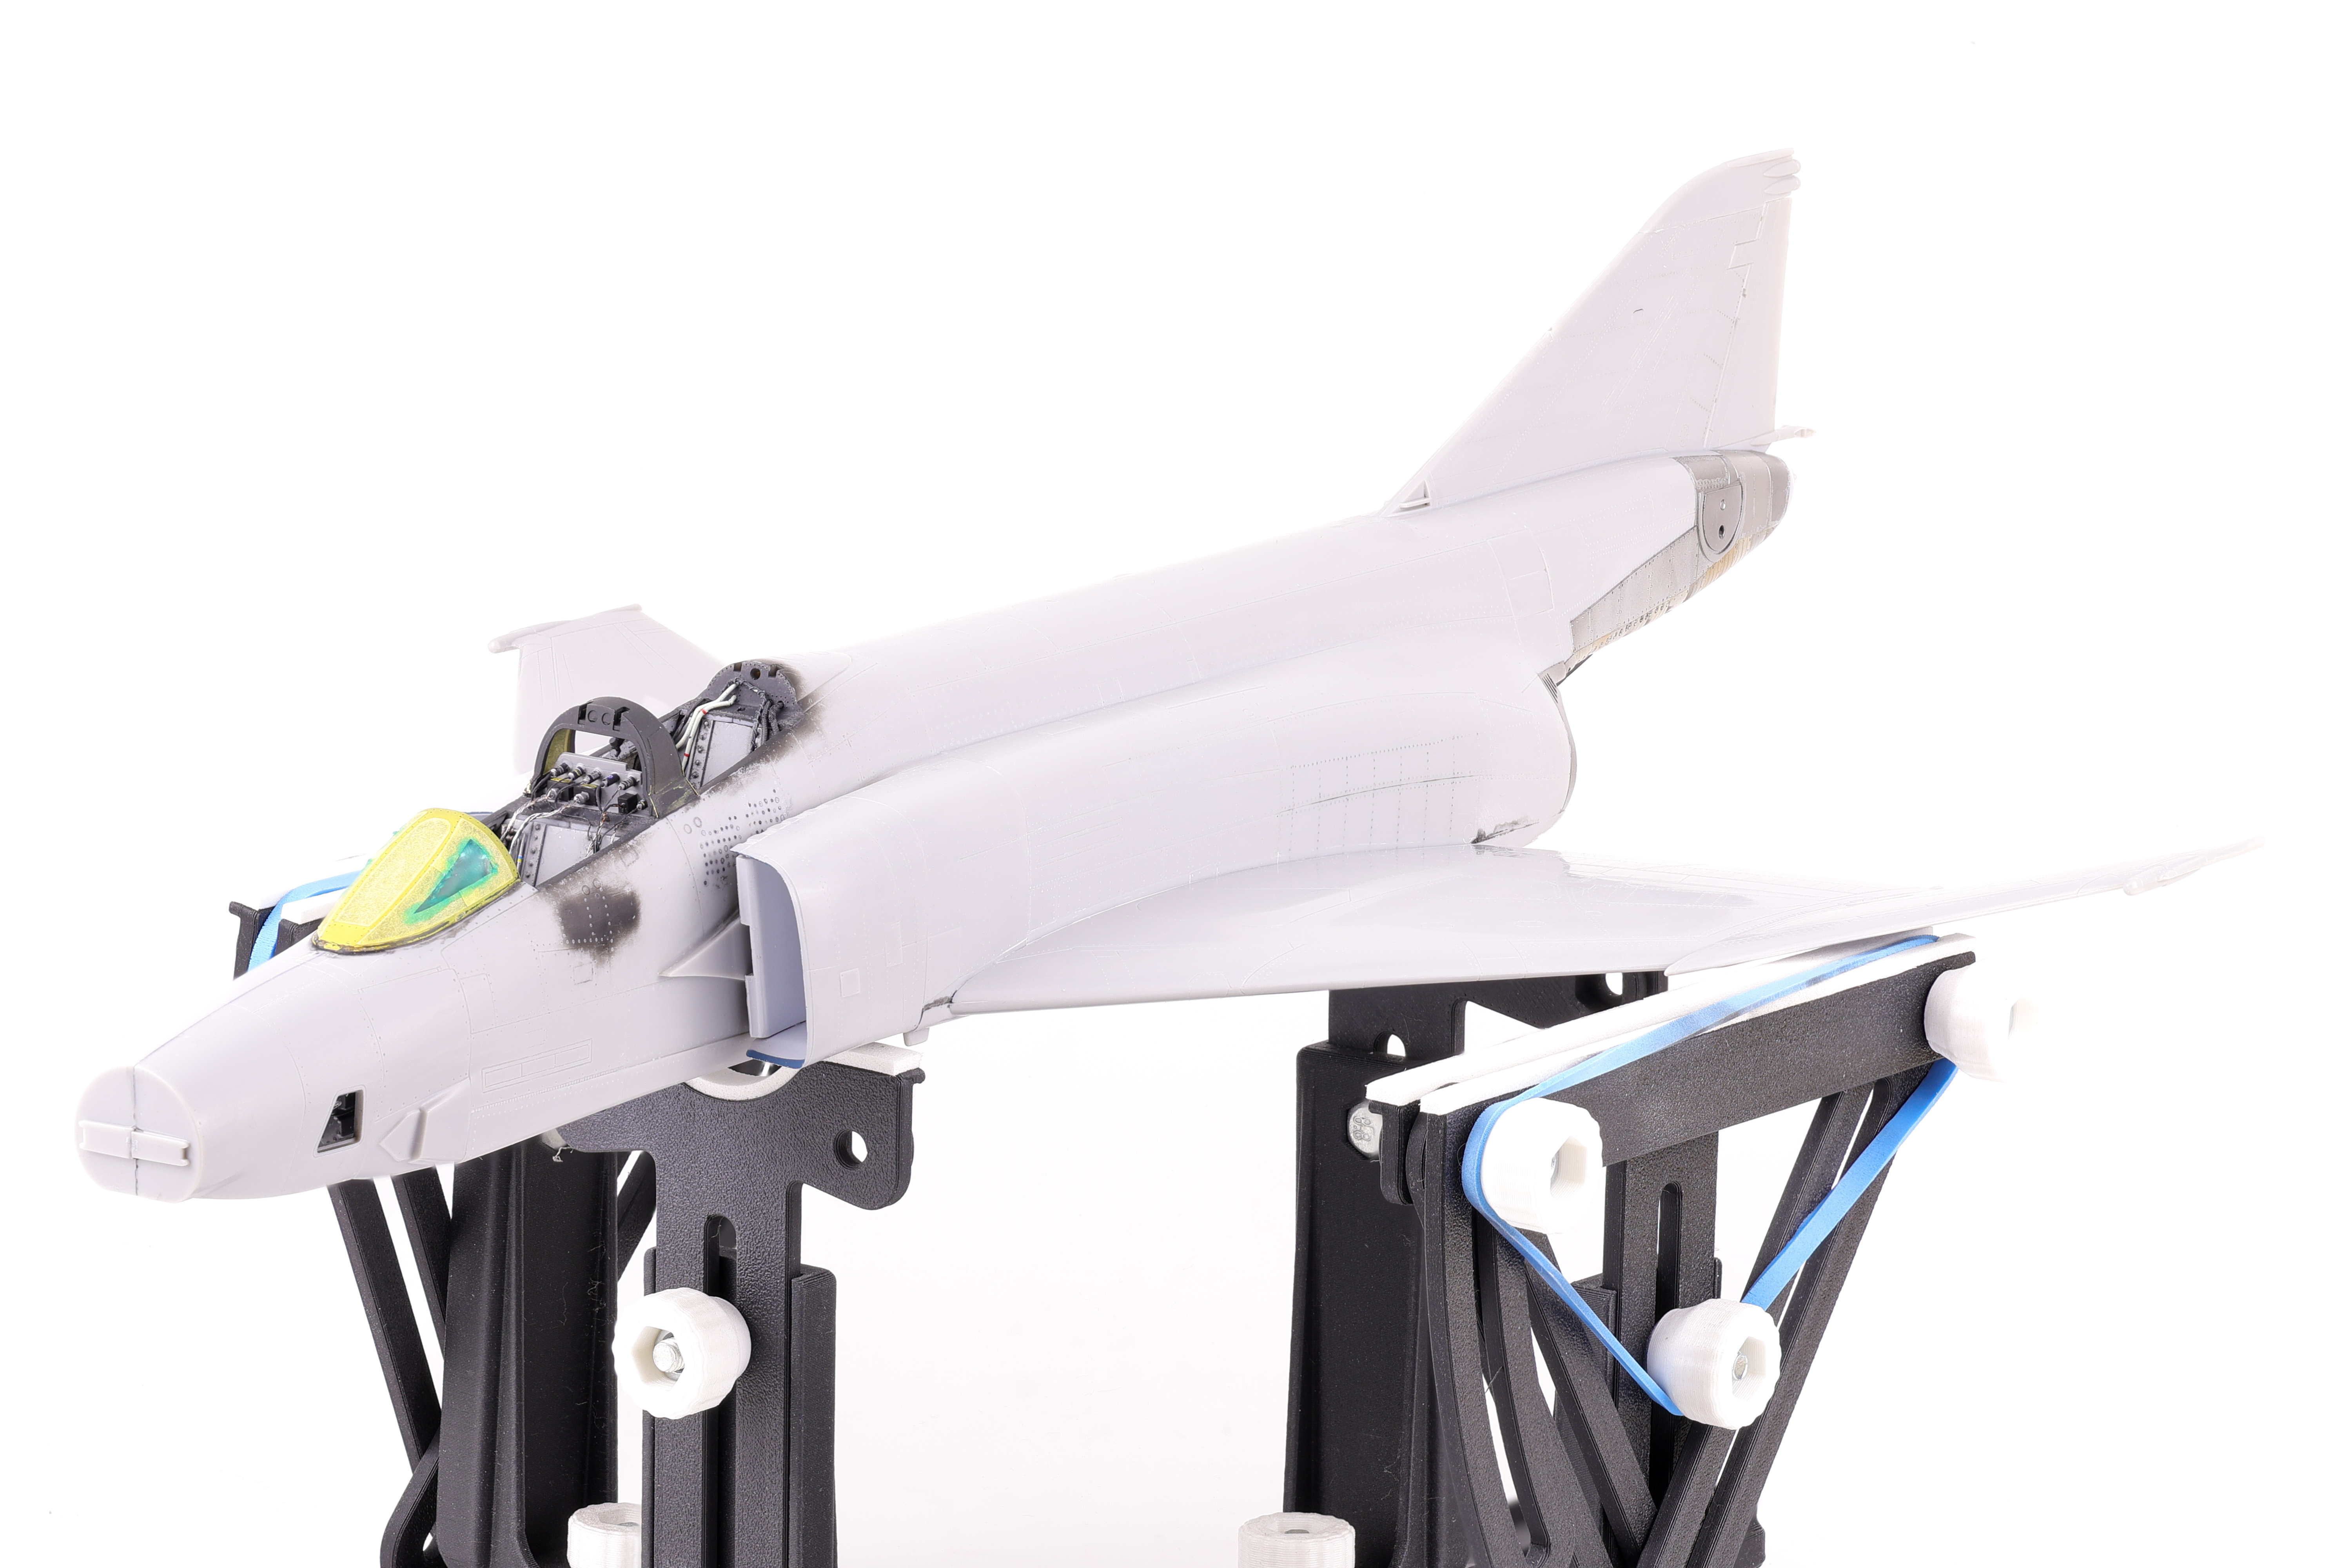
Like all aircraft, construction started with the cockpit. The Eduard set is very well detailed and a definite upgrade over the already fantastic stock cockpit. I also chose to include Master Craft Collection (MCC) 3d printed seats as the Eduard set does not include the later model GRU. 7A ejection seats. Work started by drilling out the side consoles in preparation of adding Anyz switches and dials. I’ve found that adding decals over top the molded on switches is difficult and I preferred to remove the all together.
Unlike my Phantom project, the addition of the resin cockpit meant that I needed to complete no scratchbuilding work. This was a welcome change and it meant that work quickly progressed to the painting phase.
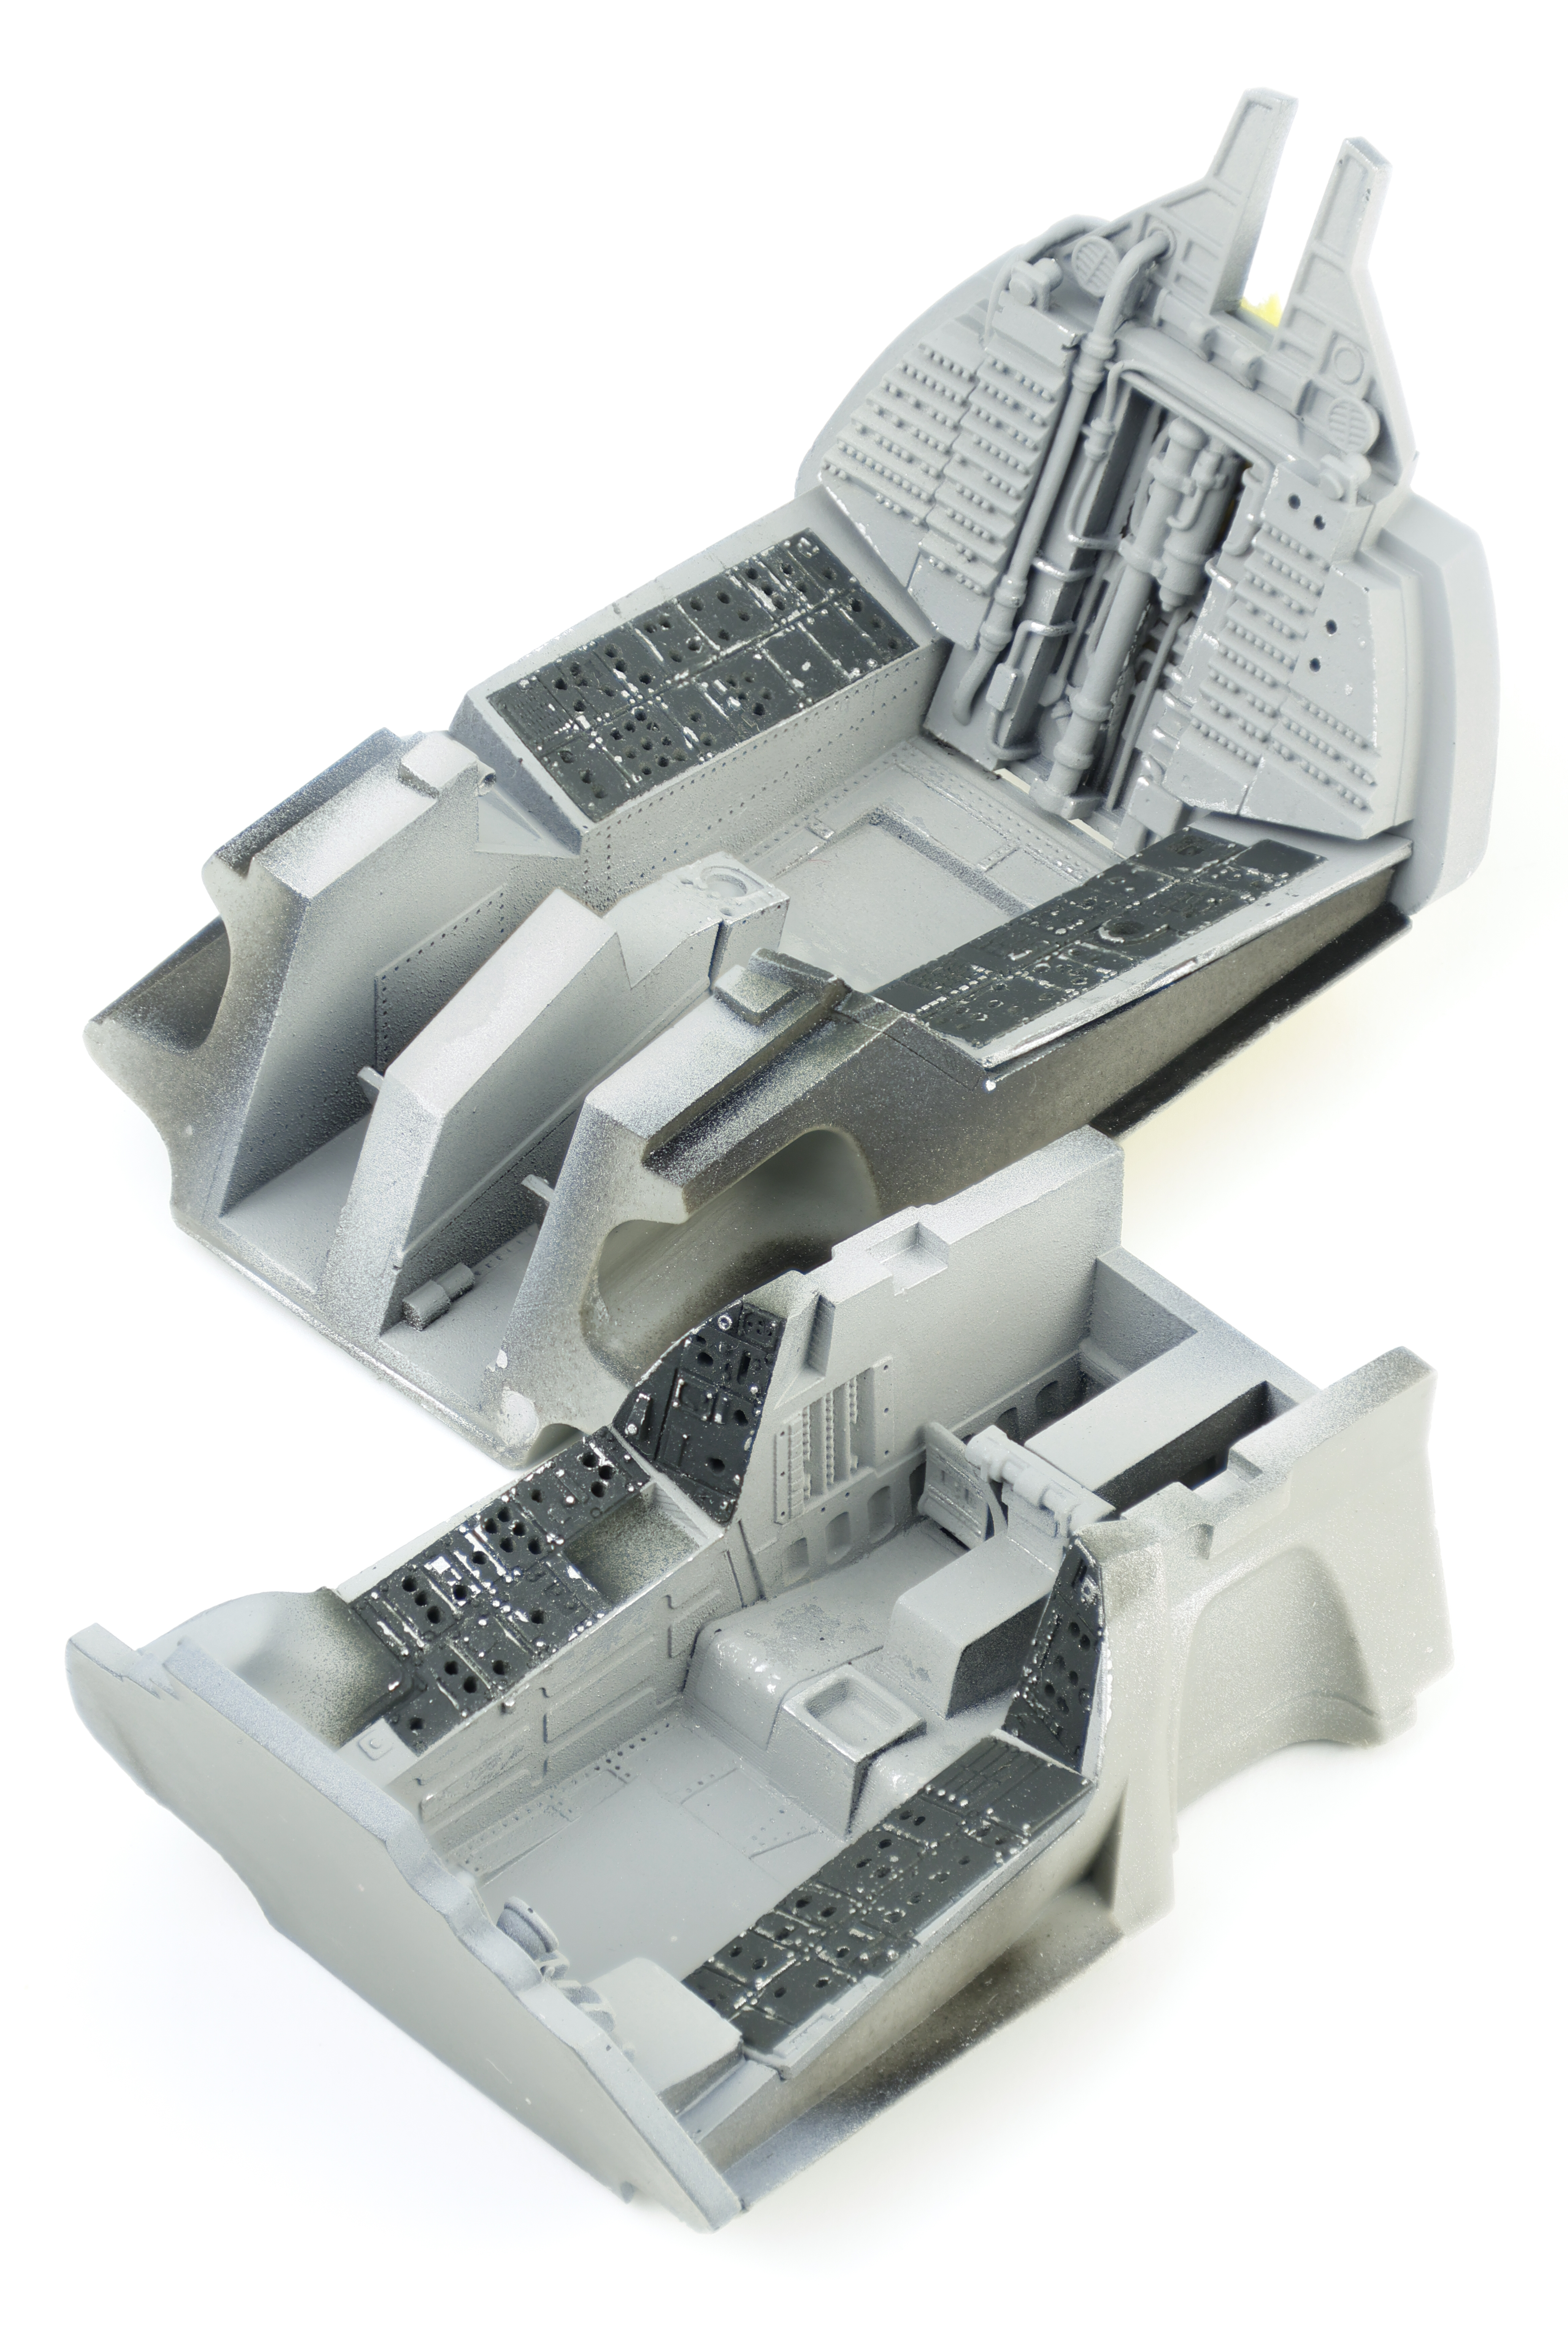
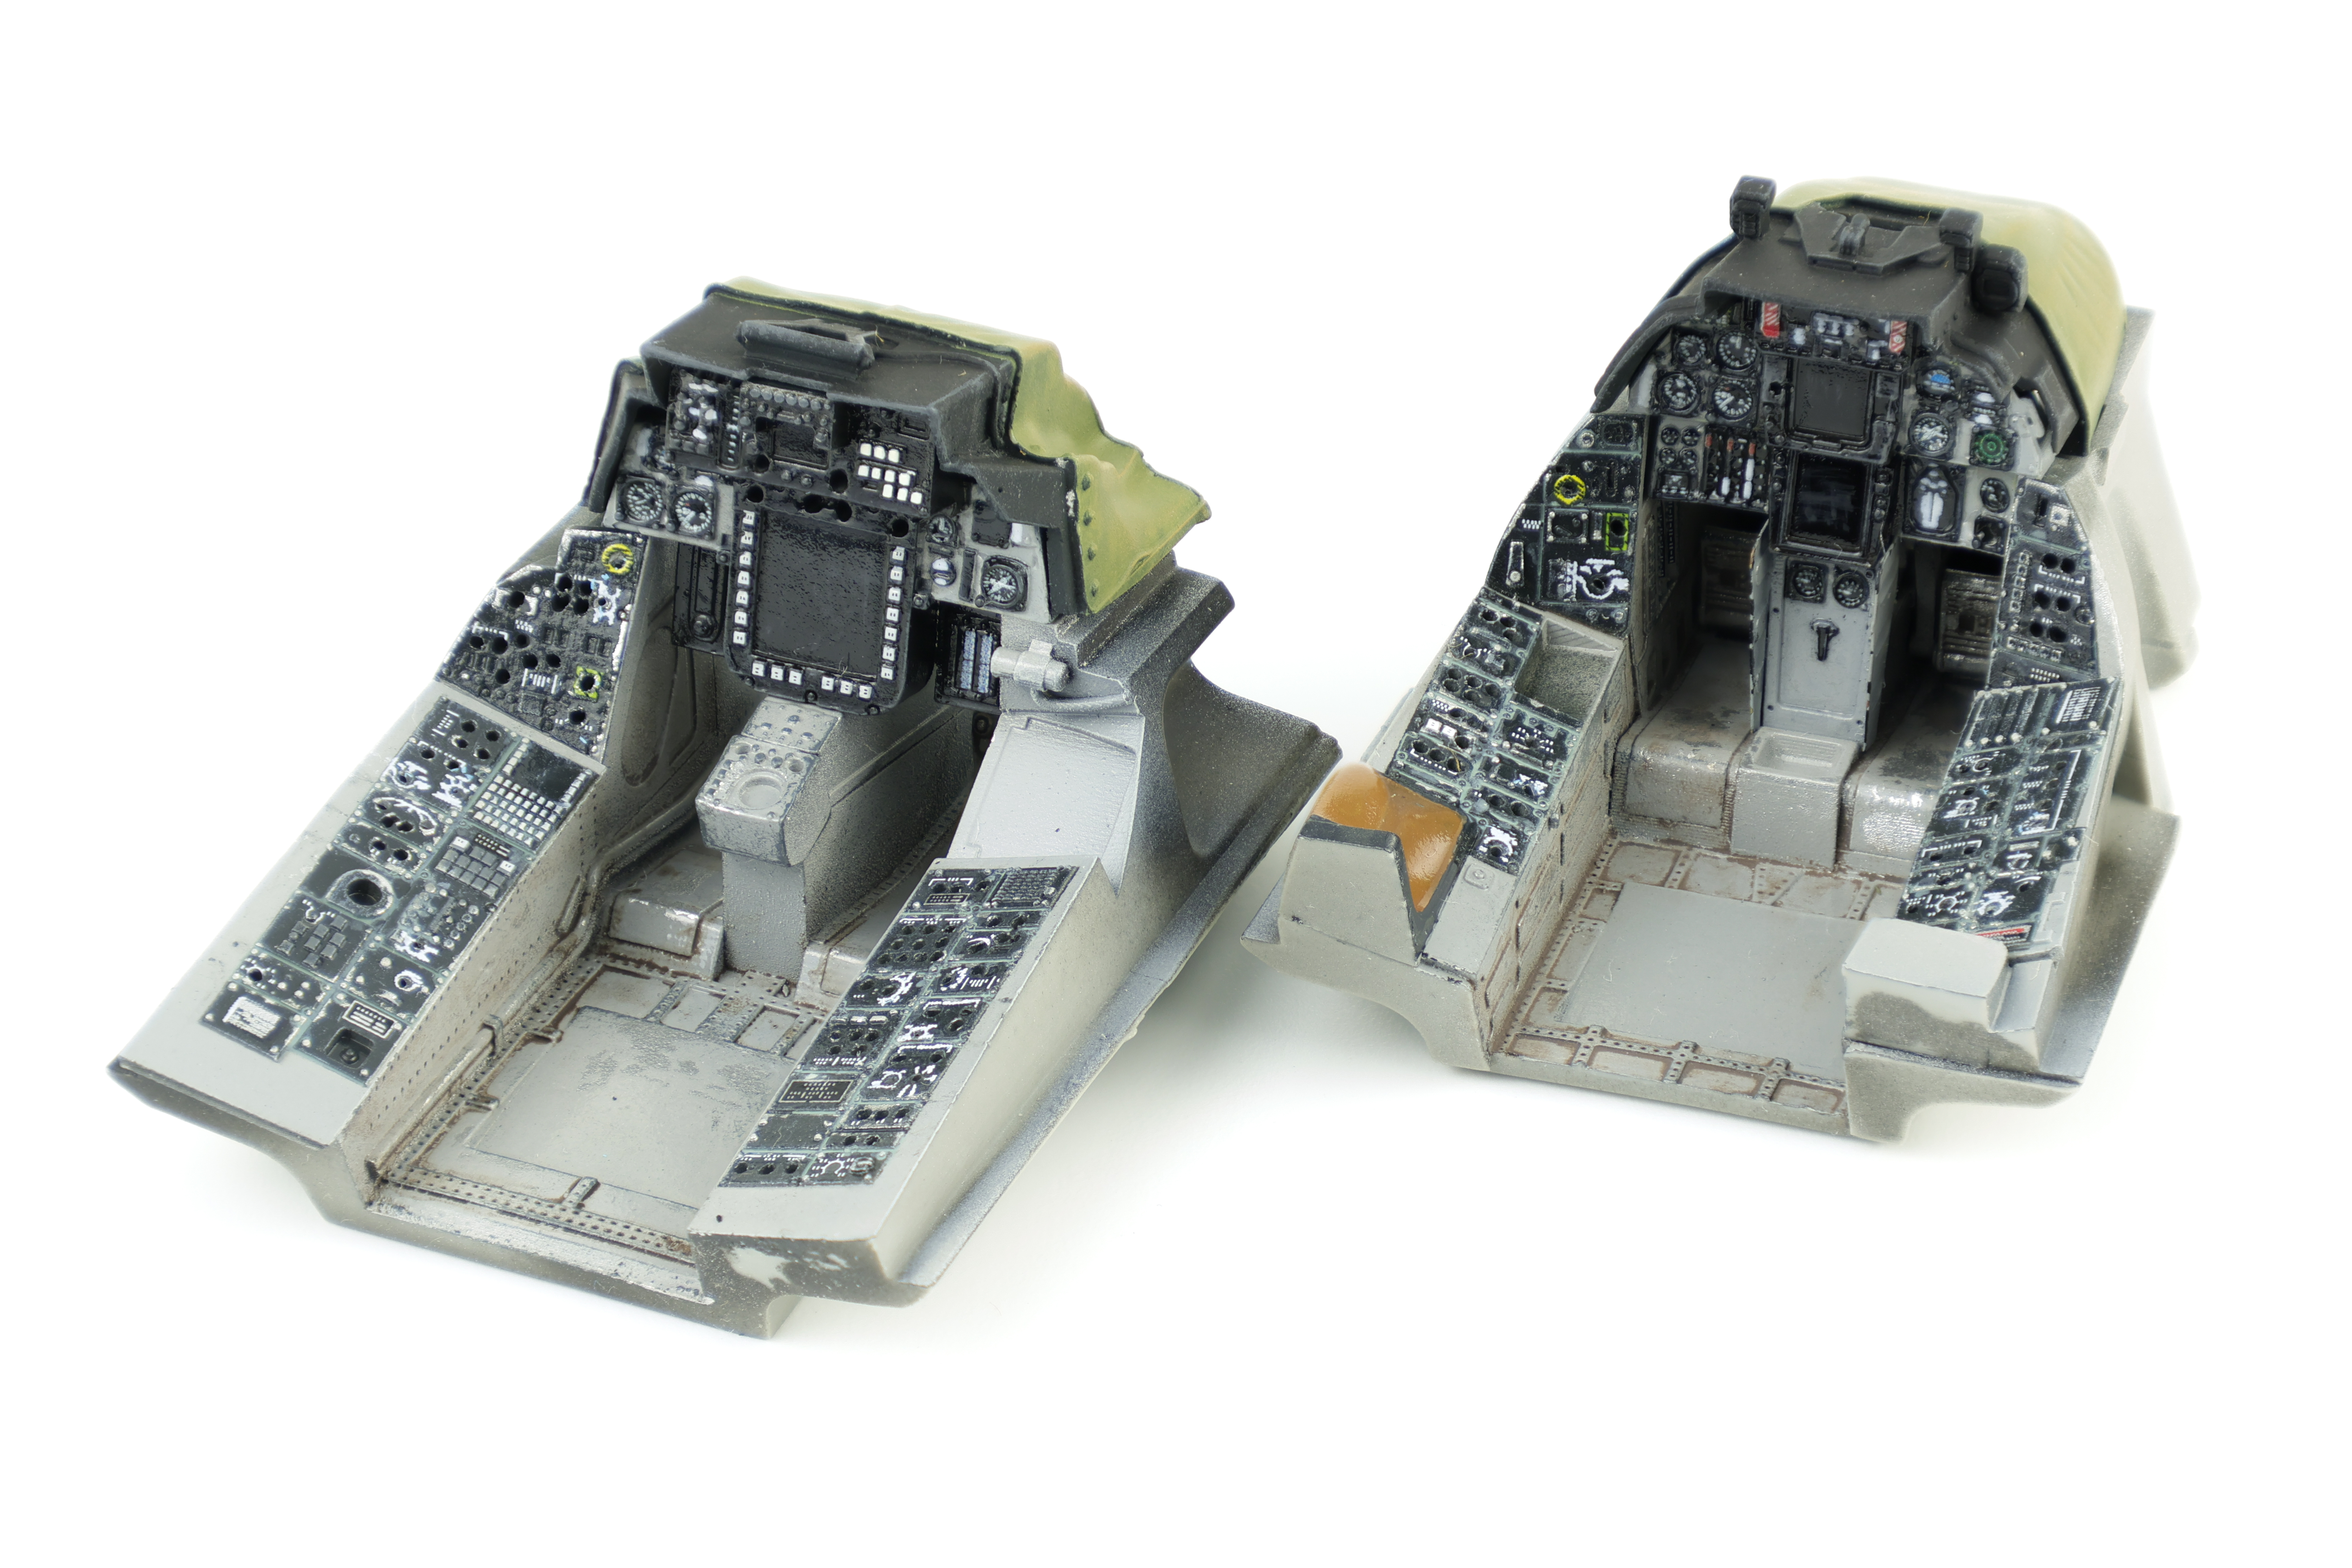
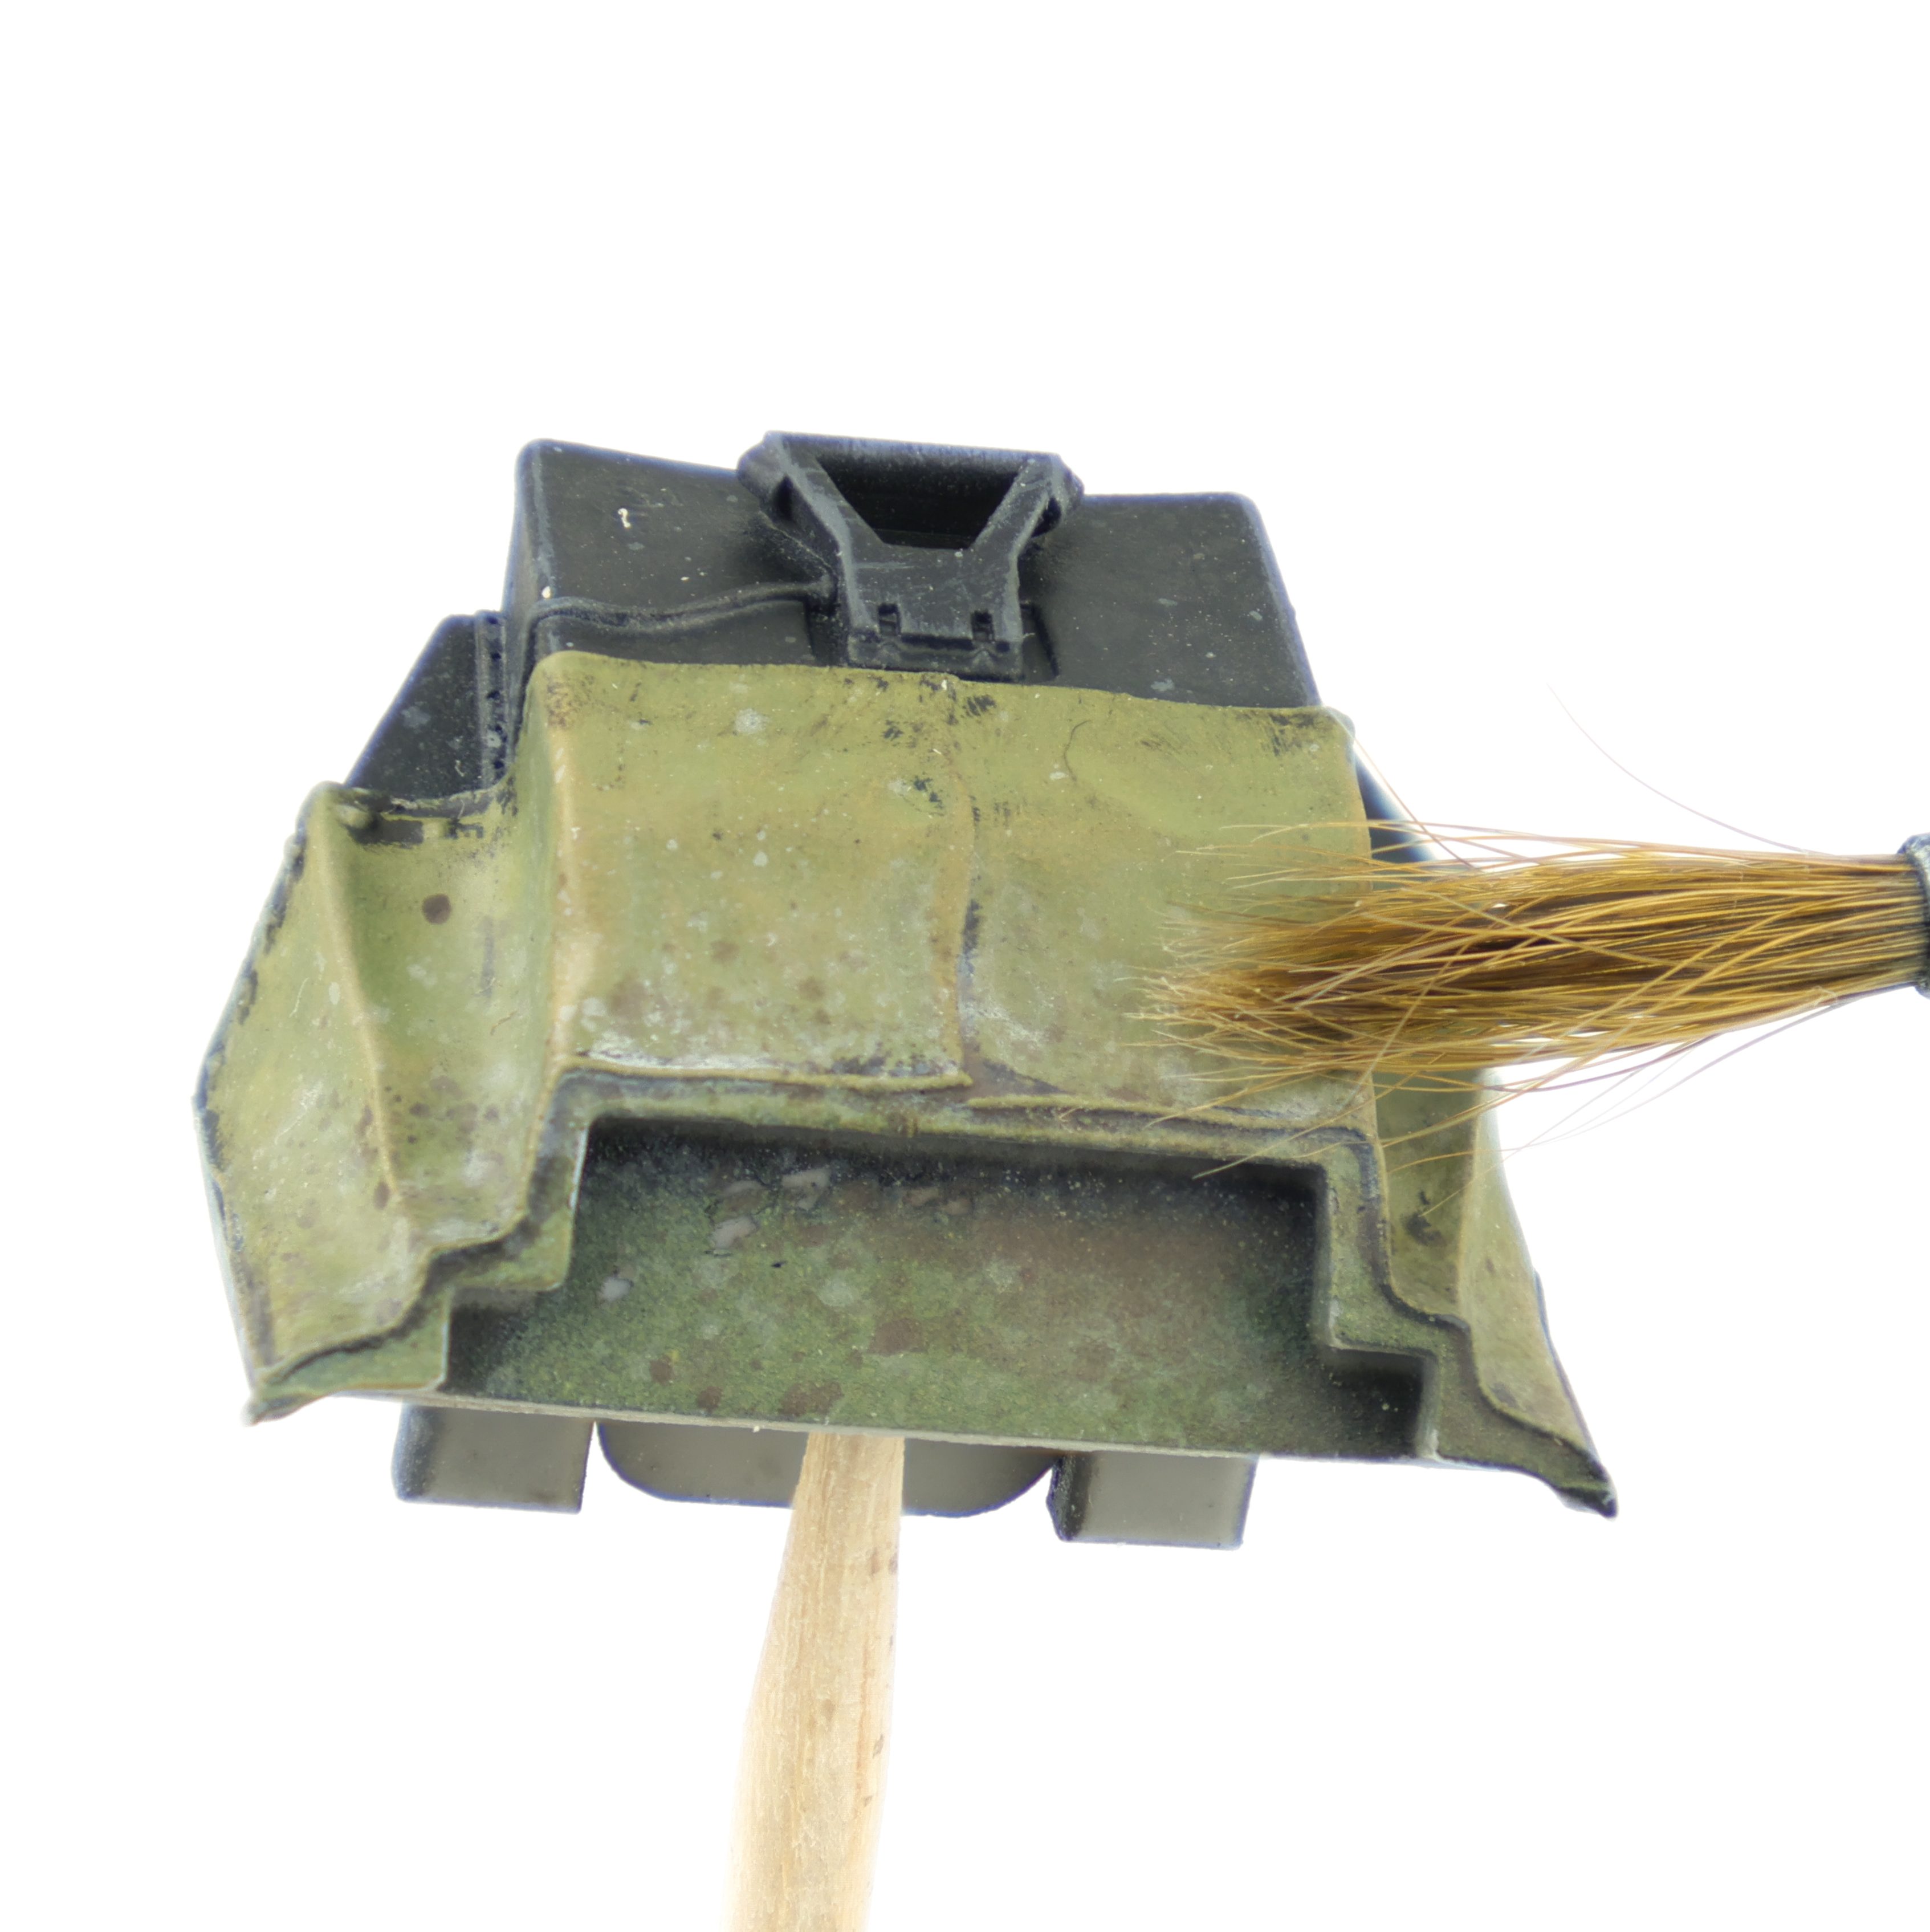
After a coat of black primer and a silver chipping coat+hairspray, I applied Tamiya Sky grey for the majority of the cockpit with the side panels emphasized with Nato black. I then did some cockpit chipping by soaking the cockpit in water before rubbing a stiff brush over the areas where I wanted wear to accumulate. On my recent Phantom project, I chose to use sponge chipping instead of the hairspray method and I wasn’t super pleased with the results I managed to achieve. I found that using the Hairspray method here was far better and got the result I was after. That said, It was still important not to overdo this effect, especially on the side consoles as the chips were particularly visible.
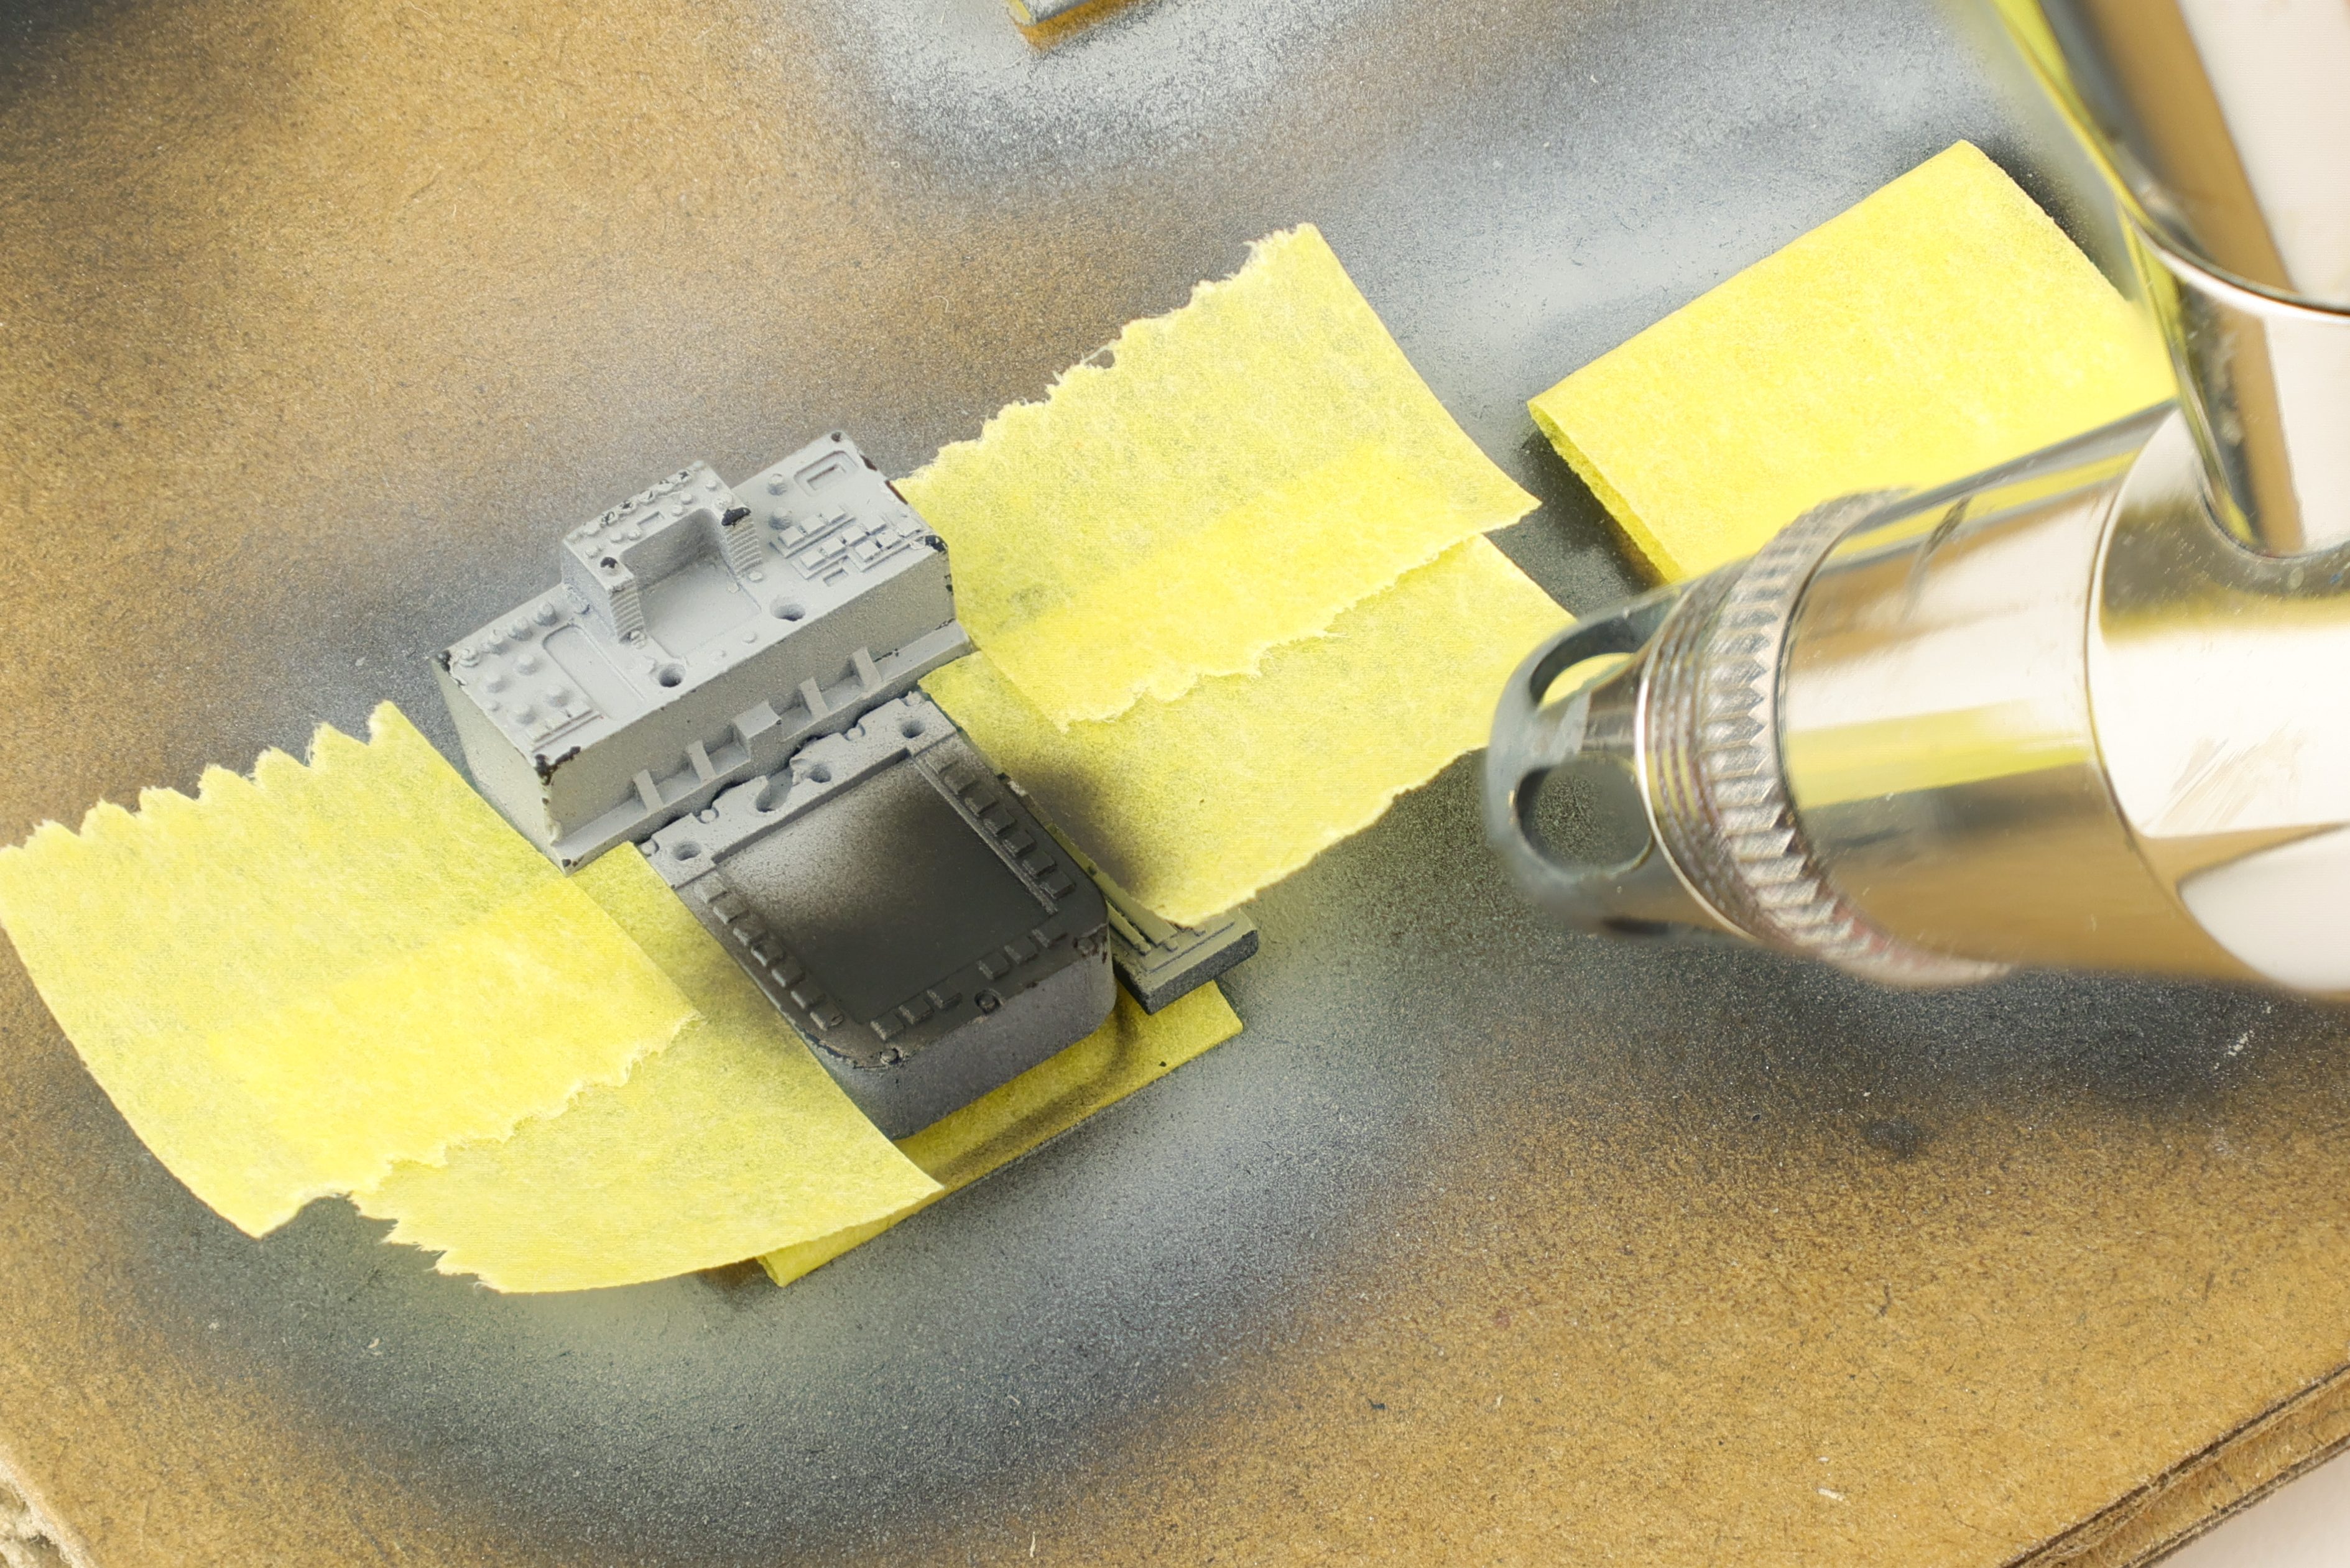
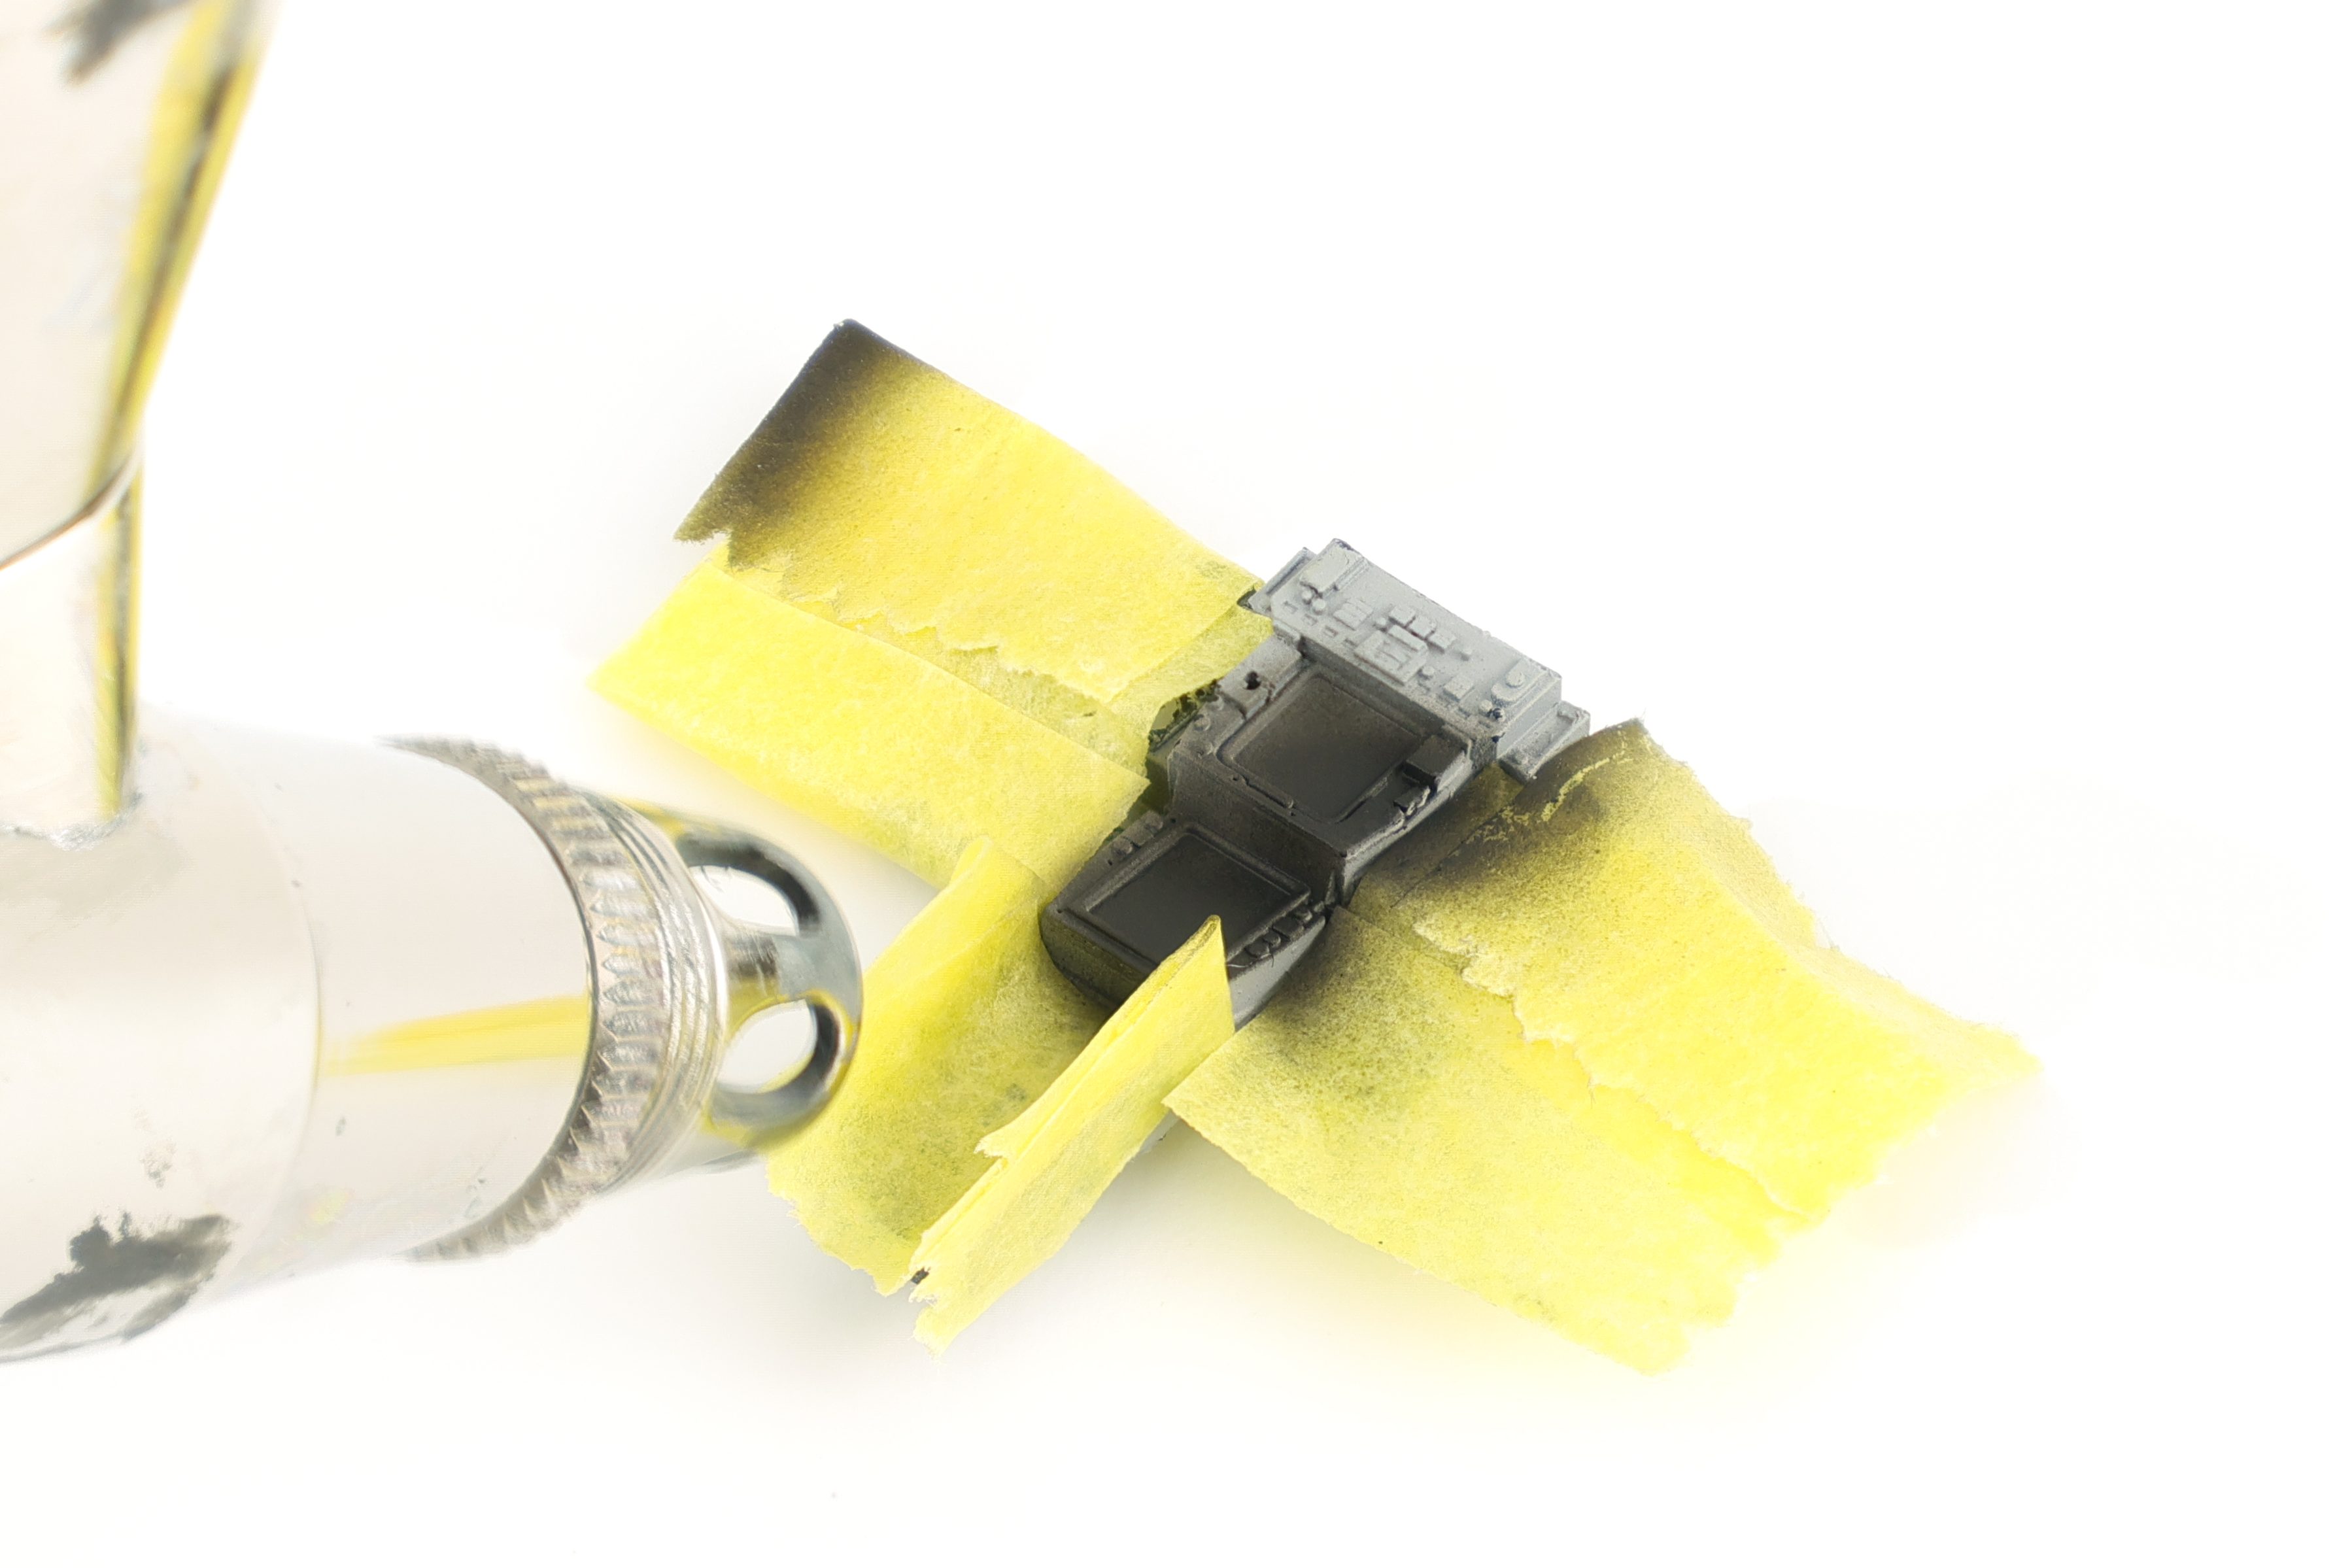
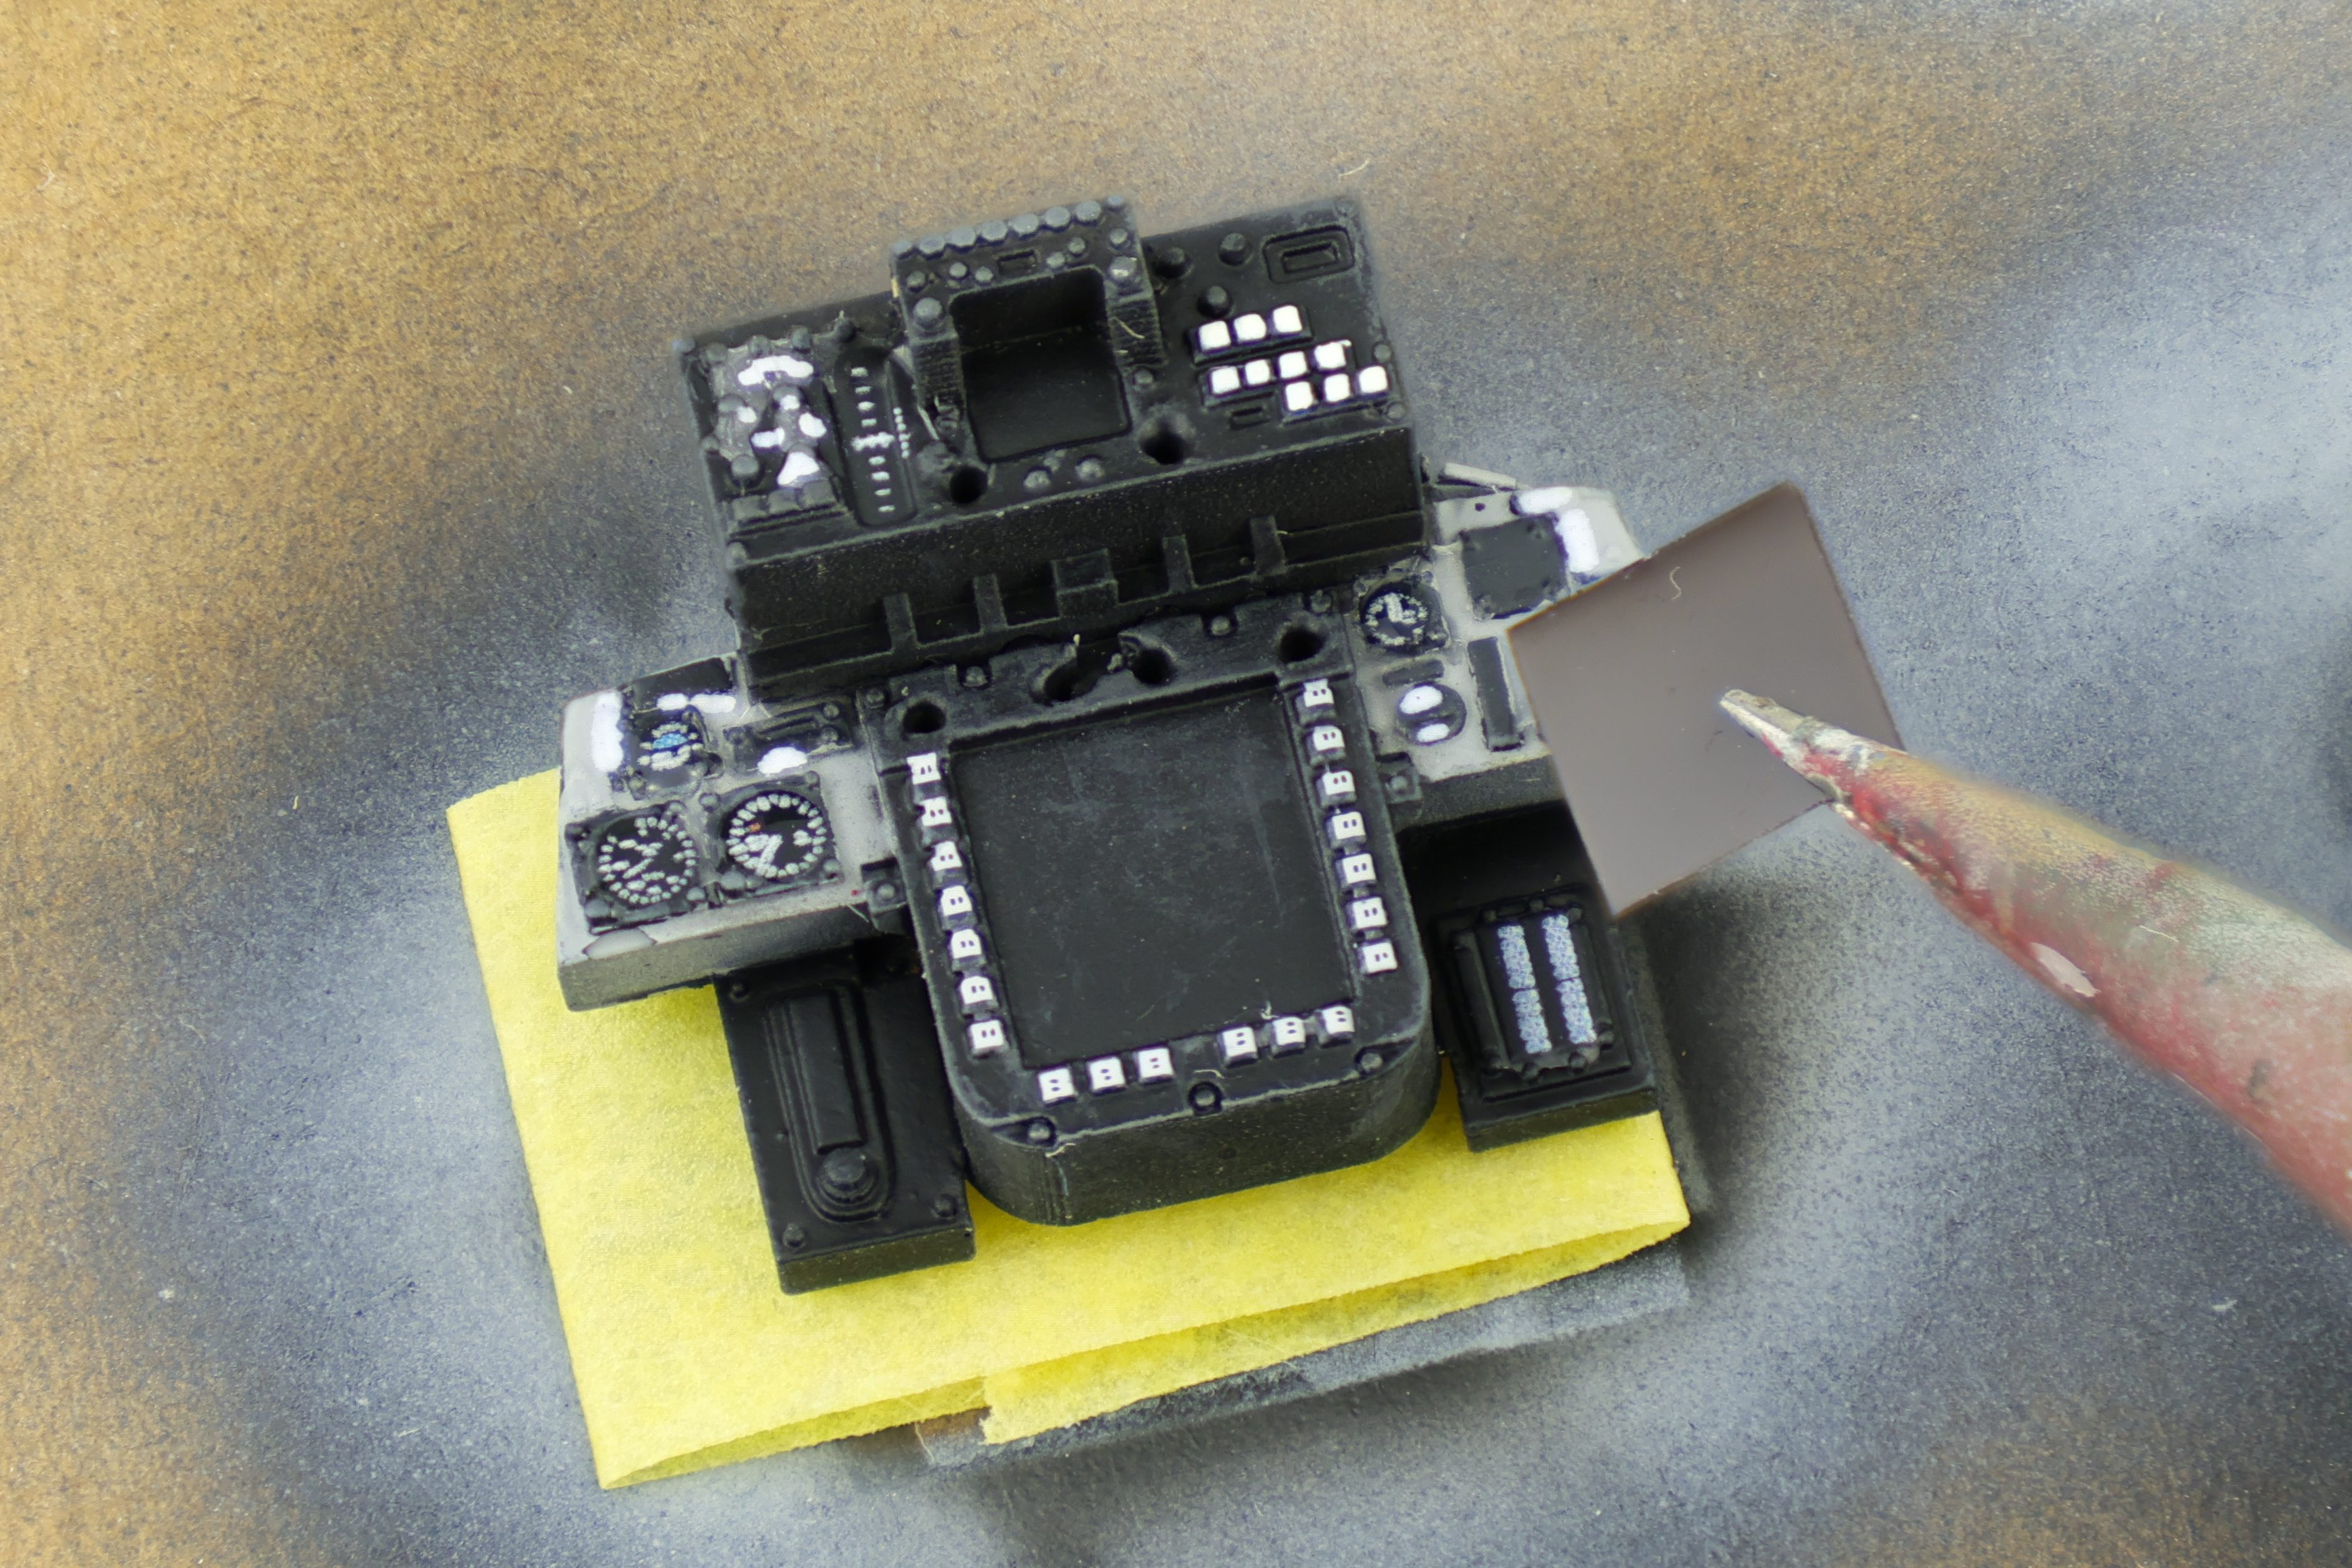
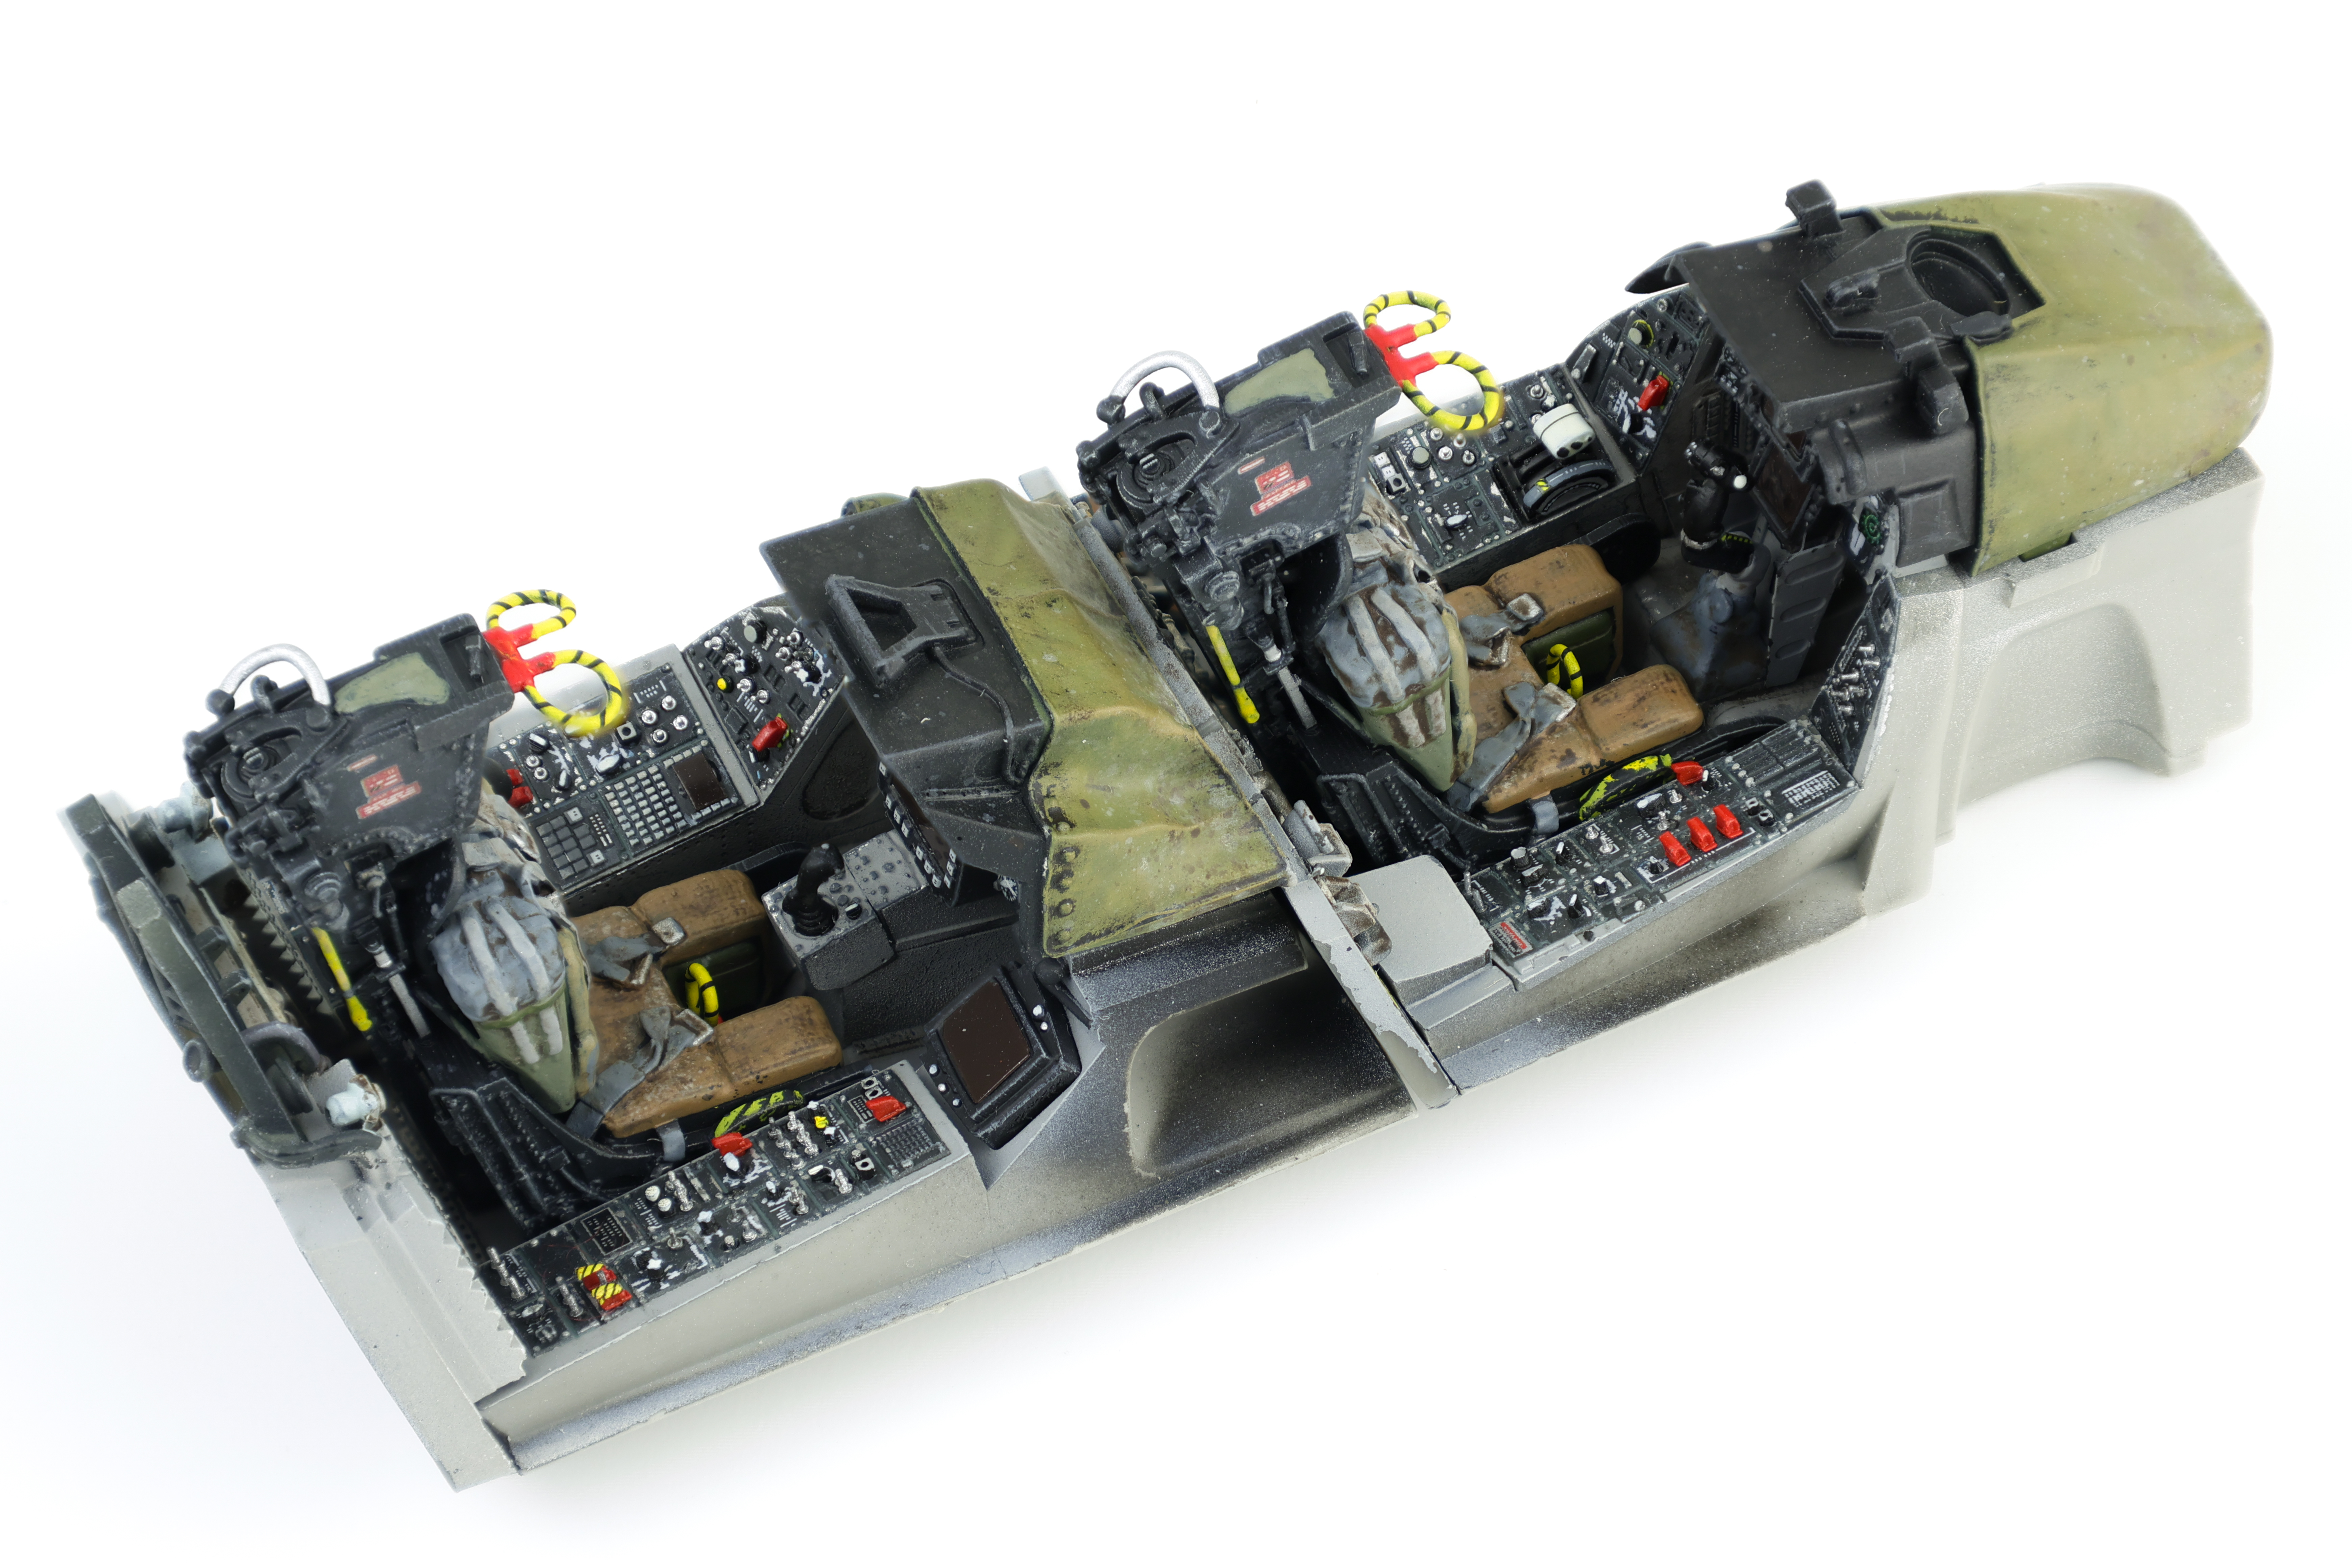
I then moved on to working on the front and rear instrument panels. These were somewhat less straightforward than the cockpit tubs as the paintwork required for them required some delicate masking. As indicated by the instructions and reference photos the instruments themselves were painted black with the panel itself finished in grey. I chose to try out a new technique for painting the instrument panels and I opted to first paint them black, followed by hairspray chipping, with grey following over top.
This would allow me to use the raised detail of the instruments to chip off the grey, revealing the black underneath. I think this approach worked ok, although there is some definite improvement to be found. I finished the panels with a medium grey drybrushing to highlight details.
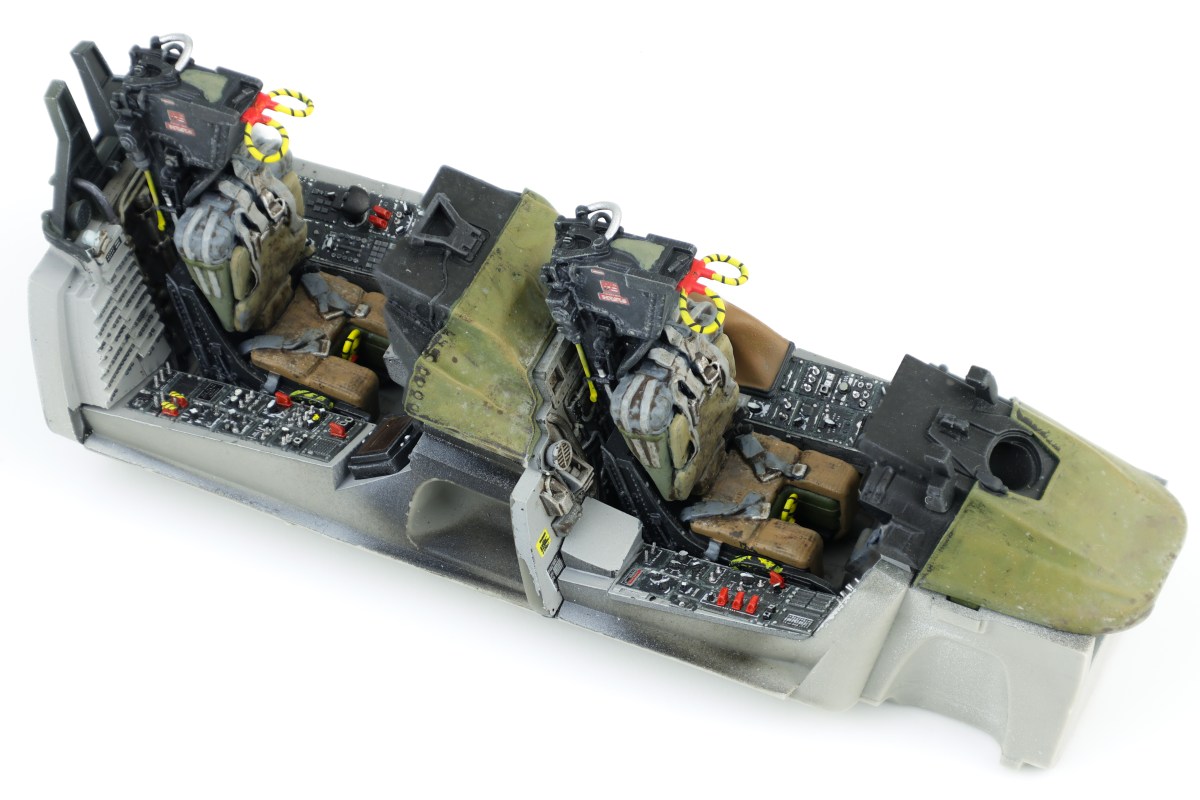
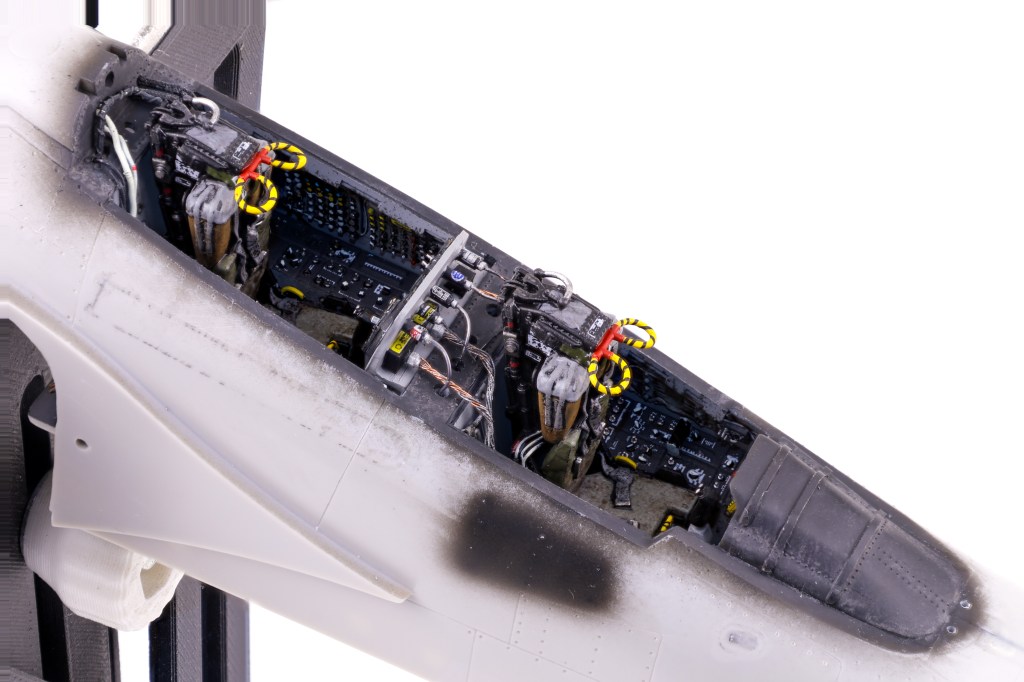
With the paintwork completed, I then moved on decals. I chose to use decals from Anyz and Jira-Gio to placard the side and instrument panels. This really helps to bring the cockpit alive and is a really key step in finishing the cockpit. After the decals dried, I applied a grey wash in-between the panels and a dark brown wash on the cockpit floor. After sealing the cockpit in a matt varnish, I decided that I wanted to try something new when it came to the main displays. I chose to use photography film to recreate the displays as they provide a really nice reflective finish.
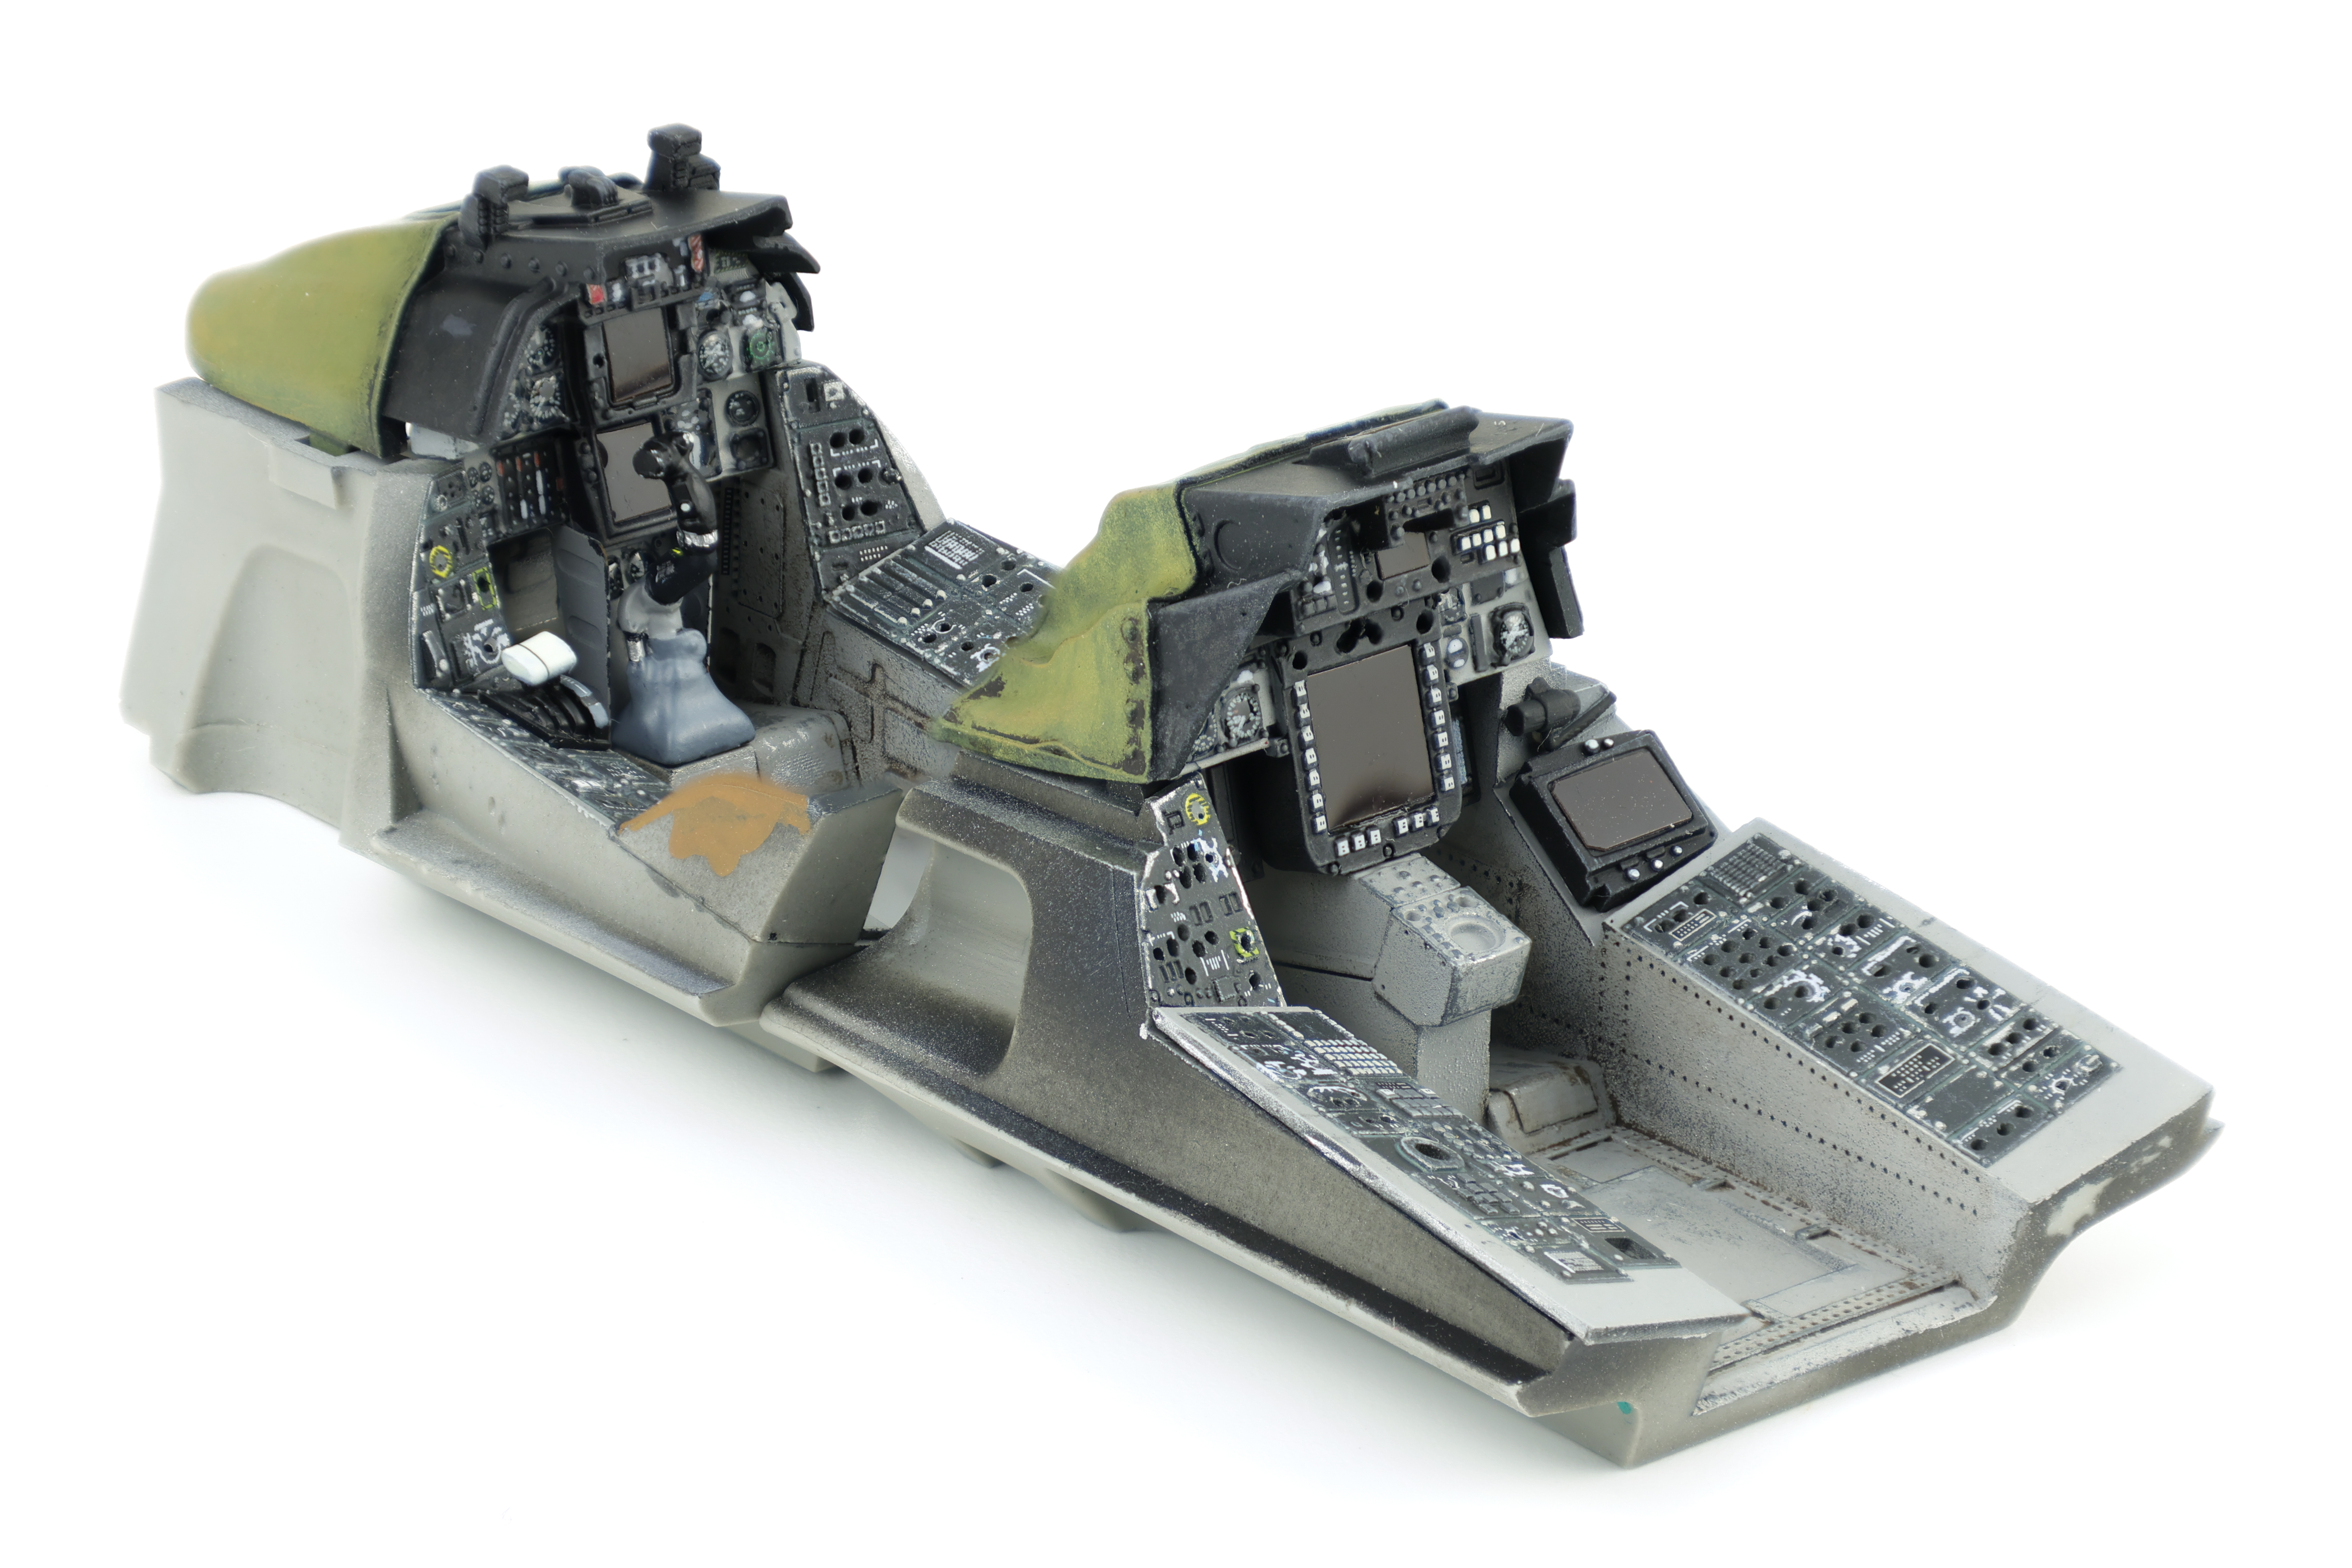
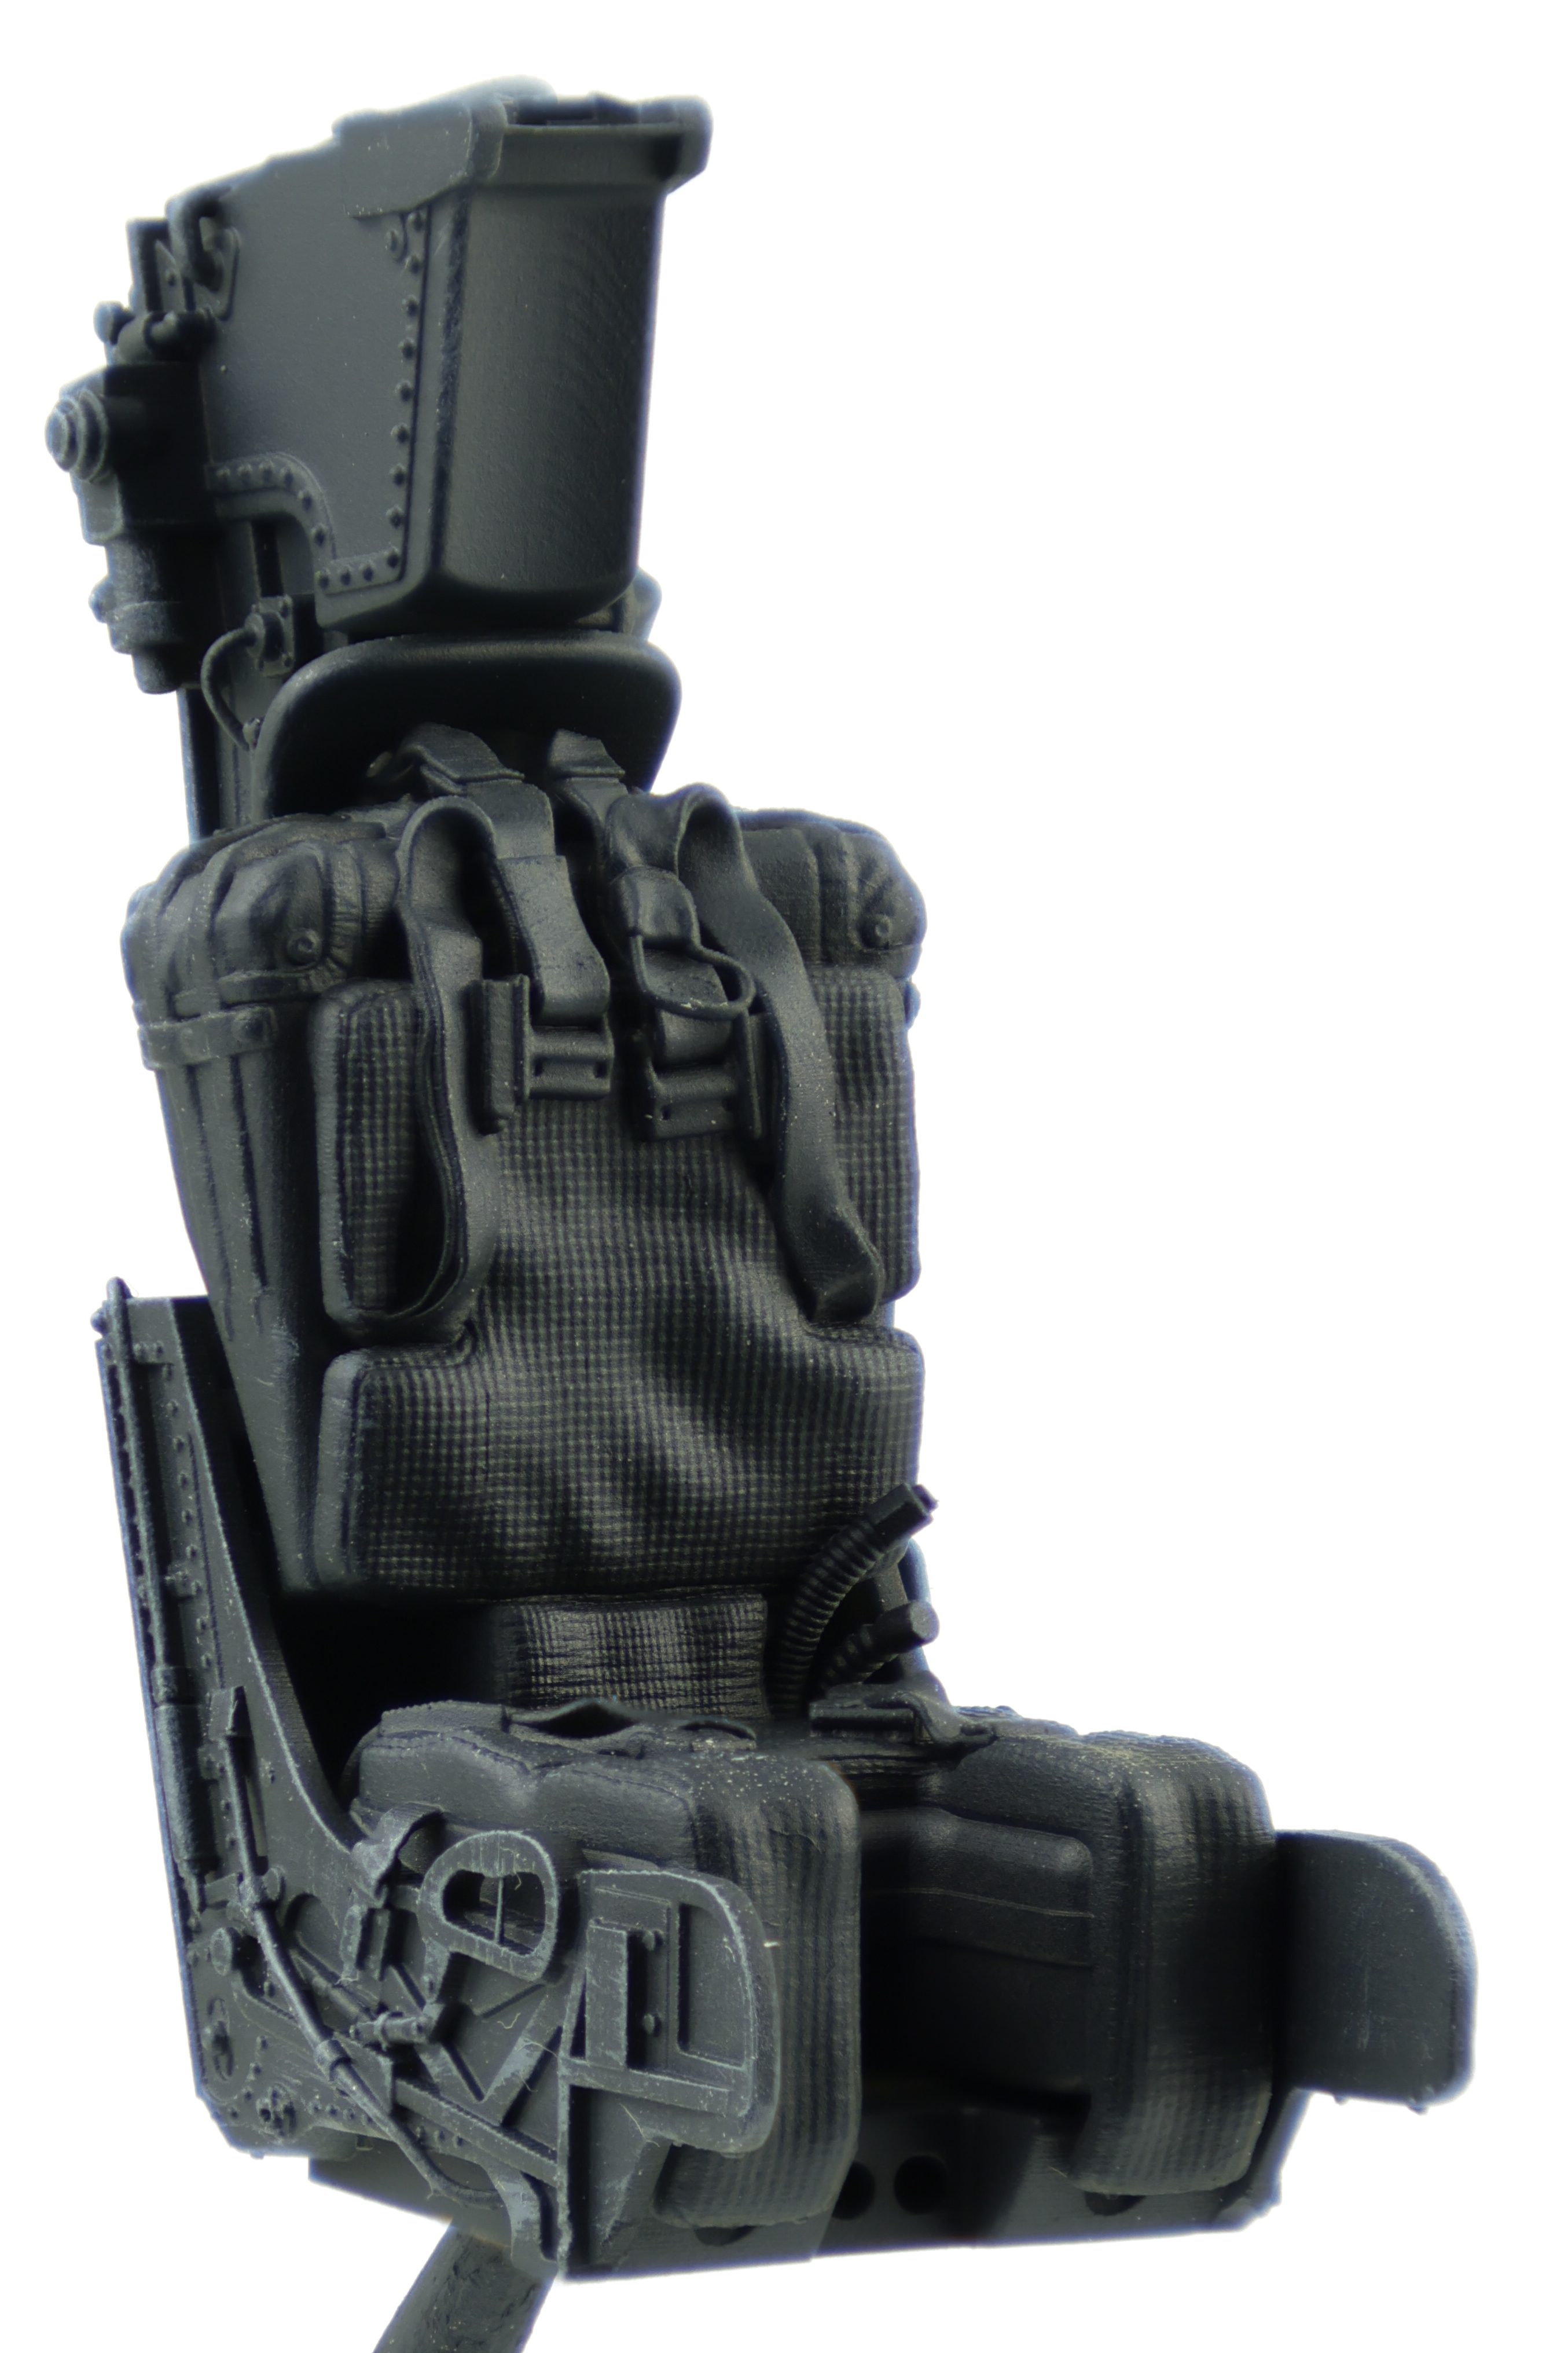
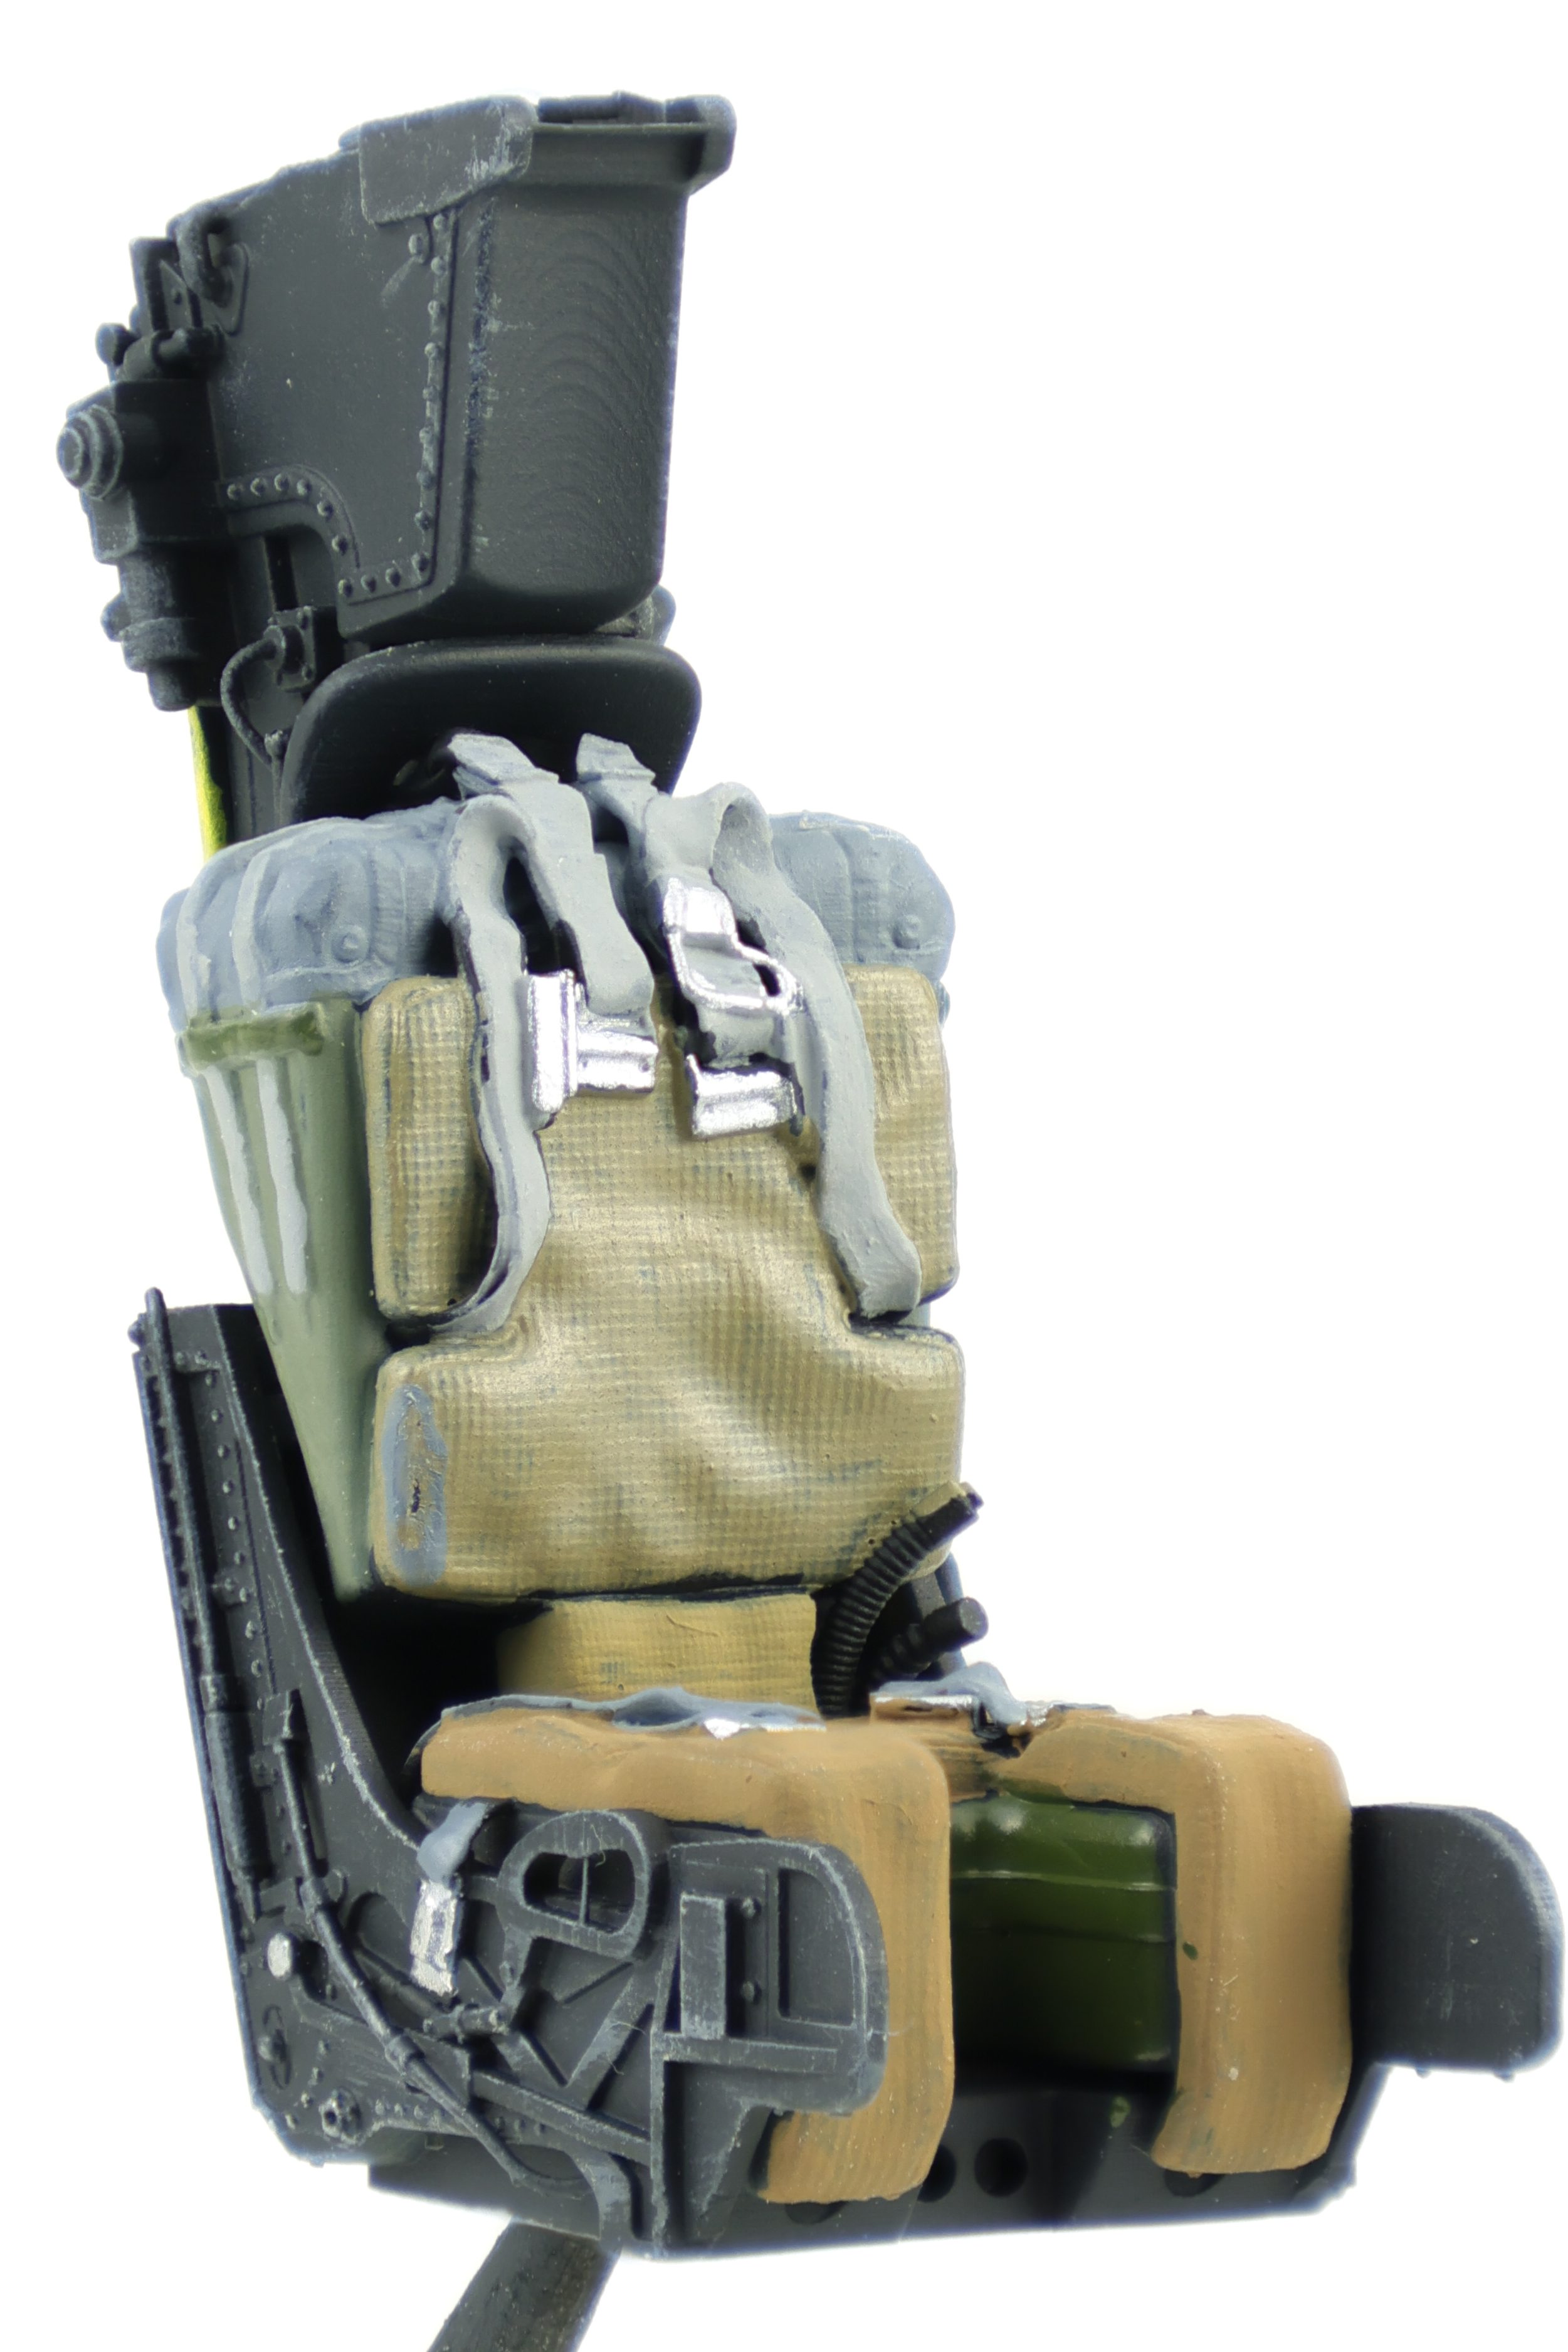
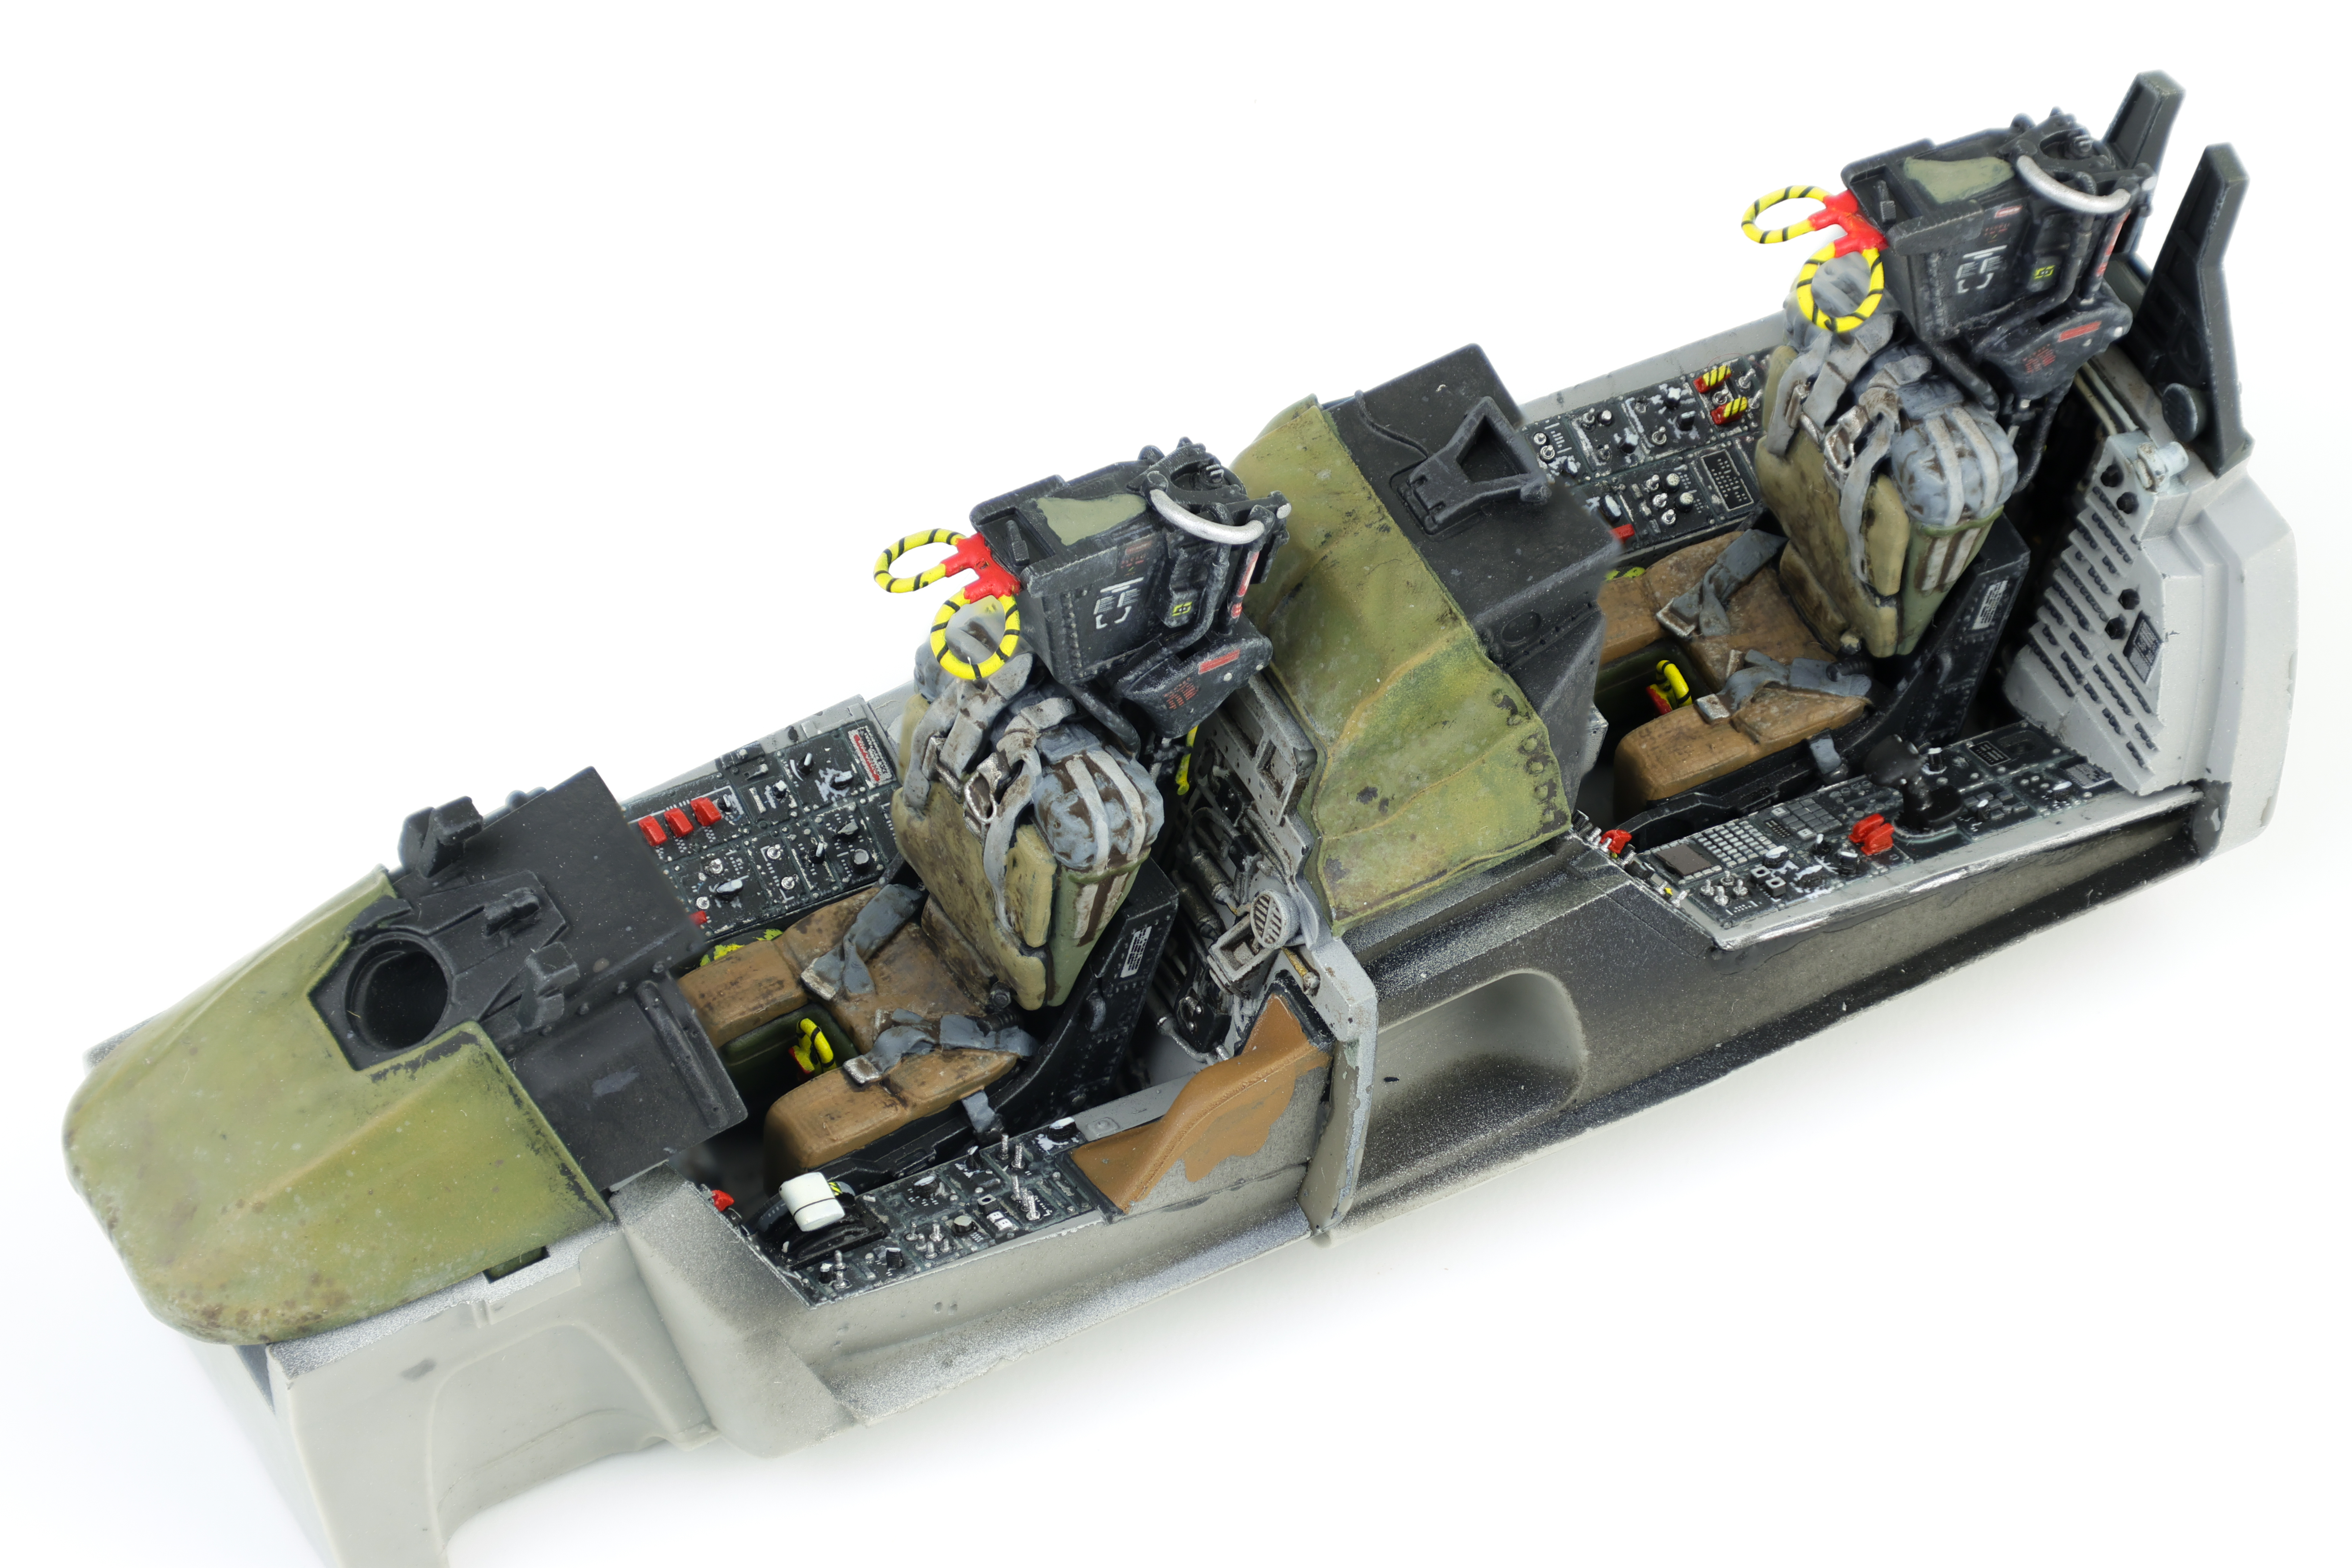
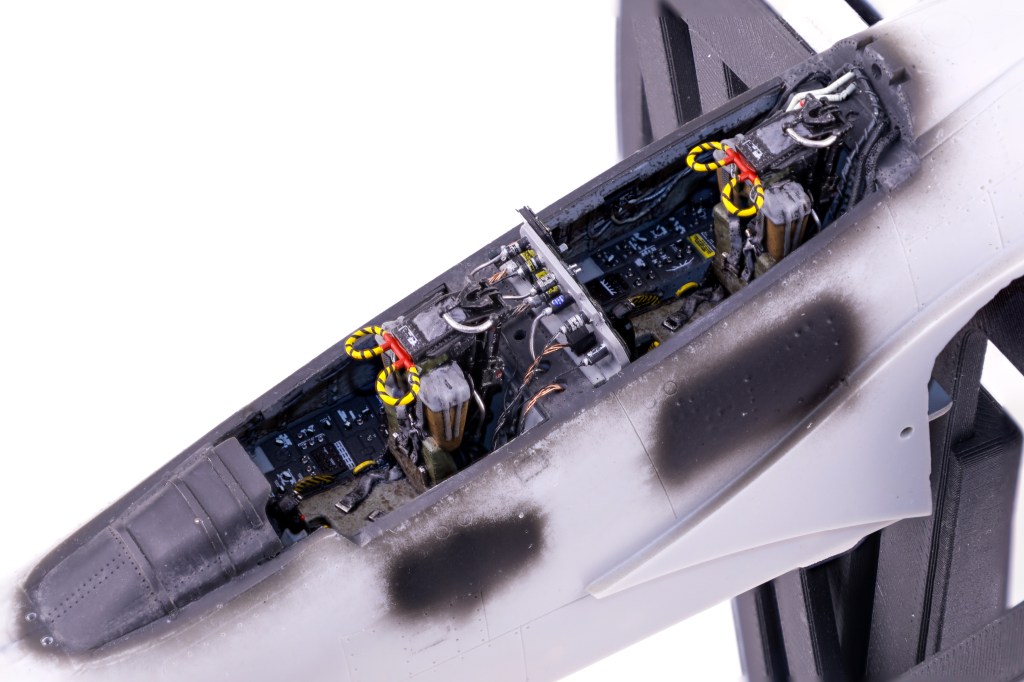
Next up, I decided to work on the ejection seats. These were 3d printed from MCC and are very well detailed. After a primer coat of Mr. Surfacer 1500 black followed by a layer of Tamiya Nato Black, I got to work brush painting all the various elements of the ejection seat. This meant painting the seat cushions/belts in the appropriate browns and greens, along with the various wires and cables attached to the seat.
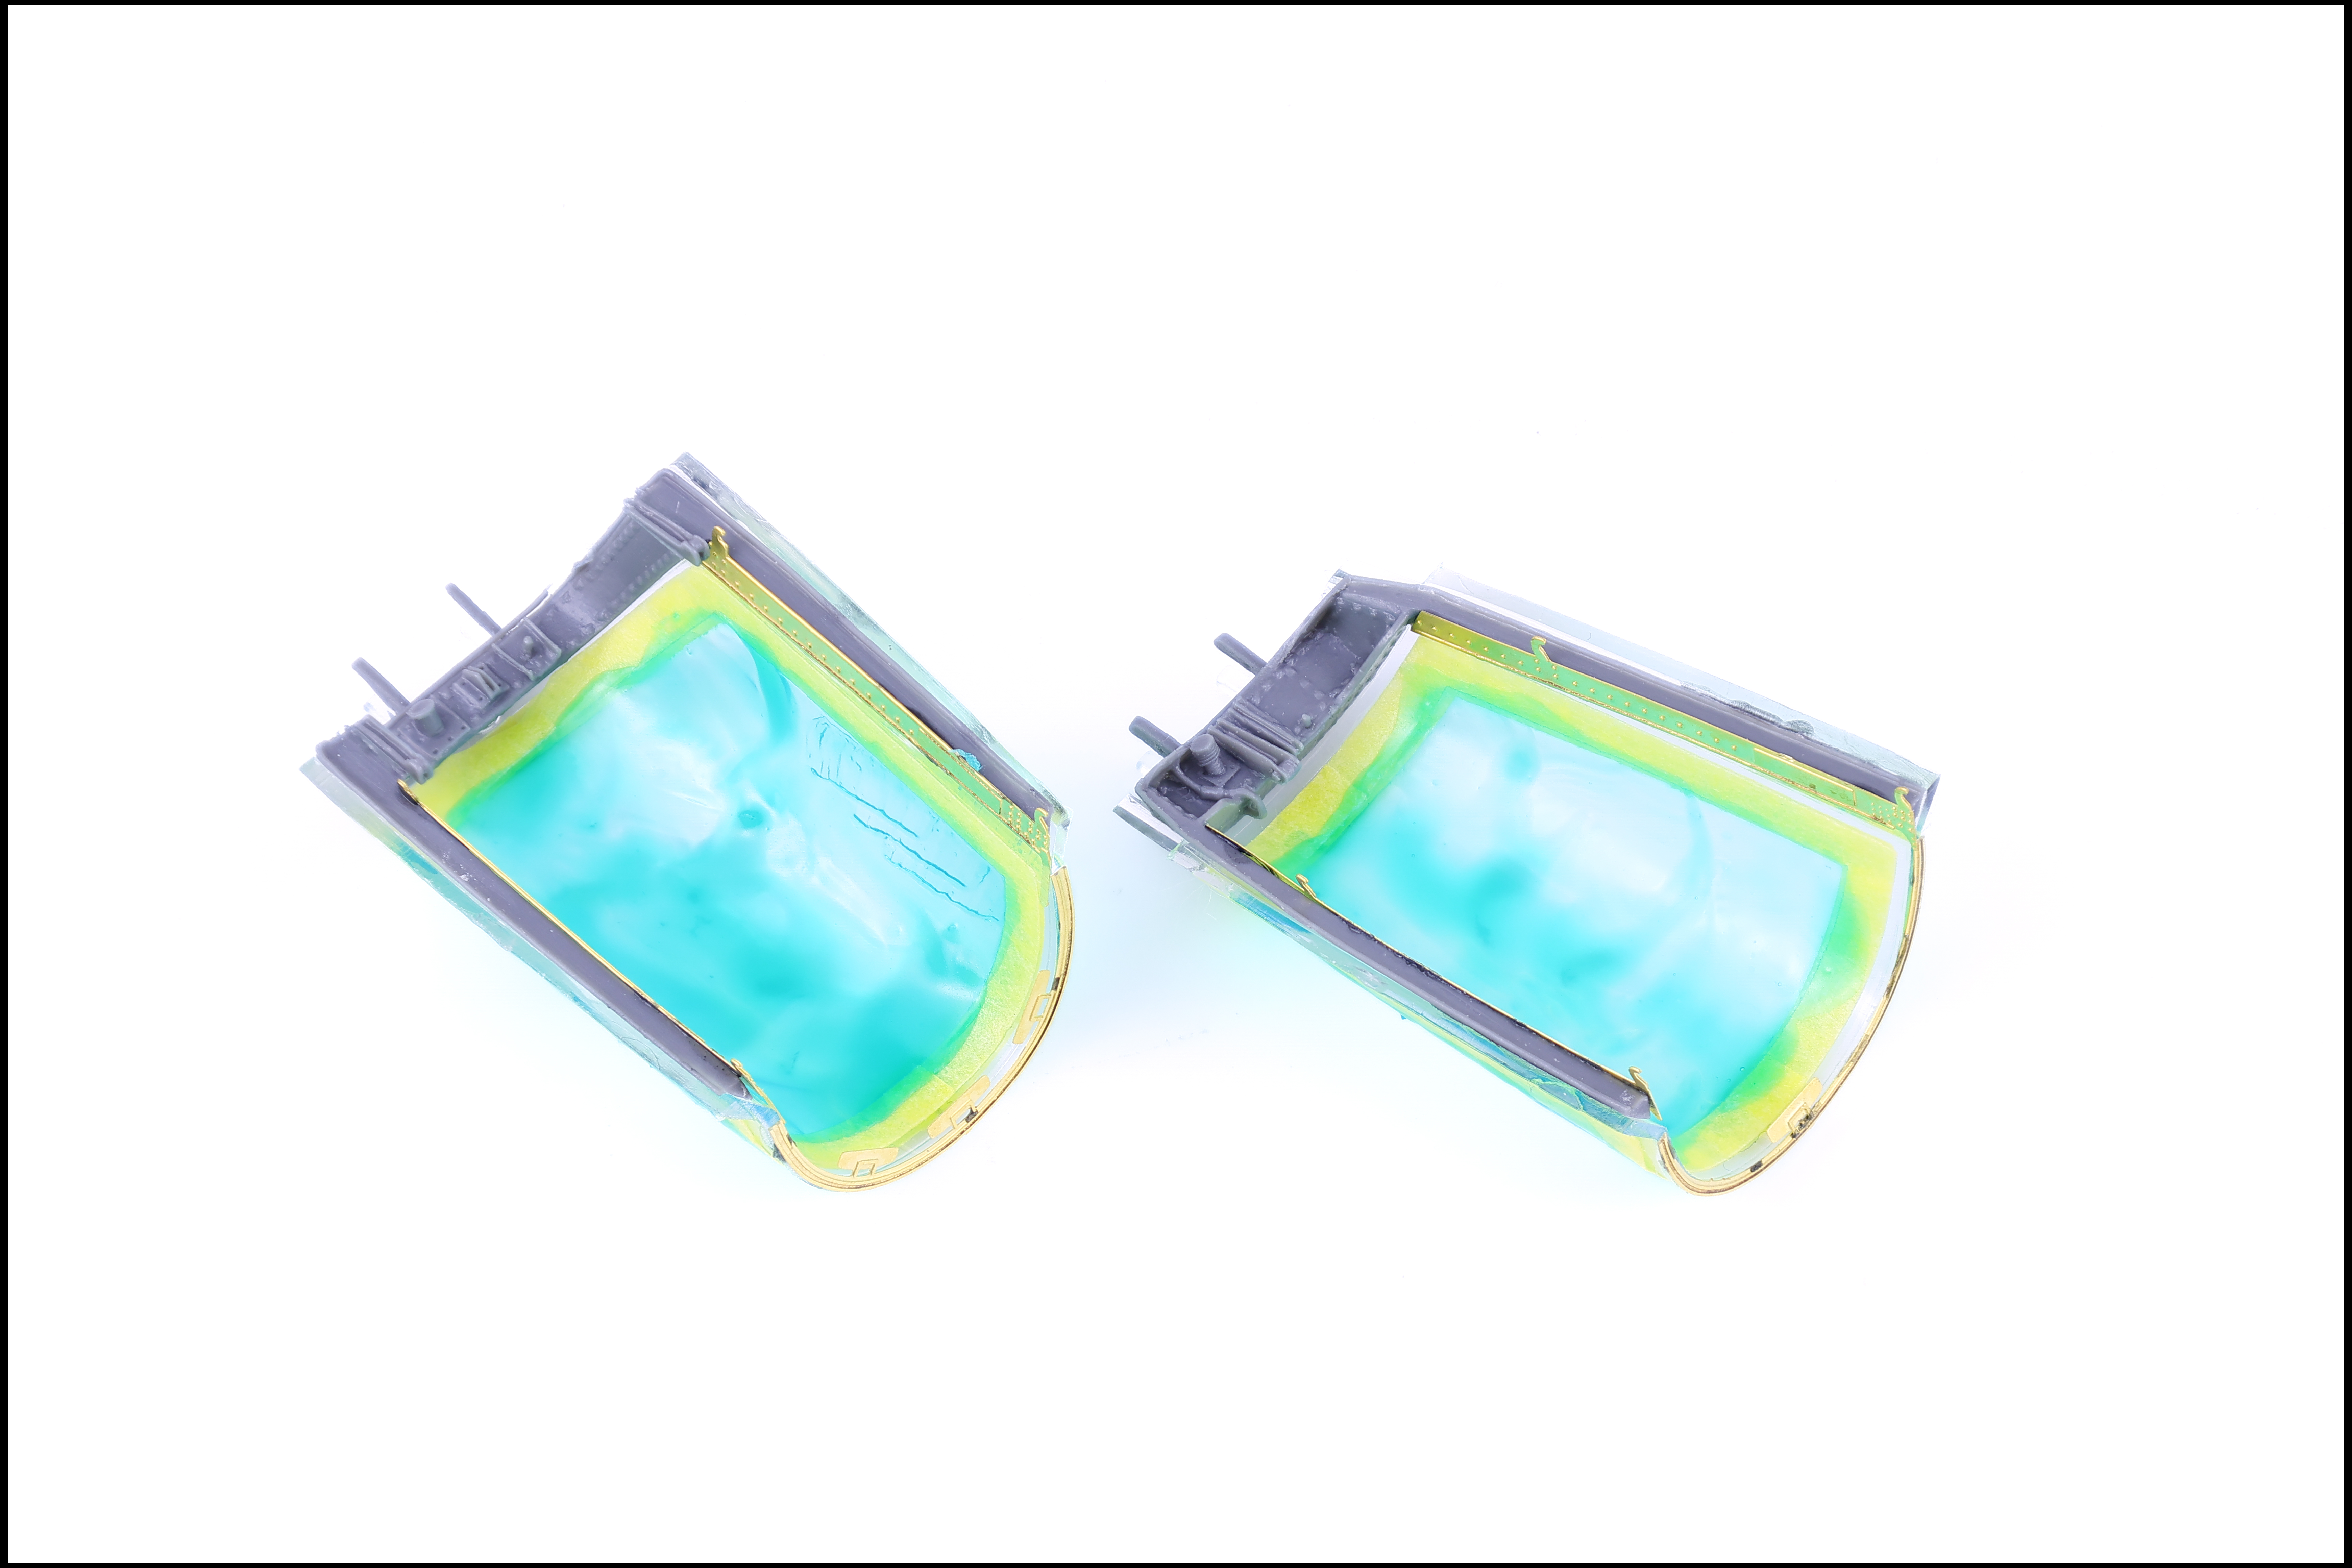
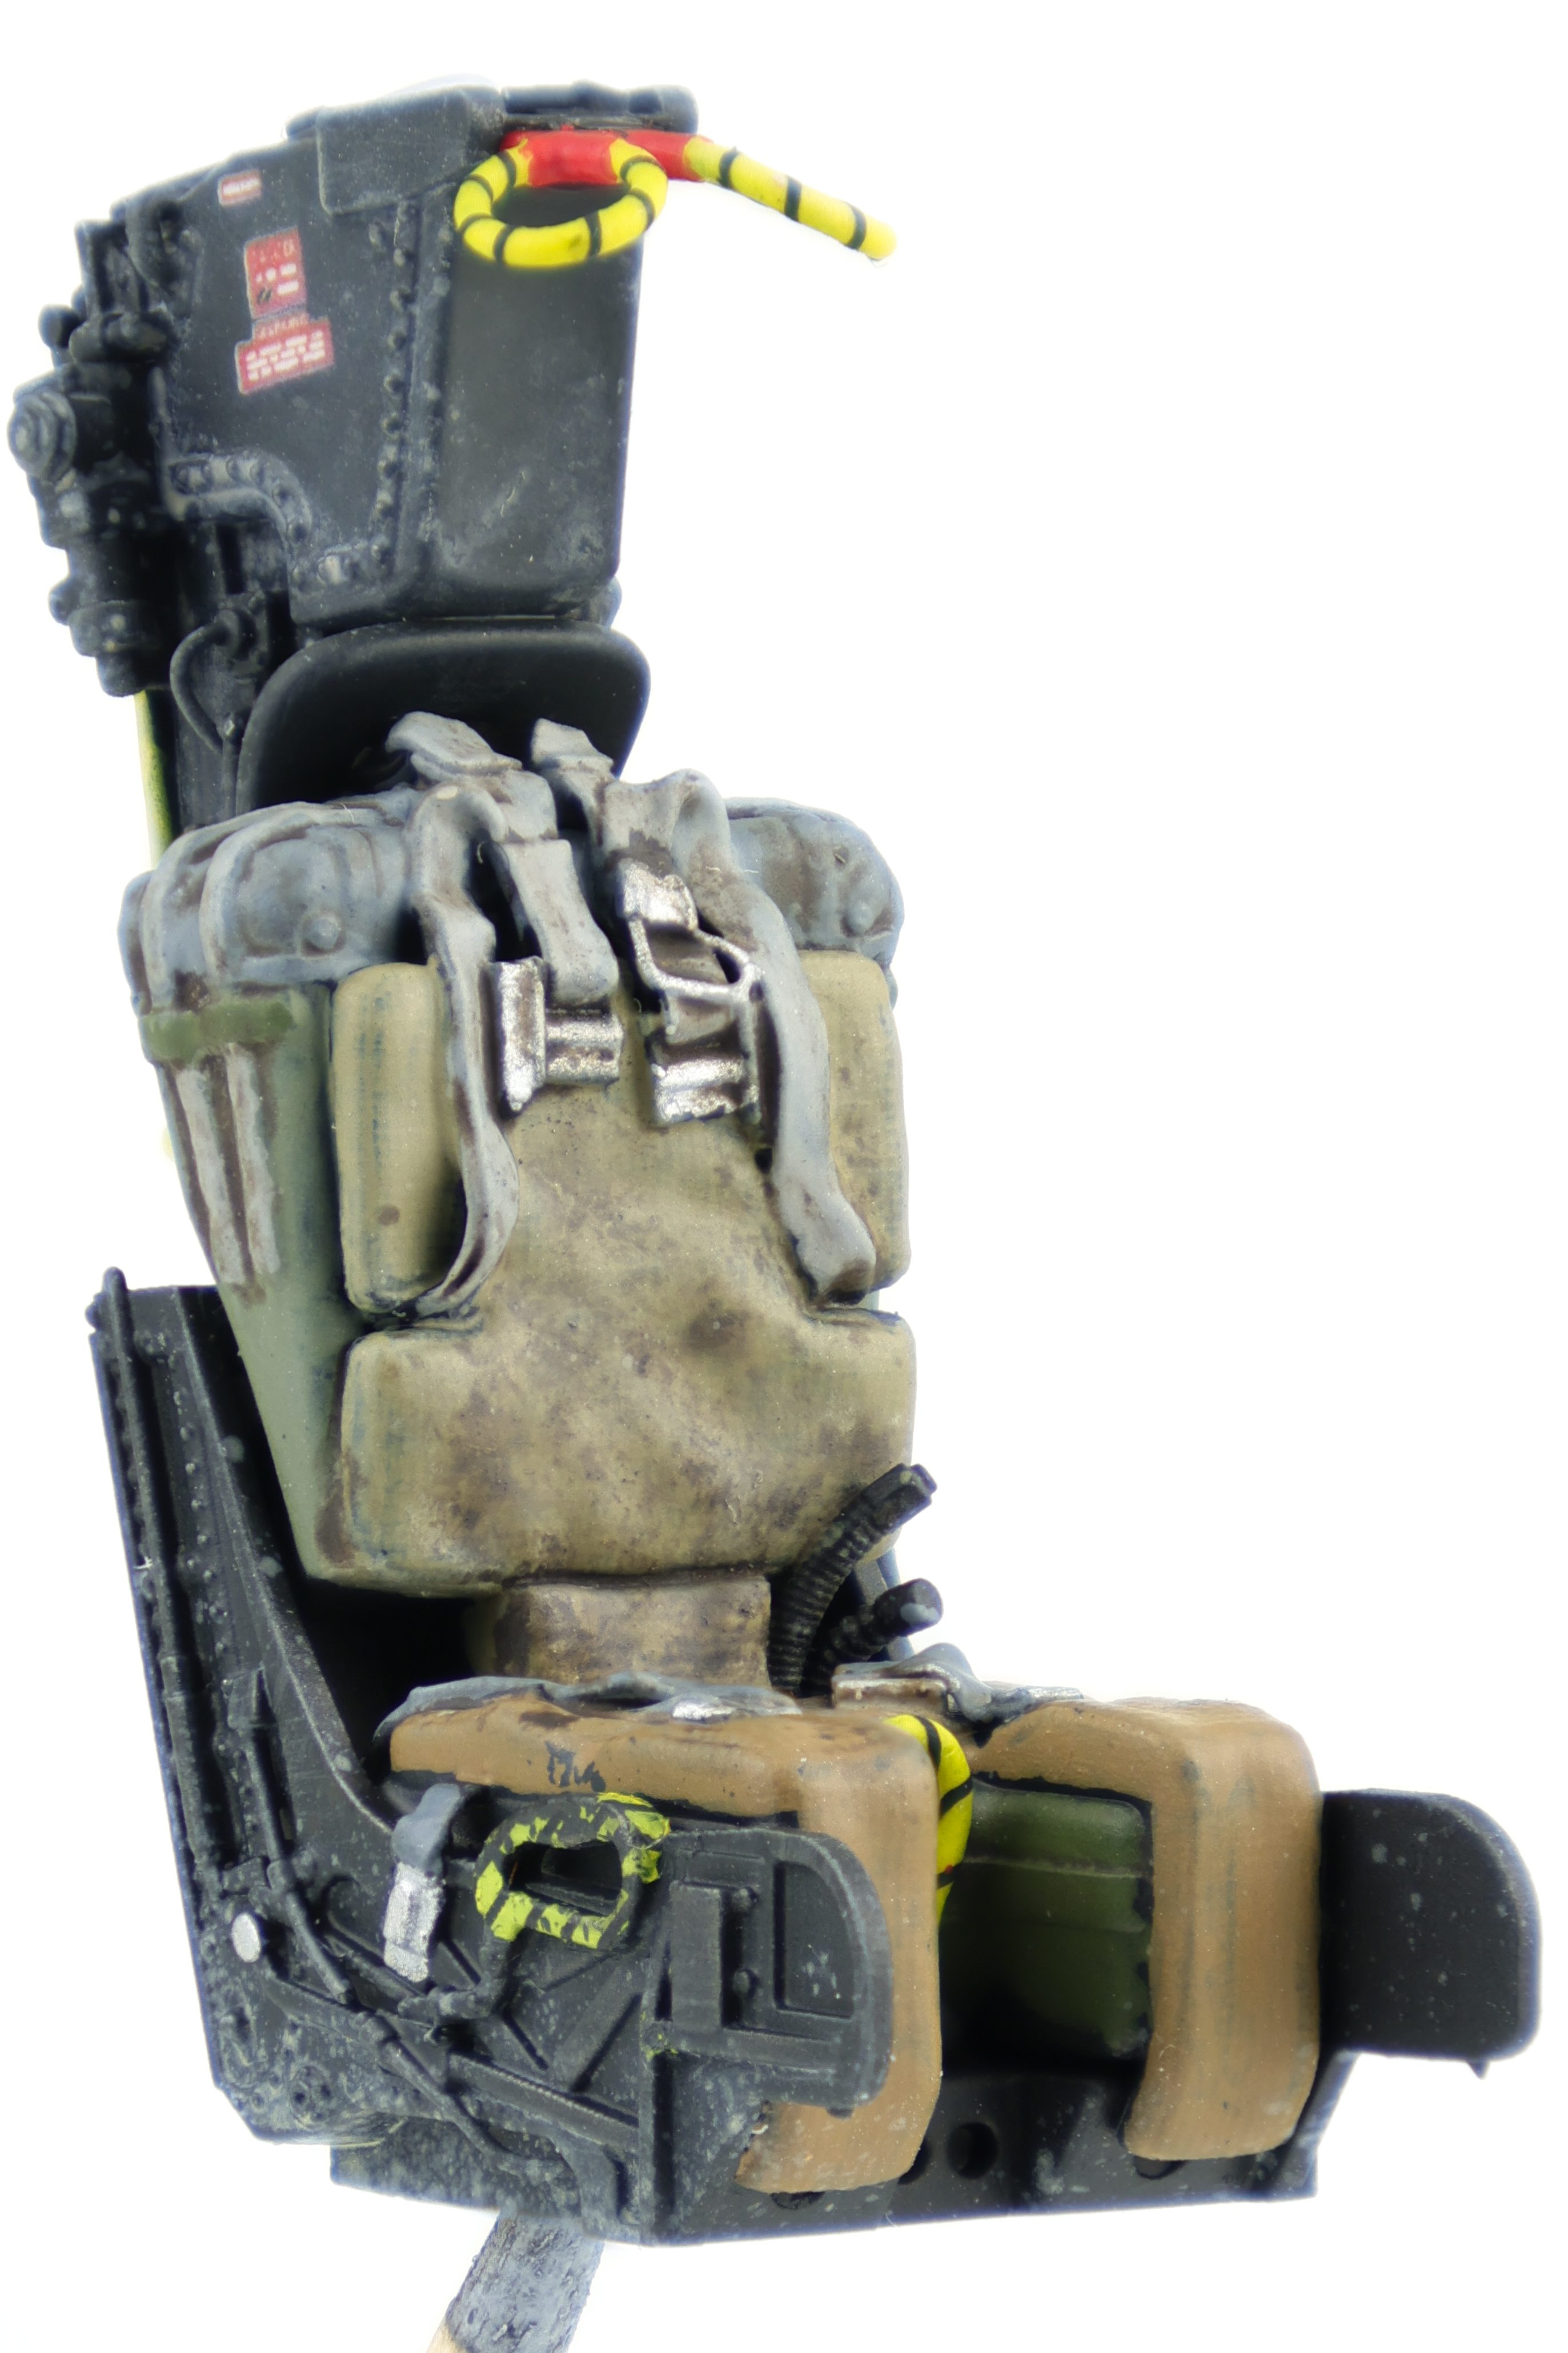
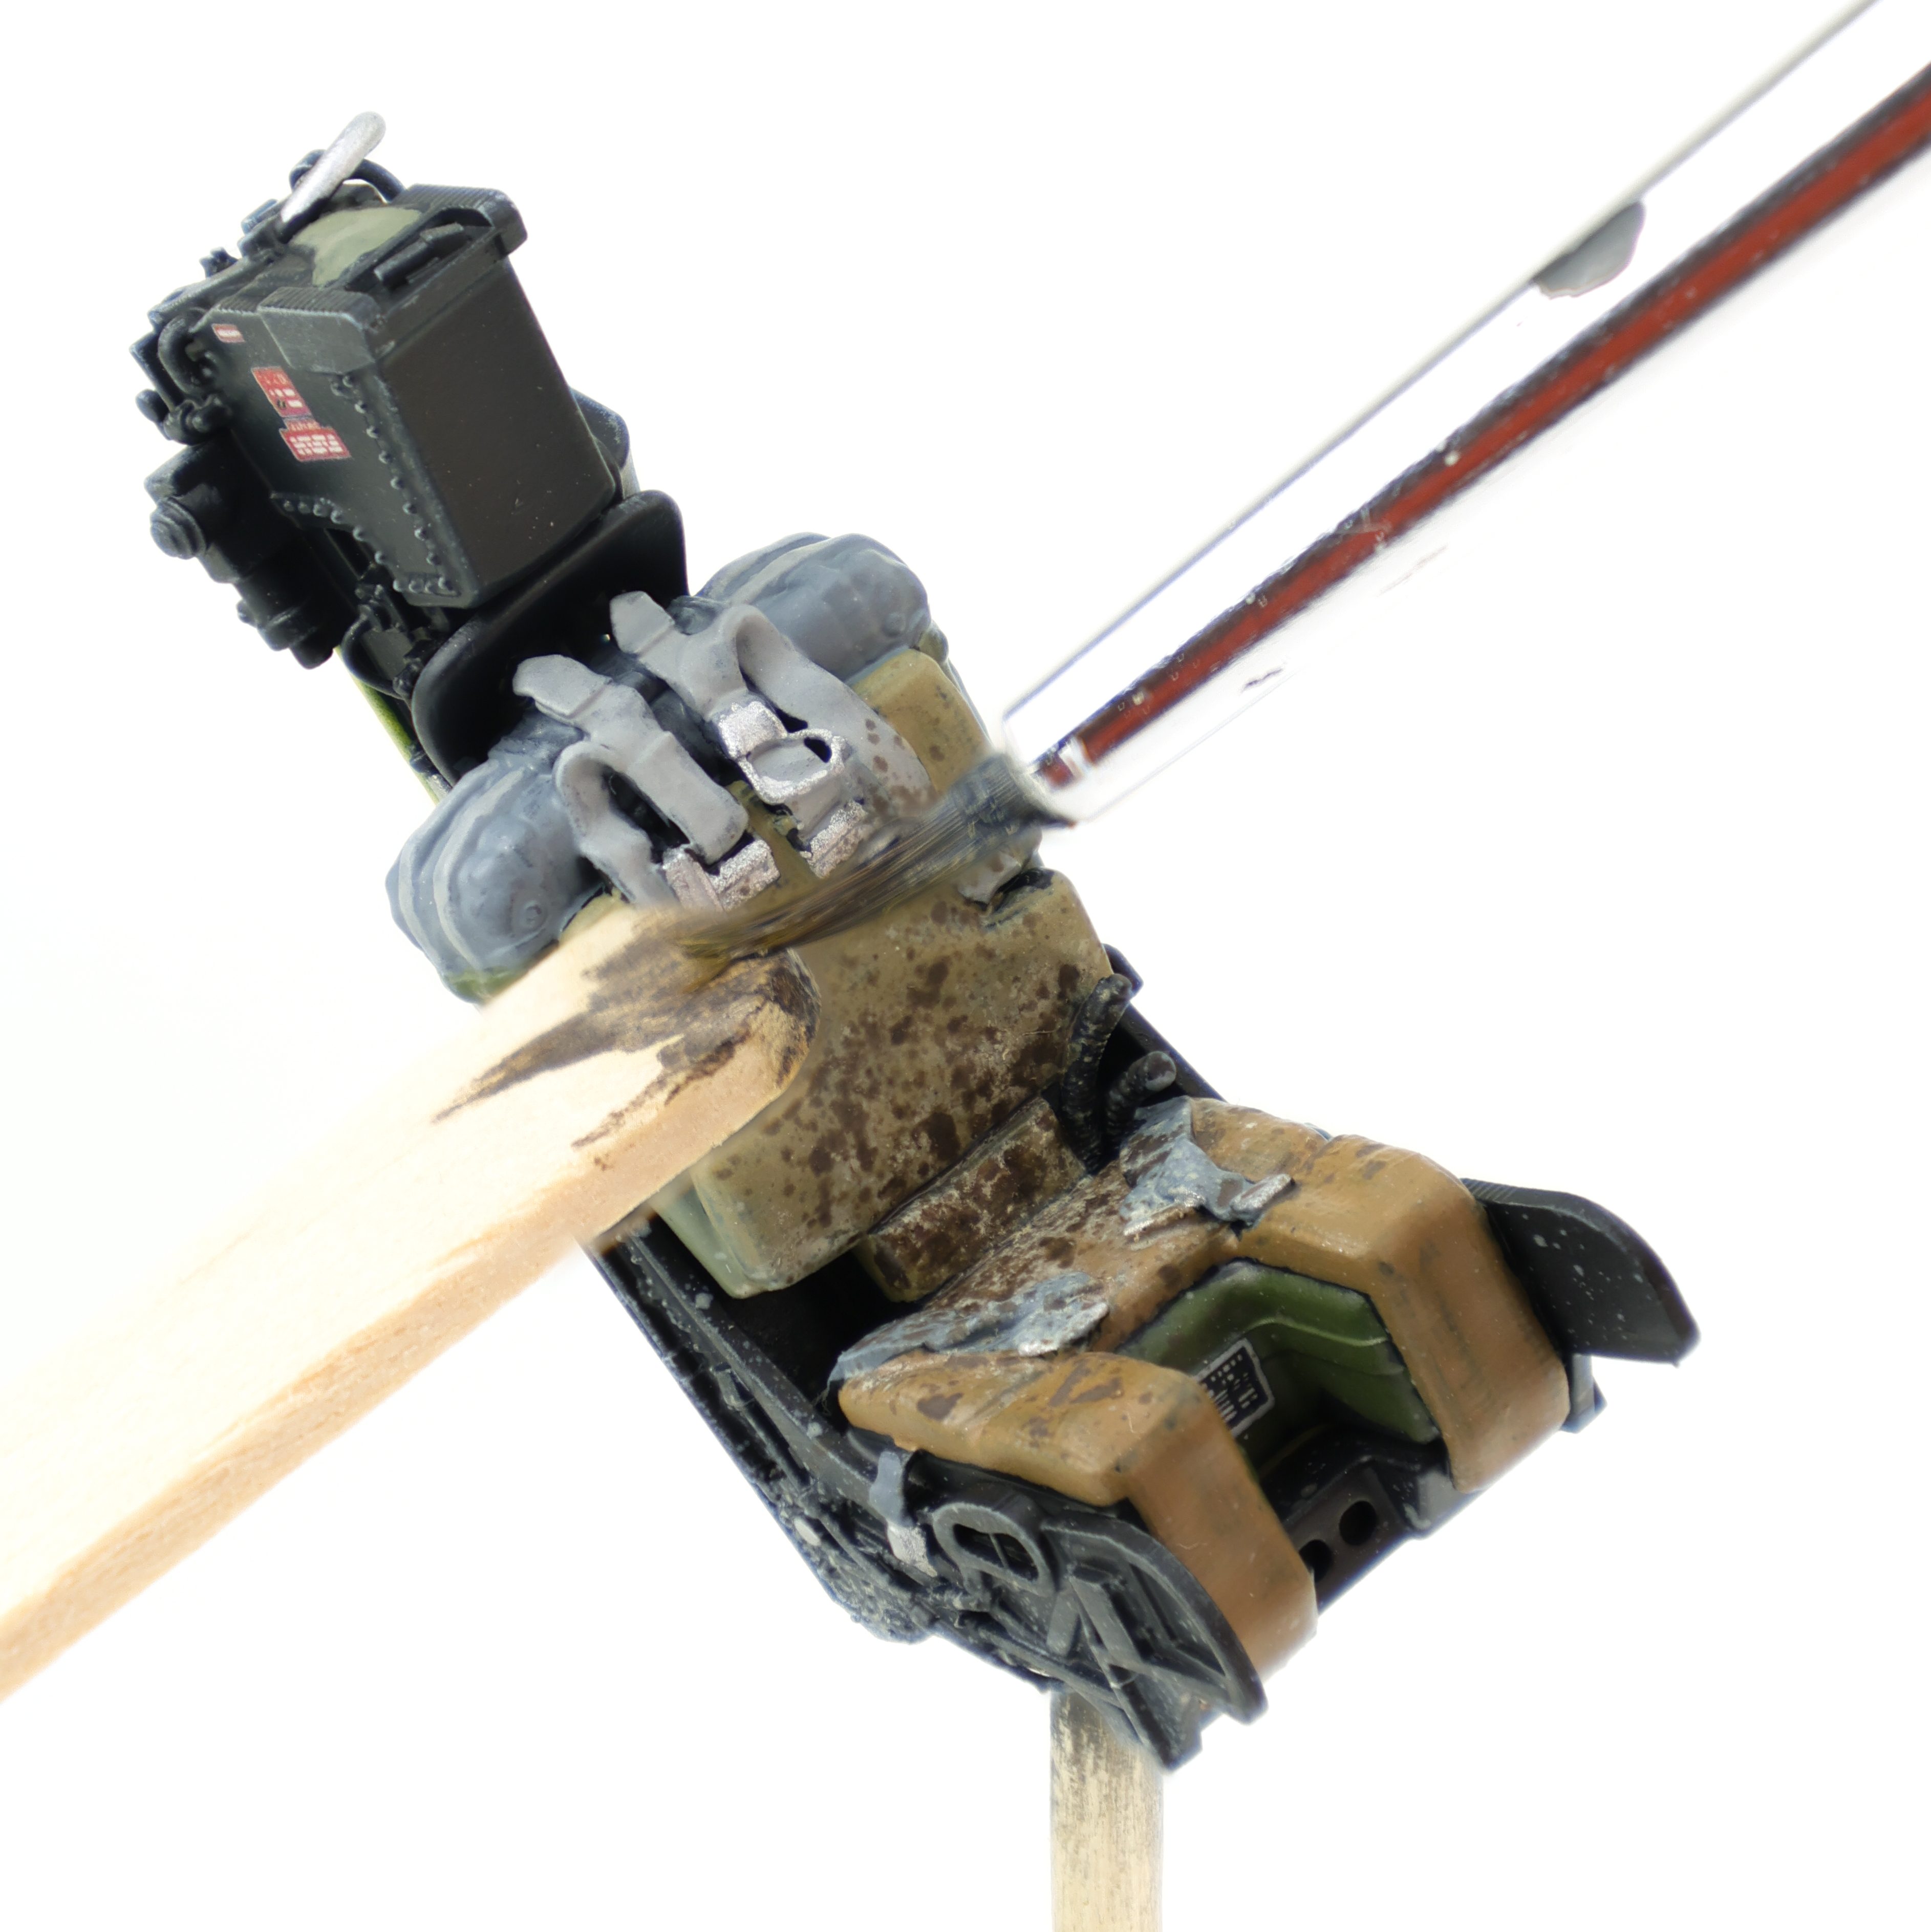
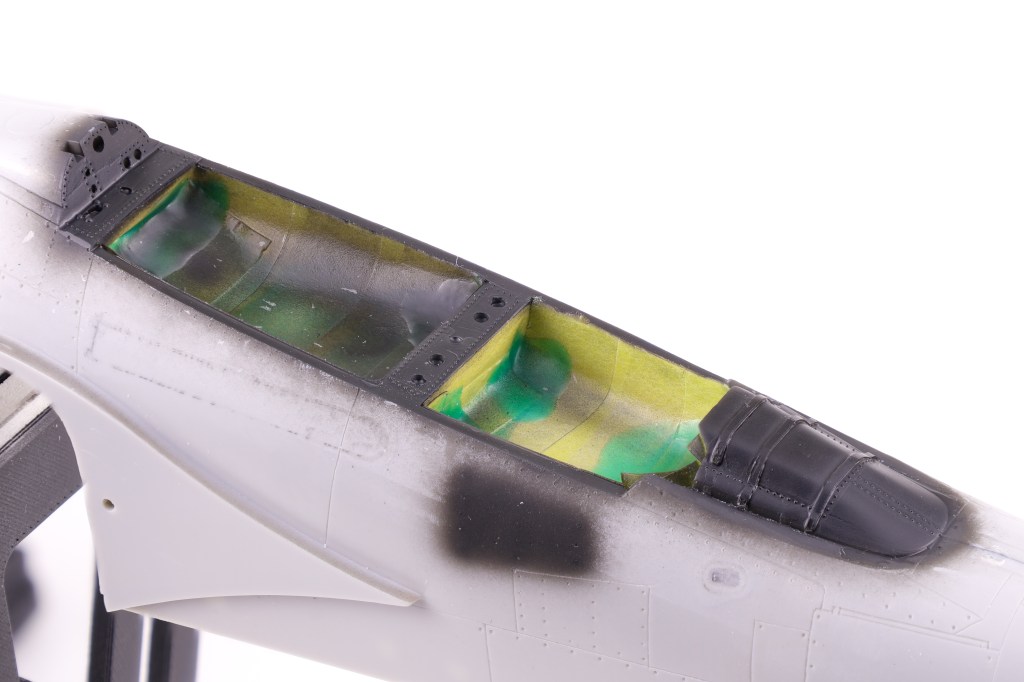
Weathering the seat was done with oils to recreate years of staining and discolouration on the seat cushions. I chose two shades of oils, a dark brown shade and a lighter dust colour. I first flicked on each of the two colours before blending them with oil paint thinner. This helped to create random shapes and intensities of both colours and really helps to achieve a weathered look in the fabric which is what I was looking for. I utilized this same technique for the fabric coverings behind the instrument panels as I wanted to recreate what the fabric looked like after sitting in the sun for some time.
With the completion of the ejection seats, the cockpit on the F-14 was more or less completed. I added the Anyz swtiches along with the required cockpit parts (Control sticks and throttle). I was really quite happy with the end result here and I think it was a definite improvement over my previous Phantom cockpit. Next up: the Gear bay!
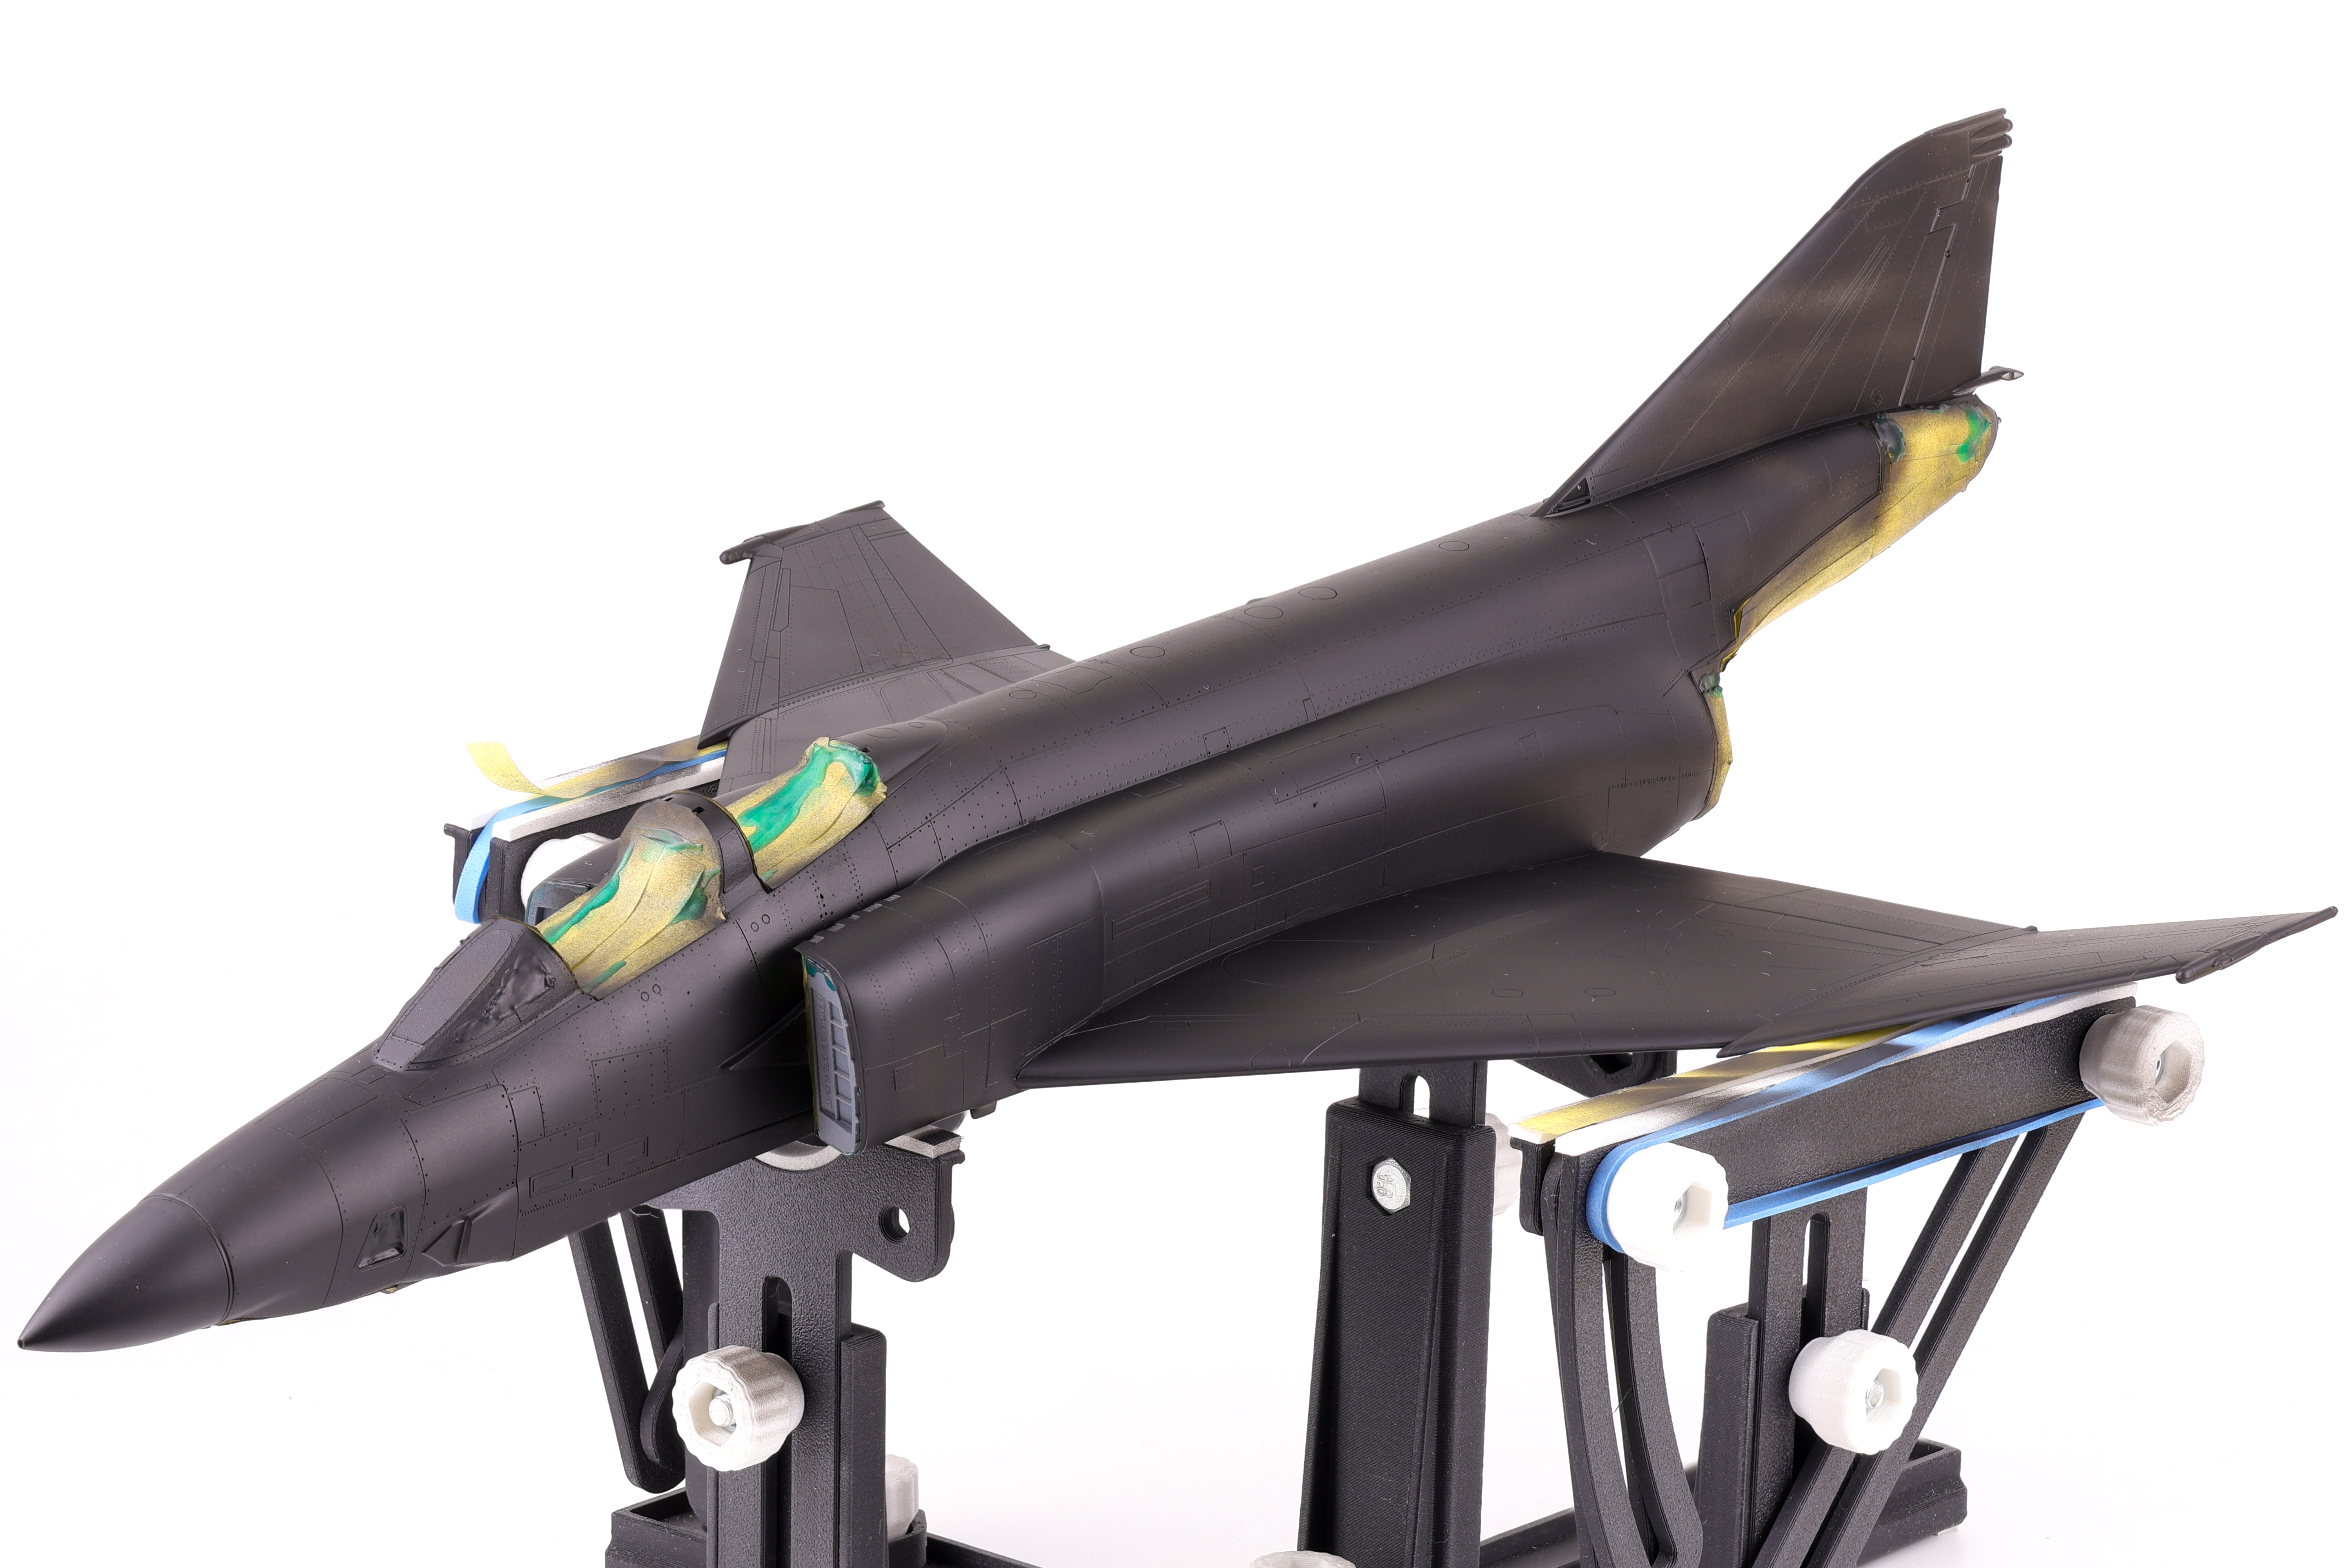
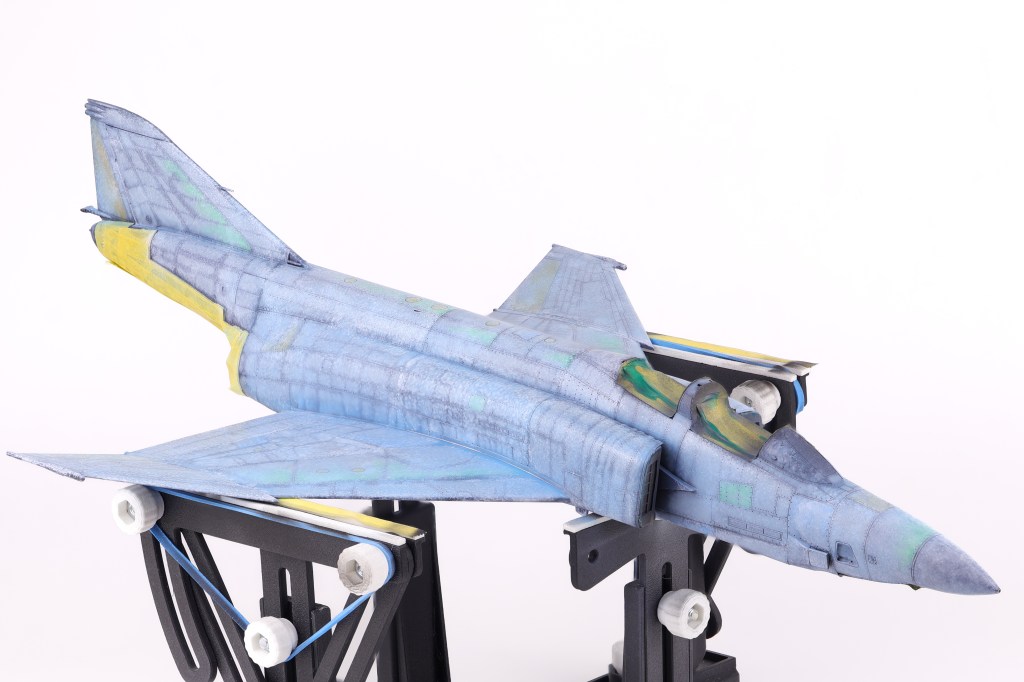
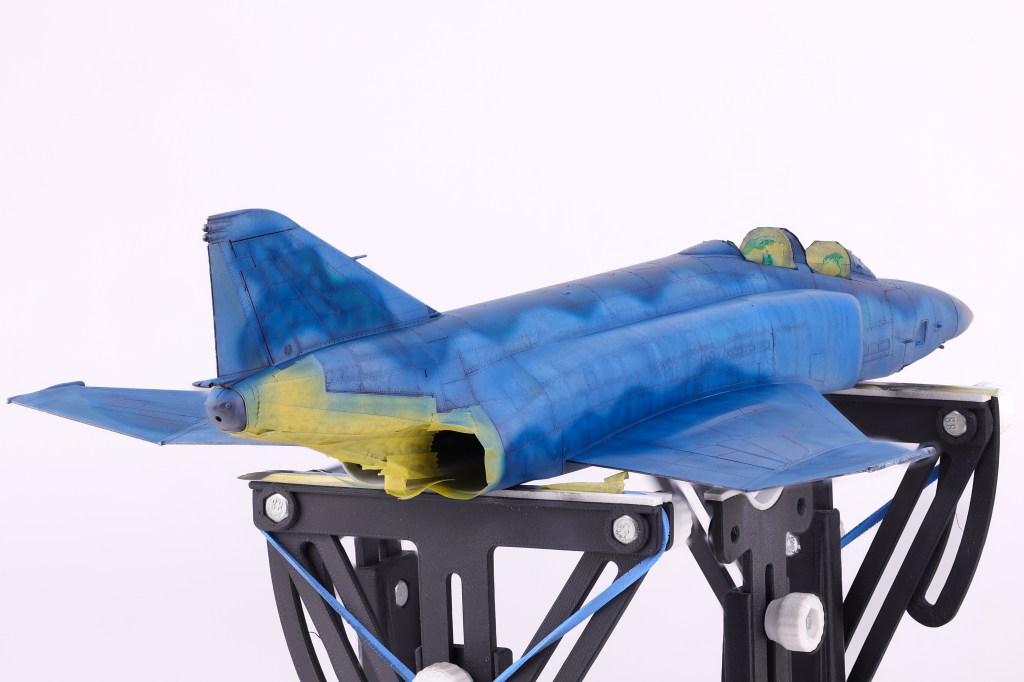
After several months on the bench, it came time to apply paint to the model. As with the majority of the models I build, I utilized the black basing technique to apply pre-shading to the model.
After the initial coat of Mr. Finishing surfacer black 1500, I used a generic light grey to serve as the initial marble coat. I wanted to make sure that my marble work was sufficiently light enough as if the base layers turned out too dark, the final paint coats would also appear too dark and require too much paint to bring the colour back into the final finish.
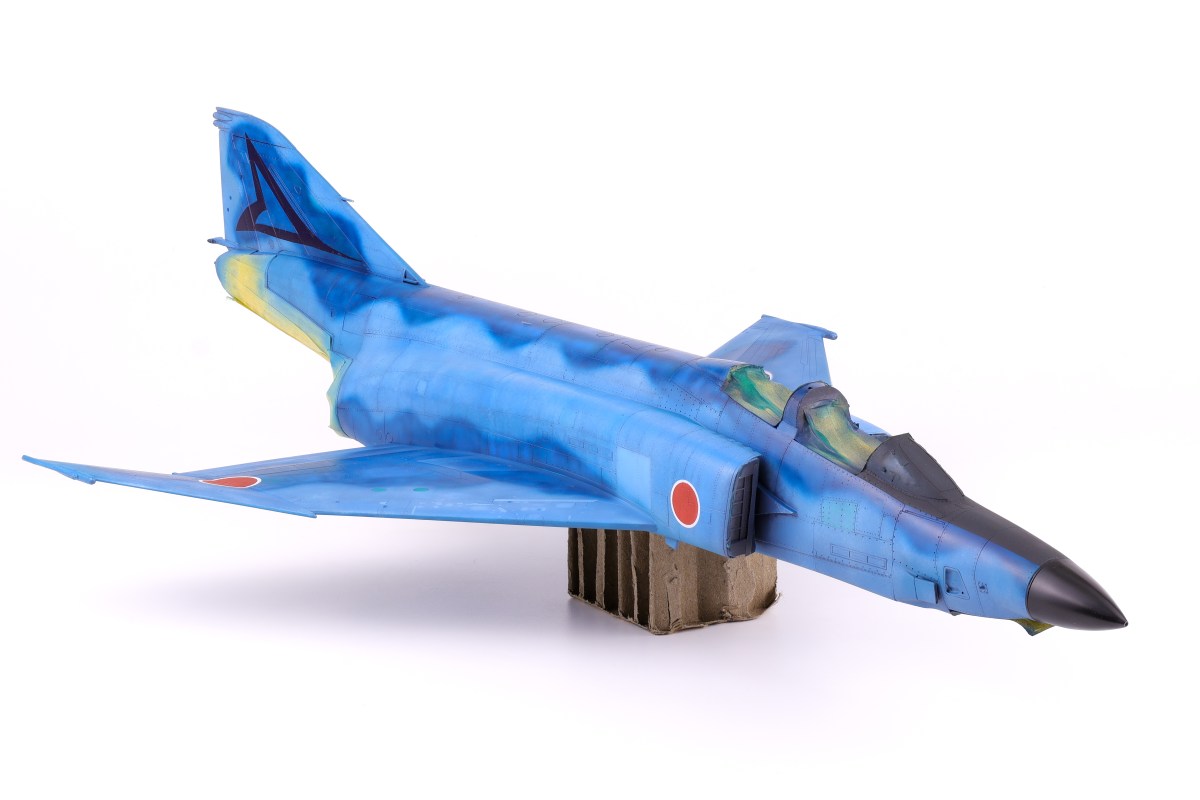
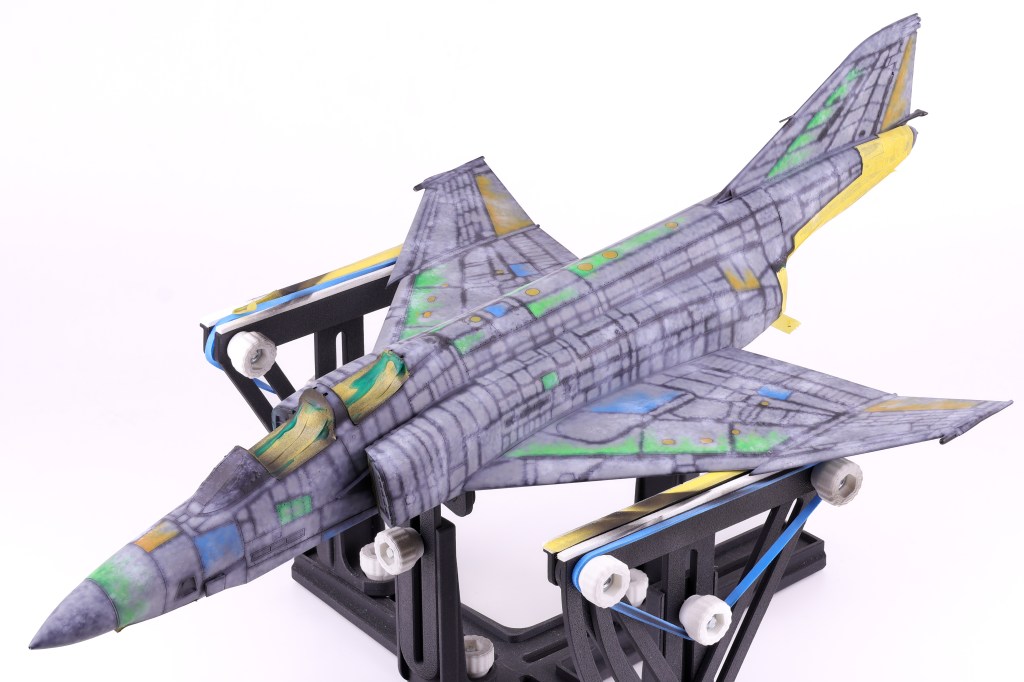
I then got to work adding some variation to the pre-shading, opting to scatter some different colours on select panels. In the end this effect was not as apparent as I had hoped but It’s still fun to play around with new approaches to techniques. The next step would be to begin blending everything together in two blend coats. The first was a thinned down coat of Mr. Color JASDF “Light Blue Impulse” which tinted the pre shading to be more in line with the final colours.
After this was done, I then tried a new technique that I have been wanting to for some time now, the layered ink patina technique. This is done by utilizing liquidex acrylic inks to achieve even further surface variation. This technique was popularized by Modeller Kris Sieber (@Luftraum72) who has a great guide on how to utilize this approach available on his website.
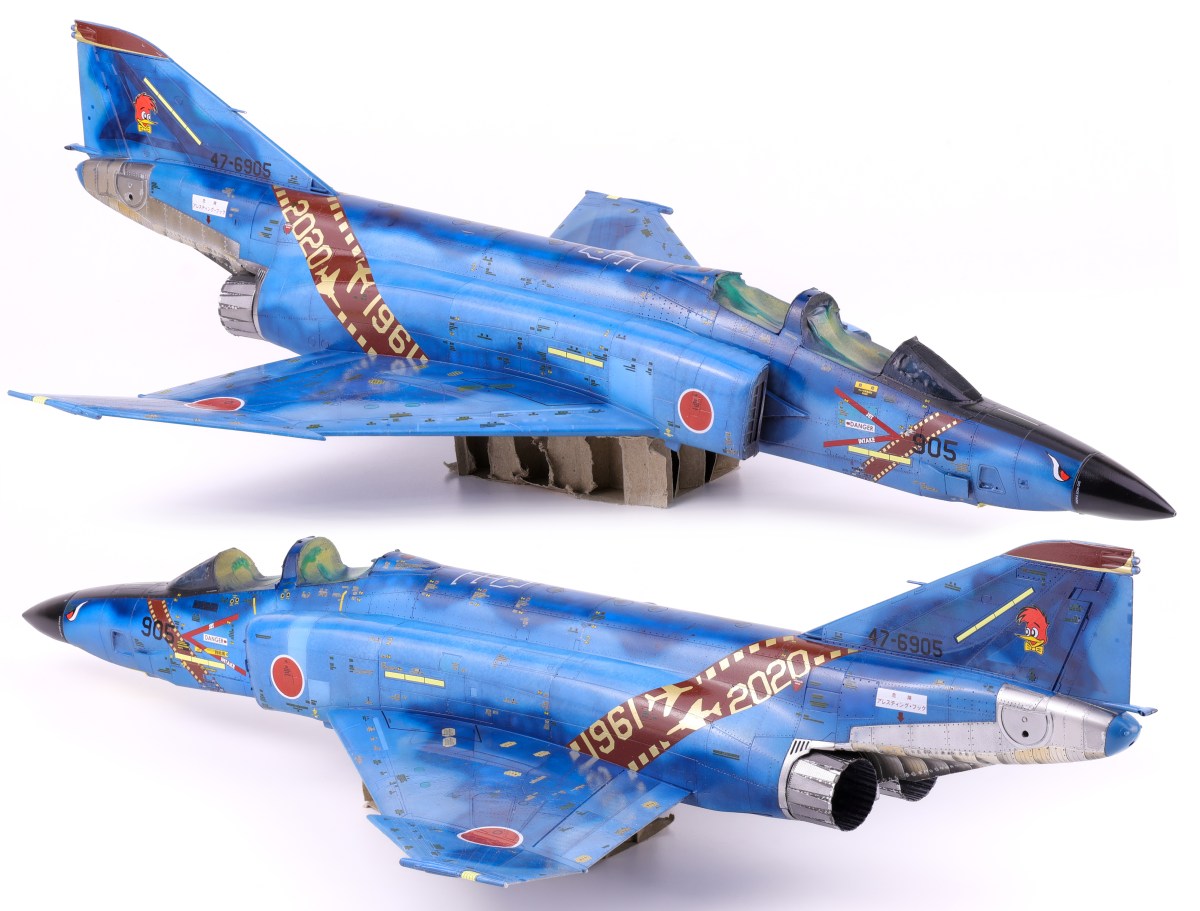
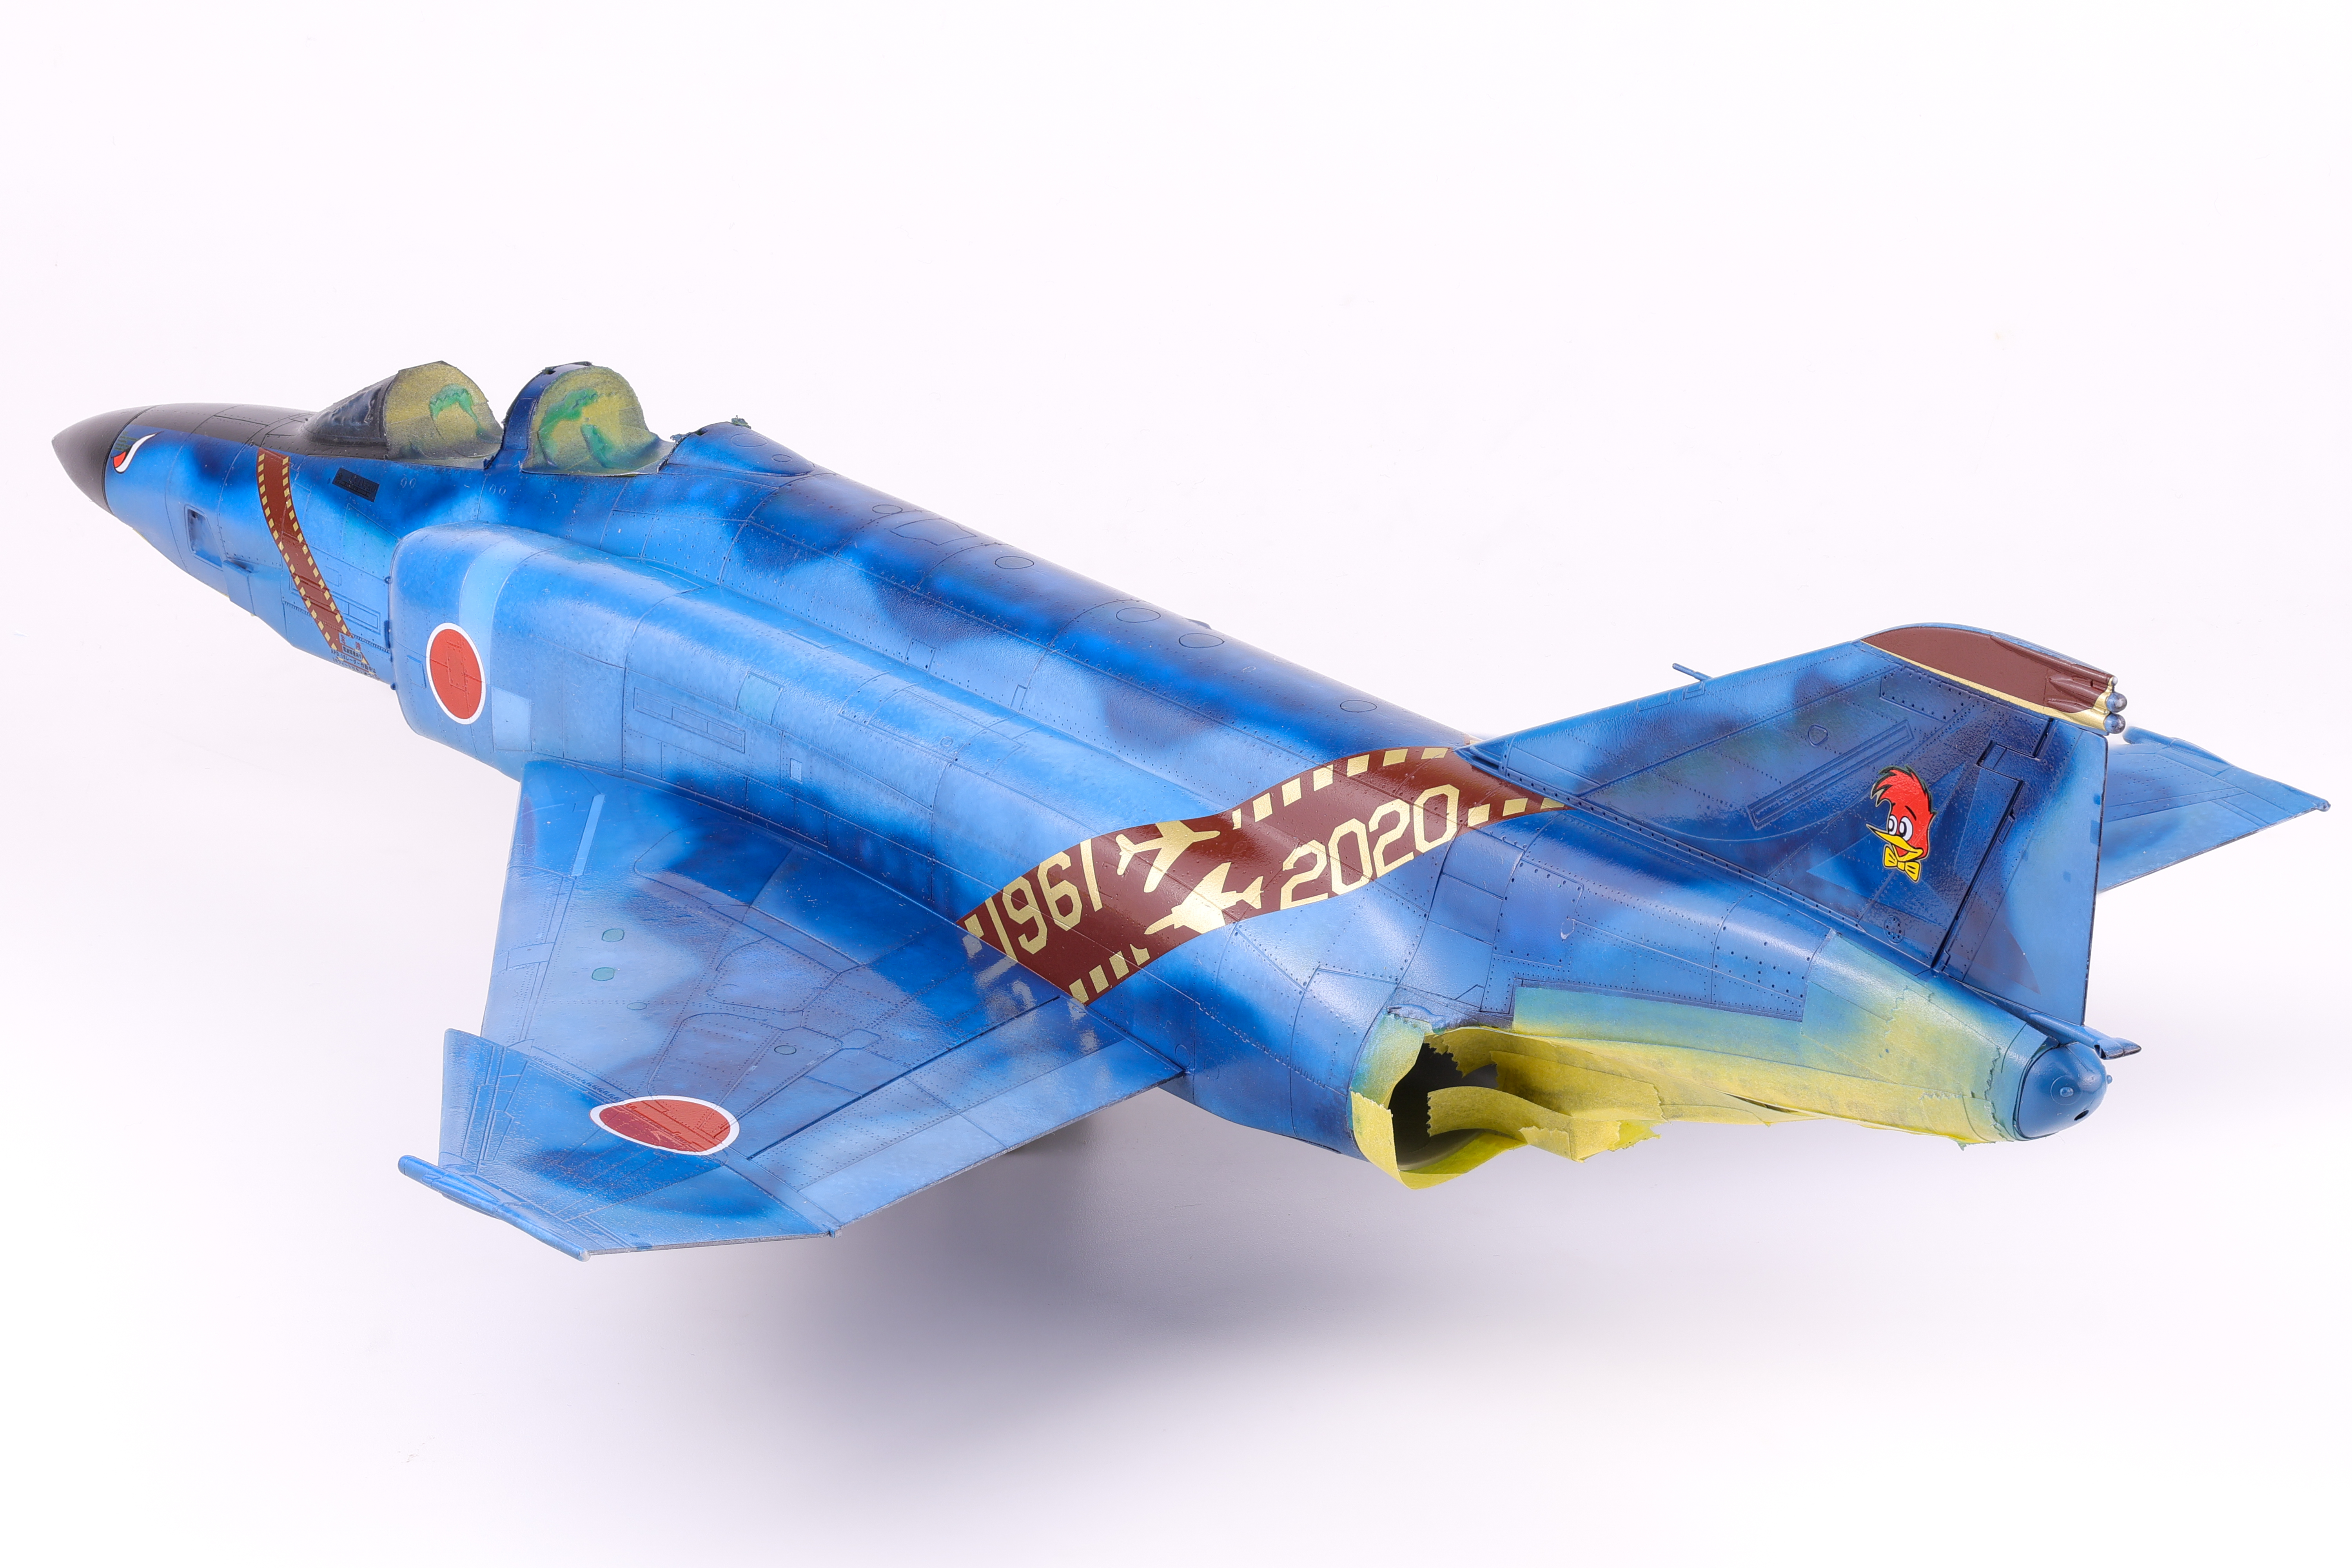
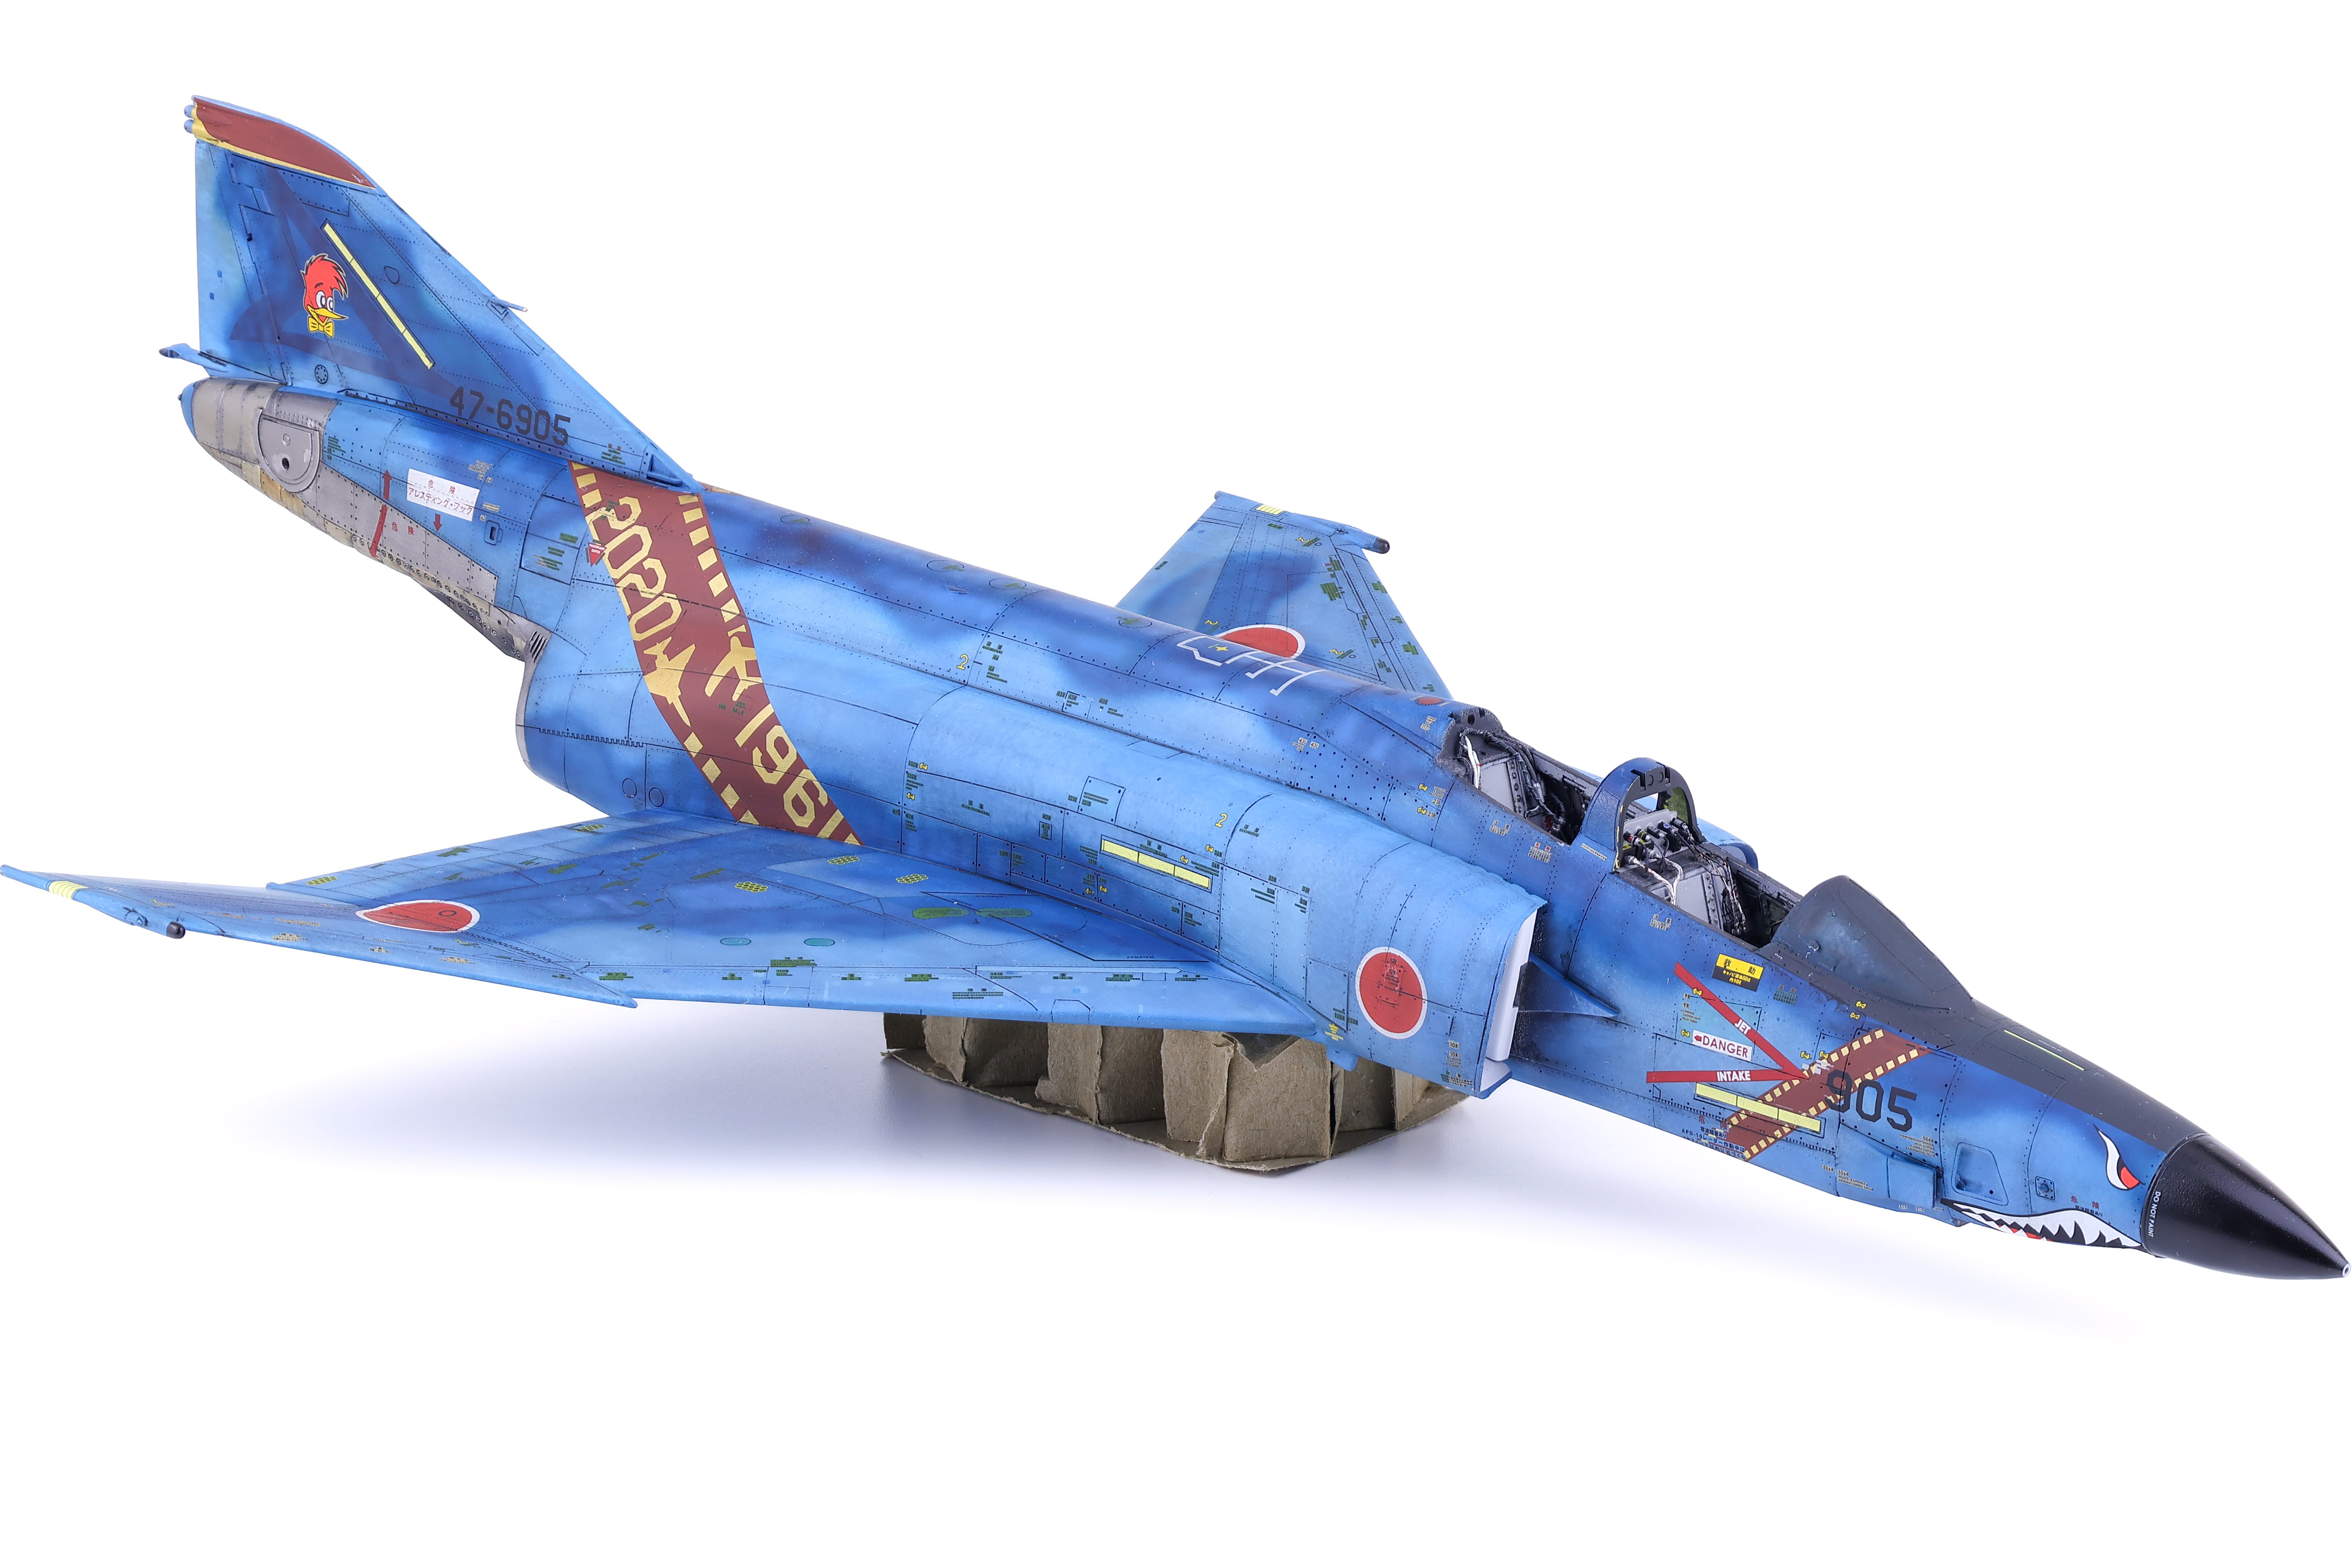
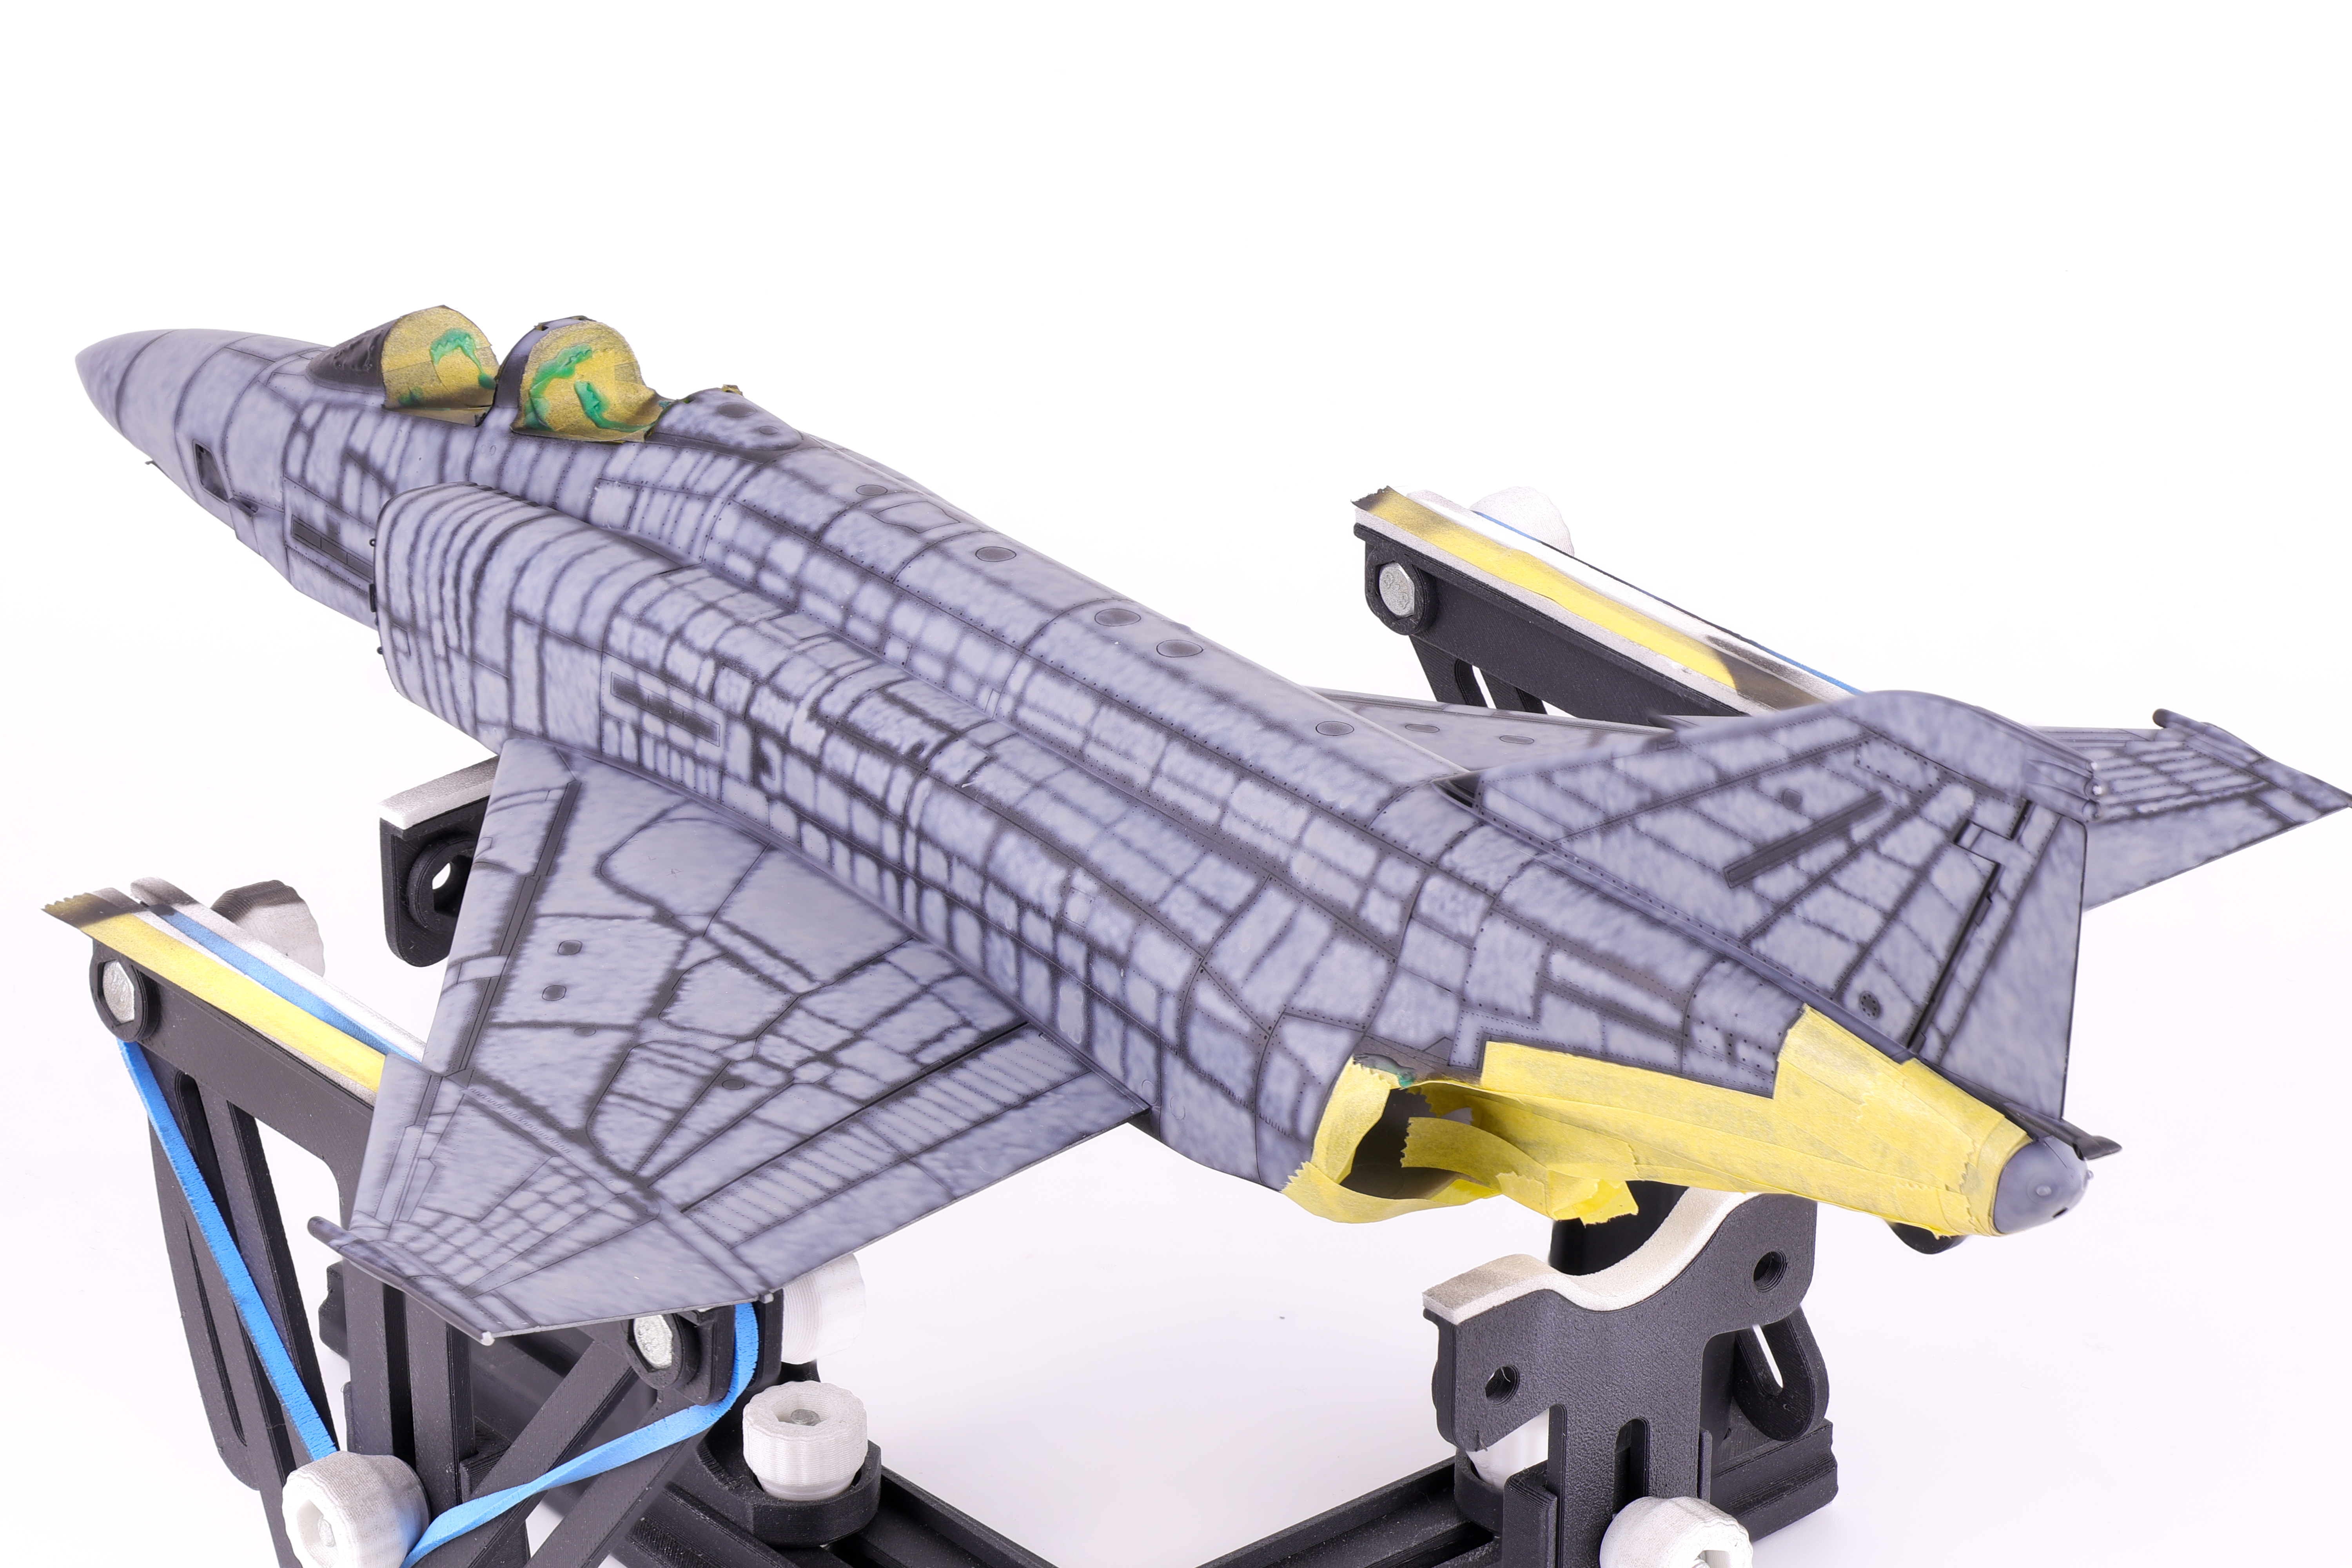
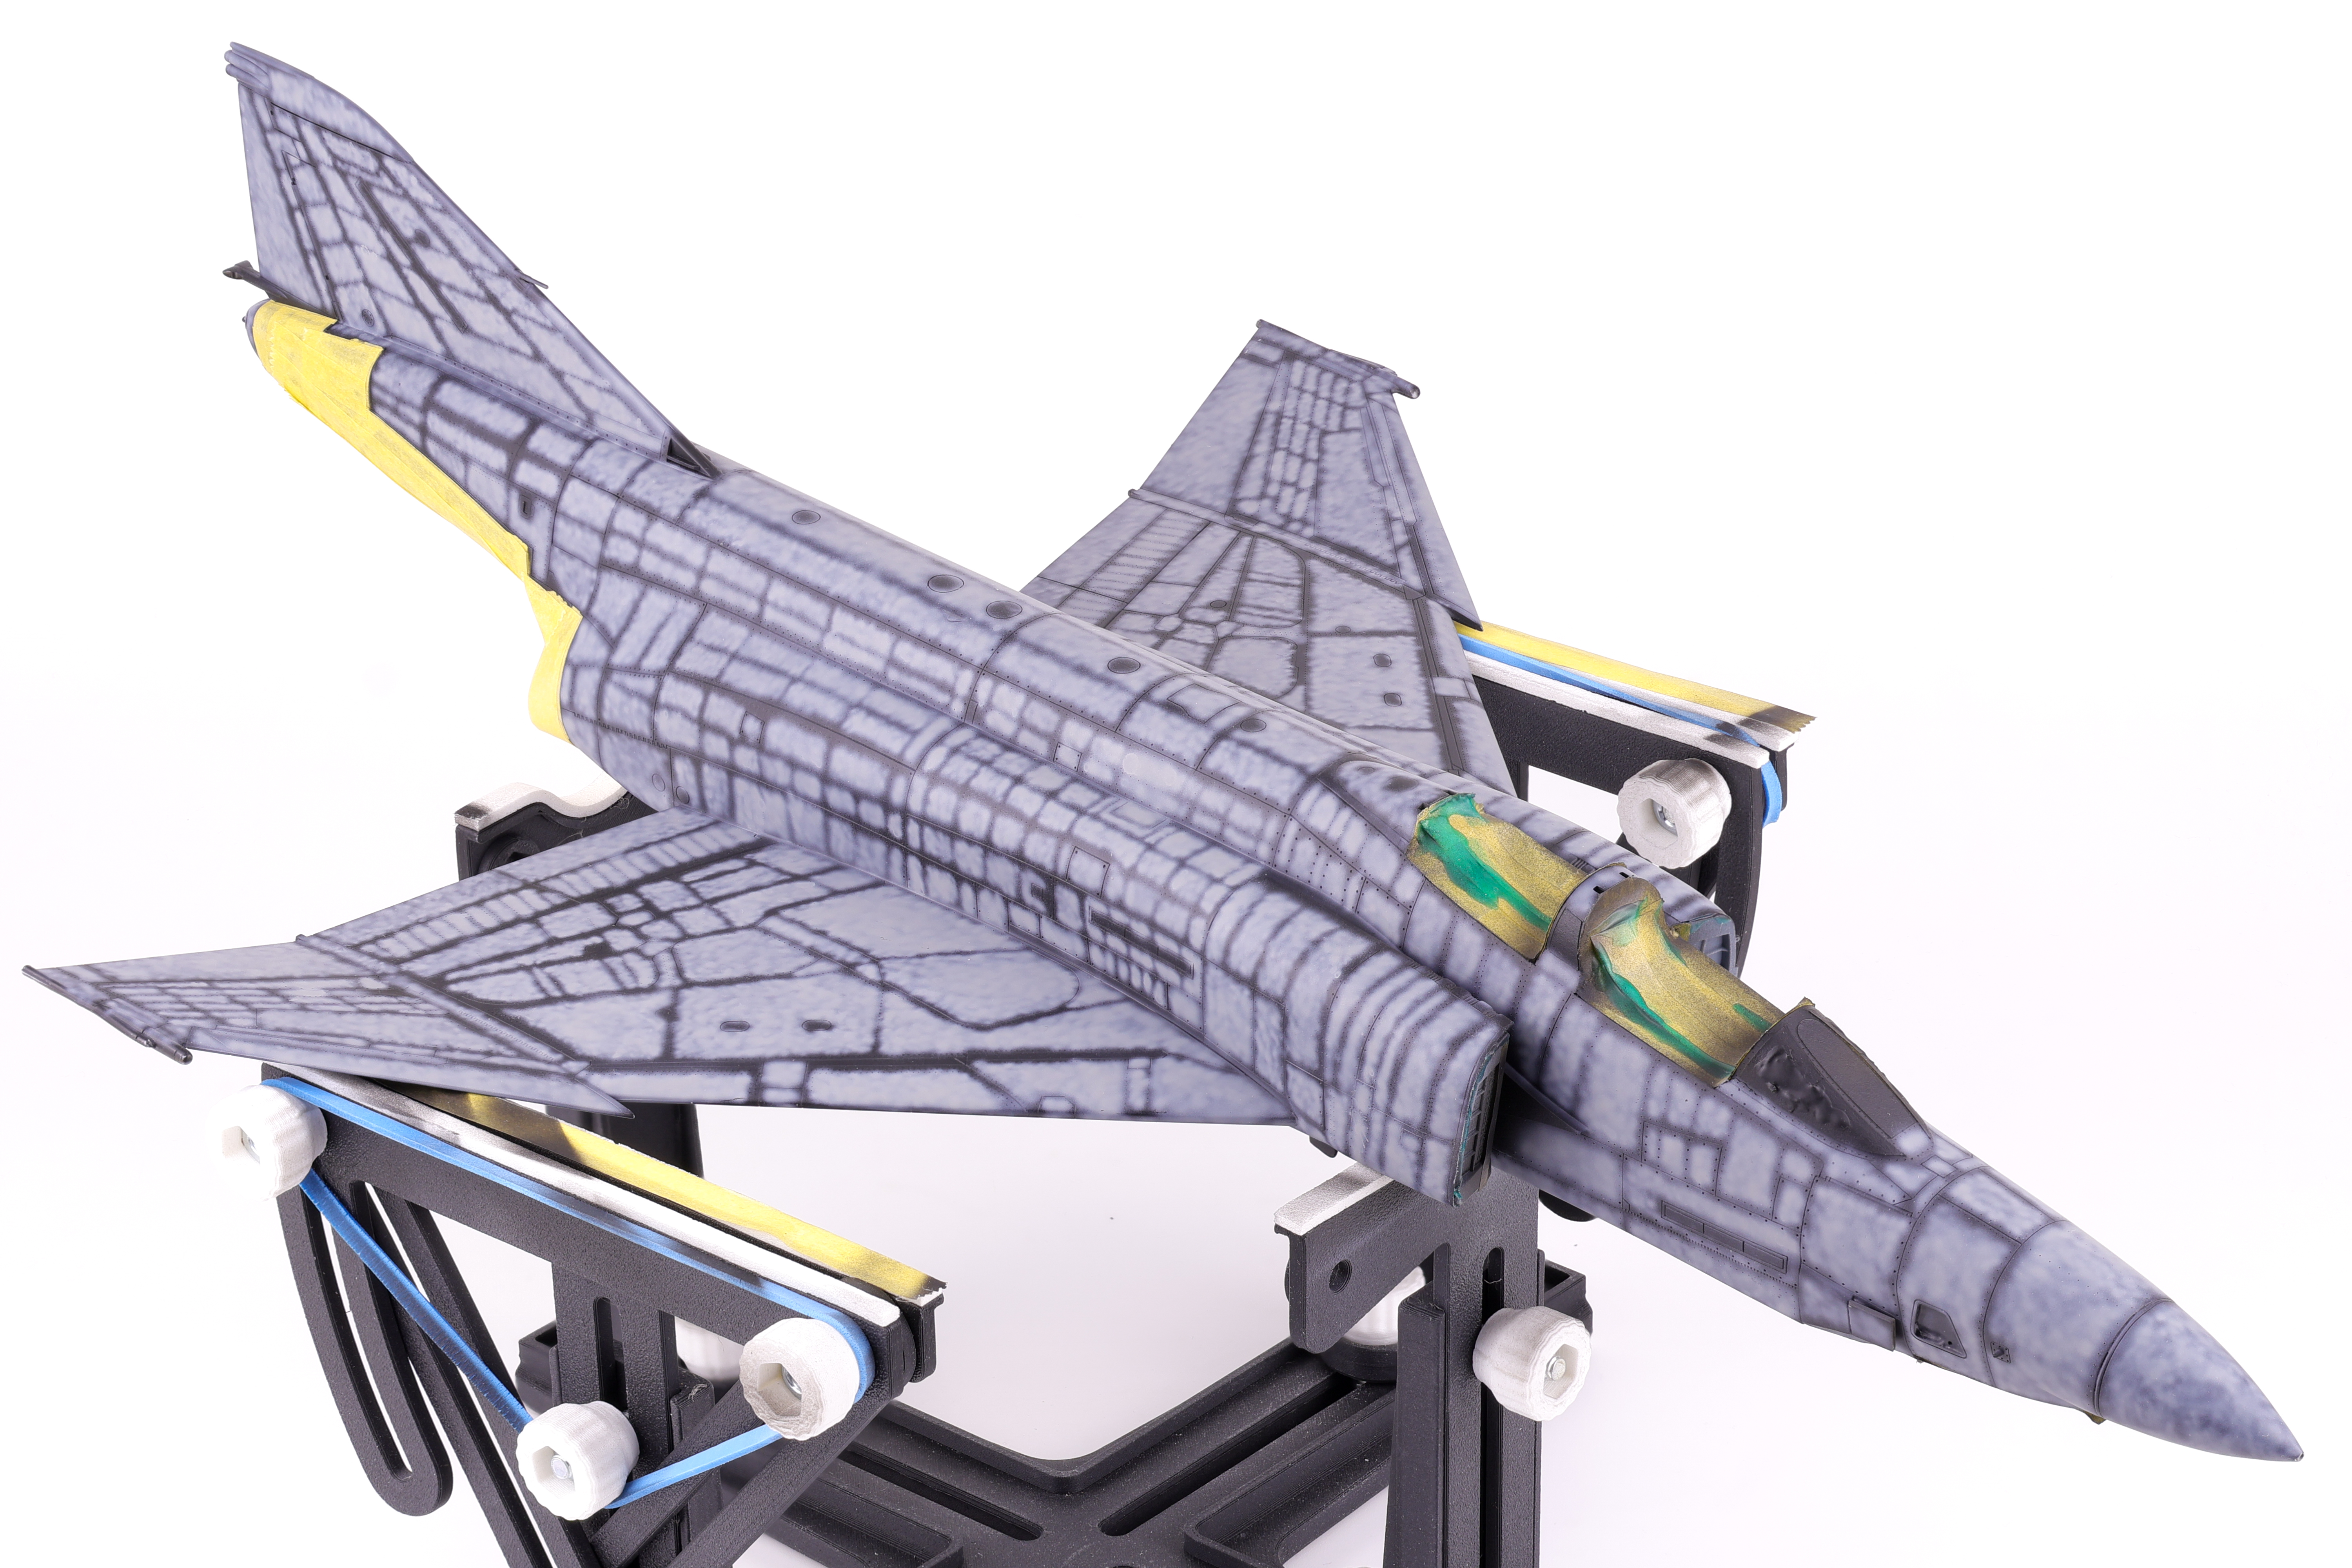
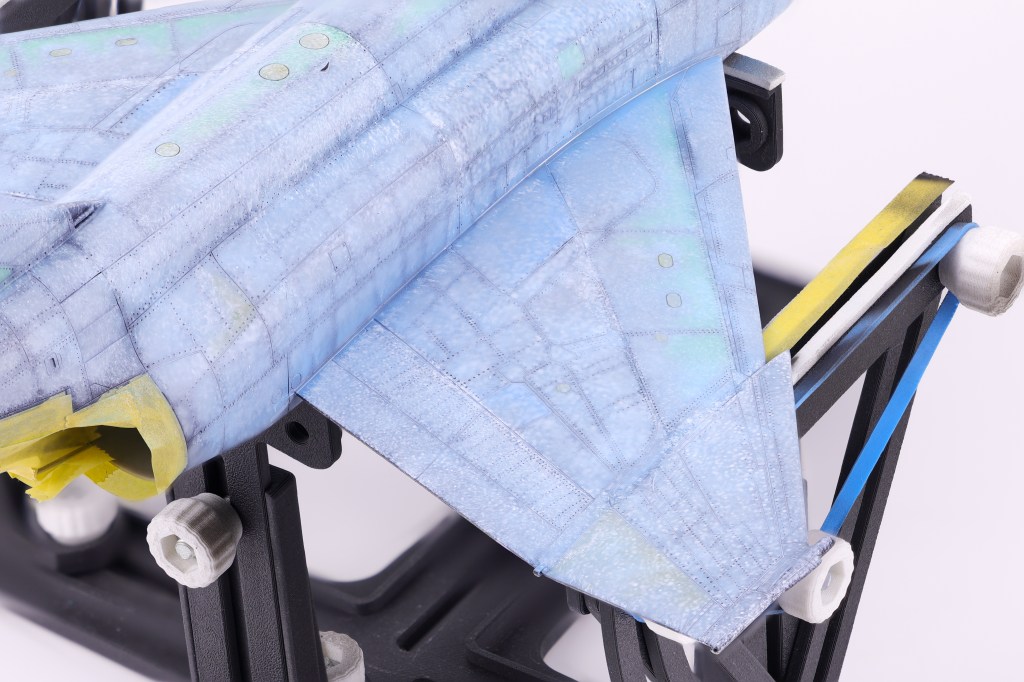
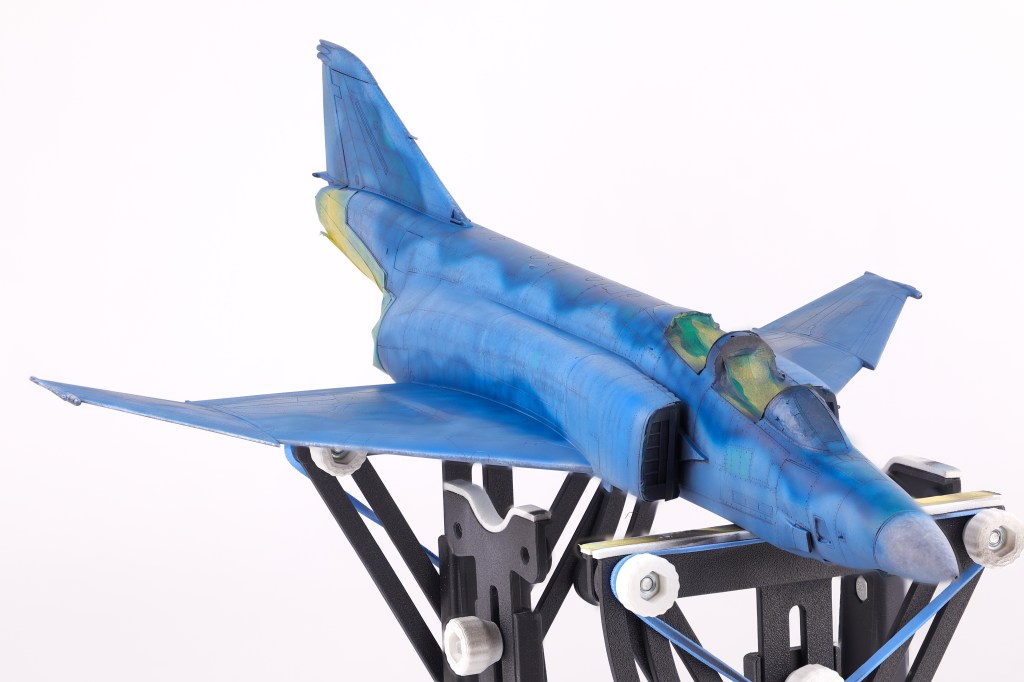
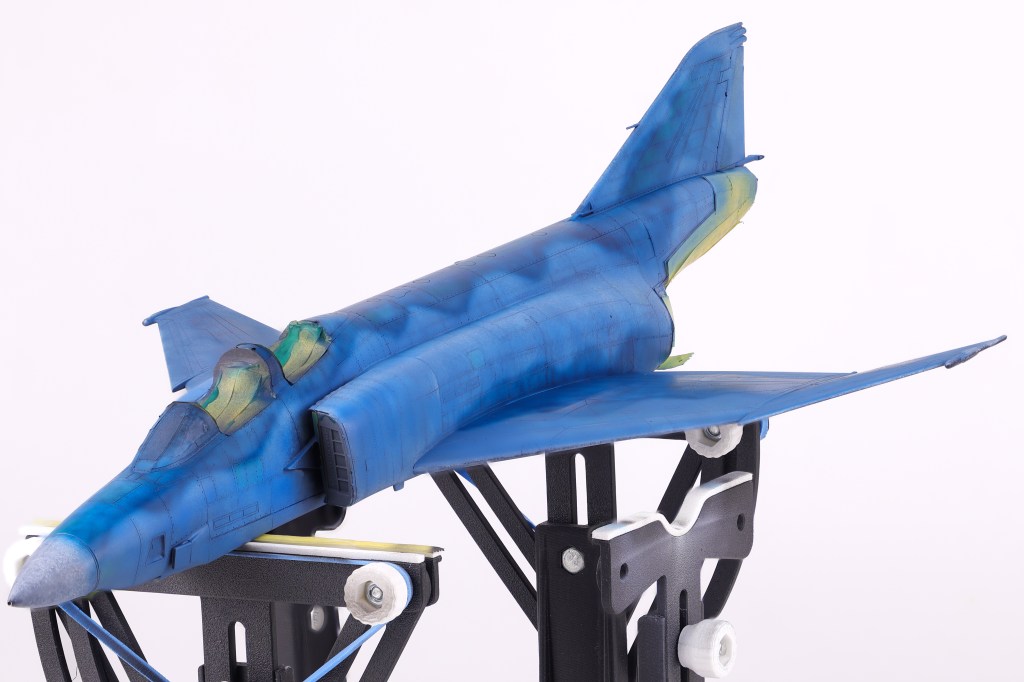
With the many pre-shading layers done, It was time to apply the final camouflage coats to the model and see if all the prior work was worth it. To do this I utilized two main shades, the first was SMS Midnight blue, the second being the aforementioned Light Blue Impulse from Mr. Color. I applied the light blue shade first, taking care not to overlap with the darker areas so not to overpower the pre-shading. I was fairly happy with how this turned out and I think that my approach here captured the duality of this distinctive scheme, in that it is incredibly vivid and striking yet also faded and worn at the same time.
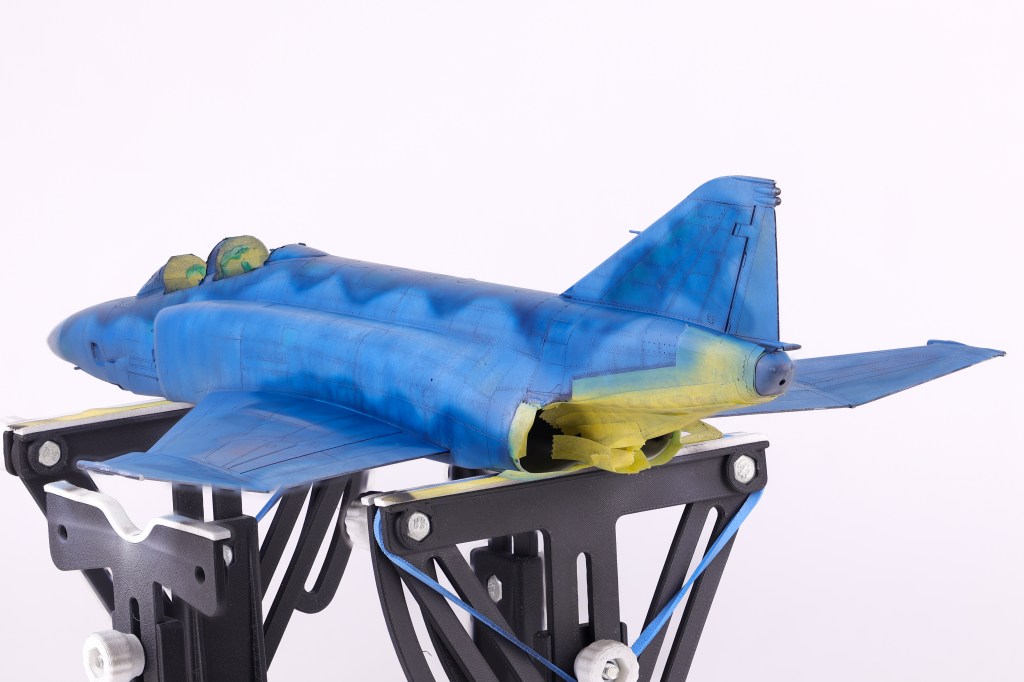
With this initial camouflage coat down, I then turned my attention to other areas that needed to be addressed. This included adding color discoloration to selected panels, painting the markings as well as the radome and anti-glare shield. Also of note was one of the scheme decals, a triangular graphic present on the tail of this aircraft. I opted to apply this decal at this time because from reference photos I could tell that it was very faded and barely noticeable on the real aircraft. To recreate this effect, I chose to paint over the applied decal prior to sealing my work in a gloss varnish
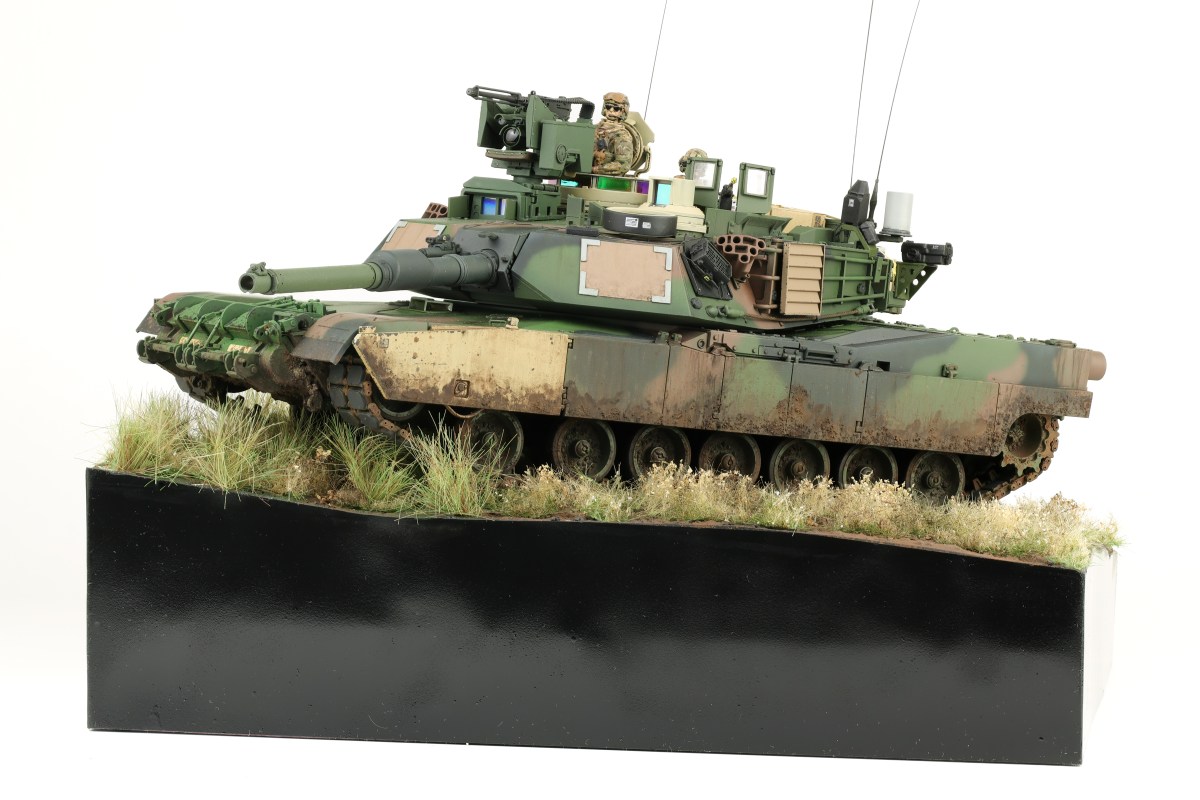
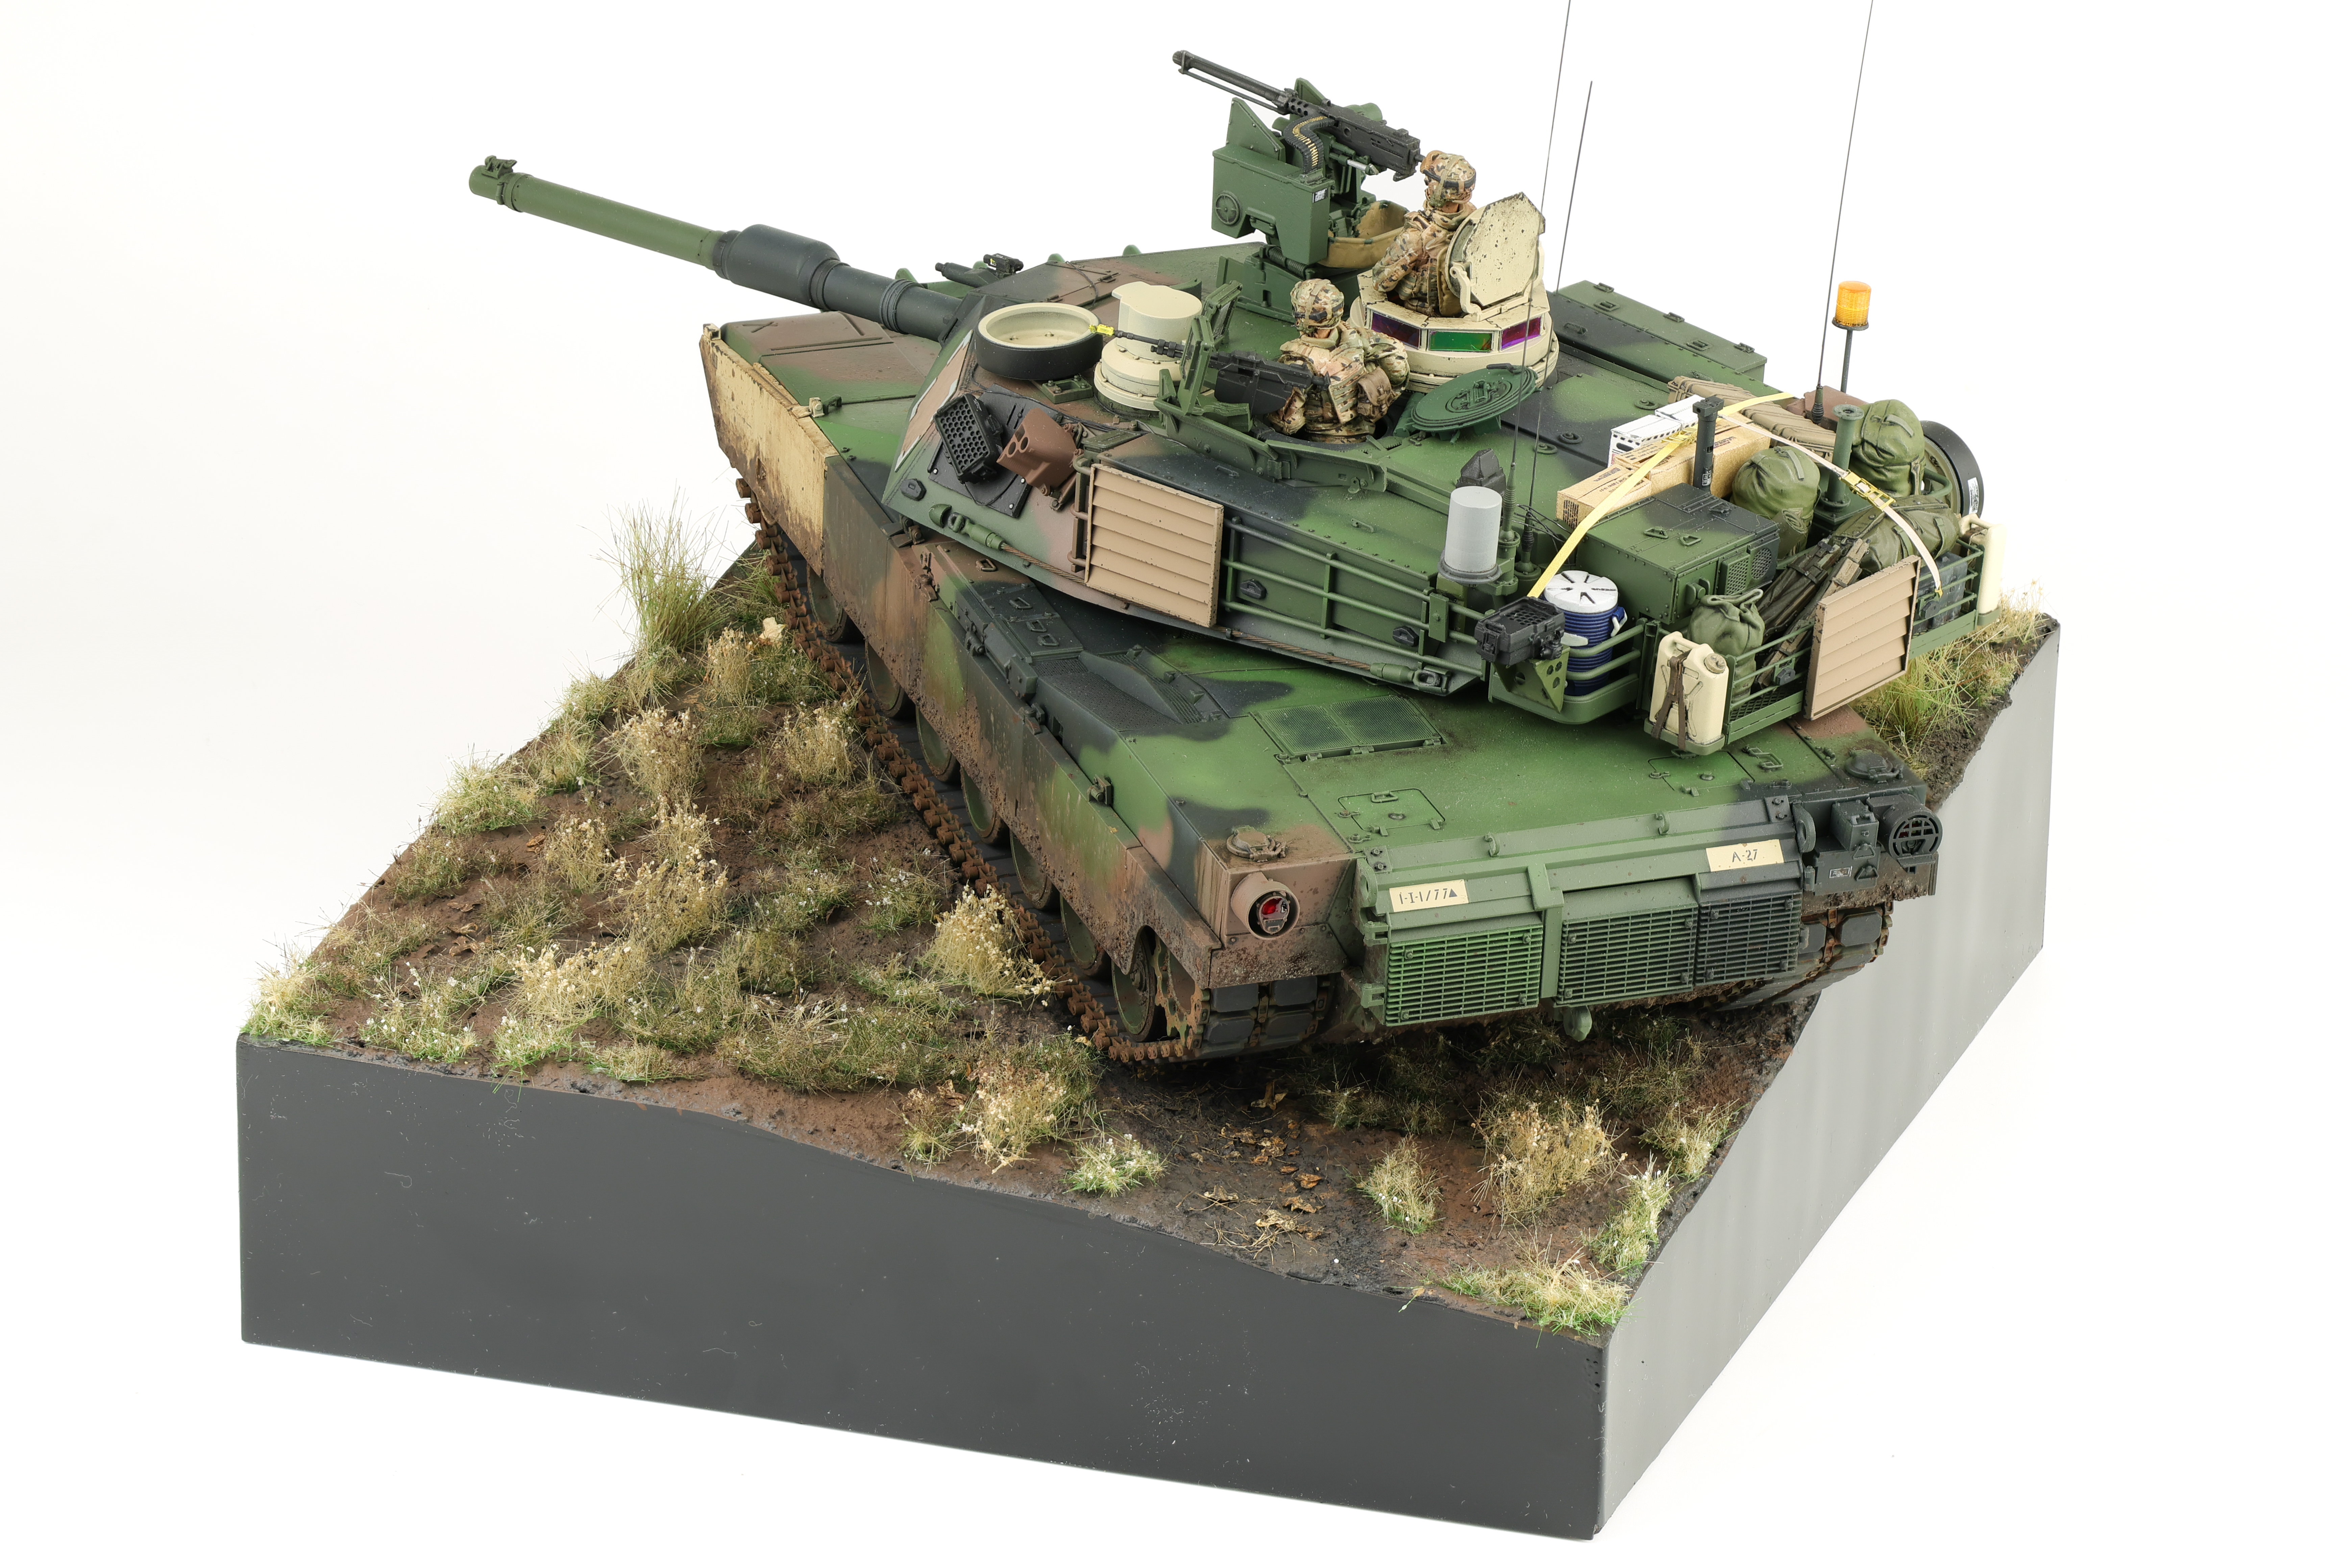
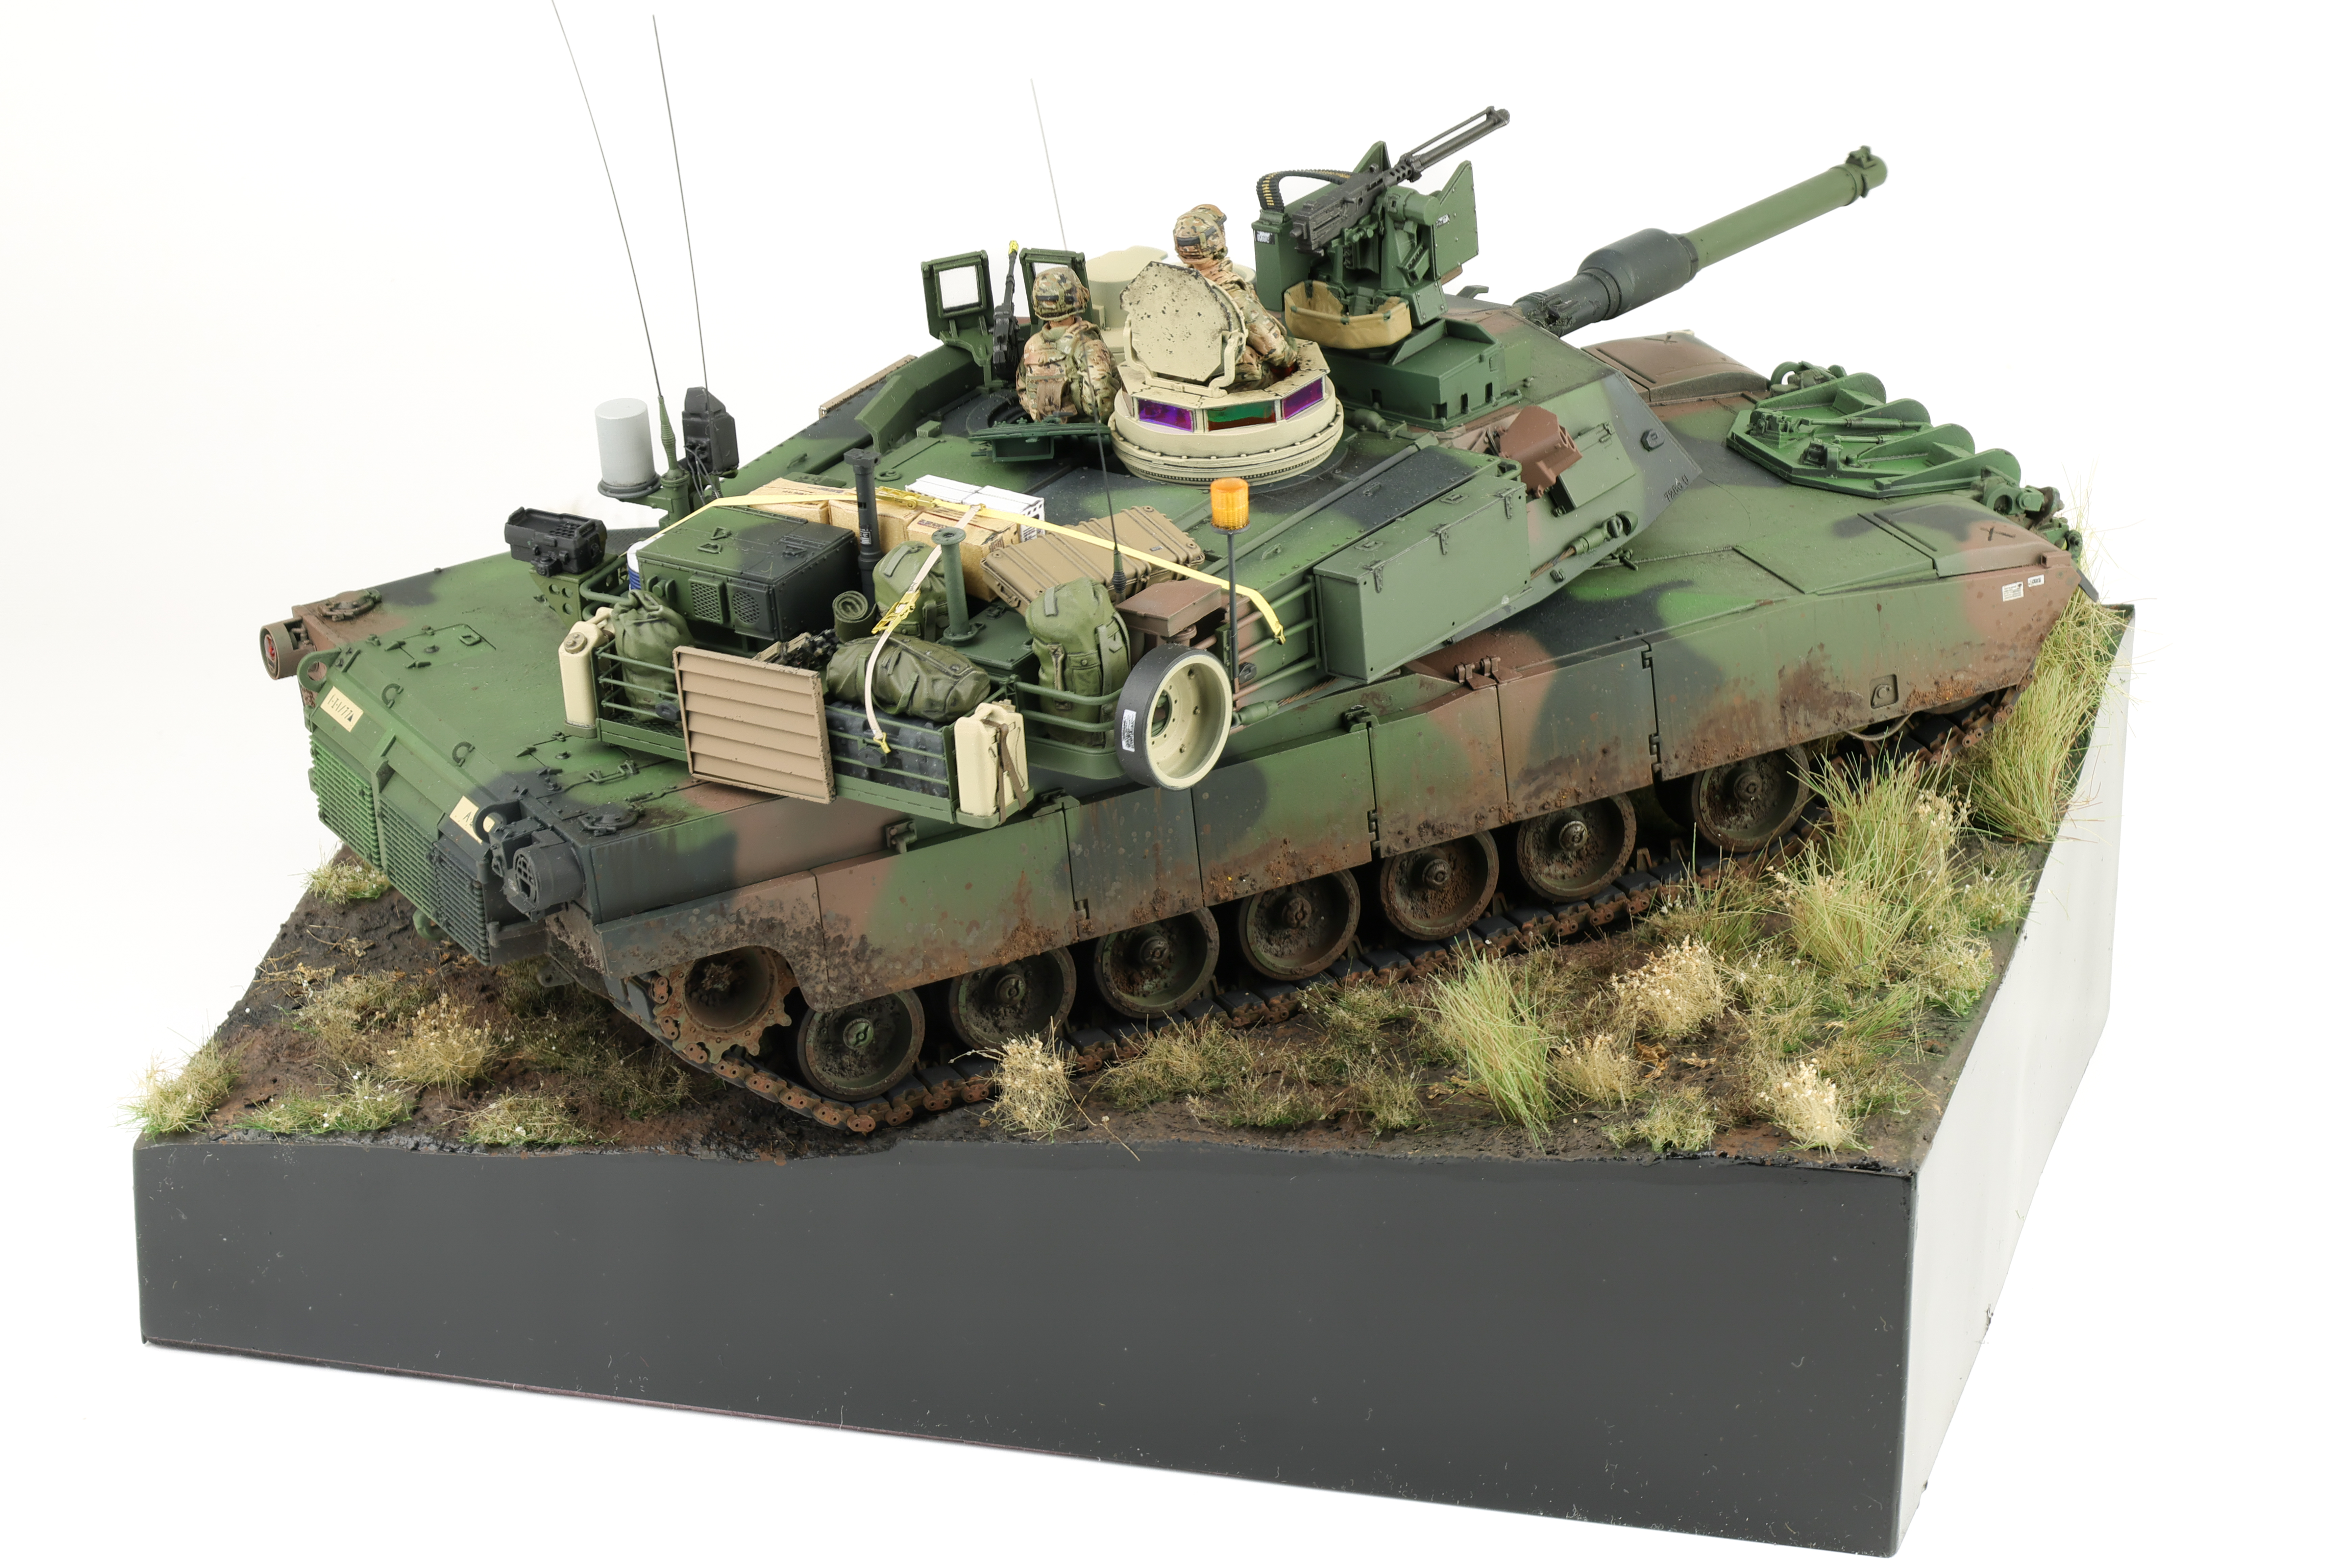
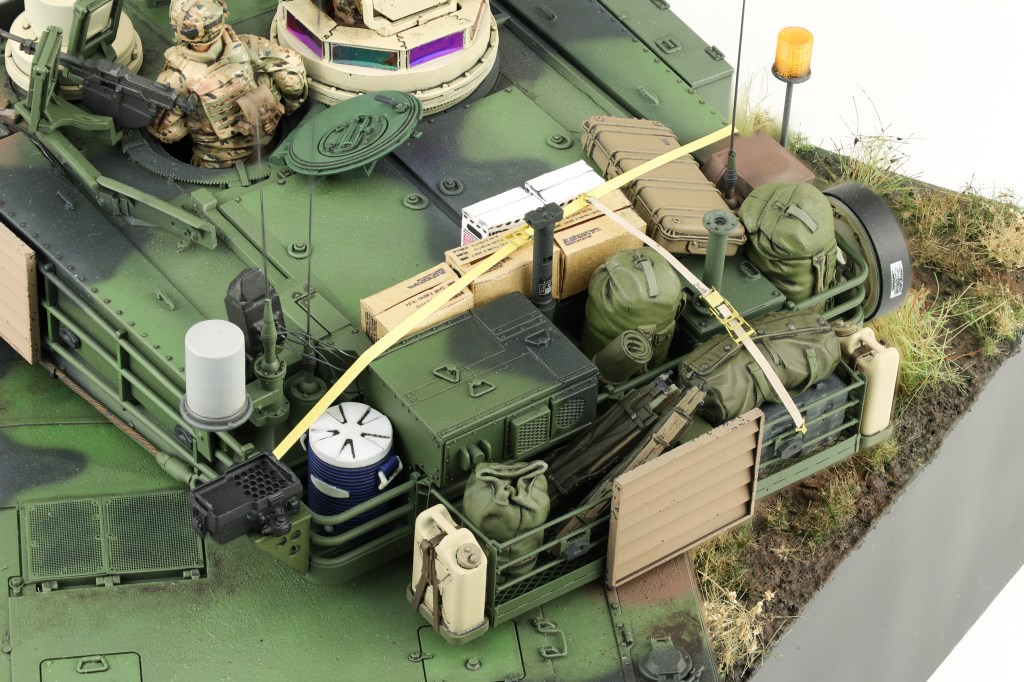
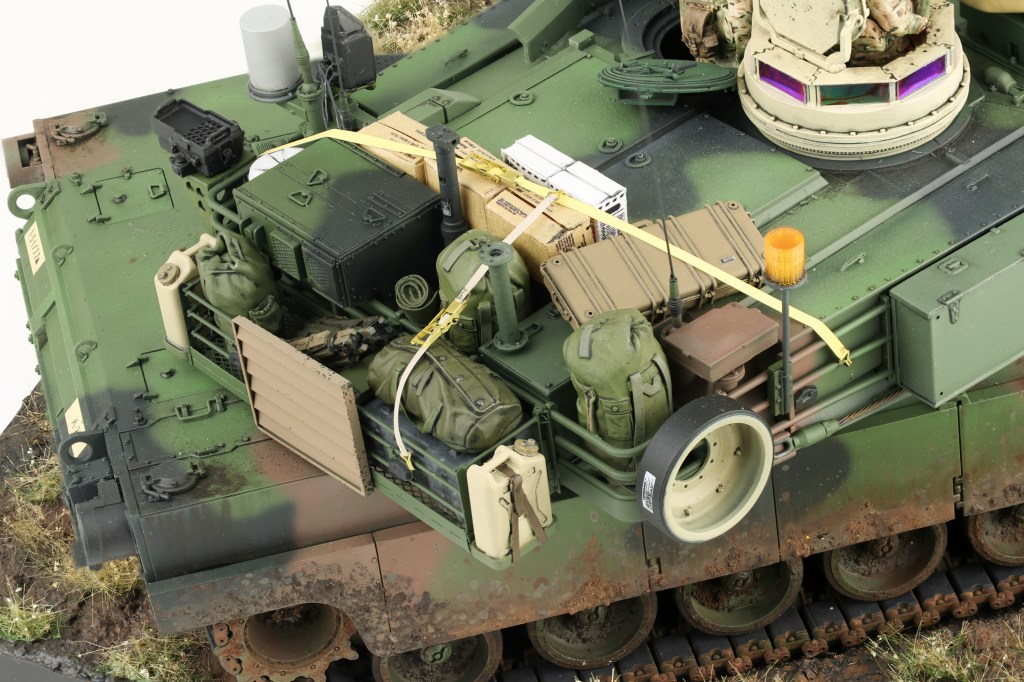
At long last, the completed M1A2 project! Super happy to finally get this on off the bench. After work was compelled on the model, I built up a quick and easy base to show off the completed build. I wanted to do something different here, so I chose to pose the model in a hull down position.
This model had been on my bench for some time, and it’s nice to finally see it finished, Enjoy the completed photos!
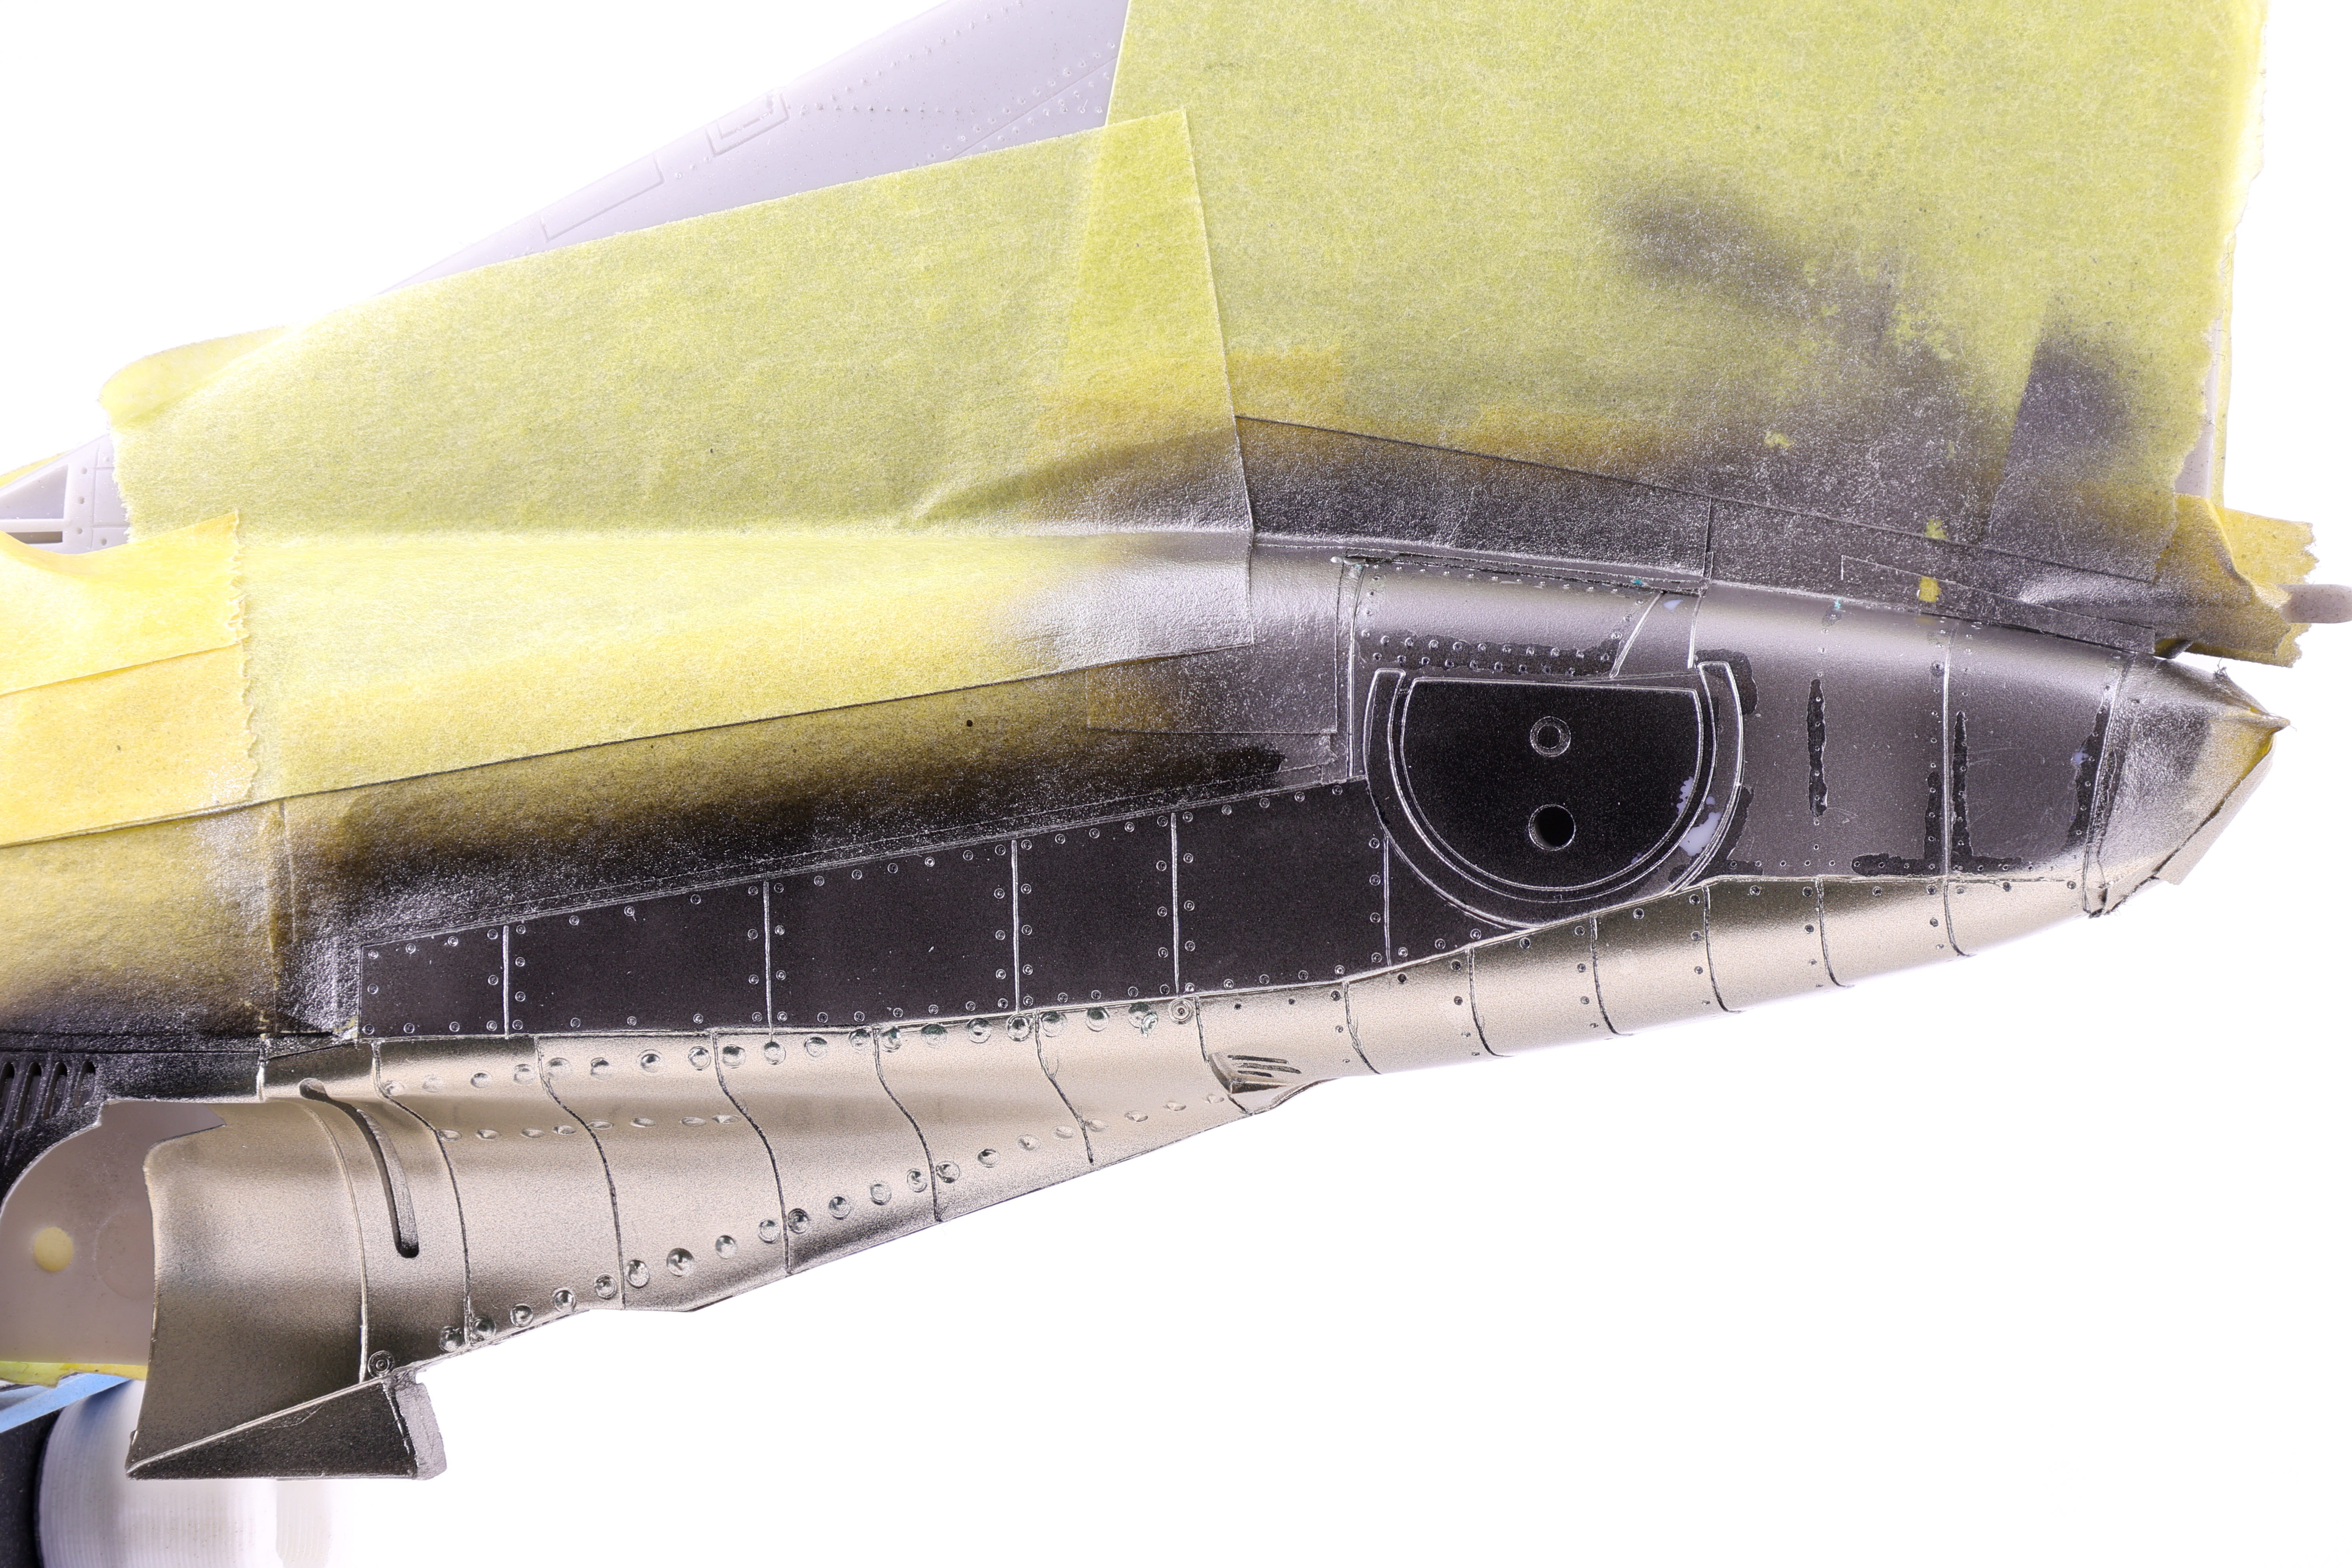
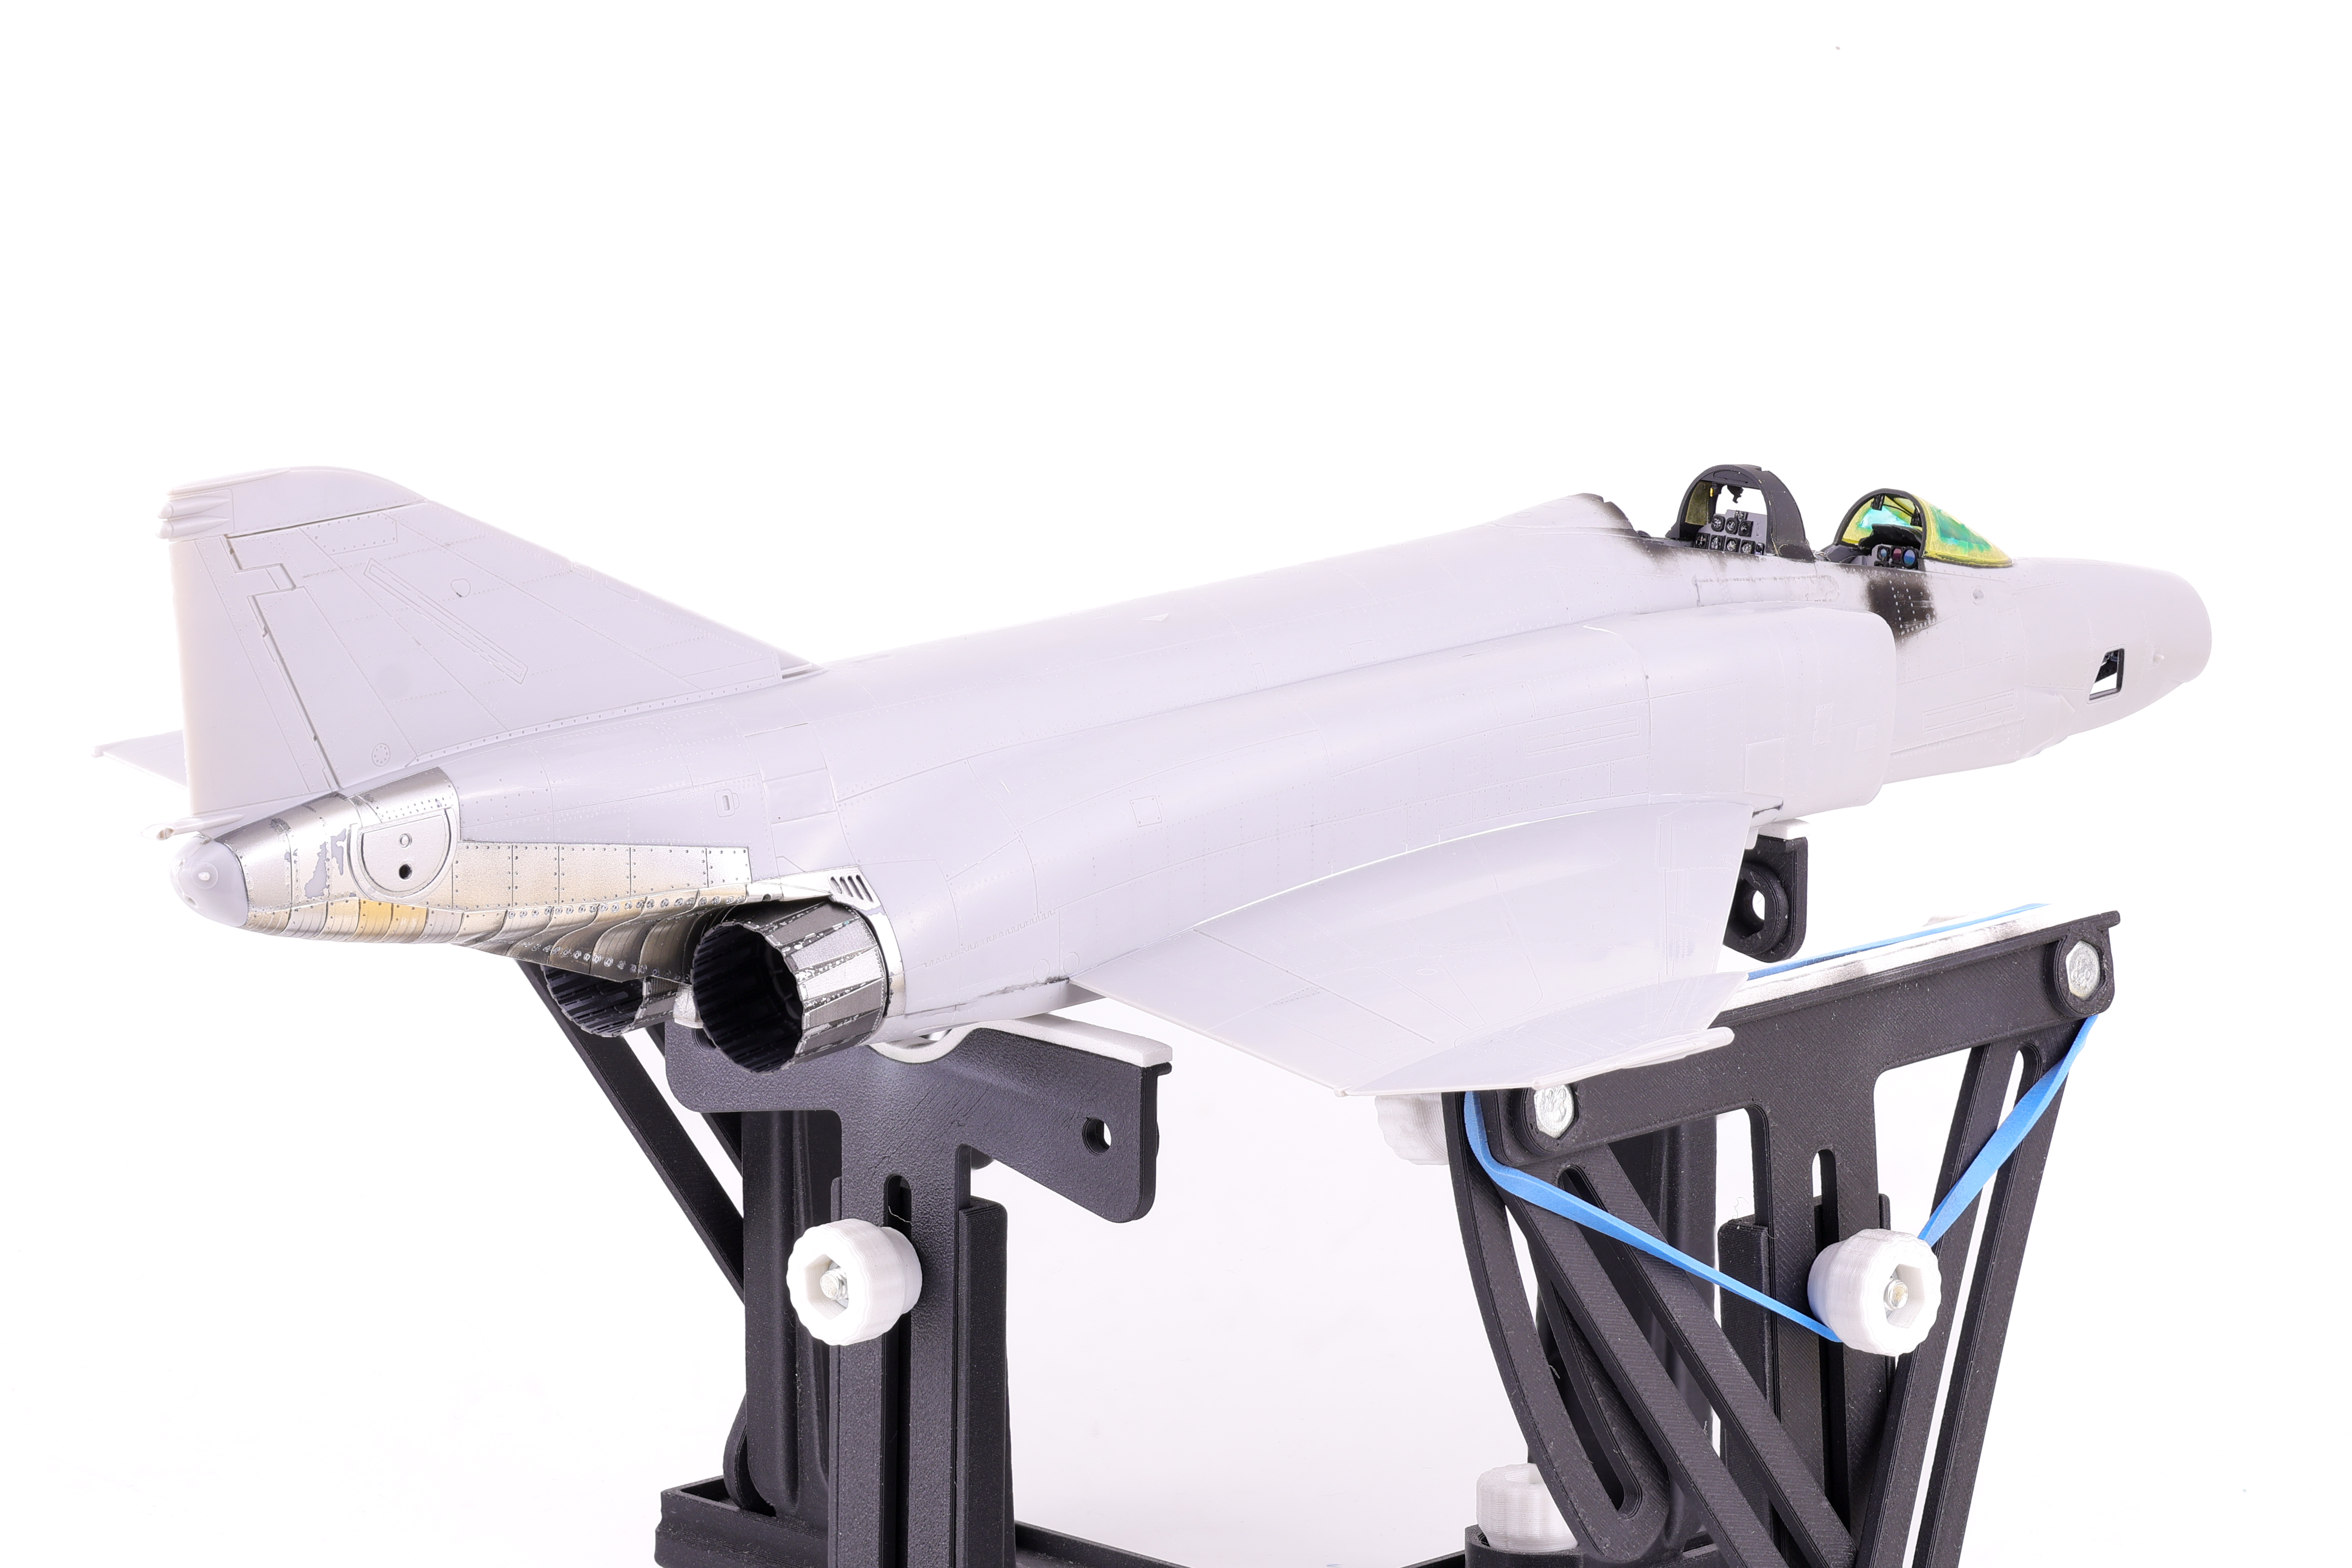
With the two fuselage halves joined work on the Phantom progressed to a new stage. Next up was the painting of the metallic surfaces and the exhausts. I chose to start work in this area because I knew that I wanted to polish the plastic surface in preparation for paint, leaving this step later on in the painting process would have made this difficult.
The plastic was buffed prior to paint application
With the bare plastic giving off a nice shine, I then hit the area with a coat of GX2 Ueno Black, my go to option for gloss black.
With this step complete, I then got to work on the actual metallic shades, selecting a mix of Mr. Color Super Metallics and Tamiya Lacquers. After playing around with the shades I had available, I was feeling pretty confident in the result I had achieved.
After the exhaust work was completed, I was able to move on to preparing the fuselage for paint. This consisted of attaching the wings and completing work around the canopy. This also included attaching the intakes which required a significant amount of sanding and putty work to ensure that they followed the contours of the main fuselage. This also meant completing work on the cockpit area, namely the sunshield and rear bulkheads To add detail in this area, I opted to apply some aftermarket rivet decals.