Categories
1:48 Aircraft

Tamiya He-219 “Uhu” (Part 5)

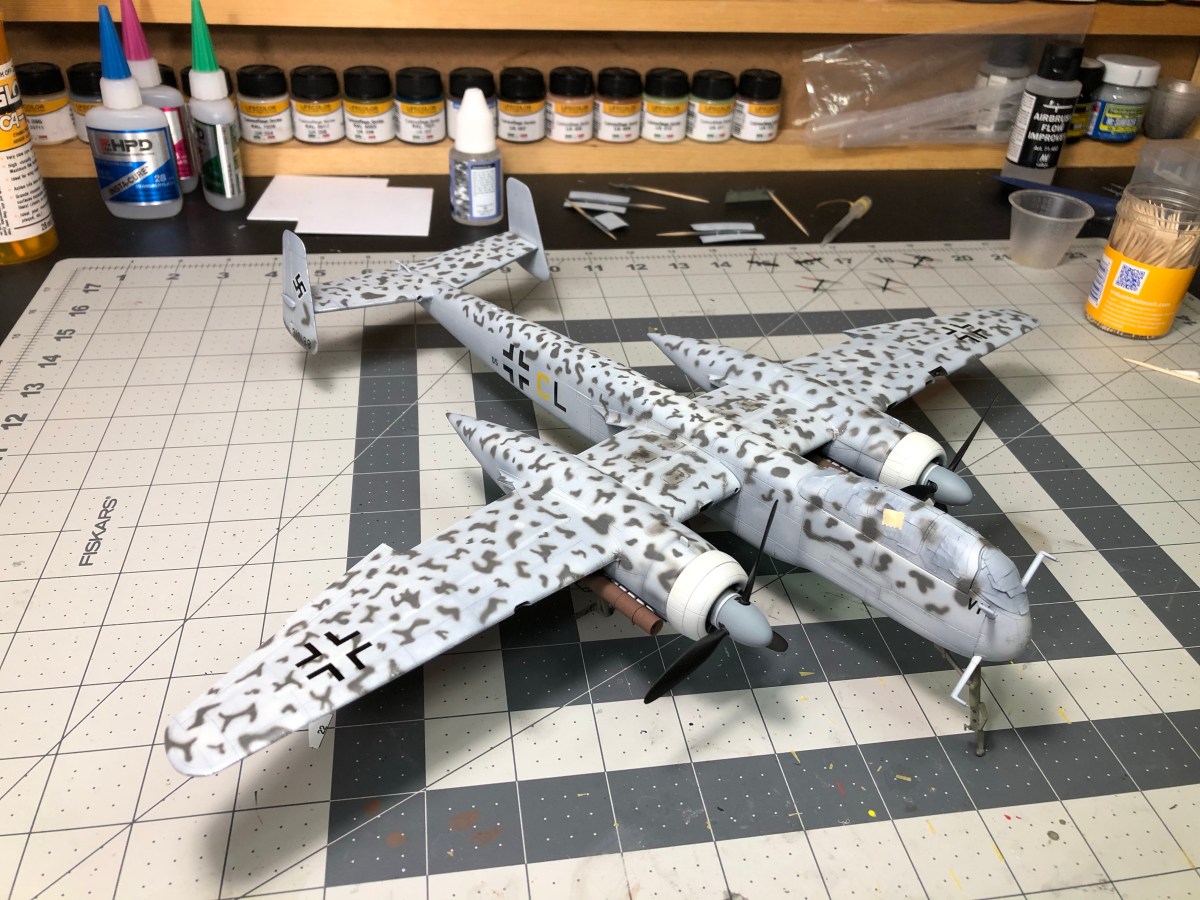
After a little over two months on the workbench, Tamiya’s 1997 Uhu has finally been completed. All things considered, I’m very happy with the result. Ever since I returned to the Model building I’ve been slowly adding techniques and procedures back into my repertoire. Tamiya’s Uhu was a lot of firsts for me, First time using oil washes, first time trying chipping effects, first time using VMS products, and first time rigging aircraft. While I was comfortable with these techniques prior to my modeling hiatus they were new to me upon returning and had to be re-learnt.

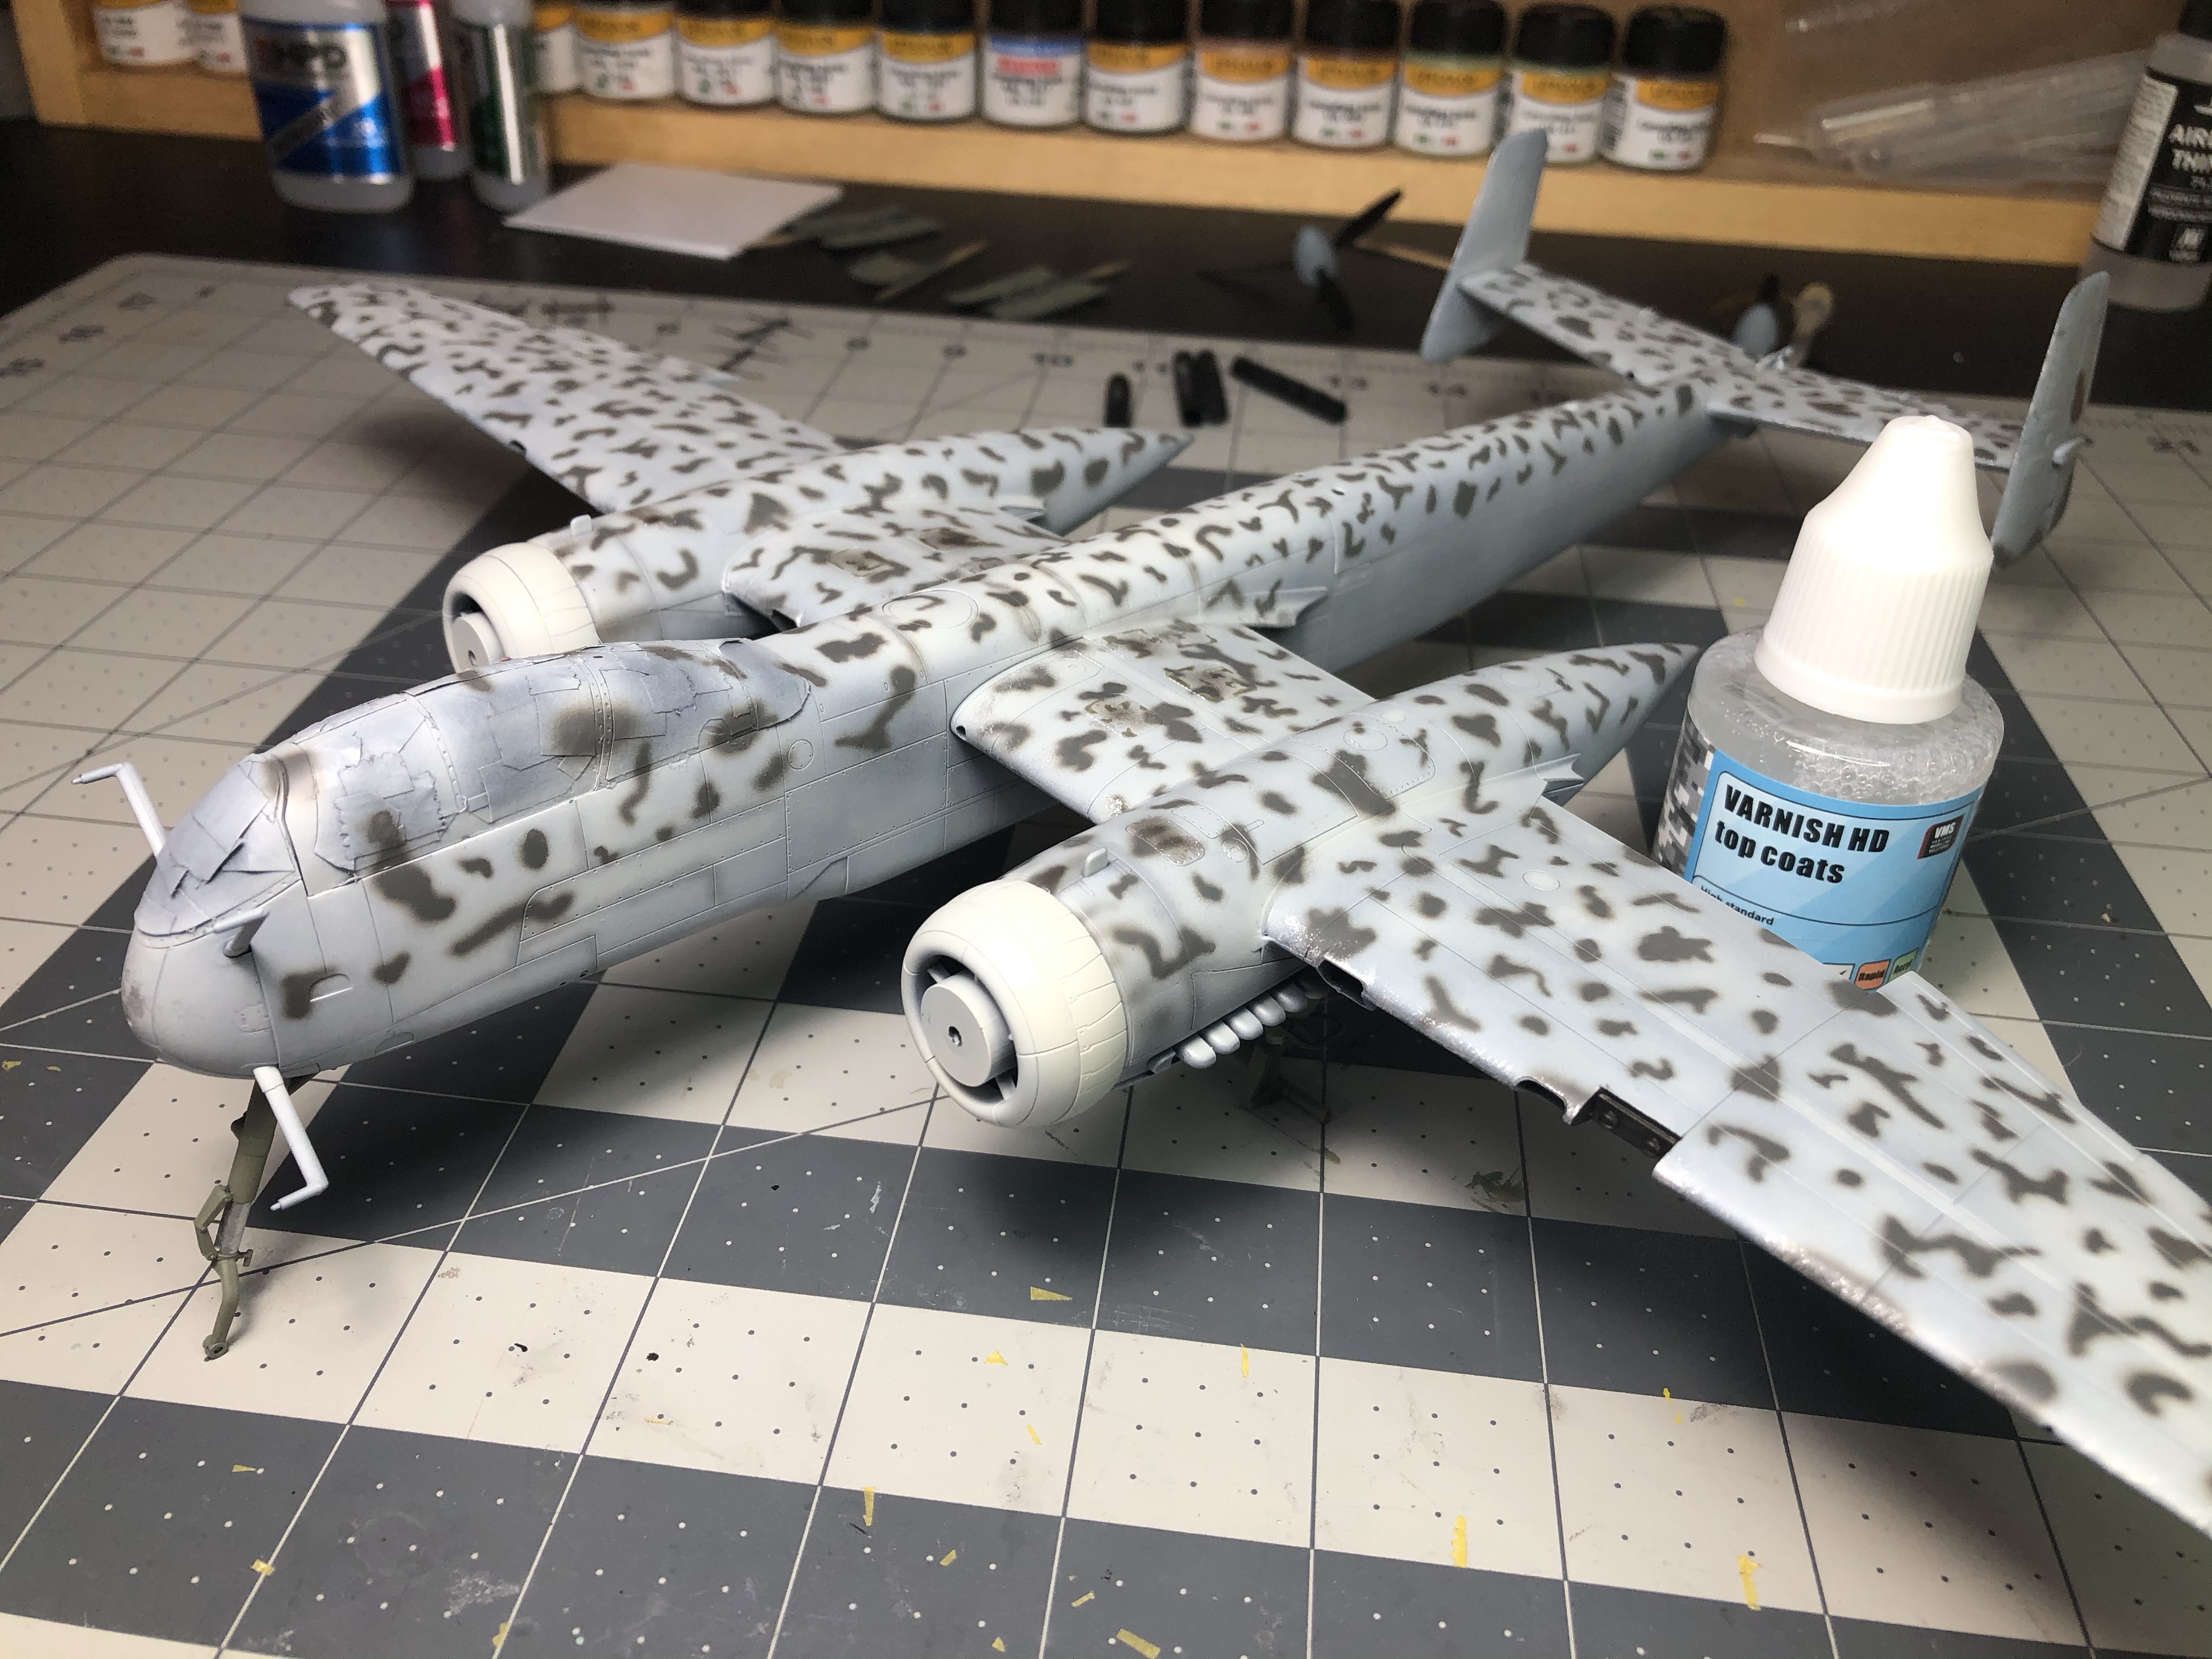
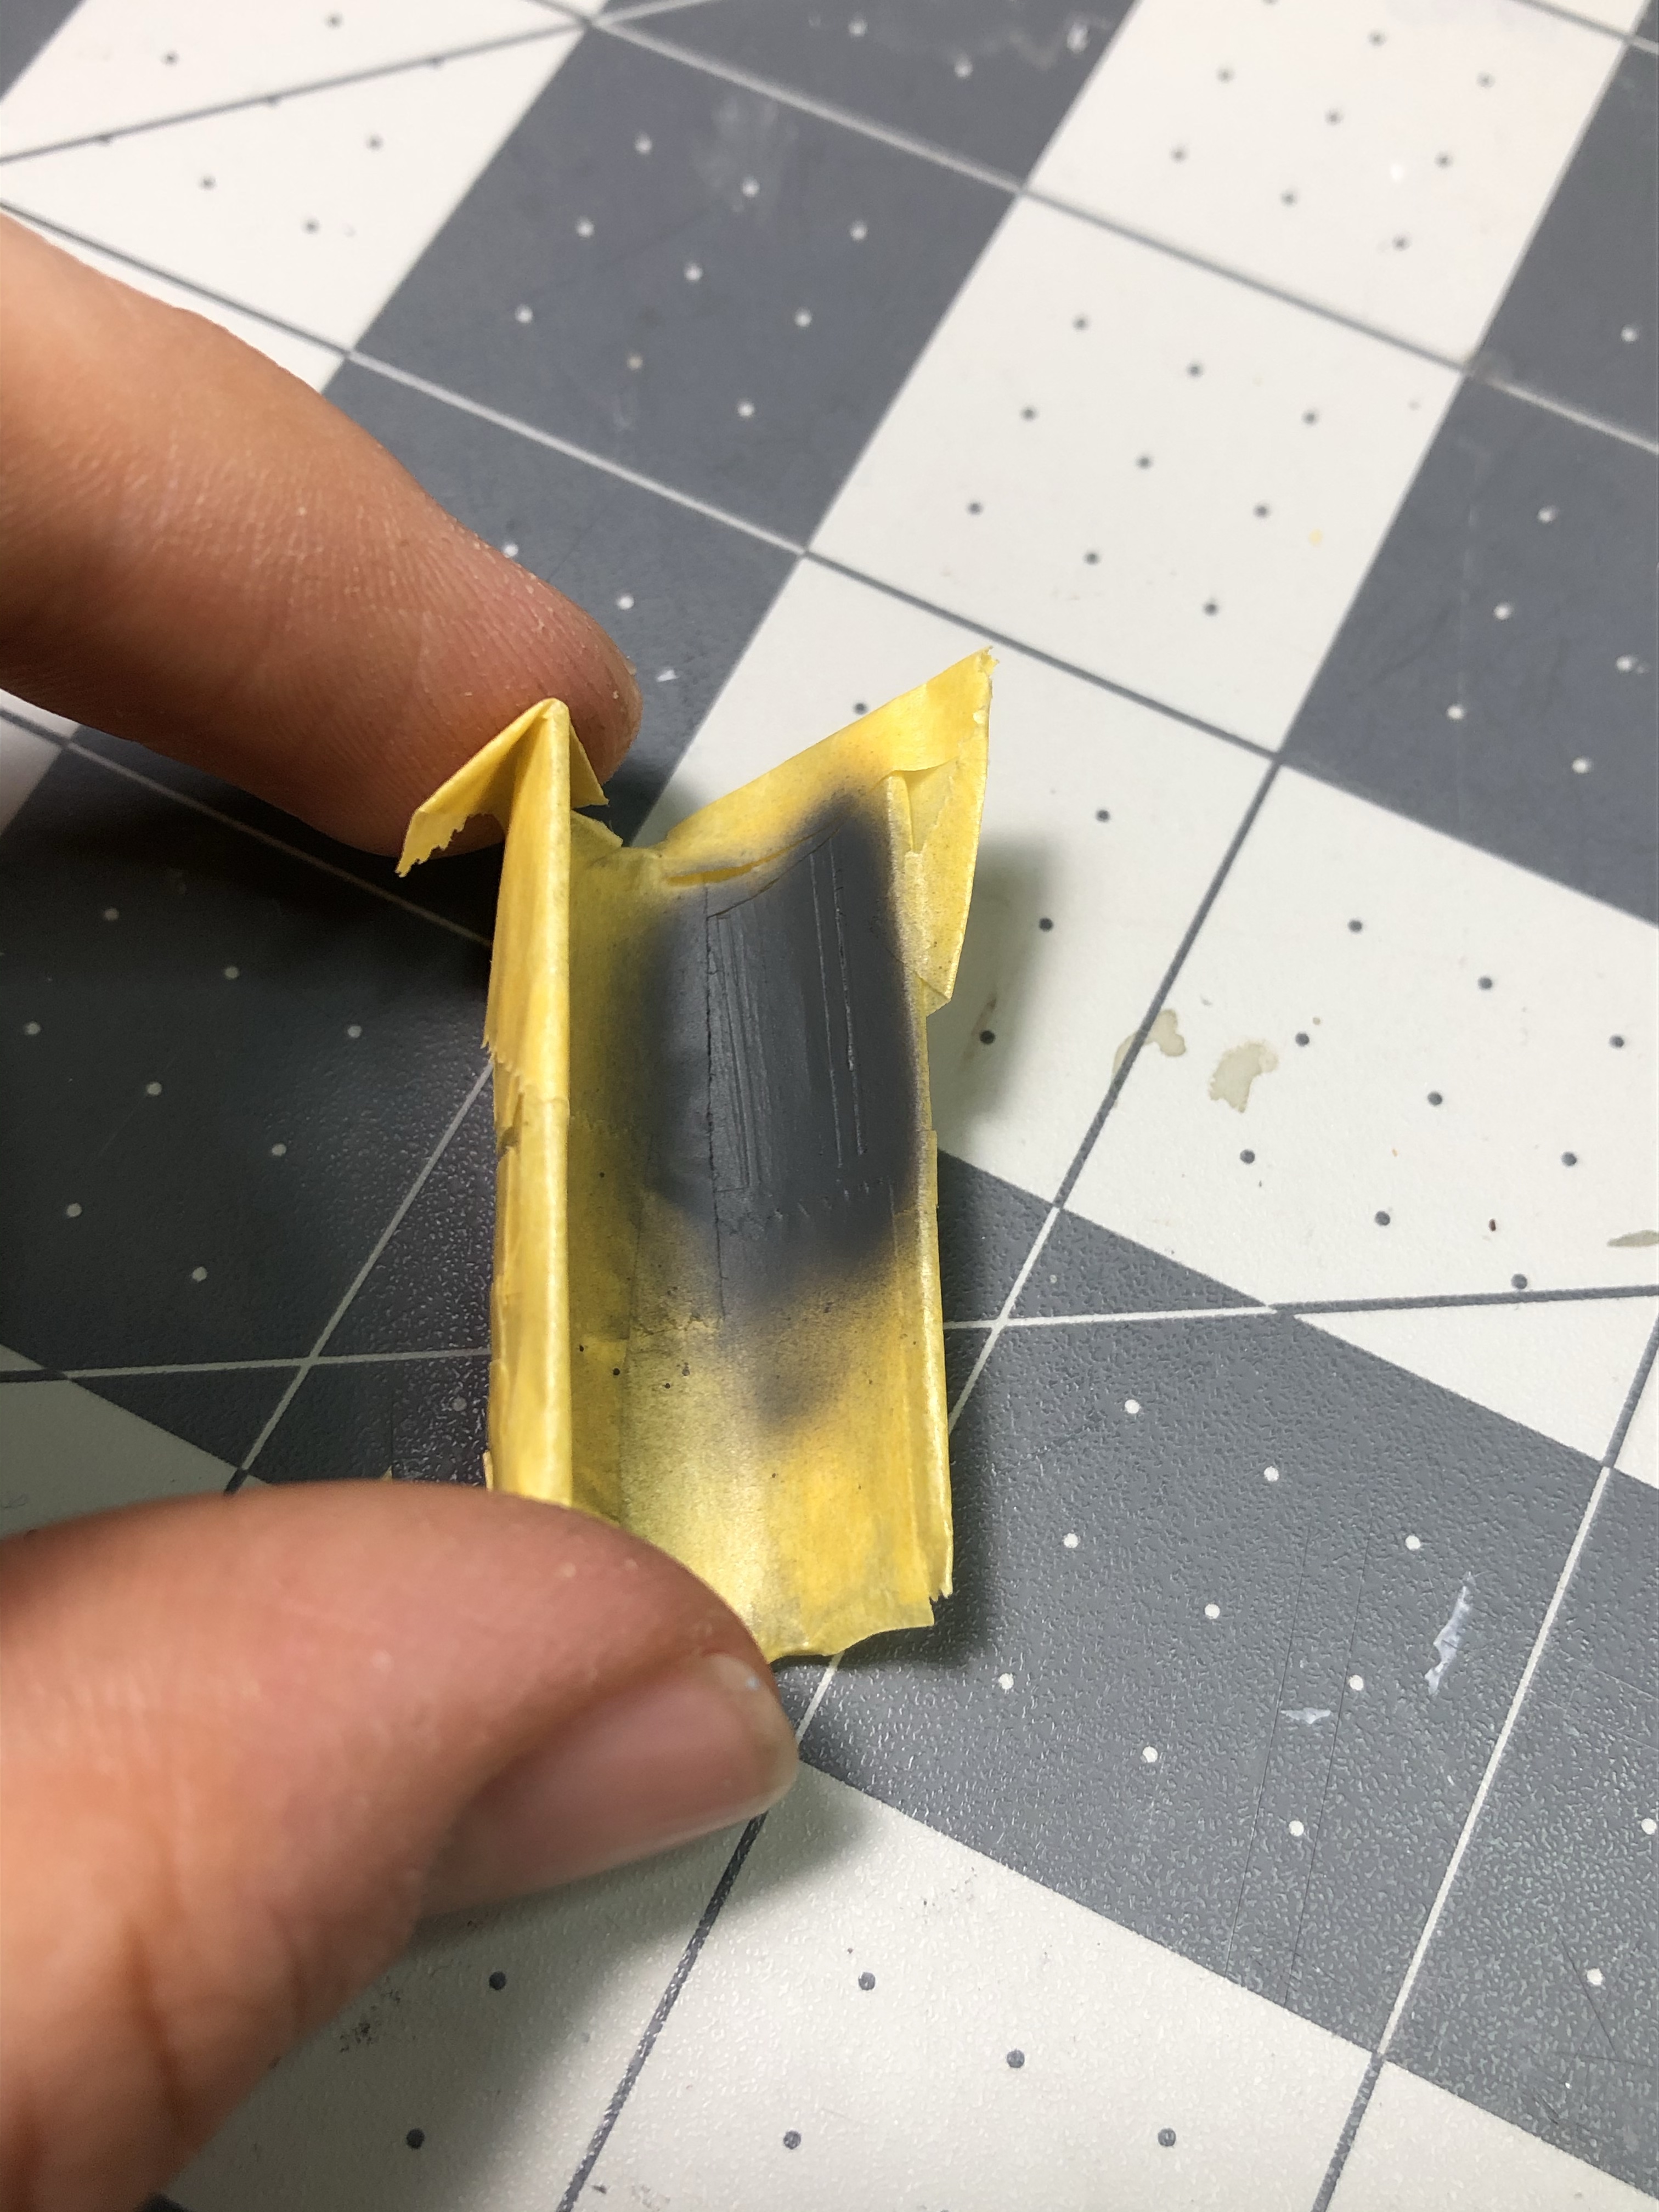
I made some significant mistakes along the way as well, notably not leaving enough time for the VMS decal setting solution to cure before spraying the satin coat and therefore wrinkling the otherwise perfect decals. Another problem I encountered was that the canopy did not seal perfectly with the fuselage causing overspray to get up inside the cockpit, something that I’ll need to look out for next time around. I also used the exhaust flame hiders as a “test run” for future German AFV exhausts. I’m not happy with how they turned out but that’s not the point, the goal was to find out what worked and what didn’t and now I know for the future how to improve.

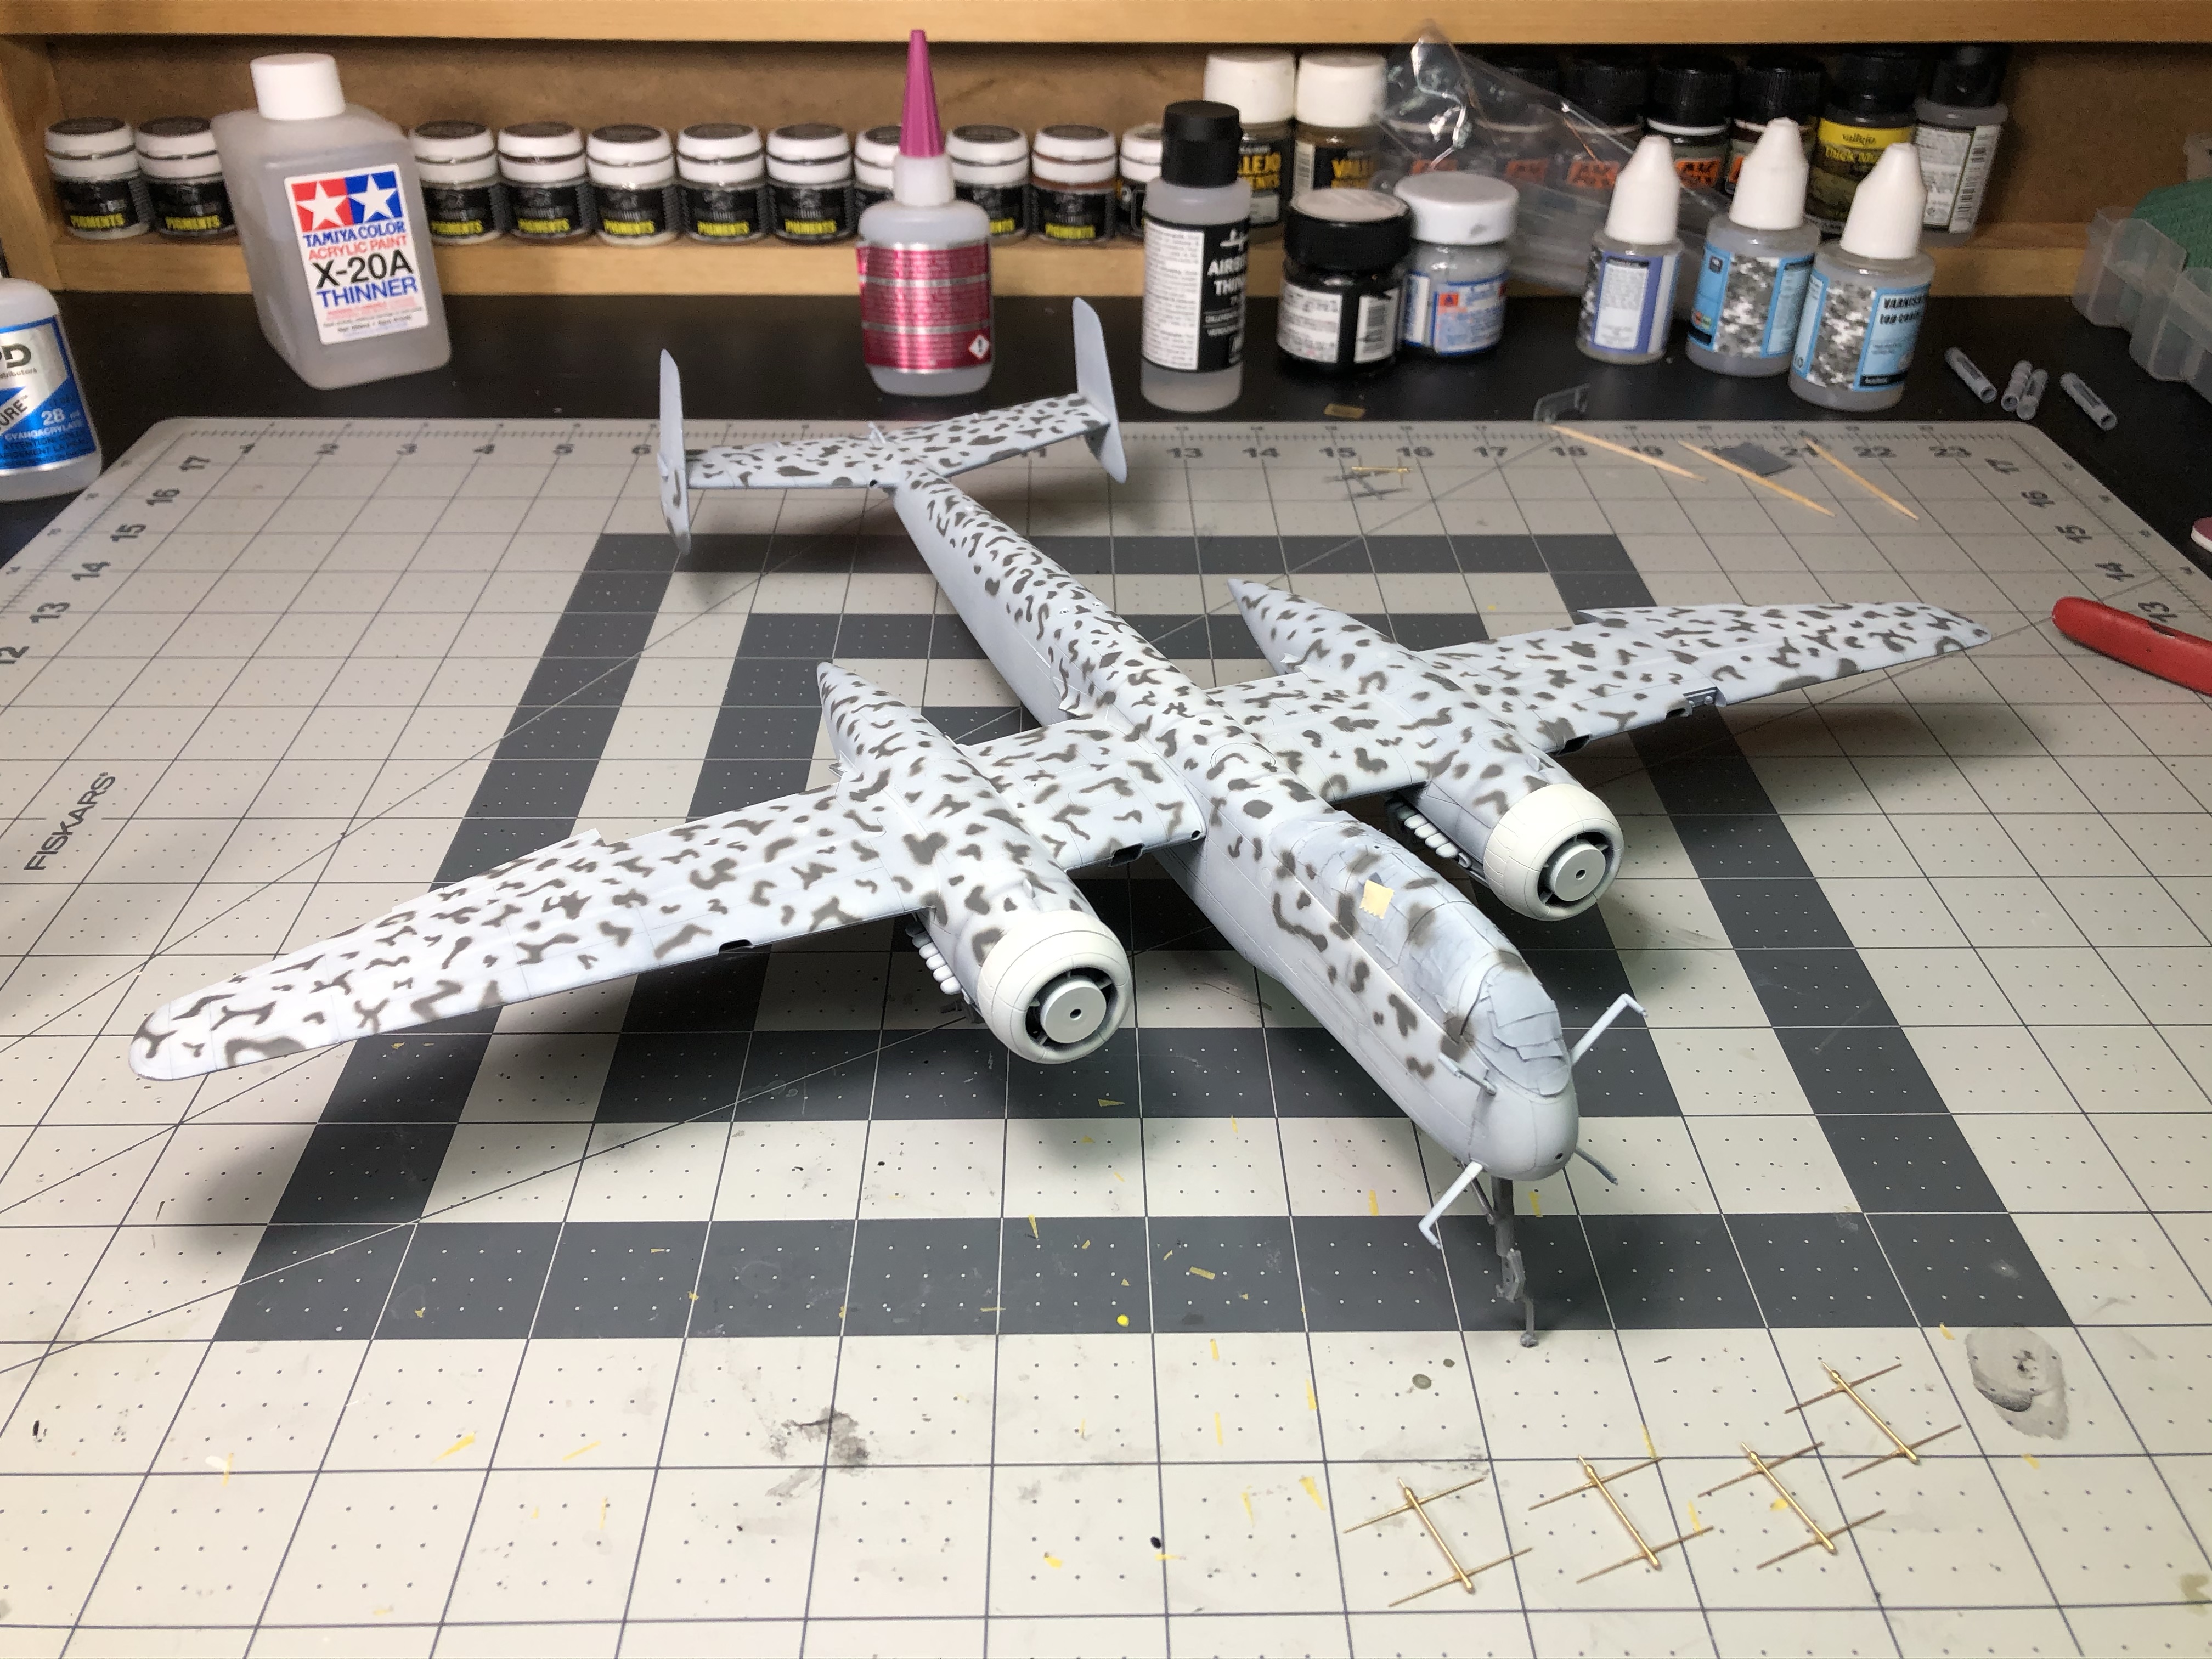
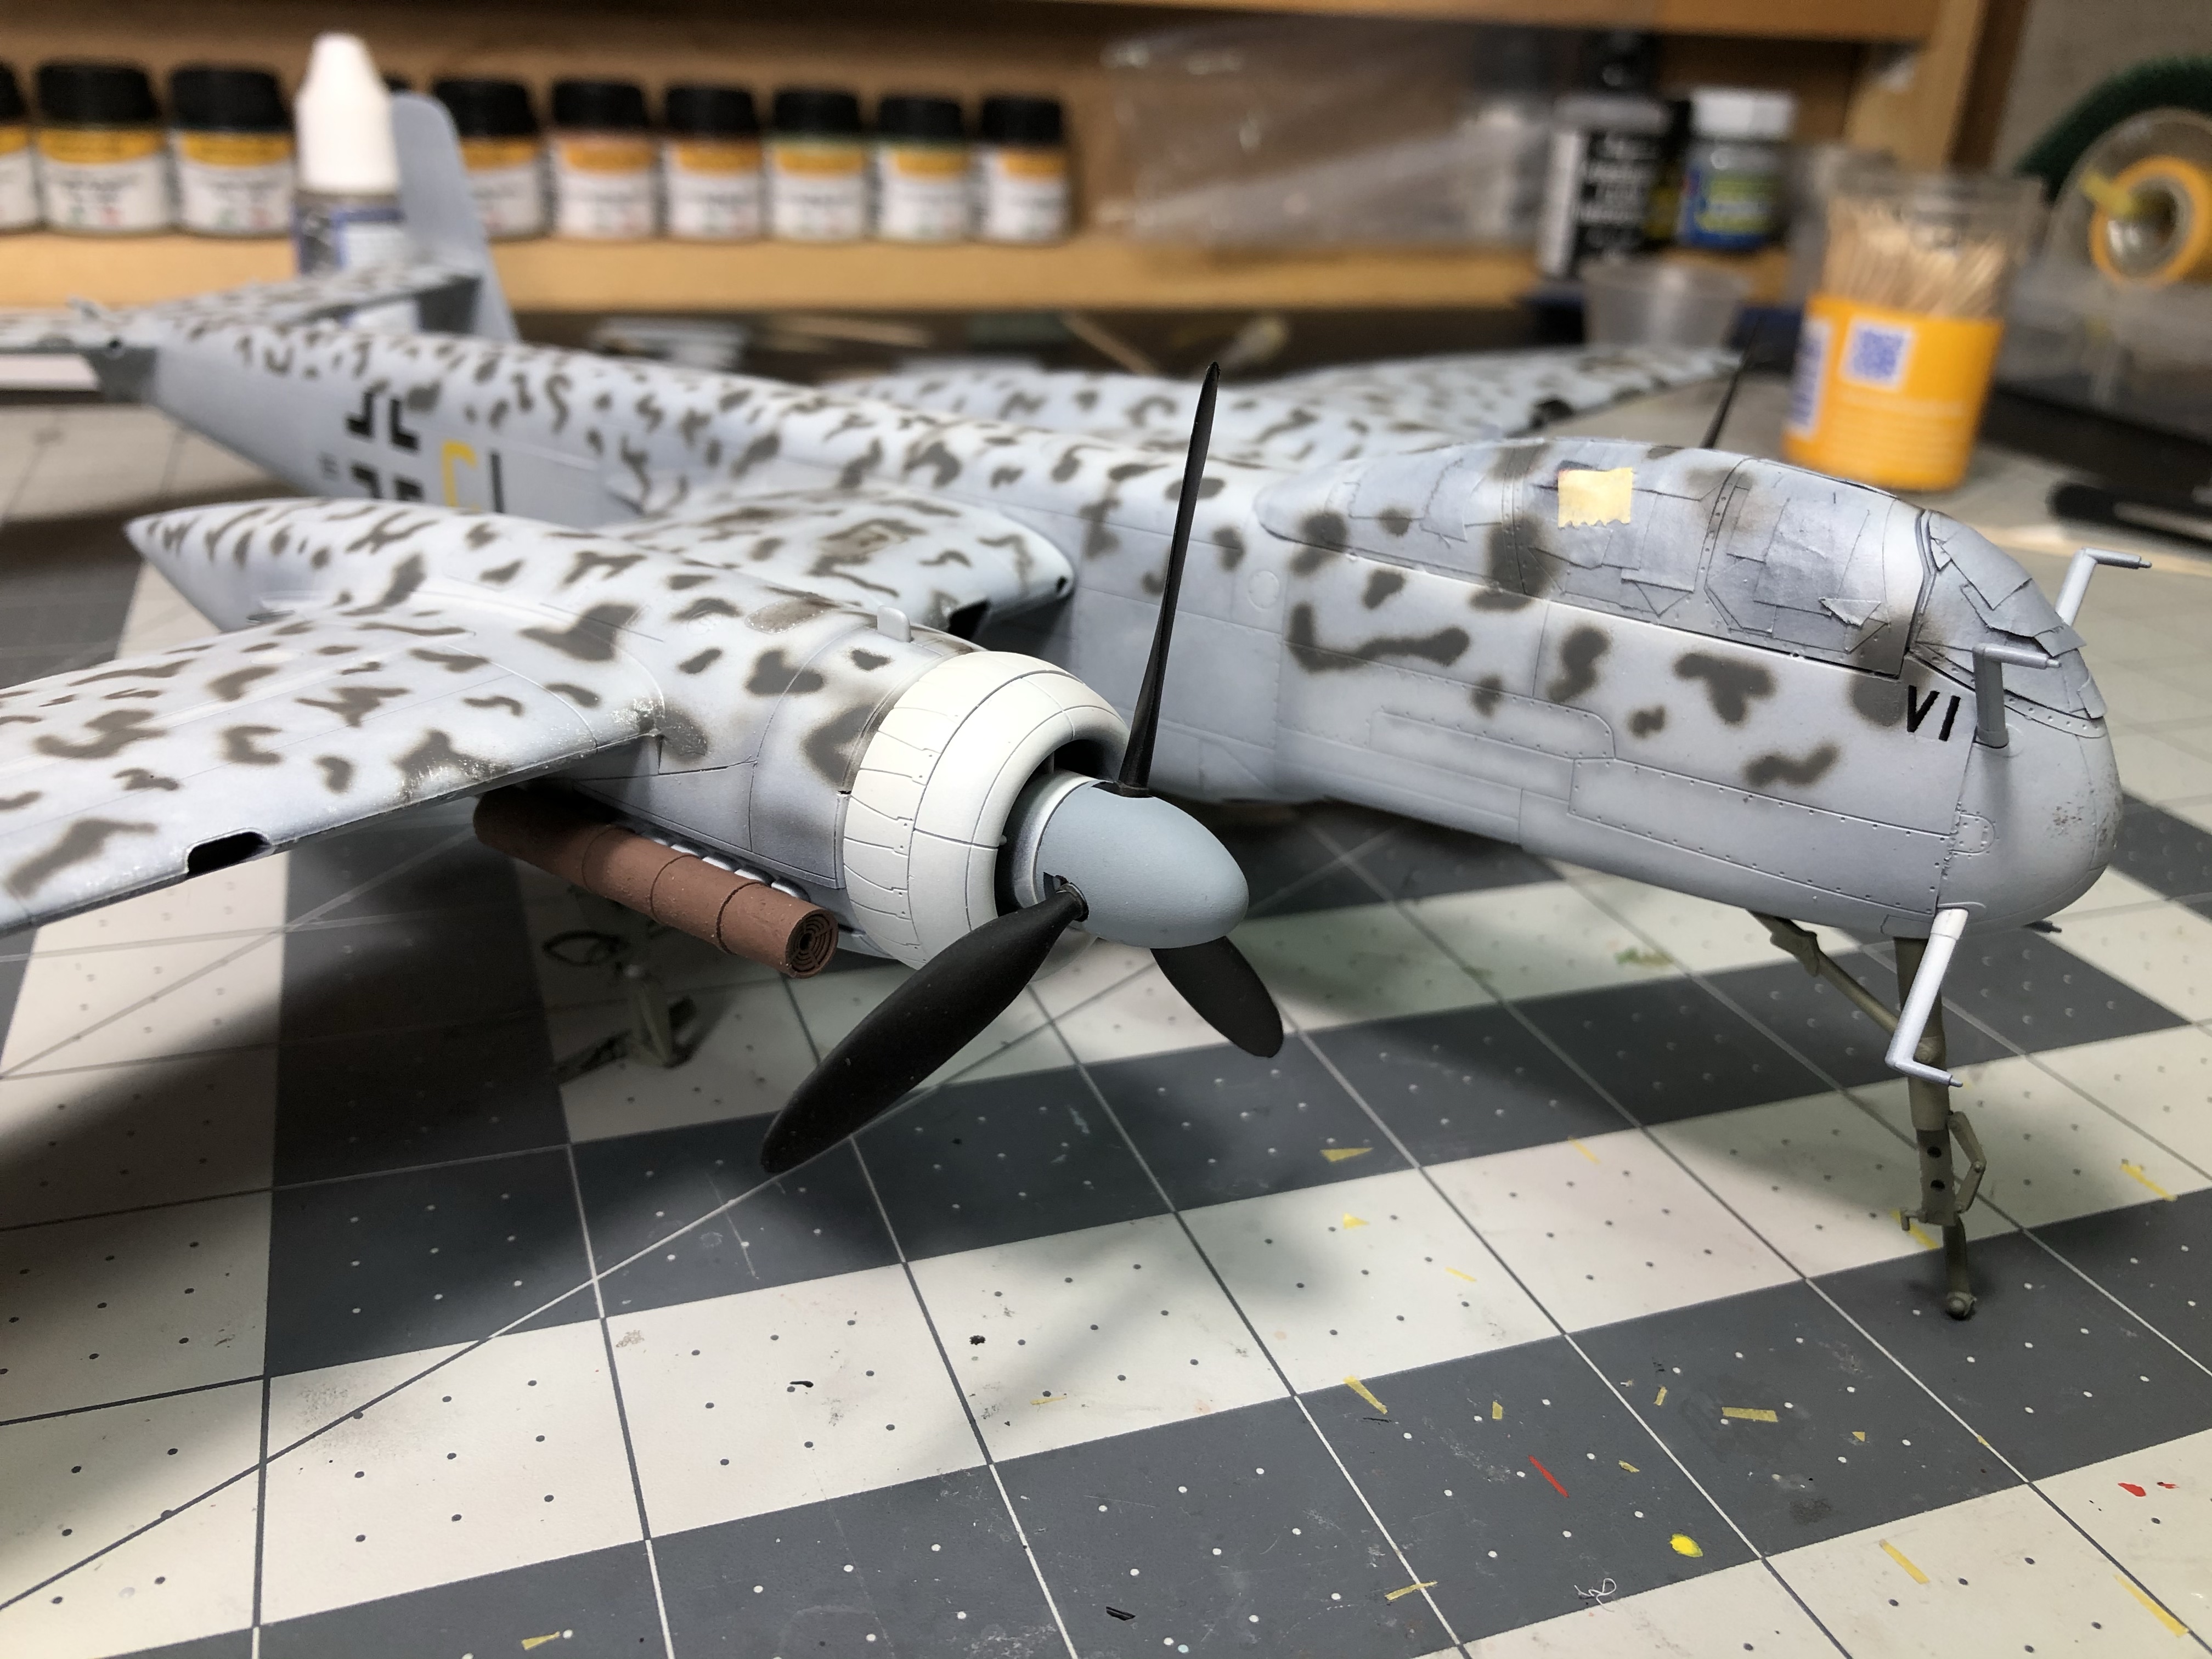
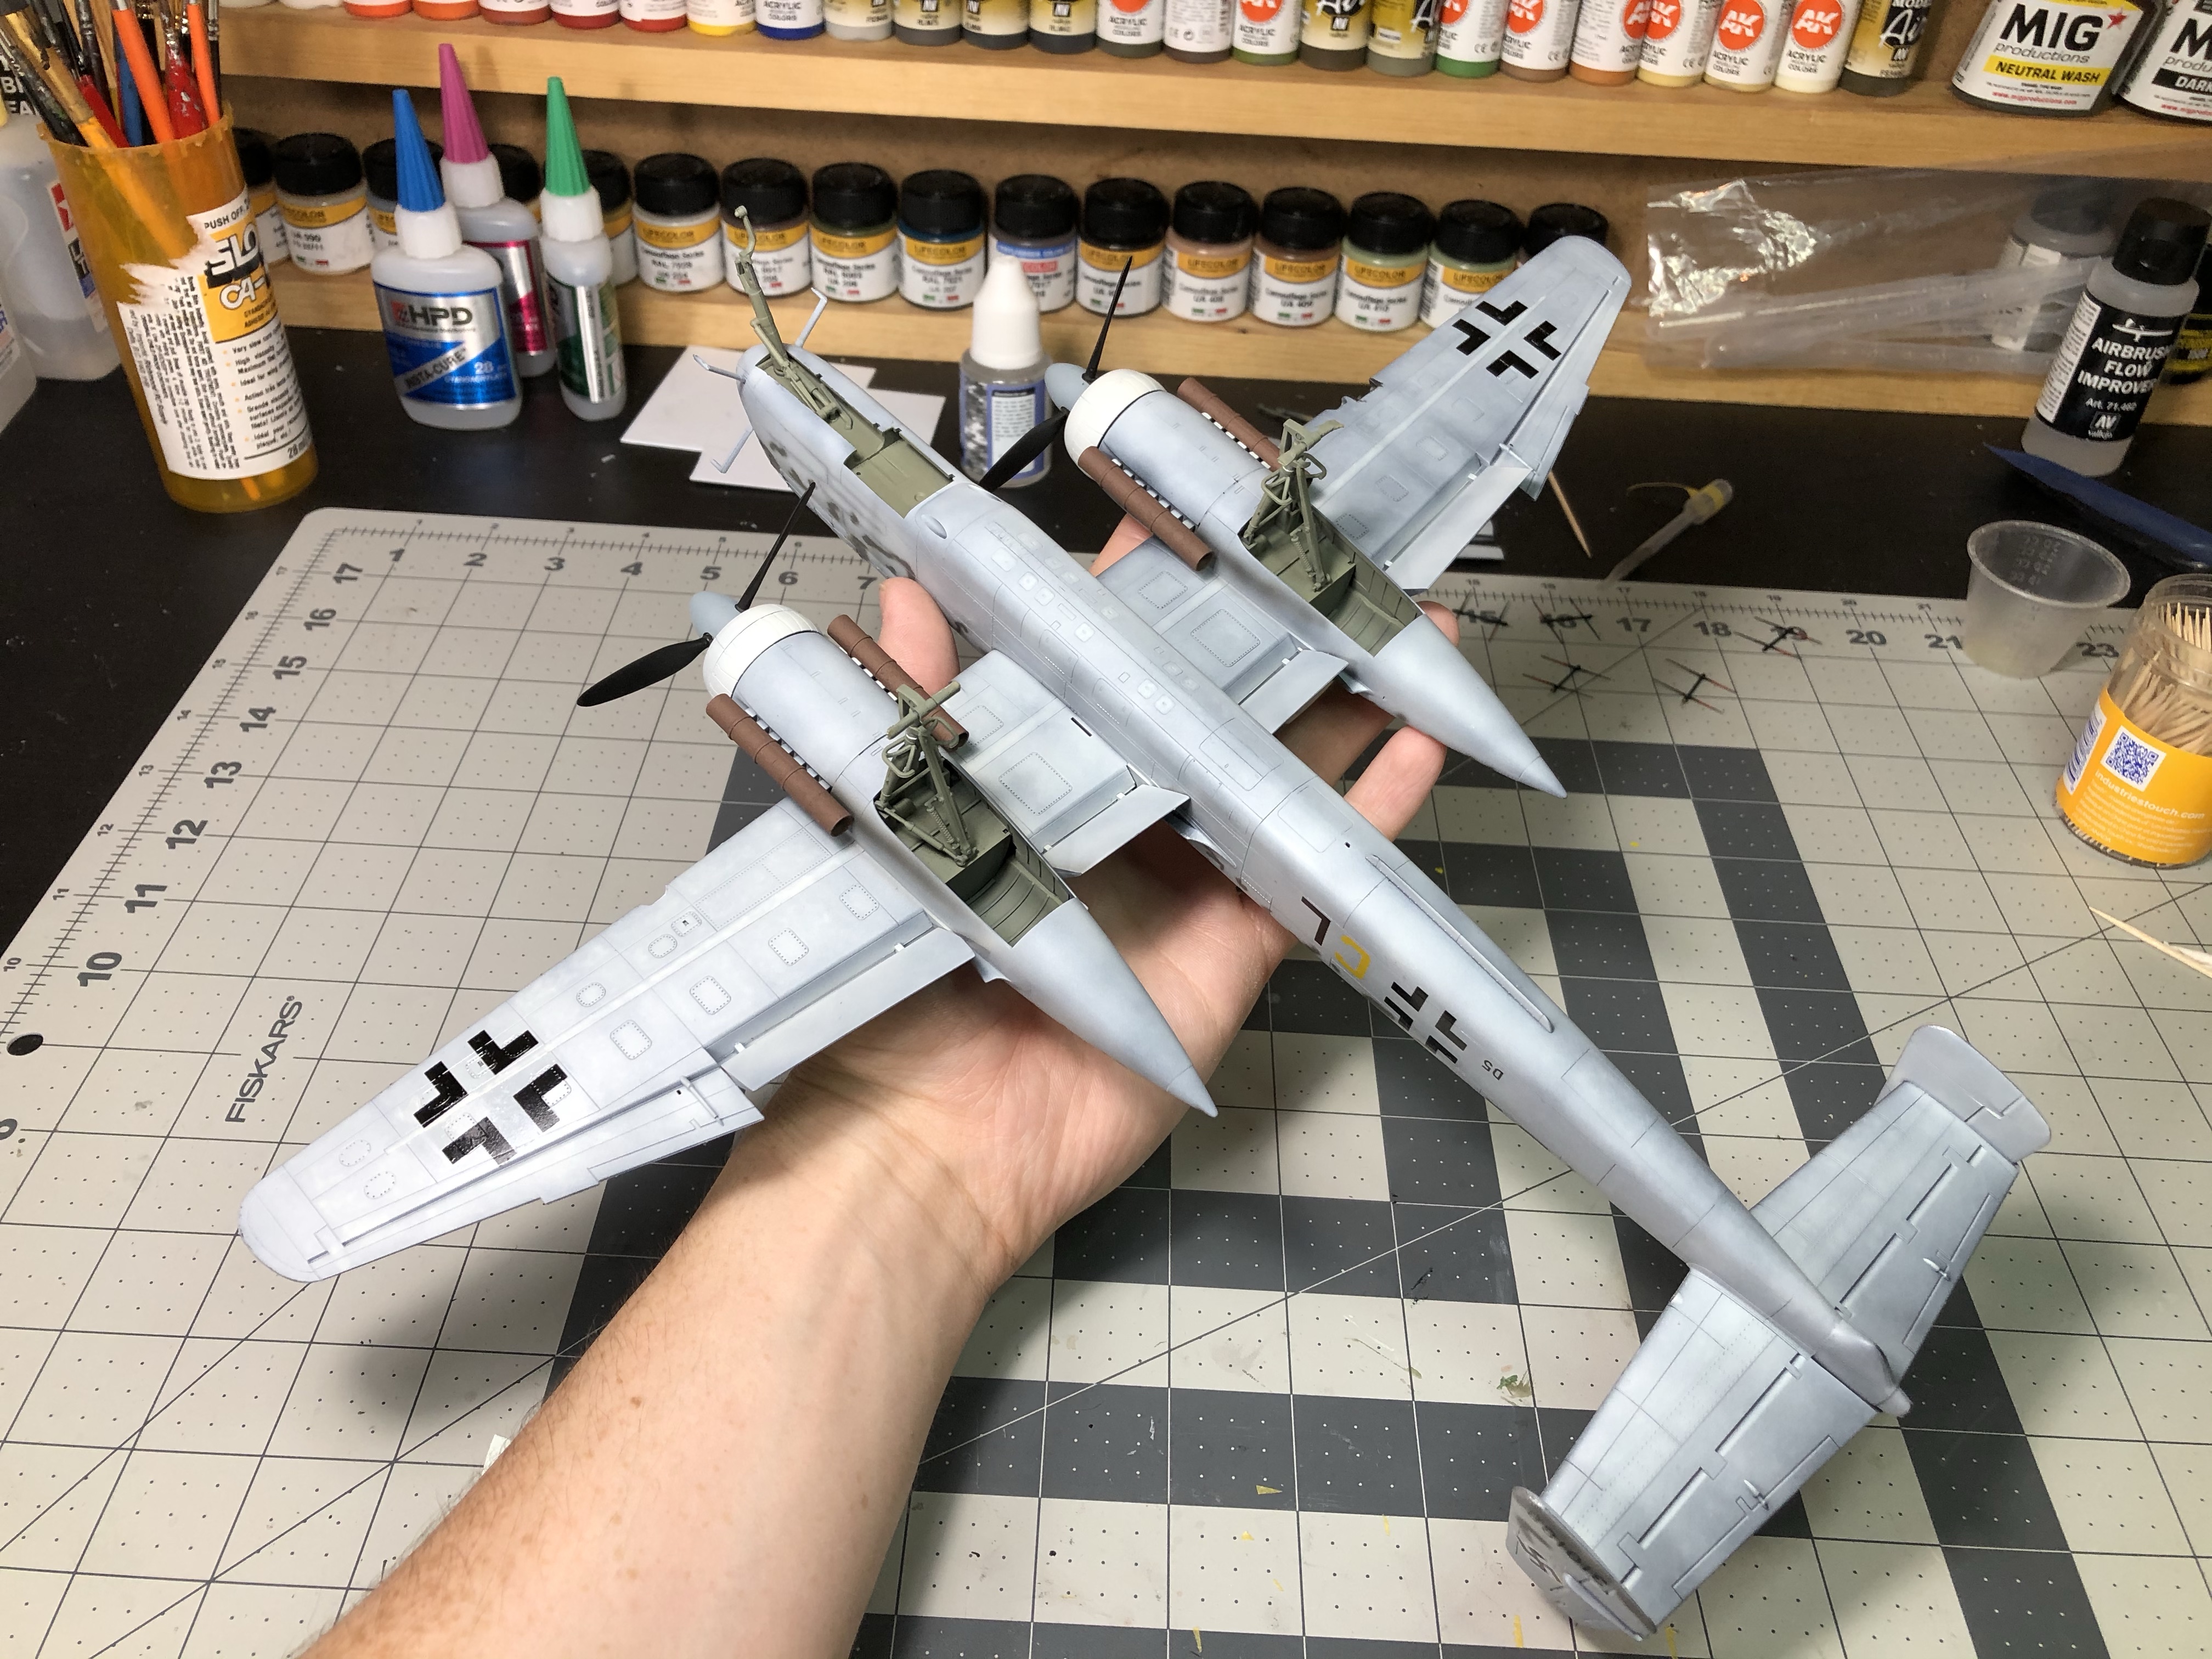
As for the model itself I’m definitely happy with how some additions enhanced the model. Eduard Models’ Resin wheel set definitely added some pop to the final product and I was pleased with where I was able to get them for the final product. The Master Models Fug-220 Radar set also really enhances the front of the kit.

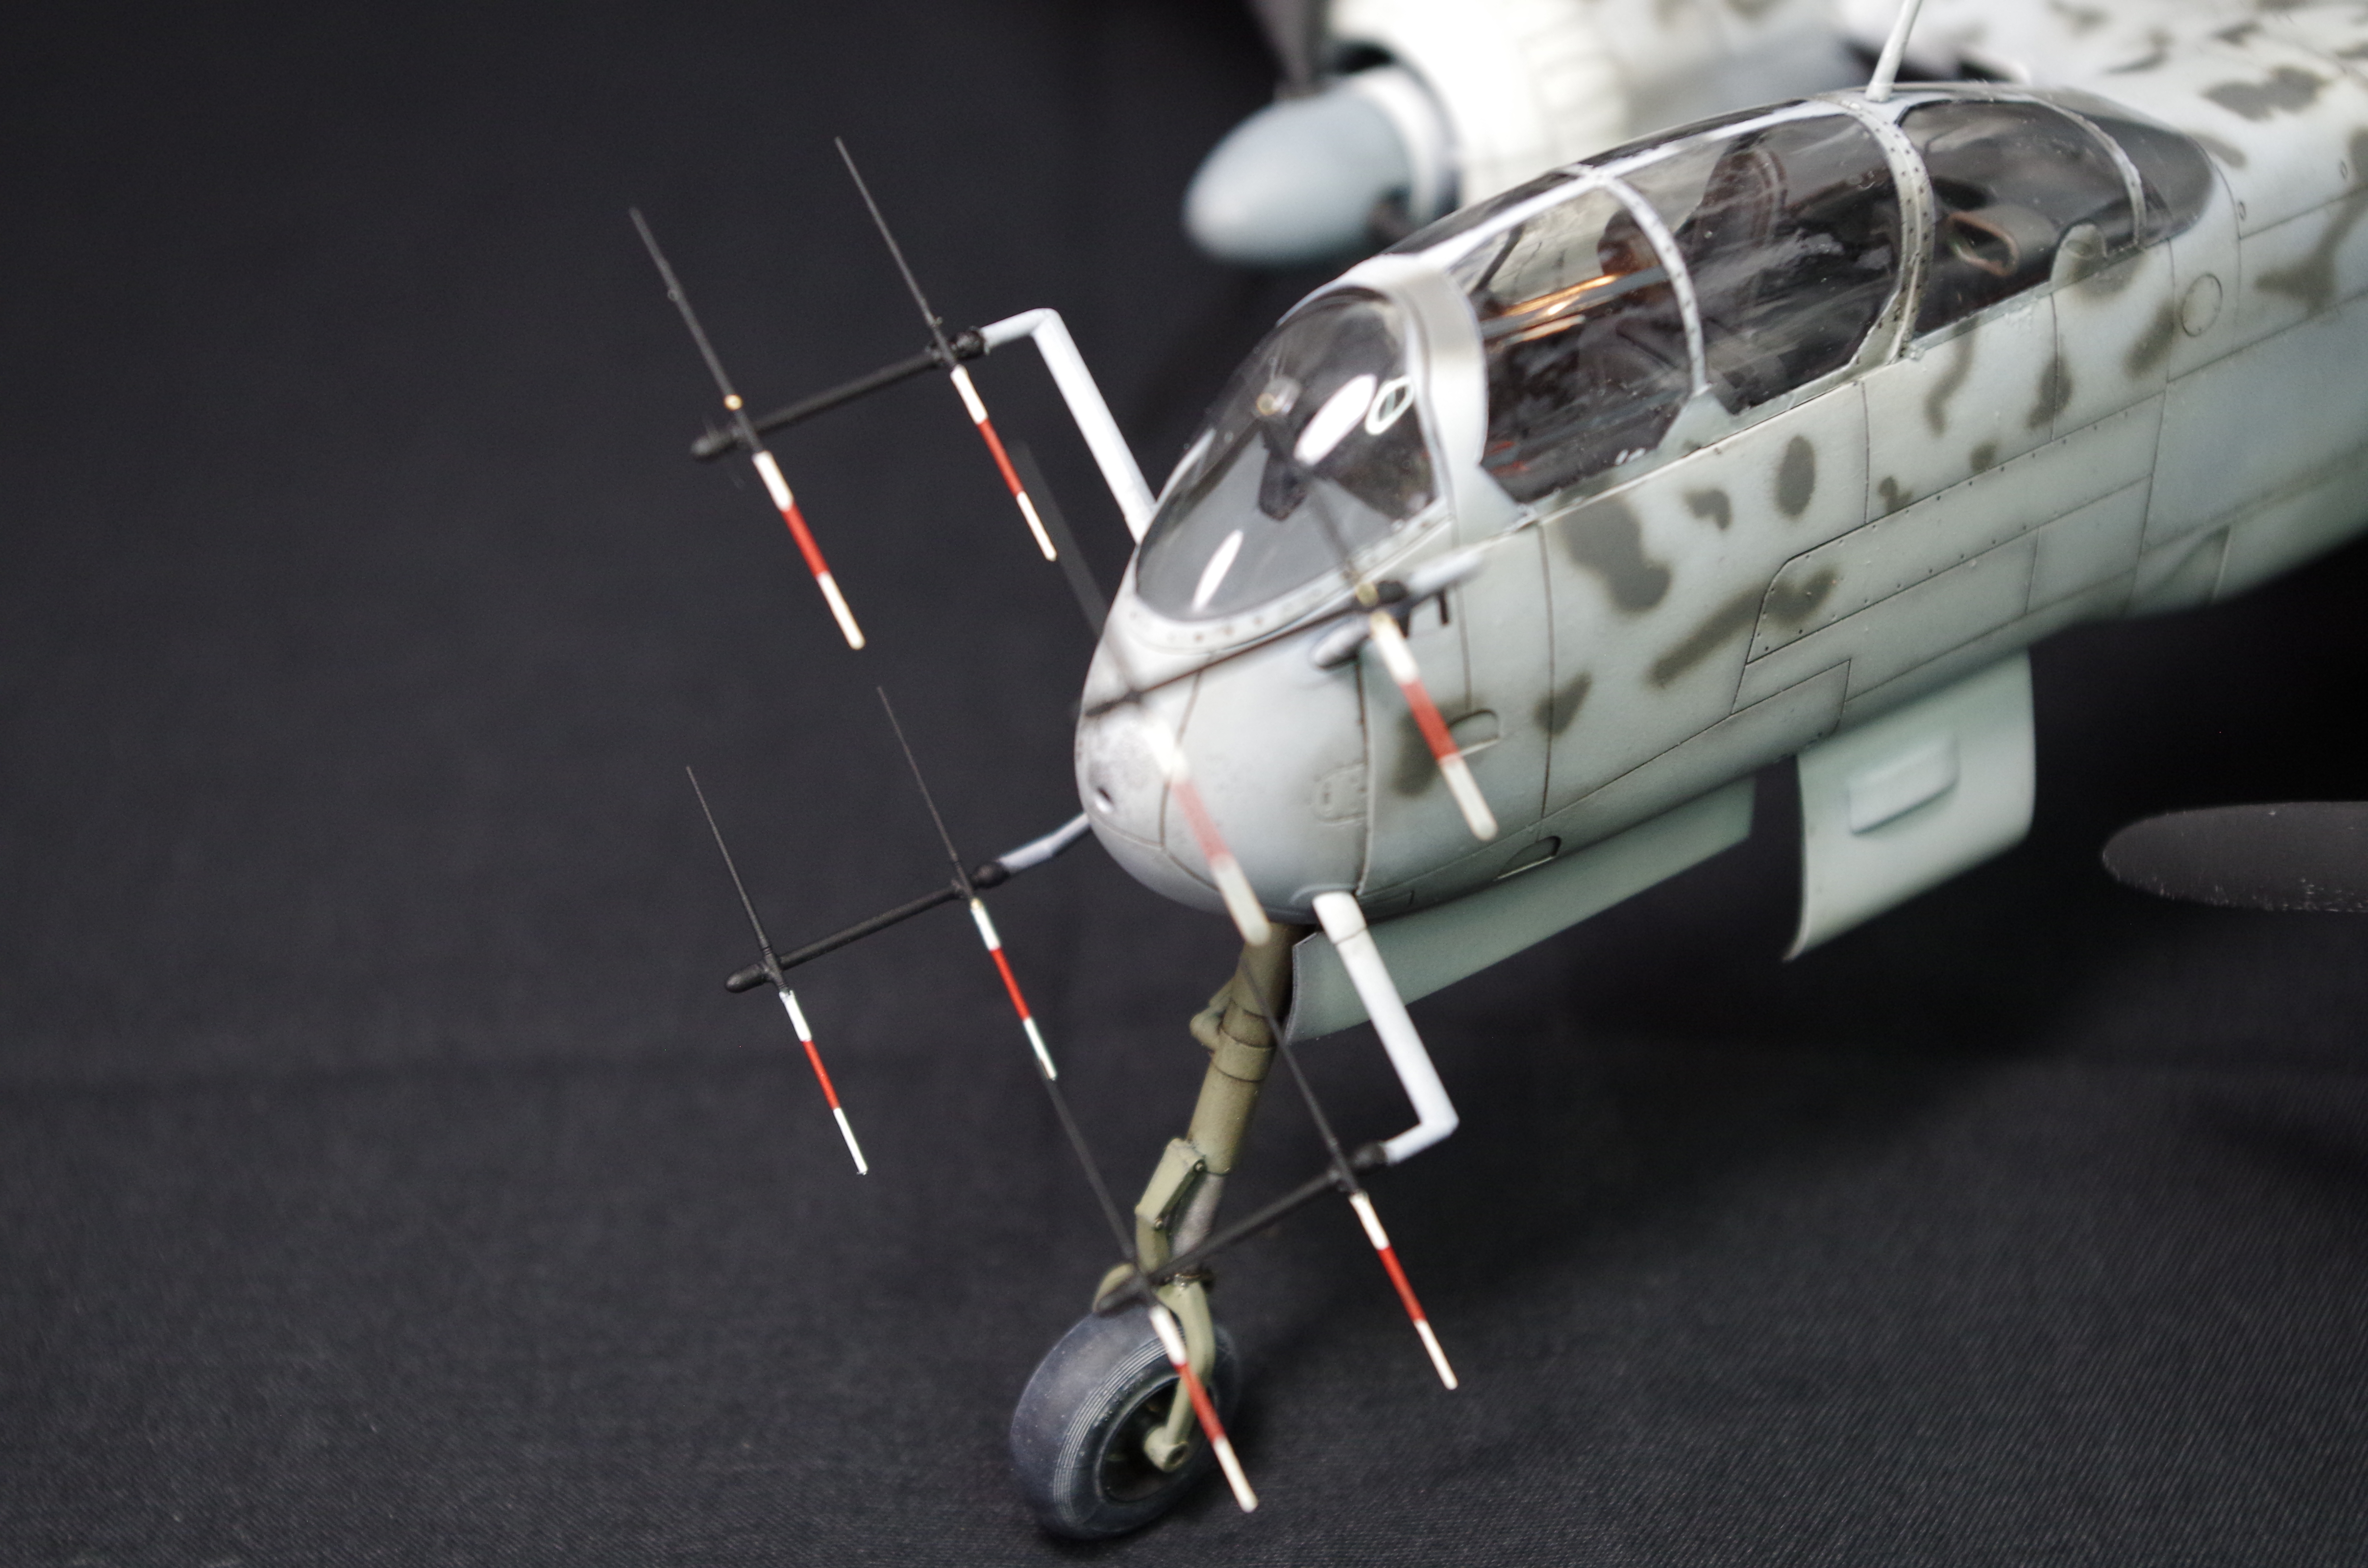
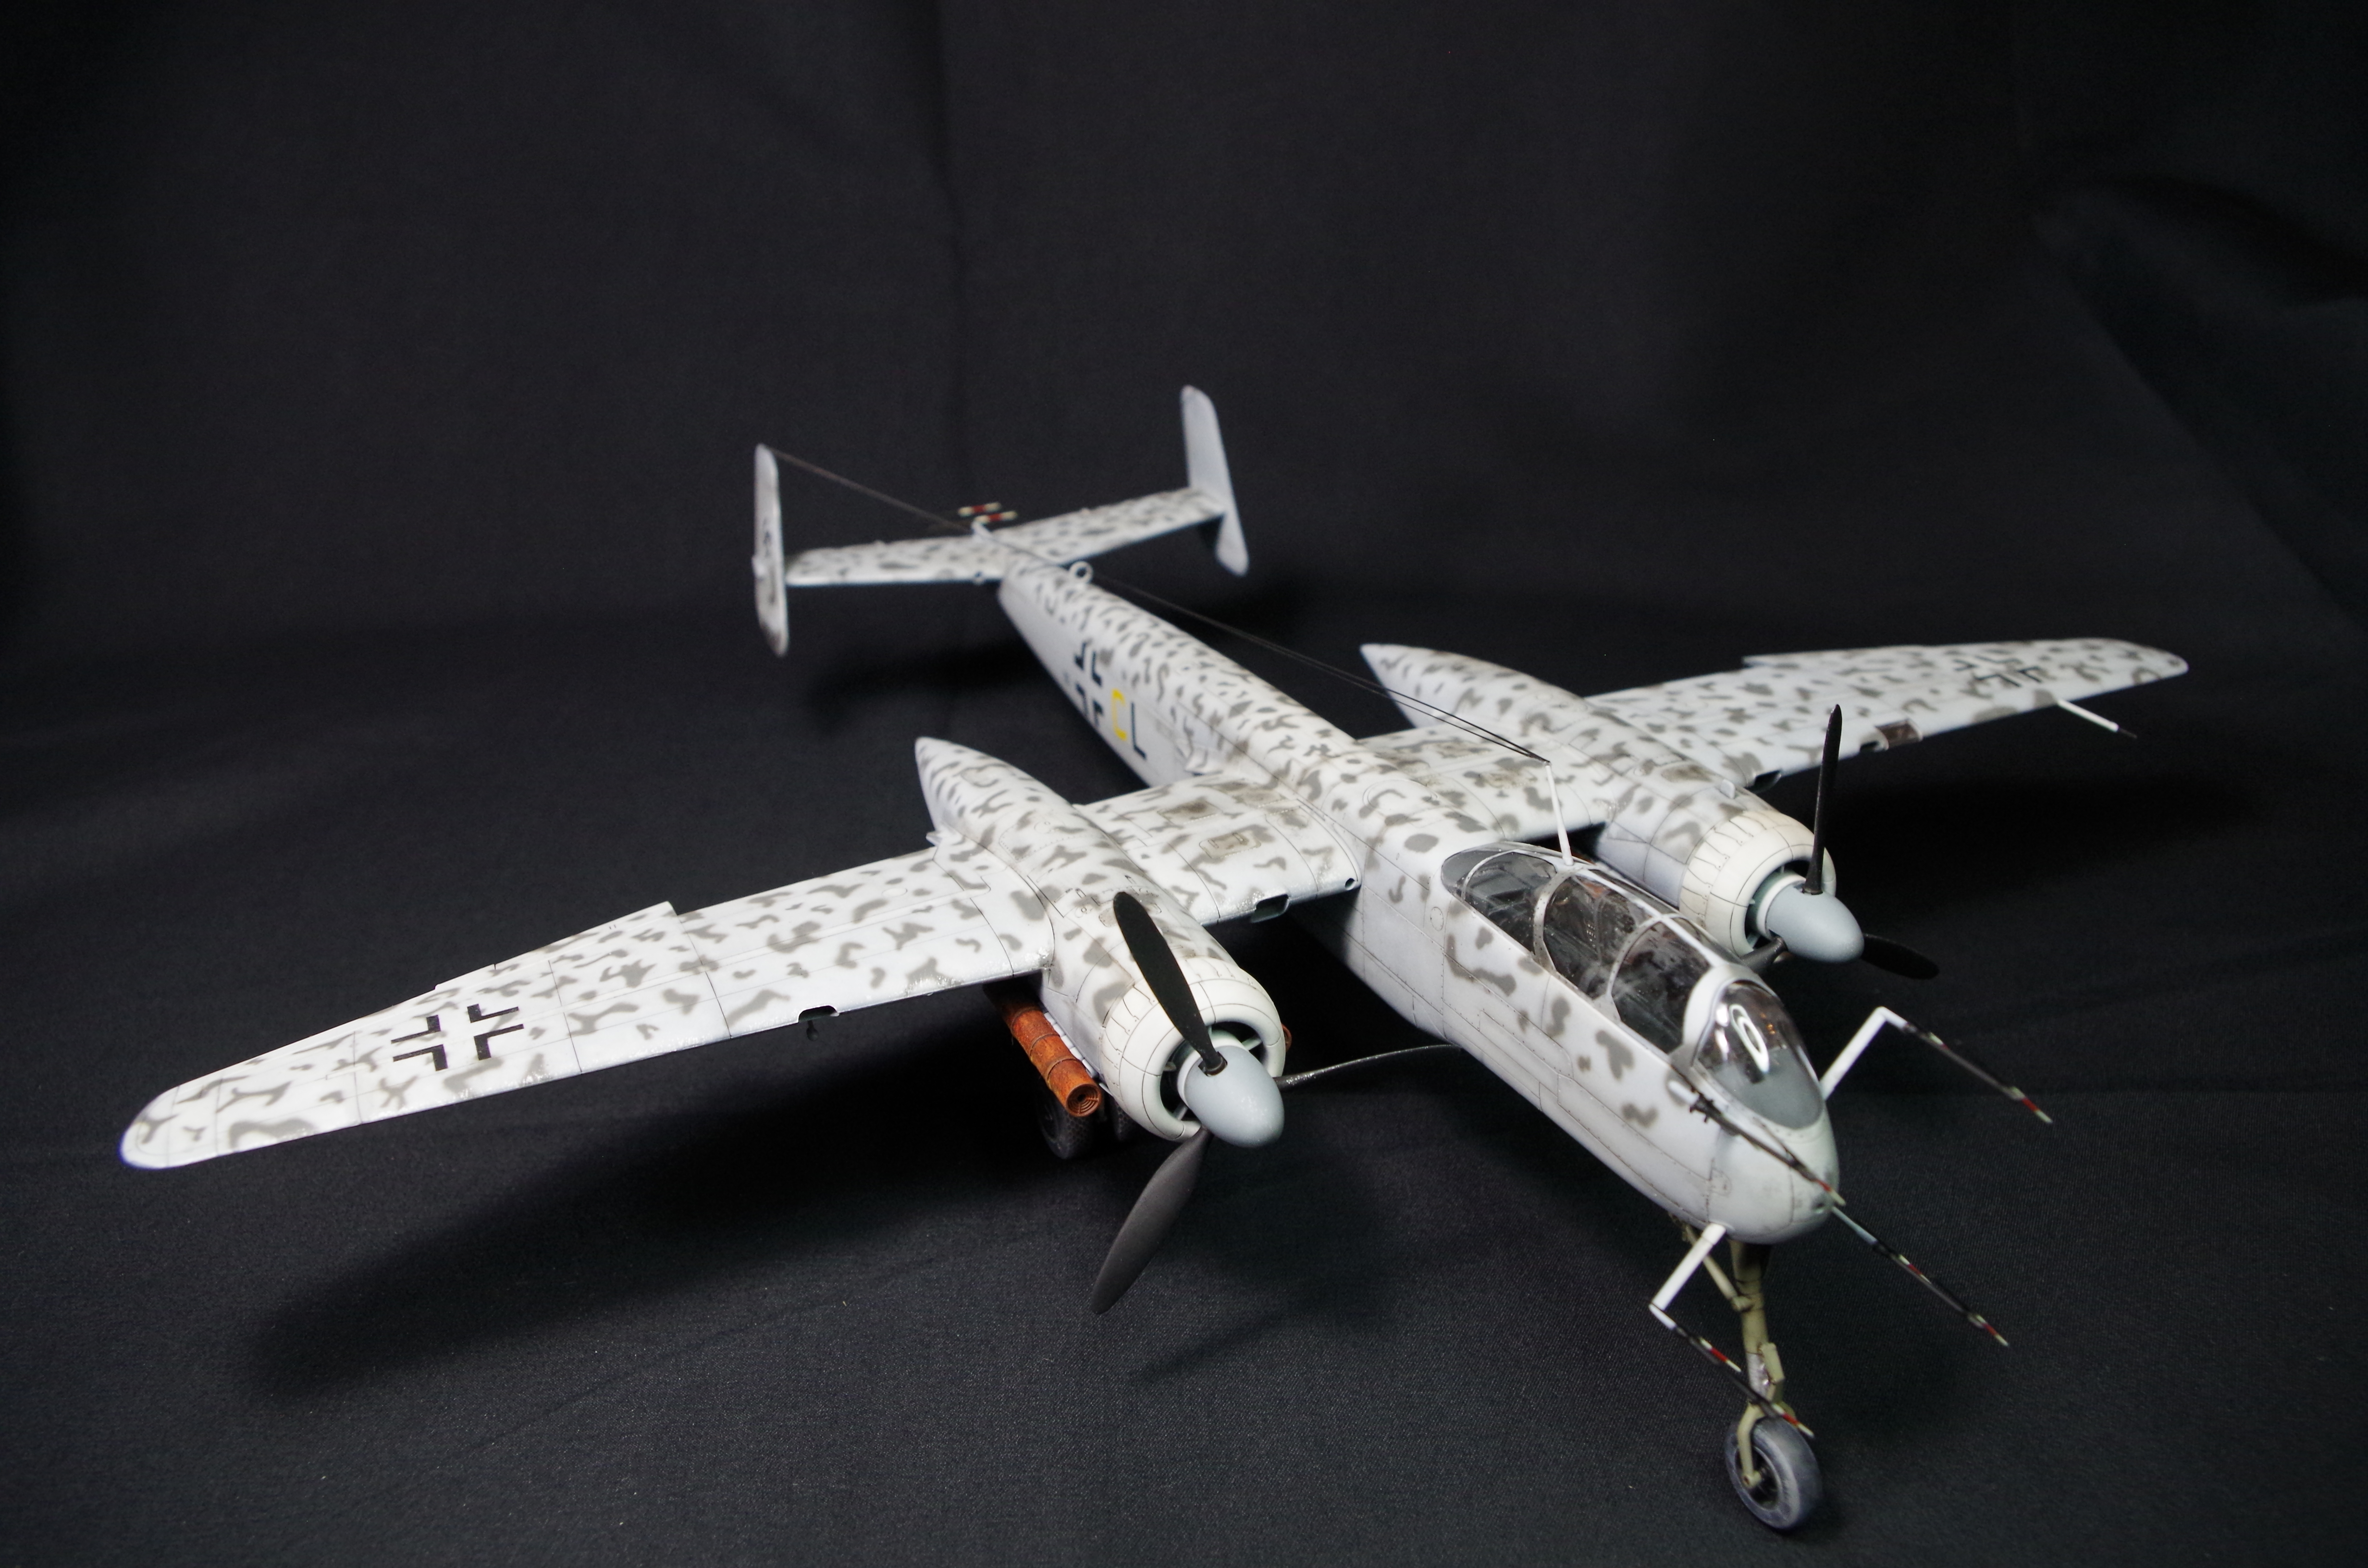
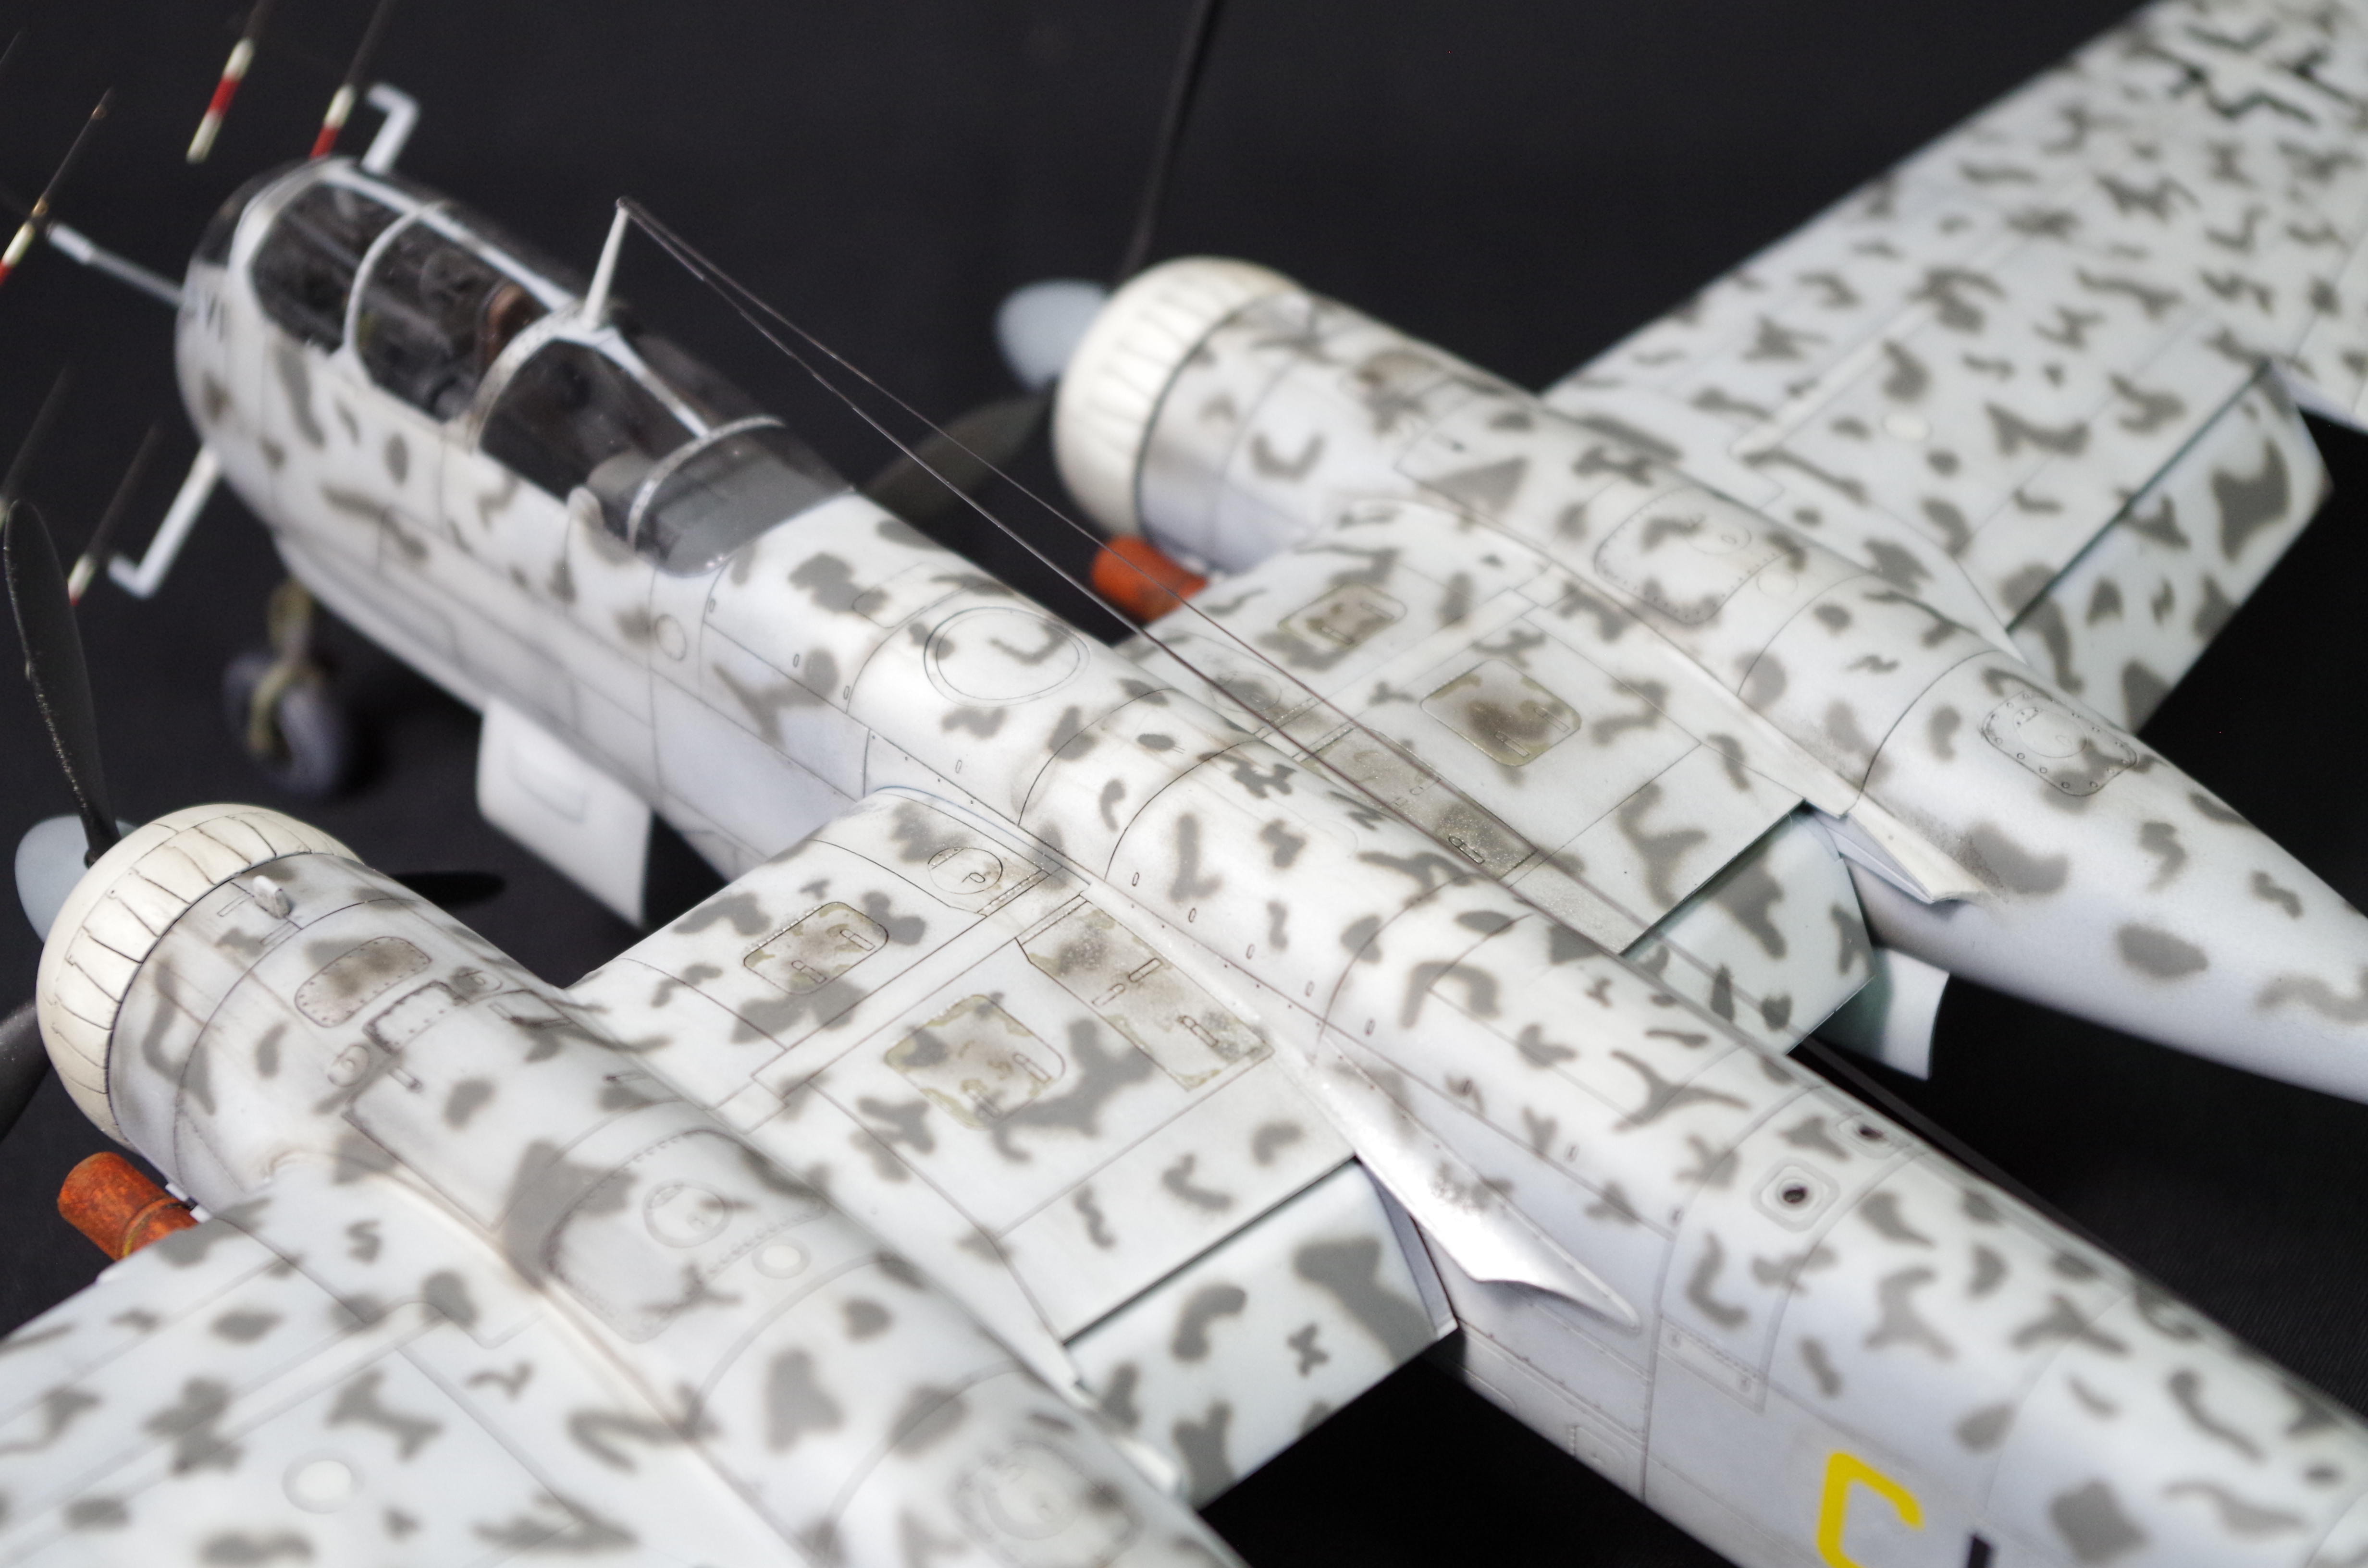
As for the weathering and finishing on the model, I used Abteilung 502 oils for an initial dark brown/black wash. I also opted to highlight some select panels with the airbrush. I used Mig Productions Oil and Grease as well as their Fuel stains product as well. The aircraft was painted with Vallejo Model air Grauweiss and Grauviolet for the spots. It was sealed with VMS’s Satin and Matte clear coats.

That’s a wrap!

Categories
1:48 Aircraft

Tamiya He-219 “Uhu” (Part 4)

Onto the camouflage! Suffice to say this particular scheme has been one of the most labor intensive patterns I’ve ever had to paint. I selected this specific scheme because I felt that the grey-violet spots over the Grauweiss base color really stood out. I also felt that I could create more interesting weathering effects with a light colored canvas.

Final camouflage scheme completed.

For painting the spots I used Vallejo model RLM 75 Grey Violet thinned with acrylic thinner and flow improver. The painting process really changed during the process and I frequently changed ratios to find the best solution for fine detail painting. I used my Sotar 20/20 airbrush and while in some cases It sprayed really well, I was finding that it was really inconsistent in how it sprayed. Lots of clogging, tip dry and spidering on the surface. It’s probably just me not used to the extremely fine nozzle and needle than what I’m used to (Badger 150).

After finishing the initial camouflage coat I also did some initial weathering on the leading edges and select panels. I really wanted to portray a heavily weathered aircraft at the end of the war.

For sealing I tried out VMS’s varnish coats which sealed the paint excellently. Instead of going for a typical gloss goat I just used a satin which was definitely smooth enough for decals. I definitely want to do more product reviews so I think I’ll post a more detailed review of VMS products in the future, possibly one for Lifecolor paints as well.

Decals were pretty straightforward despite being over 20 years old at this point. With the assistance of VMS decal setting solution I was pleasantly surprised how well then went down, really great stuff!

Anyway that’s it for now at least, next up is weathering!

Categories
1:48 Aircraft

Tamiya He-219 “Uhu” (Part 3)

I’ve been getting a lot more work done on the Uhu as of late. Since my last update I’ve managed to get the final base coat down and get it ready for the first pass of camouflage spots. I’ve accepted the fact that I’ll miss my goal of completing the build in a single month, seeing as I’ll have to finish it sometime in the next four days. To pick up where we left off I masked the canopy off before spraying the first coat of primer down.

I really wanted to go the extra mile so I painted the railing for the cockpit window in the inside of the canopy. We’ll have to see how it looks in the end.

Painting

For primer I used Mr. Finishing Surfacer 1500 Black thinned with Mr. Levelling thinner. I was pretty happy with the results to be honest and I’ll definitely be using this combination in the future for primer. It goes on super smooth and adheres really well to the surface.

For the painting and weathering I really wanted to get a worn, weathered look in the aircraft. To start, I used the black basing technique. Paired with the very light base coat I felt this approach would be best. I used a Badger Sotair airbrush to achieve the fine squiggly lines for this technique.

First pass, picking up highlights.

I slowly built up the paint opacity with further coats until I felt it was at a good point. Some details I wanted to highlight was the wing spar strut and the panel lines around the cockpit.

I made the final pass blending the various highlights together and overall I’m pretty happy with how it turned out. I definitely still need some practice but it’s a step in the right direction.

The final result