Category: Projects

Where various build projects are documented and posted.

  • CF-18A Hornet: Main construction and Painting

    CF-18A Hornet: Main construction and Painting

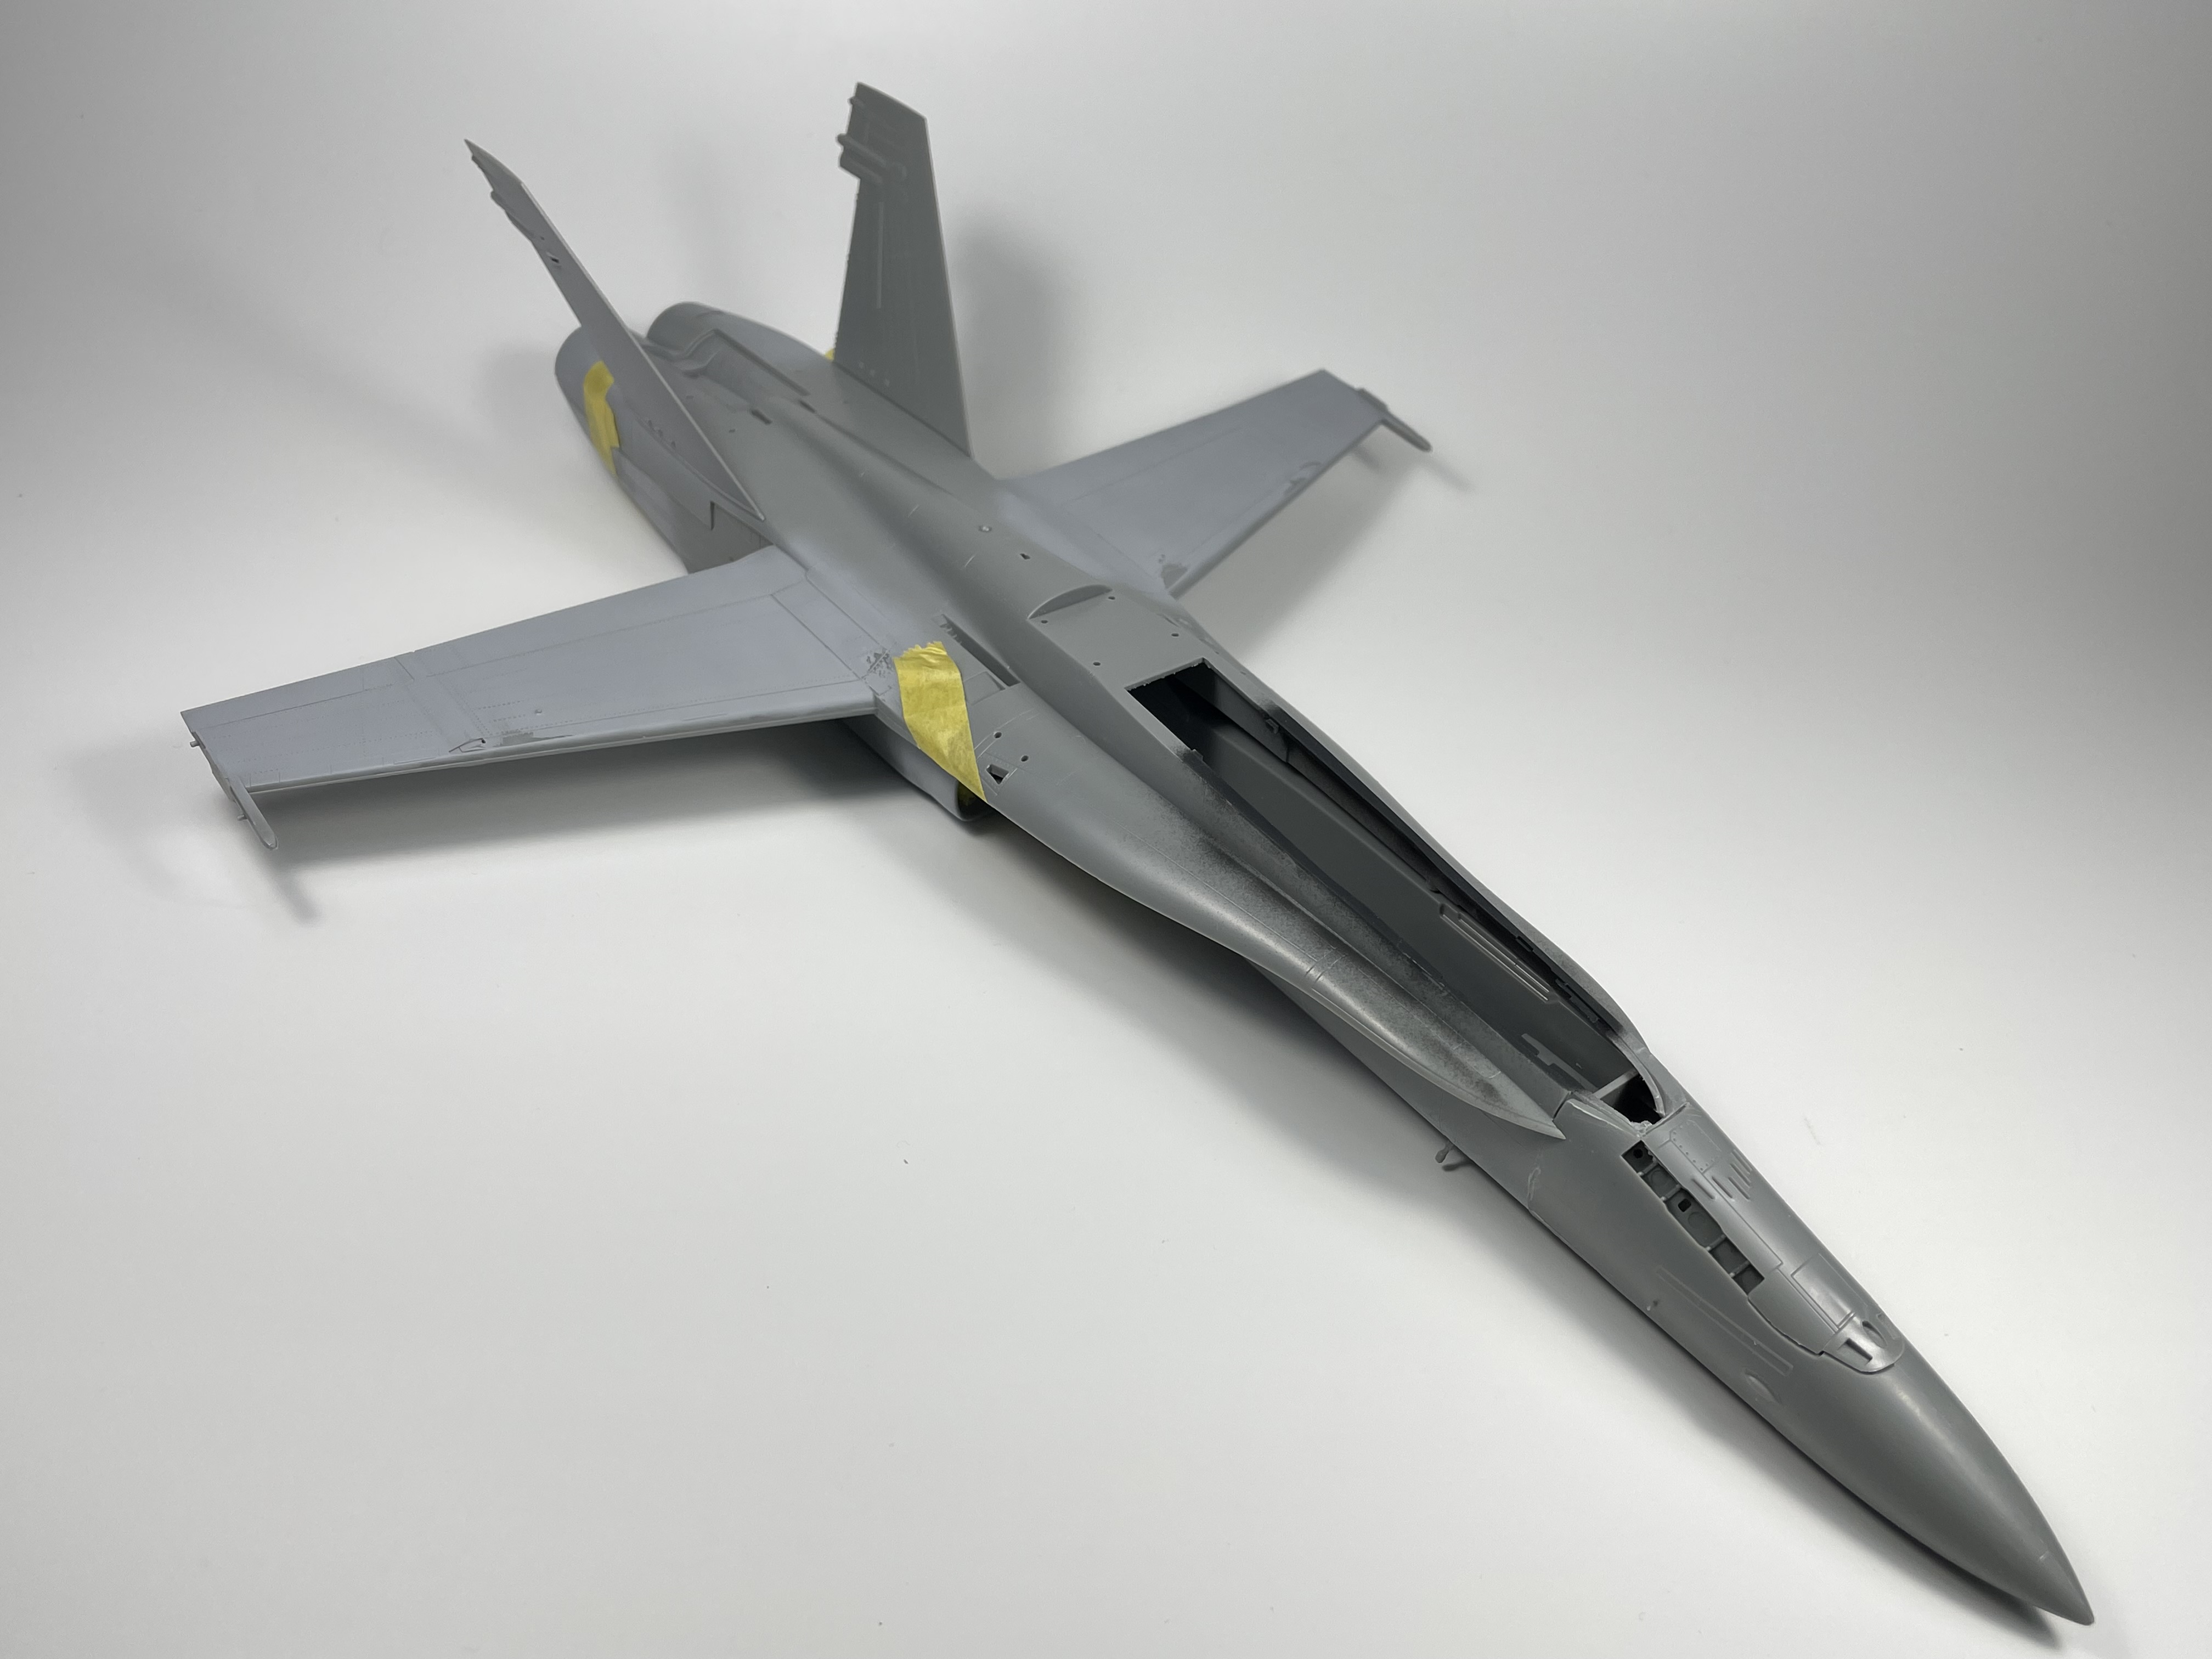
    With the cockpit and gear bays completed, work could get started joining the two fuselage halves and other assemblies before spraying paint. I have to admit, I wasn’t looking forward to this part as Kinetic’s nose assembly is rather infamous for it’s fit and this build is no exception.

    The whole nose and front windshield assembly is such a bear to build, It’s really quite frustrating that they built it the way that they did. none the less I was able to complete it after a lot of sanding and swearing and got it to a place where I was reasonably happy with it.

    almost ready for paint!

    Seeing as I’m opting to represent a early 1990’s Hornet, I also removed the nose antenna and opted for the early style antennas on the spine of the aircraft. Mr. Finishing surfacer black was the primer of choice (my default choice) and I got to work on the main painting process.

    I also started with the main painting process by marbling the control surfaces. They are all being painted separately and I typically use them as a test bed for practicing before committing to the main body. I chose three main shades for the marbling xf-23 light blue and xf-65 field grey were used as the grey and green shades along with a mix of xf-10 flat brown and xf-57 buff for a brown shade. Both the xf-23 and xf-65 were lightened with white before applying them to the model. It’s important to lighten the marble colours before applying them in my opinion as if they are took dark then it is difficult to get coverage with the main coats and as a result the main coat must be a shade lighter. By preshading and marbling with a slightly lighter shade you can avoid this and spray the exact desired final colour.

    For the first blend layer I used Mr. Color 308 (FS36375) and 337 (35237) for the lower and upper surfaces respectively. I sprayed a very thinned mixture as I really didn’t want to overpower the pre-shading/marbling. After blending the finish I sprayed Tamiya flat white through a torn up scour pad to get some surface highlights and additional variability. The end result set me up quite nicely for the final coats of paint.

    After unifying the surface I was left with the finish below. I’m quite happy with how this main round of painting has gone although I do want to go a bit further with various post shading effects. This was my first Cf-18 and all in all this was the overall effect I was searching for.

  • CF-18A Hornet: Cockpit and Gear bays

    CF-18A Hornet: Cockpit and Gear bays

    For my next major project I decided on building a CF-18 Hornet, I’ve always wanted to build one and really wanted to utilize everything I’ve learned over the past year.

    After doing some research on the available options, I settled on the 1/48 offering from Kinetic. The brand wasn’t my first choice, but they are the only manufacturer that has a somewhat new mold of a legacy Hornet.

    I wanted to do a somewhat fresh take on this subject and so opted to build an early 90’s bird that participated in the 1991 Gulf War and in the scheme prior to the distinctive “Canada” wordmark (fellow Canadians will know what I’m talking about this logo is everywhere).

    A CF-18 sits on the ramp in Doha, Qatar as part of “Operation Friction”

    Construction unsurprisingly starts with the cockpit. I took my time here, spending a few extra days to get all the details I wanted added. Lots of extra wiring was added to the resin Aires seat and the end result really paid off. Lead and copper wire was used (0.1, 0.2 widths ) along with brass micro-tubes from Albion alloys. Some 3d Printed avionics from Anyz were also used. I coiled 0.1mm copper wire to create a avionics cable in roughly the same position it is in real life.

    The cockpit was painted over a few days, It was surprisingly straightforward. After adding the X-22 clear coat, the real fun could begin, dealing the cockpit. For this I used Anyz and Airscale decals. Anyz makes really great “miscellaneous” decals and cockpit switch selector indicators. Airscale has good warning and dial decals.

    Overall I’m very happy with how the decaling went for this project, it’s time consuming work, but not difficult by any means

    For the weathering, I wanted to keep it restrained but obvious that the jet was working in a desert environment. I felt that it would be reasonable for dust to accumulate in areas of the cockpit. The key would be to keep it very subtle. I used dusty shades of oils to brighten up the surface and pickout highlights.

    Kinetic’s gear bays are quire well detailed OOB. None the less, I still wanted to add some extra detail here for the experience. After looking at various reference photos I could tell that they were incredibly busy and complicated, and the extra piping would help increase the realism. I found it difficult to work in the nose gear wheel well as there really isn’t a lot of space to work in. As such, most of my detailing efforts went into the main gear bay. I painted the bays in standard Tamiya white and picked out details with various metal shades along with Tamiya black.

    I added various Anyz and Airscale decals to the wheel wells and I feel that having lots of placards in the area really adds to the realism. For the weathering I think that I may have overdone it in same regards. I first did a very light brown (tan coloured really) oil wash in order to simulate dust buildup. I then followed that up with a very dark brown/black pinwash in crevices to pickout all the details. I then spreckled the surface with MIG’s oil and grime effect to simulate oil spots. Is it overdone? yup, that’s ok though it not too off the mark IMO but this result is on the dirtier end of the spectrum for sure.

    To return to the cockpit, all that was left to complete on it was to add the sidewalls and Anyz dials to the build. Suffice to say I’m very happy with how the cockpit turned out.

  • RFM Pz.III Ausf. J

    RFM Pz.III Ausf. J

    Want to see my review of this kit? Click here: nomadmodels.wordpress.com/2021/04/04/rfm-panzer-iii-ausf-j-in-box-review/

    Returning to armour, this past summer I completed RFM’s excellent Pz.III Ausf J in a North African Scheme. I had been meaning to do a DAK scheme for a while now as I find it’s a very interesting look and difficult to pull off effectively. Construction started smoothly and I had the pleasure of using quite a few accessories for the built that I’ve collected over time. As is normally the case, construction started with the lower hull and then moved on to the fenders. I used Eduard PRINT tools and ROCHM jacks for the first time and was very pleased with how they came together.

    Construction progressed very smoothly after that, with the minor exception of how the fenders interacted with the top part of the hull.

    RFM has you attach the fenders separately from the lower hull and then attach the upper hull on top of the fenders. This was fiddly to complete and the only downside of the kit worth mentioning. I added Accessories from Panzer Art, DEF Model and RFM’s own set for detailing the model.

    Of particular note are the tracks by T-Rex. They are by far and away the best tracks I’ve worked with. They are very well detailed and extremely easy to put together. If T-Rex offers a set for a subject I’m building, I’m using them from now own.

    Painting came next, I attempted to mottle my chosen colour for the kit over a panzer grey base but found that it didn’t work quite right IMO. I used an unconventional colour, Sail (for ships) by Mr. Color’s aqueous line. I wanted a very faded colour and not something that just looked like lighter dunkelgelb. In this regard I think it did go a bit too far and for my next DAK subject I’ll darken it ever so slightly I think.

    For weathering the standard dark brown oil wash was used. For chipping I took a slightly new approach, and used the technique shown in the book “Tank Art 1” (which is fantastic btw). While I thought my attempts at chipping using lacquer thinner (which tends to melt the paint instead of chipping it) were passable, I do feel like I need more practice in this area. I also used various streaking effects and pigments on the lower surfaces to really sell the fact that this was a desert vehicle and was exposed to harsh elements.

    All in all this build took a little over a month to complete and I quite like how my first DAK vehicle came out! This won’t be the last I complete.

  • Eduard Spitfire Mk.VIII

    Eduard Spitfire Mk.VIII

    While working on Tamiya’s P-38, I picked up Eduard’s “weekend edition” Mk.VIII Spitfire. Considering that the kit was around $30 CAD it was too much of a bargain not to pick up. This was my first time building a Spitfire, as well as my first time building a Eduard kit. Surface details were fantastic, although I didn’t find that it had Tamiya levels of fit/engineering.

    Construction of course started with the cockpit and it’s well detailed. I didn’t spend too much time here but added some wiring and drilled out weight saving holes. I was aiming to have the build completed within a month so progress was brisk.

    I had never done a hard edge camouflage before and wanted to experiment with making one. I also tried out the Mr. Color Aqueous range of paint which performed well IMO. The finish was painted with the marbling technique although since I also wanted chipping on the wing root I had to find a way to work around the metallic surface while panting.

    I used AK masking putty for the camouflage and was really pleased with how it performed, despite the fact that it took a bit to get used to using. In the end I was really pleased with how the marbling and hard edges turned out.

    I used AK lacers for the RAF “Azure blue” And I have to say that it’s a fantastic colour to work with, the contrast between the desert camp above and the pale blue below is very nice.

    Eduard includes decals for the wing markings but I instead opted to paint them using Tamiya NATO black. The end result speaks for itself in my opinion/

    And with that decals were added and the kit was weathered up! I learned that while durable, Eduard decals need a very aggressive setting agent to settle. I clear coated the model with Tamiya X-22 and MCLT. Oils were used for about 99% of the weathering with some pigments used as well.

  • Tamiya P-38G Lightning “Operation Vengeance”

    Over the past month I’ve managed to complete Tamiya’s new P-38. I’ve recently completed a move across the country and I’m happy to be back to building. I’m going to try to commit to churn out several builds over the next couple months to make up for the time spent away from the bench.