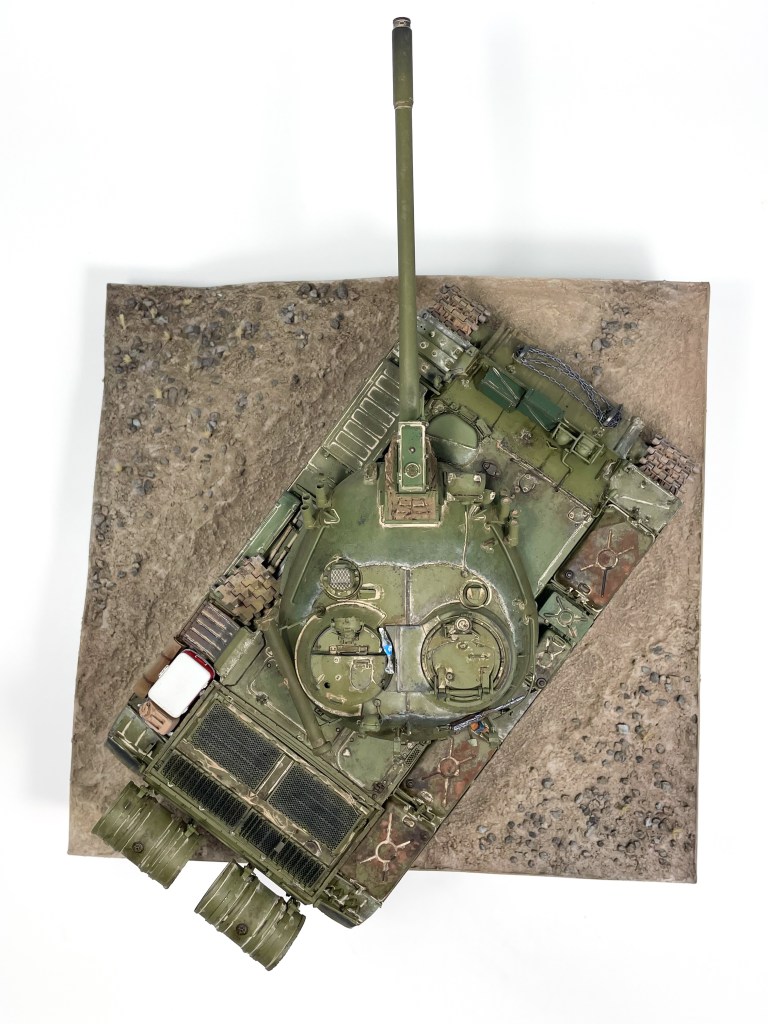
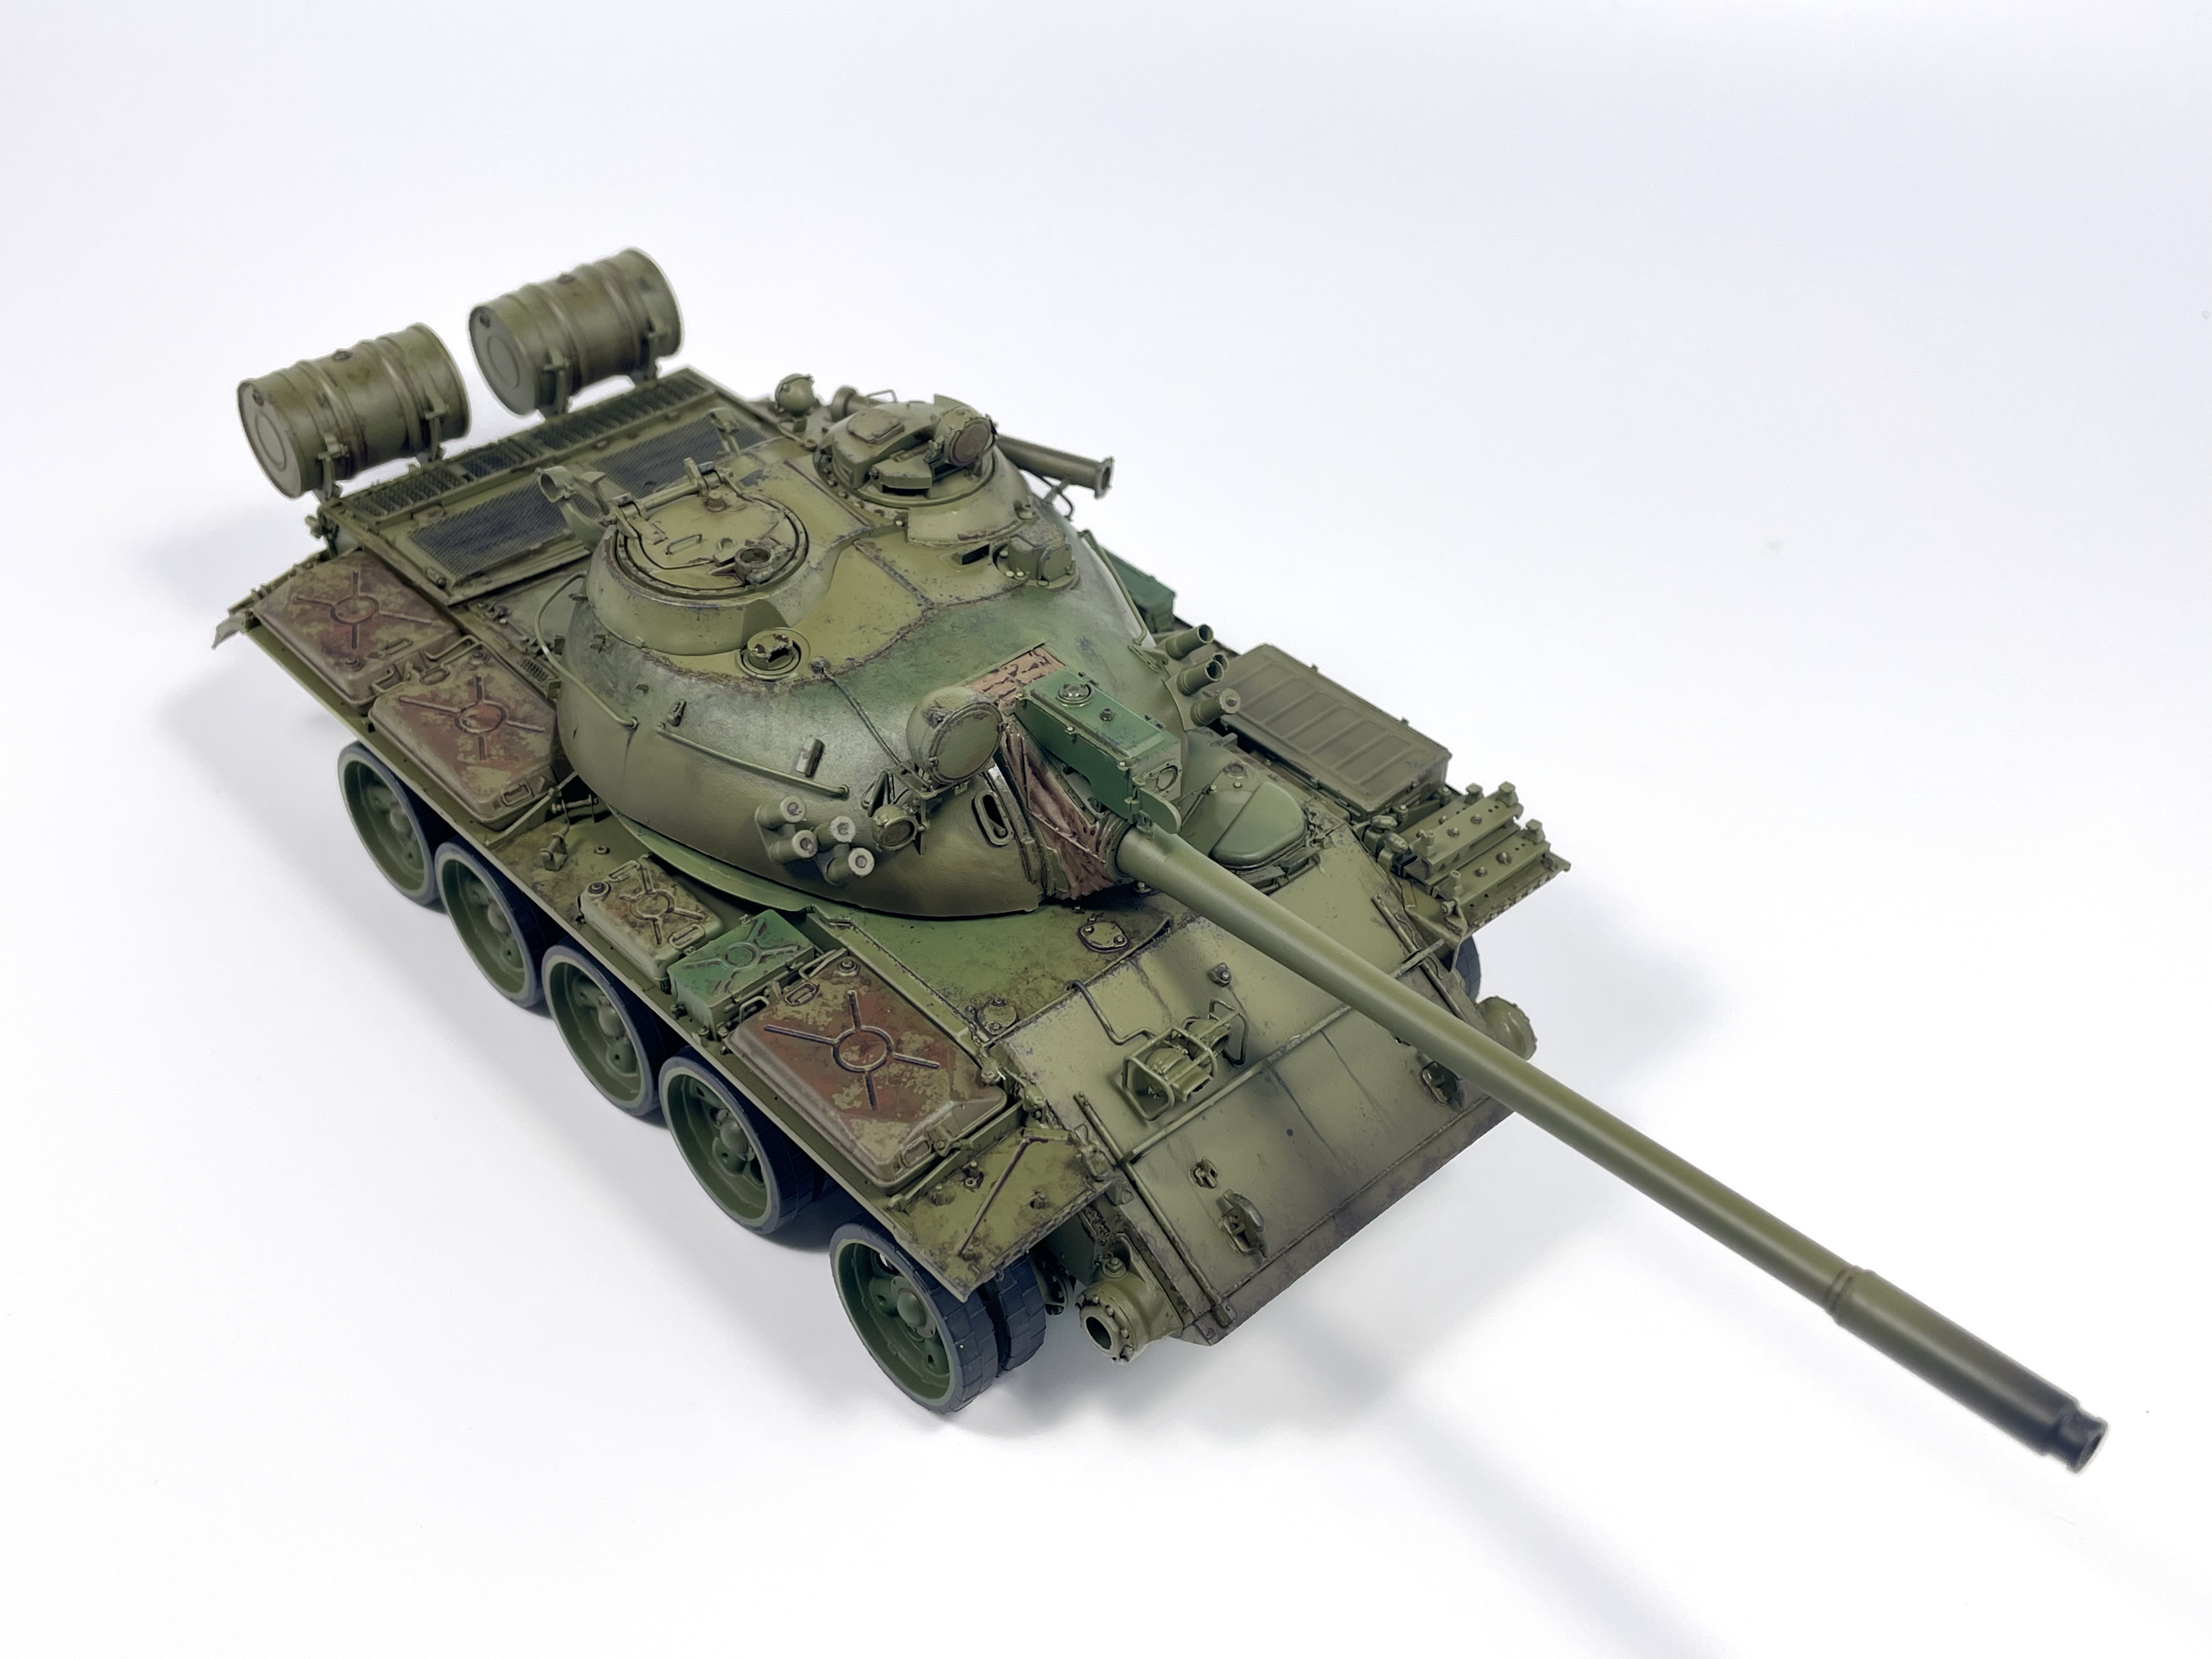
After almost three years in the making Miniart’s T-55 has been completed! This kit has been sitting in my “in progress” drawer for well over a year now and it feels great to finally have it completed. I decided to try to push myself and try out new techniques in completing it and I’m glad I did. One goal of mine was to not use any pre-shading at all in the painting process, a technique that is very familiar to me and I use in a lot of my builds. Instead I used the dullest coat of Russian 4bo as the main base coat and tried post shading the model to create colour modulation.
I’m glad I placed these limitations upon myself because I’ve felt that when I have a technique or process that I like I can tend to stay entrenched in said process and not grow as a modeller. I definitely feel like this build exposed me to new ways of doing things that I’ll be incorporating into future builds. One new technique I tried out was weathering over a matte coat. In prior builds I had always done my weathering over a gloss or satin clear coat and left the matte coat until the end to tie things together. I decided to stray from this process in this build with the majority of heavy weathering being doing over the final matte clear coat. It went better than I expected and it’s something I’ll be doing going forward.
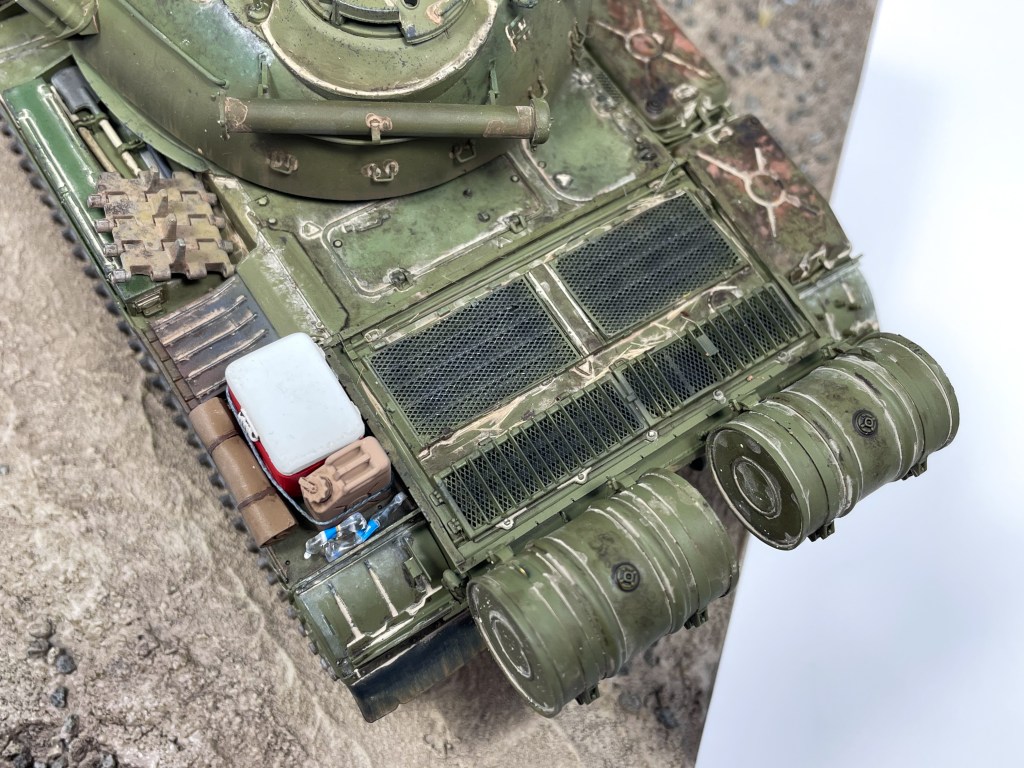
I also made an effort to use a lot of different weathering products and mediums together. In prior builds I may have just stuck to one specific type of medium in my weathering and as a result I may have not been as familiar weathering with enamels or pigments for example. For the T-55 I made heavy use of these mediums with the various fuel and oil stains being created with MIG enamel products. I also used quite a bit of pigments and applied them basically where I felt dust and debris would collect on the vehicle. In short, I think that the three pronged approach to the weathering on this build (Oils for a general wash and streaking, Enamels for fuel stains, oil leaks, and rust effects, and pigments for dust and dirt deposits) worked well and it’s a process I’ll keep in mind for the future.
That’s it for now! Enjoy the final build gallery below!
Miniart’s T-55 has been in progress in one form or another for almost two years now. It’s survived being stuffed in a box and a move across the country. There’s a few reasons why I’m only getting around to finishing it now, namely that I was more interested in other projects and that it’s a complex kit and not one you’d try to finish when being away from the hobby for a sustained period of time. I’ve slowly picked away at it for the past year but with a new year returns an old build as I’m determined to start the year by finishing off this shelf queen.
In starting the weathering process I’m reminded that conceptualizing the final result *before* beginning the painting process is needed for a good result. In slowly chipping away on this build I painted a layer of 4BO with no real direction as to what I wanted the final result to look like. Looking back this was a mistake, as I would have liked to add some chipping effects via the hairspray method. This mistake could be salvaged however and I decided to use this build to experiment with post shading, colour modulation and other heavy weathering effects. Basically I want to push this build and really go far with the weathering and pigments to get a better understanding of what works and what doesn’t. I settled on a dusty finish of a vehicle set in a desert environment and I think the green of the tank will contrast nicely with the brown environment it will be set in.
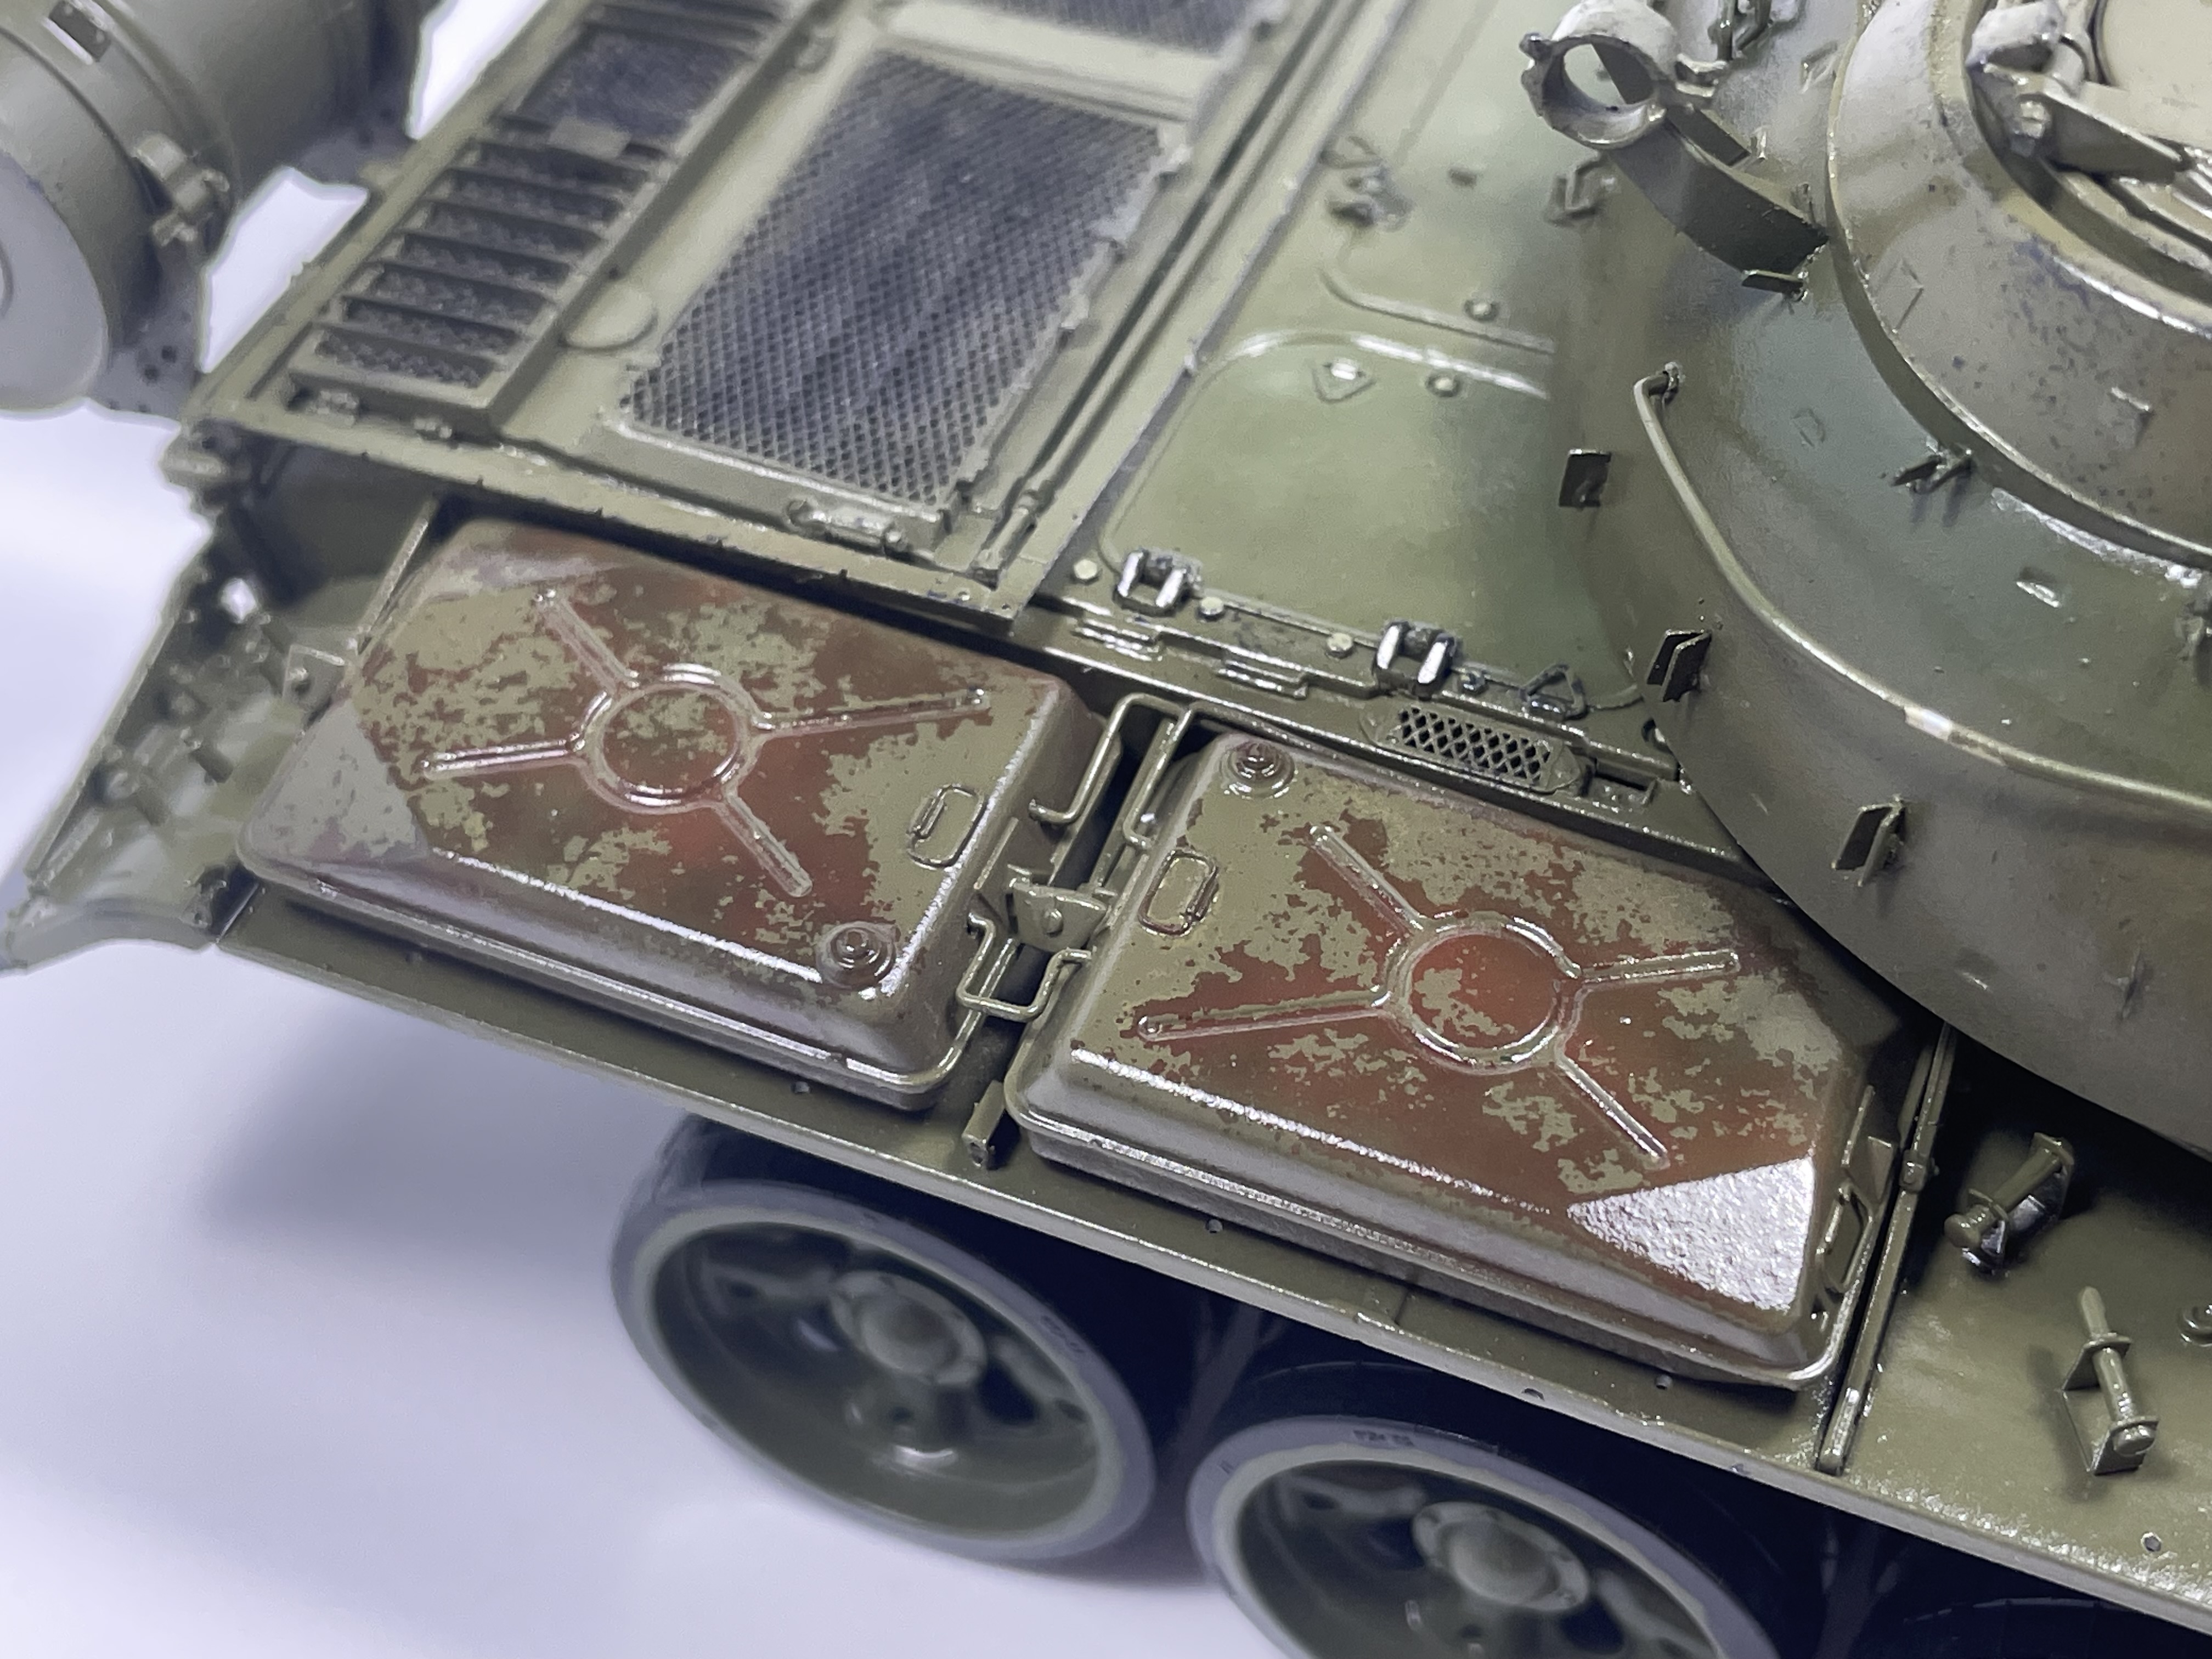
The weathering process started with adding some rust highlights by spraying some various rusty shades on the fuel tanks to create some contrast between the tanks and the vehicle hull. I then opted to treat the fuel tanks to a chipping effect to simulate areas where the paint has peeled away and exposed the rusted metal underneath.
Hairspray chipping helped to start a rust effect on the fuel tanks.
After getting the tanks where I wanted them, I hit the model with a gloss coat to seal the paint prior to an oil pinwash. Normally I’d stick with satin finishes on armour but seeing as there were a lot of details for a wash to skink into I opted for the gloss coat in this stage. After the pinwash I used VMS Satin to seal the model again before moving onto further effects. I opted for a satin coat instead of working over a gloss surface because it would allow for easier blending between the various effects I wanted to use.
Initial weathering was comprised of enamels from MIG using various grime and fuel stain effects. I like how this initial stage turned out although I think I need more practice with enamels as they are not my go to as much as oils are. That said, I like how “grimy” I was able to make the surfaces look and how the staining interacts with the colour modulation. This phase was only meant to be a base for the pigment work which will come next.
Since I knew I wanted to pose this vehicle in a Desert or Arid setting, I wanted a significant amount of dusting done to the model. I started on the running gear and underneath the fenders and stippled on AK’s “Kursk Earth” along with various other pigments. I also utilized a “light mud” product from AK to get very light splashes to add contrast. With it having been quite a while since I had really dirtied up a tank much of this process was experimenting to see how I liked the end result. I also cut up some static grass and mixed it with a light pigment before applying it to the model to simulate foliage being stuck to the underside of the vehicle.
For the initial dusting I utilized two pigment shades with pigment fixer and while I think it was good experience to practice with using pigments I think my application of this medium would use some refinement. I do think I need to slow down a bit and put more effort into blending while the pigments are still drying which is something I’ll need to keep in mind for the next build.
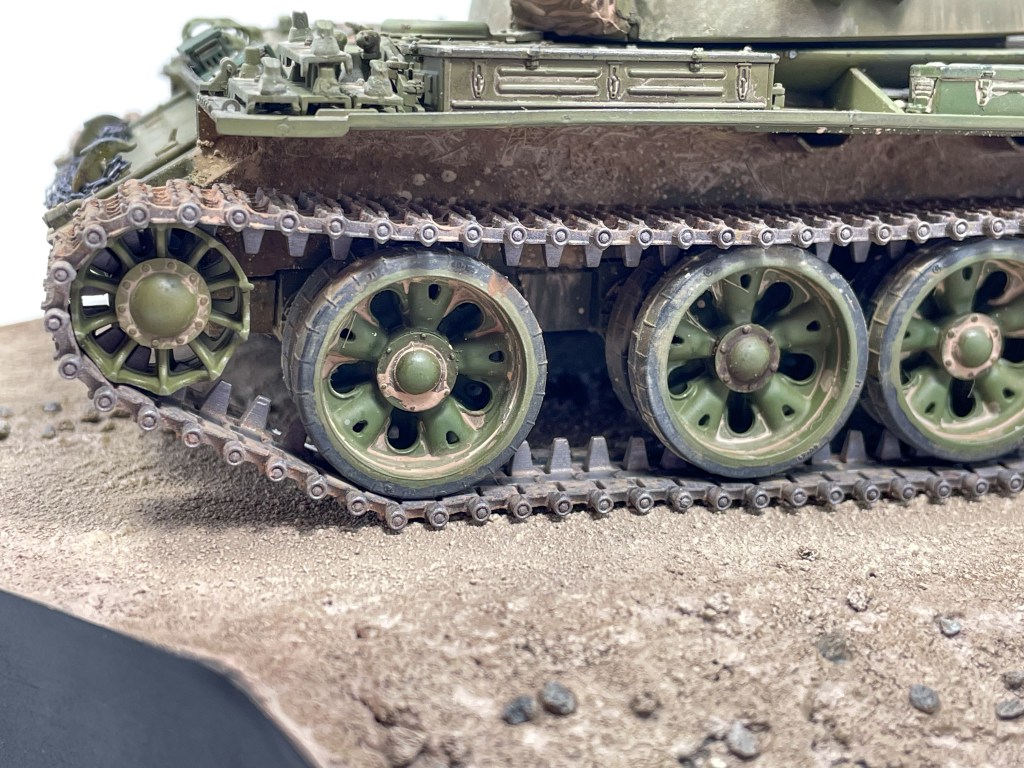
I used T-Rex tracks for this build and couldn’t be happier with how they turned out. I painted them in Gunze Mr. Metal Color “Iron” which if left unbuffed will remain a dull dark grey but will result in a really great shine if you rub the surface. I added some more “Kursk Earth” long with several different pigment shades to create a dusty weathered look. I then used several q tips to wipe away the pigments where wear would occur and revealed a nice shine to represent polished metal. I also added graphite onto the cleats on the reverse side to represent where the track would contact the ground the hardest and buff them metal.
This is where I’ll leave this update for now but there are sill a few things I’d like to do before declaring this one complete. I’d also like to put this one on a proper base so I’ll need to get that completed as well. Hoping to get the T-55+Base all done by the end of February so not a whole lot of time left!
Out of all the random vehicles I’ve been meaning to build, a Sd.Kfz.251/22 or “Pakwagen” has been randomly near the top of my list for a while now. I’m not really sure why, it looks well proportioned I guess and was one of the more useful late war vehicles the Germans came up with. This is the first AFV Club kit I’ve picked up and got it for $70 CAD. Let’s see how it shapes up!
Kit Features: 18/20
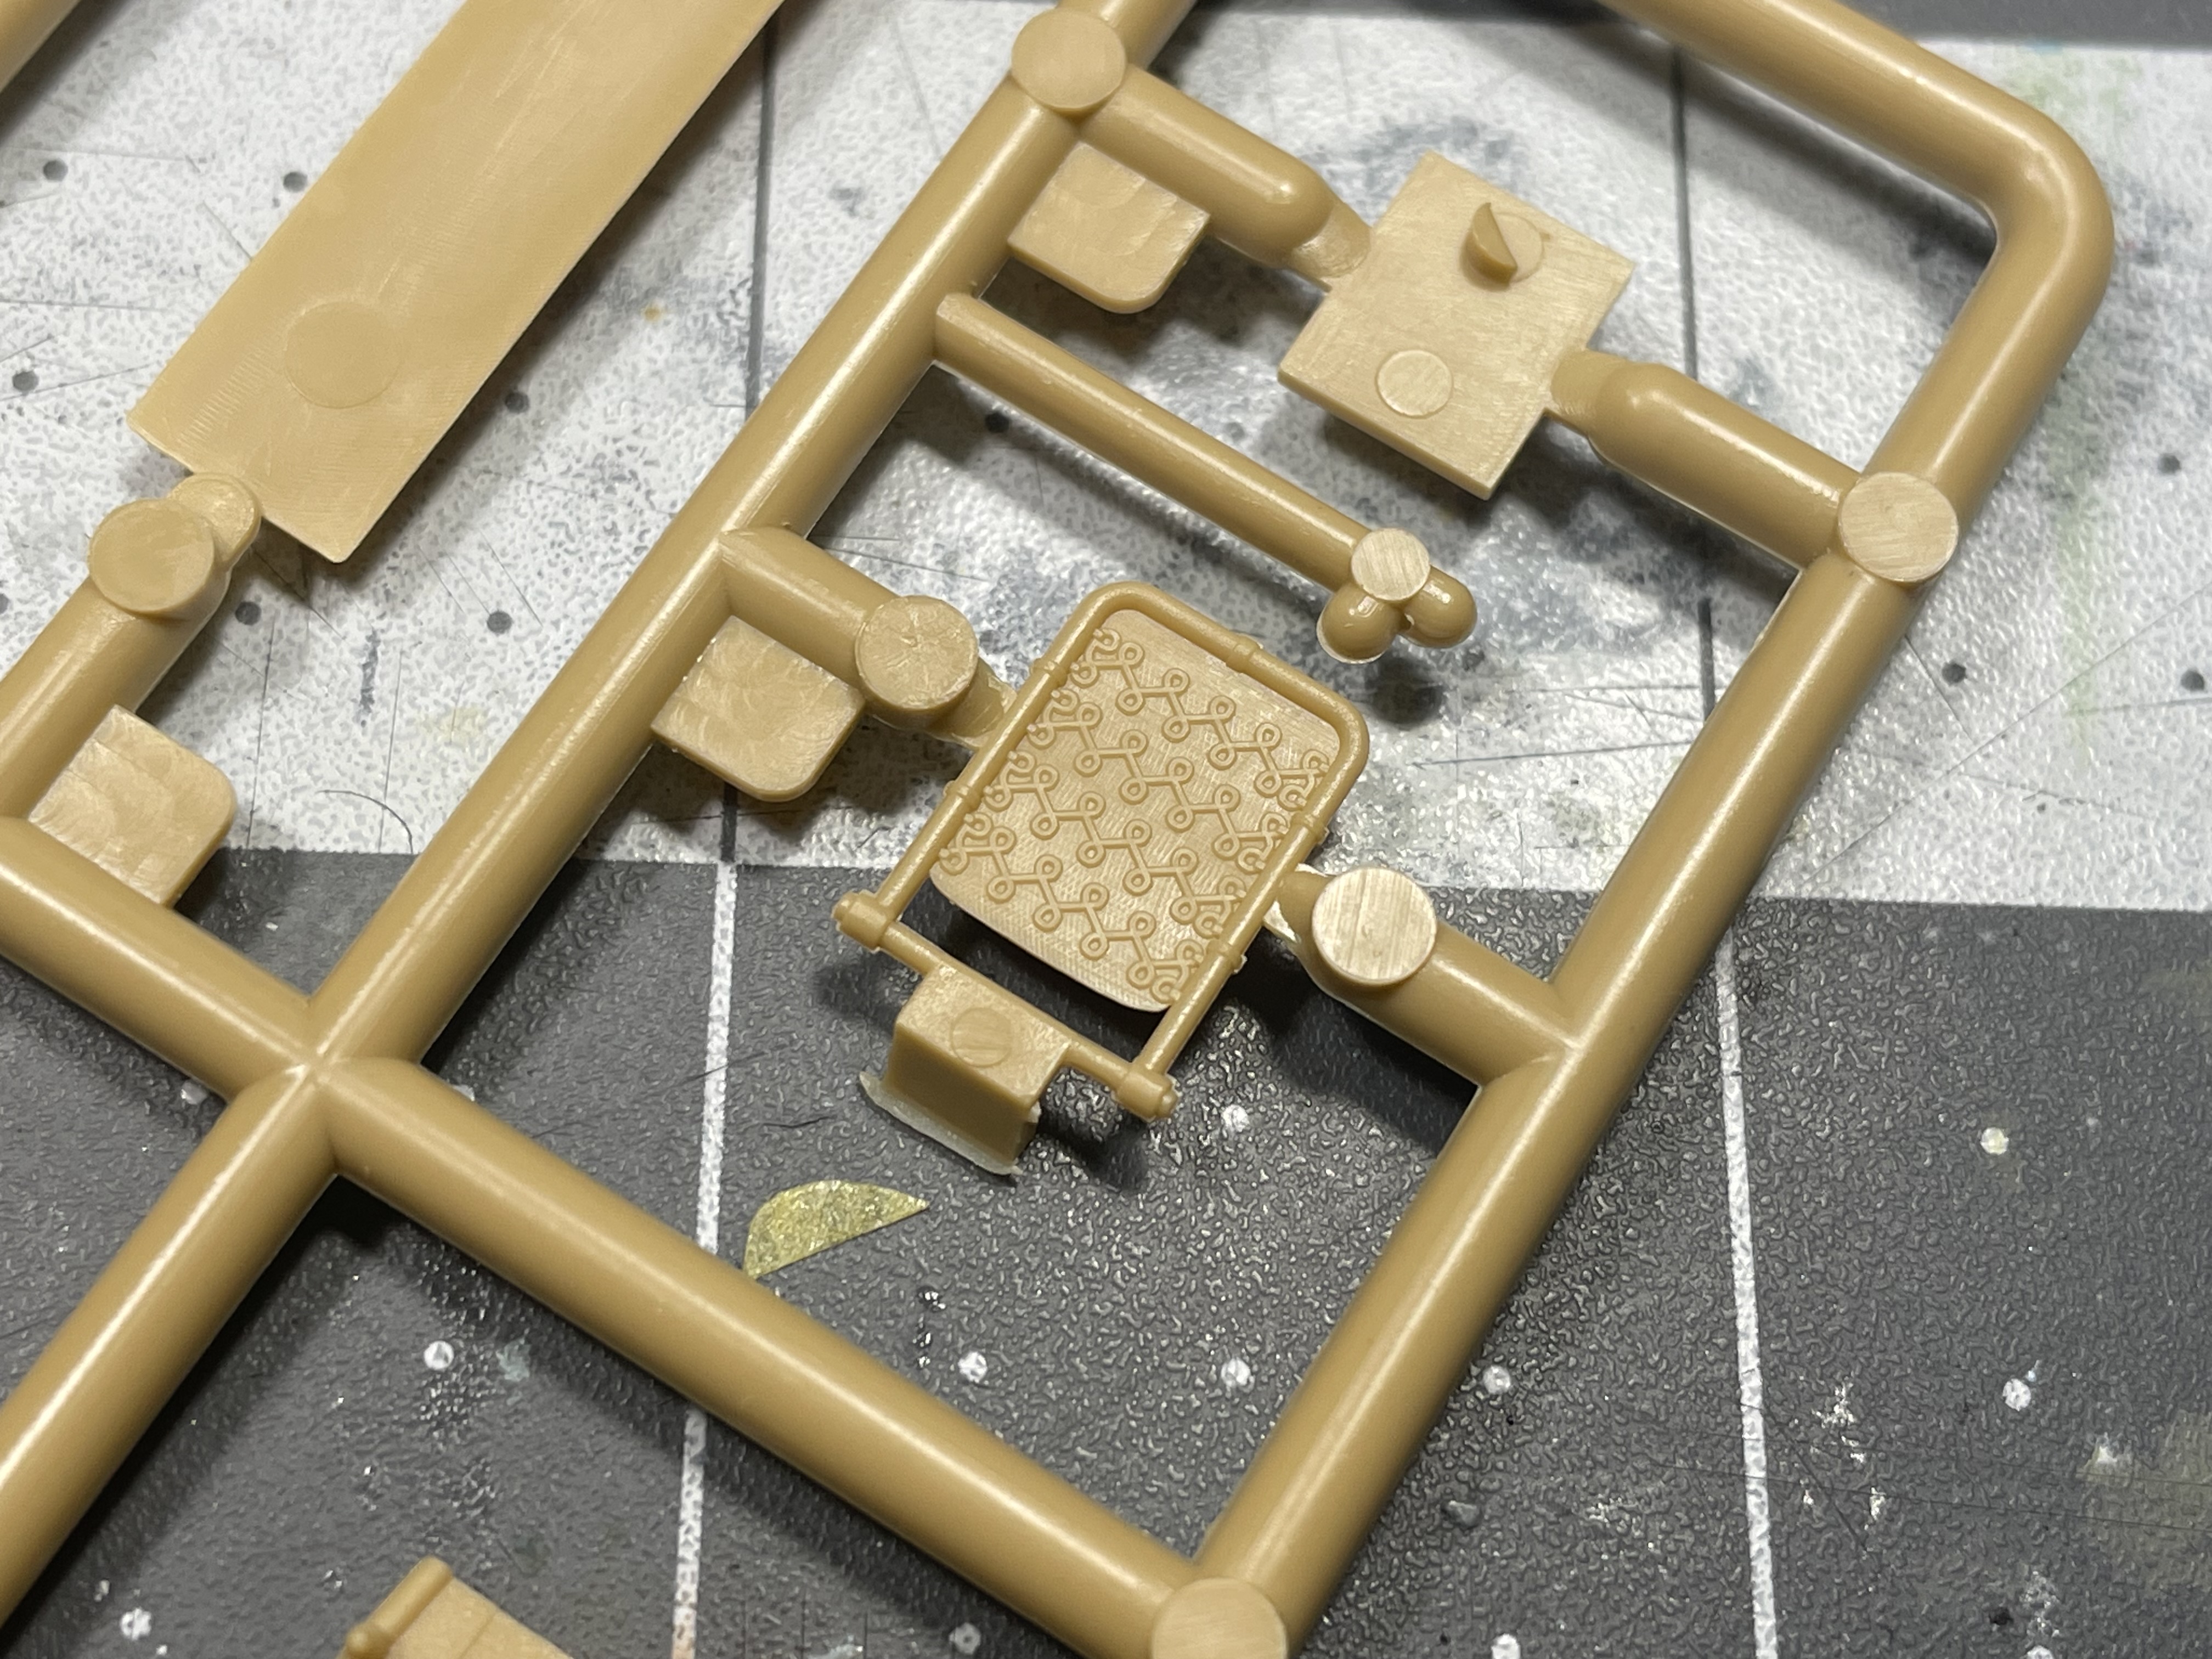
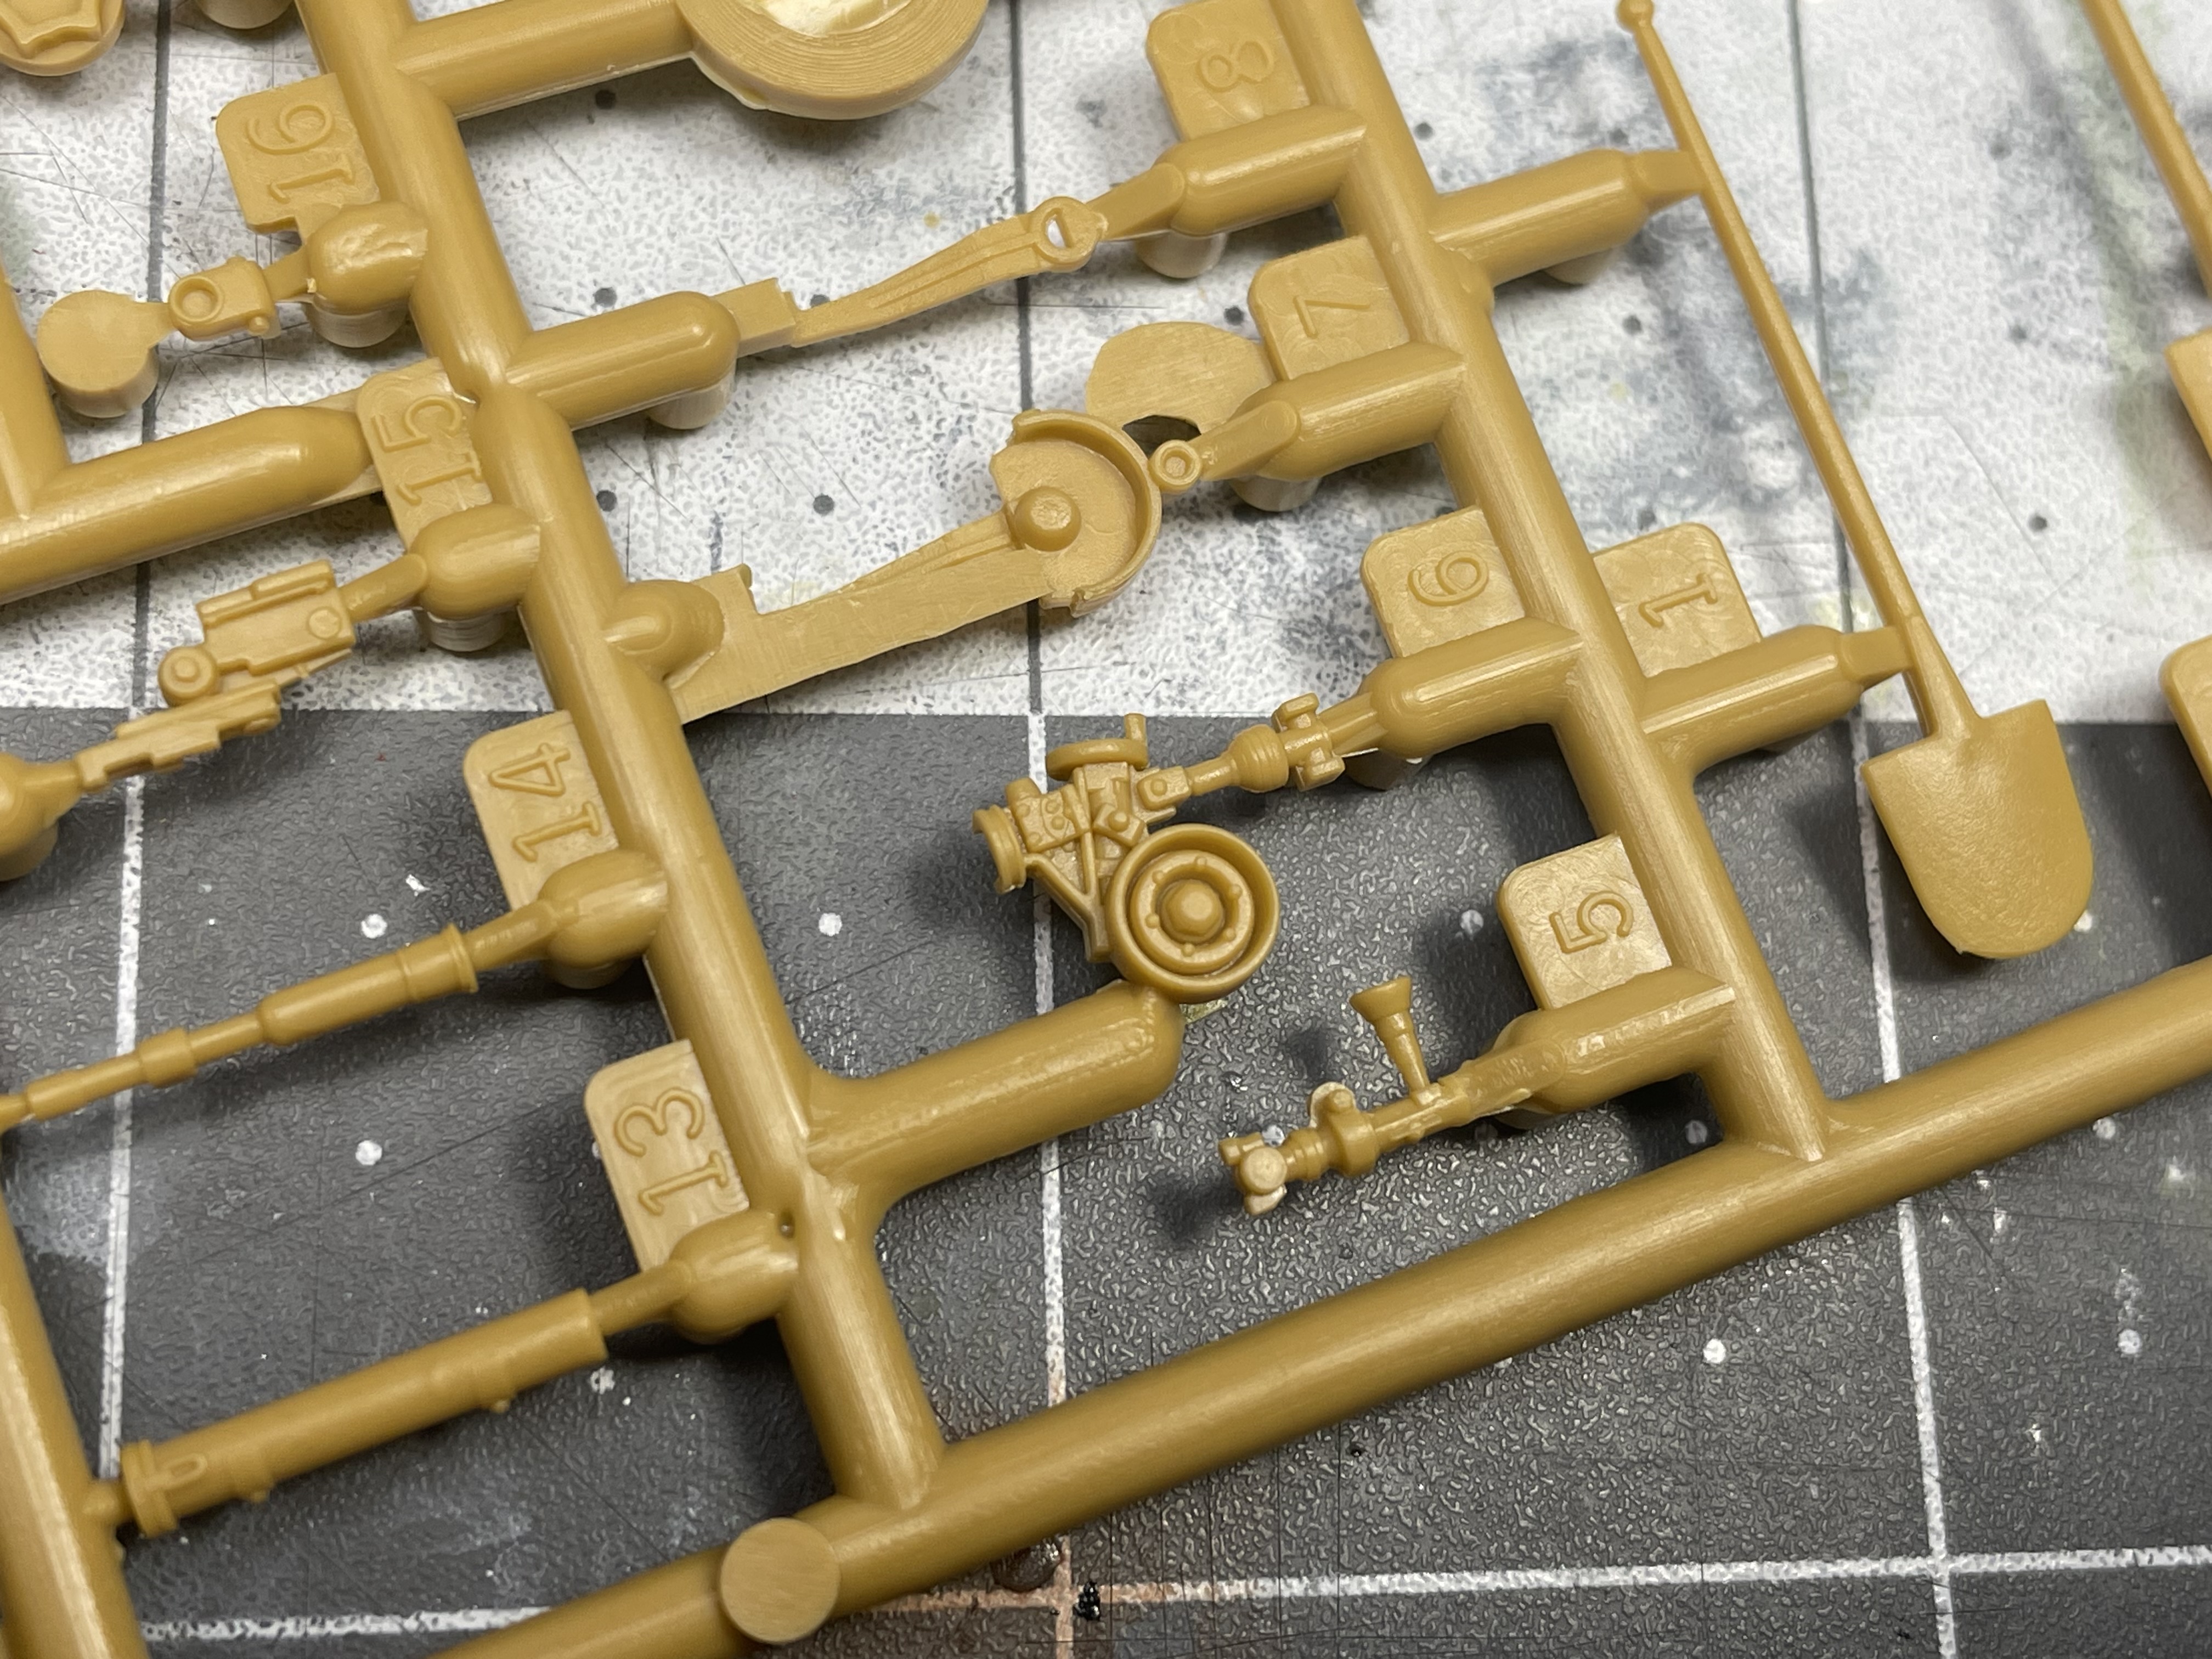
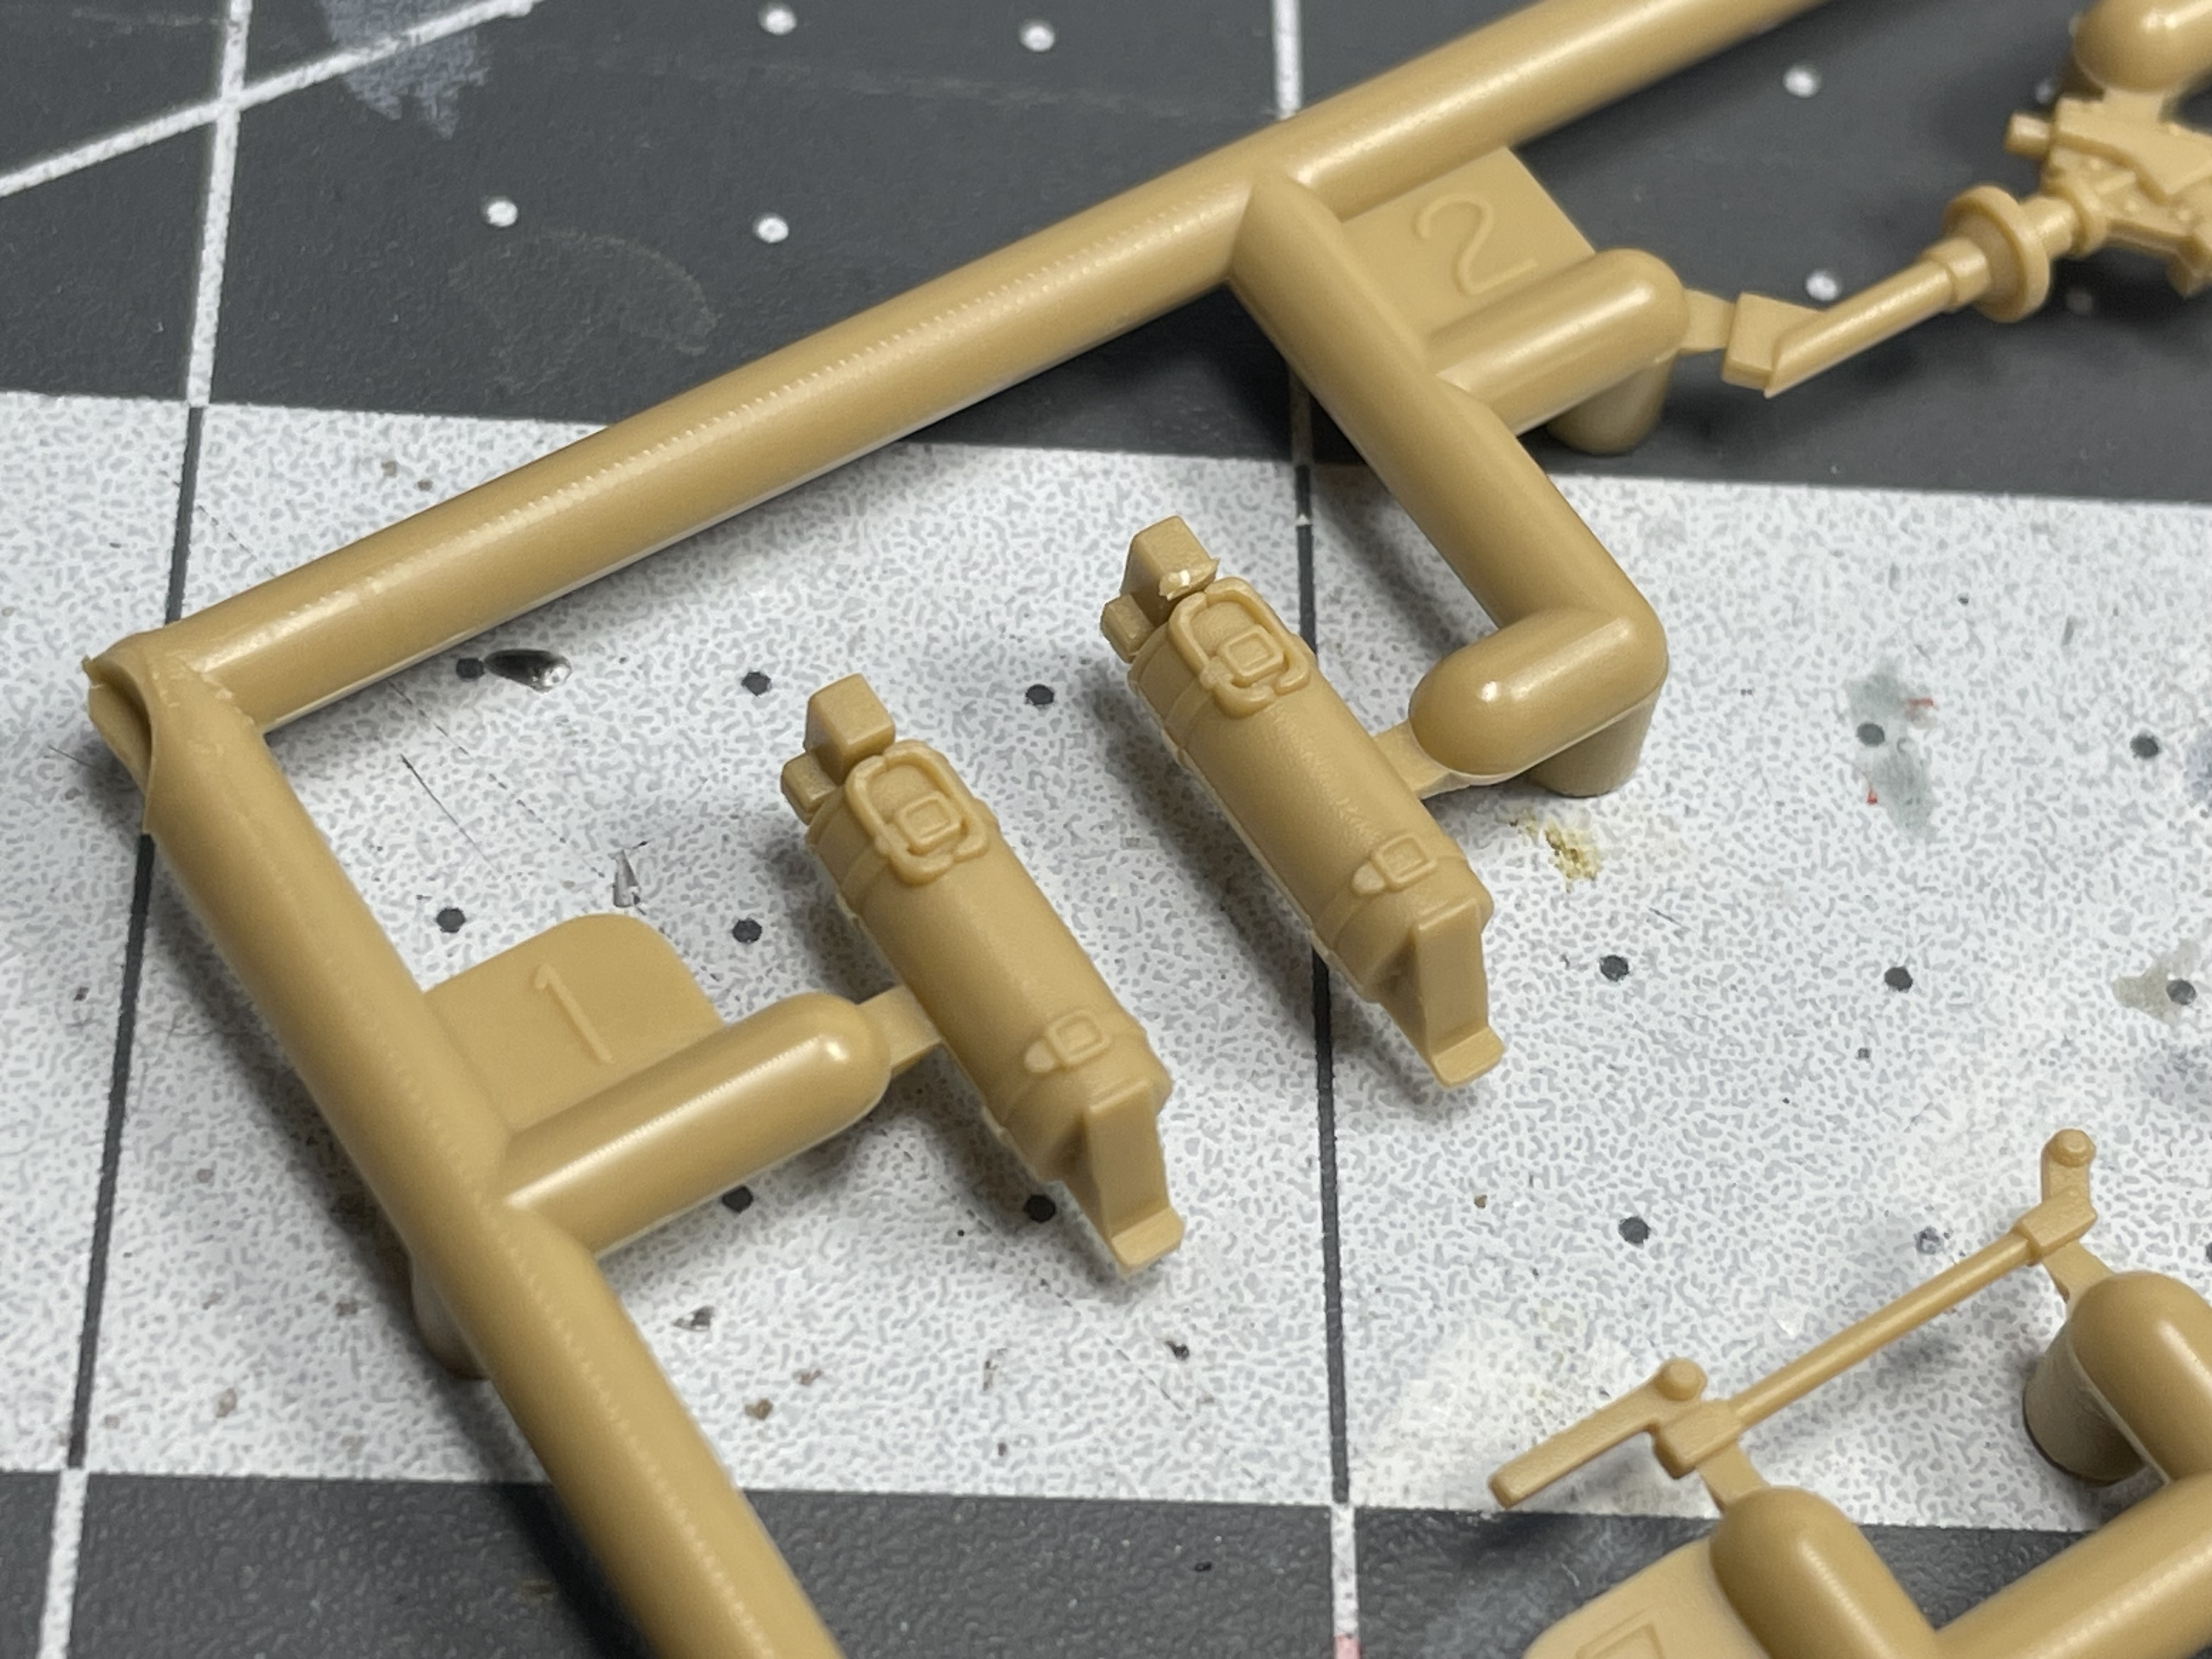
AFV Club kits have a reputation for being detailed and this one includes a lot for the builder. Included is a small fret of photo-etch, a brass gun shield and a metal barrel as well. Also included is a generous amount of small arms (4x Kar98K, MG34, MG42 and a MP40) along with personal equipment that would have been owned by the vehicle’s crew. Rubber tracks are included but I will say that these tracks are the best rubber tracks I’ve seen and very well detailed. I also like that it includes the vehicle tools molded *without* clamps, a very welcome addition. Only points missed out on is the absence of any kind of figures but otherwise This kit is off to a good start.
Quality of Molding: 41/50
As expected, AFV Club’s Pakwagen has a high quality of molding with one exception. In looking over the spues the detail is quite high, with the stand outs being the driver’s seat and crew bench (molded with leather texture), the crew weapons, the gun cradle with all the rivet details and the exterior locker details. While these areas are the standouts the entire kit really is very well detailed and very intricate that an intermediate to experienced builder will be able to flesh out. The only exception to this is the welding detail. The stock welds look extremely faint in some areas and will need to be re-done, no question. All in all however I’d say that I’m not disappointed by the detail present in this kit and considering the comparatively low price of the kit compared to some 2024 releases the welds are not the worst thing in the world and I’d still say the Pakwagen has high detail.
Instructions: 8/20
The instructions definitely are where AFV Club opted to save some money in the fact that they really are nothing special. A short blurb on the front about the history of the vehicle and standard line drawings, nothing special. No colour at all and the profiles included really are nothing special, In fact I’d say the profiles exemplify the “cheapness” of the instructions, no colour callouts (on the profile page) and tiny profiles. Spelling mistakes are also present.
Miscellaneous: 5/10
Included are decals for one vehicle based out of the “western front” which let’s be honest is a huge cop out. The singular saving grace for the markings is that they include division markings and stencils, along with license plate information. I like it when kits include these types of markings because often times vehicles have a lot more organizational markings than just some numbers and a cross/star and adds to the realism of the final subject. In one of my early drafts of this review I initially failed AFV Club’s Pakwagen but thinking about it more now, the inclusion of the division stencils is just enough to warrant a 5/10 score. The quality of the tracks also helped increase this score as they are excellent.
Total: 72/100
AFV Club is shamless for some of the corners it cut while putting together this kit but on some level it’s understandable? I have no doubt this kit will end up looking great, the detail is there and a experienced builder will take advantage of it. Experienced builders put research into the vehicles they build and because of this AFV Club was clearly ok with not putting as much information behind the markings they chose for this subject. This is in stark contrast with a manufacturer such as Eduard that will not only provide a highly detailed kit but also information about the person who operated the real life vehicle. Add on the fact that this wasn’t a $90 monster and some of the errors are forgivable.
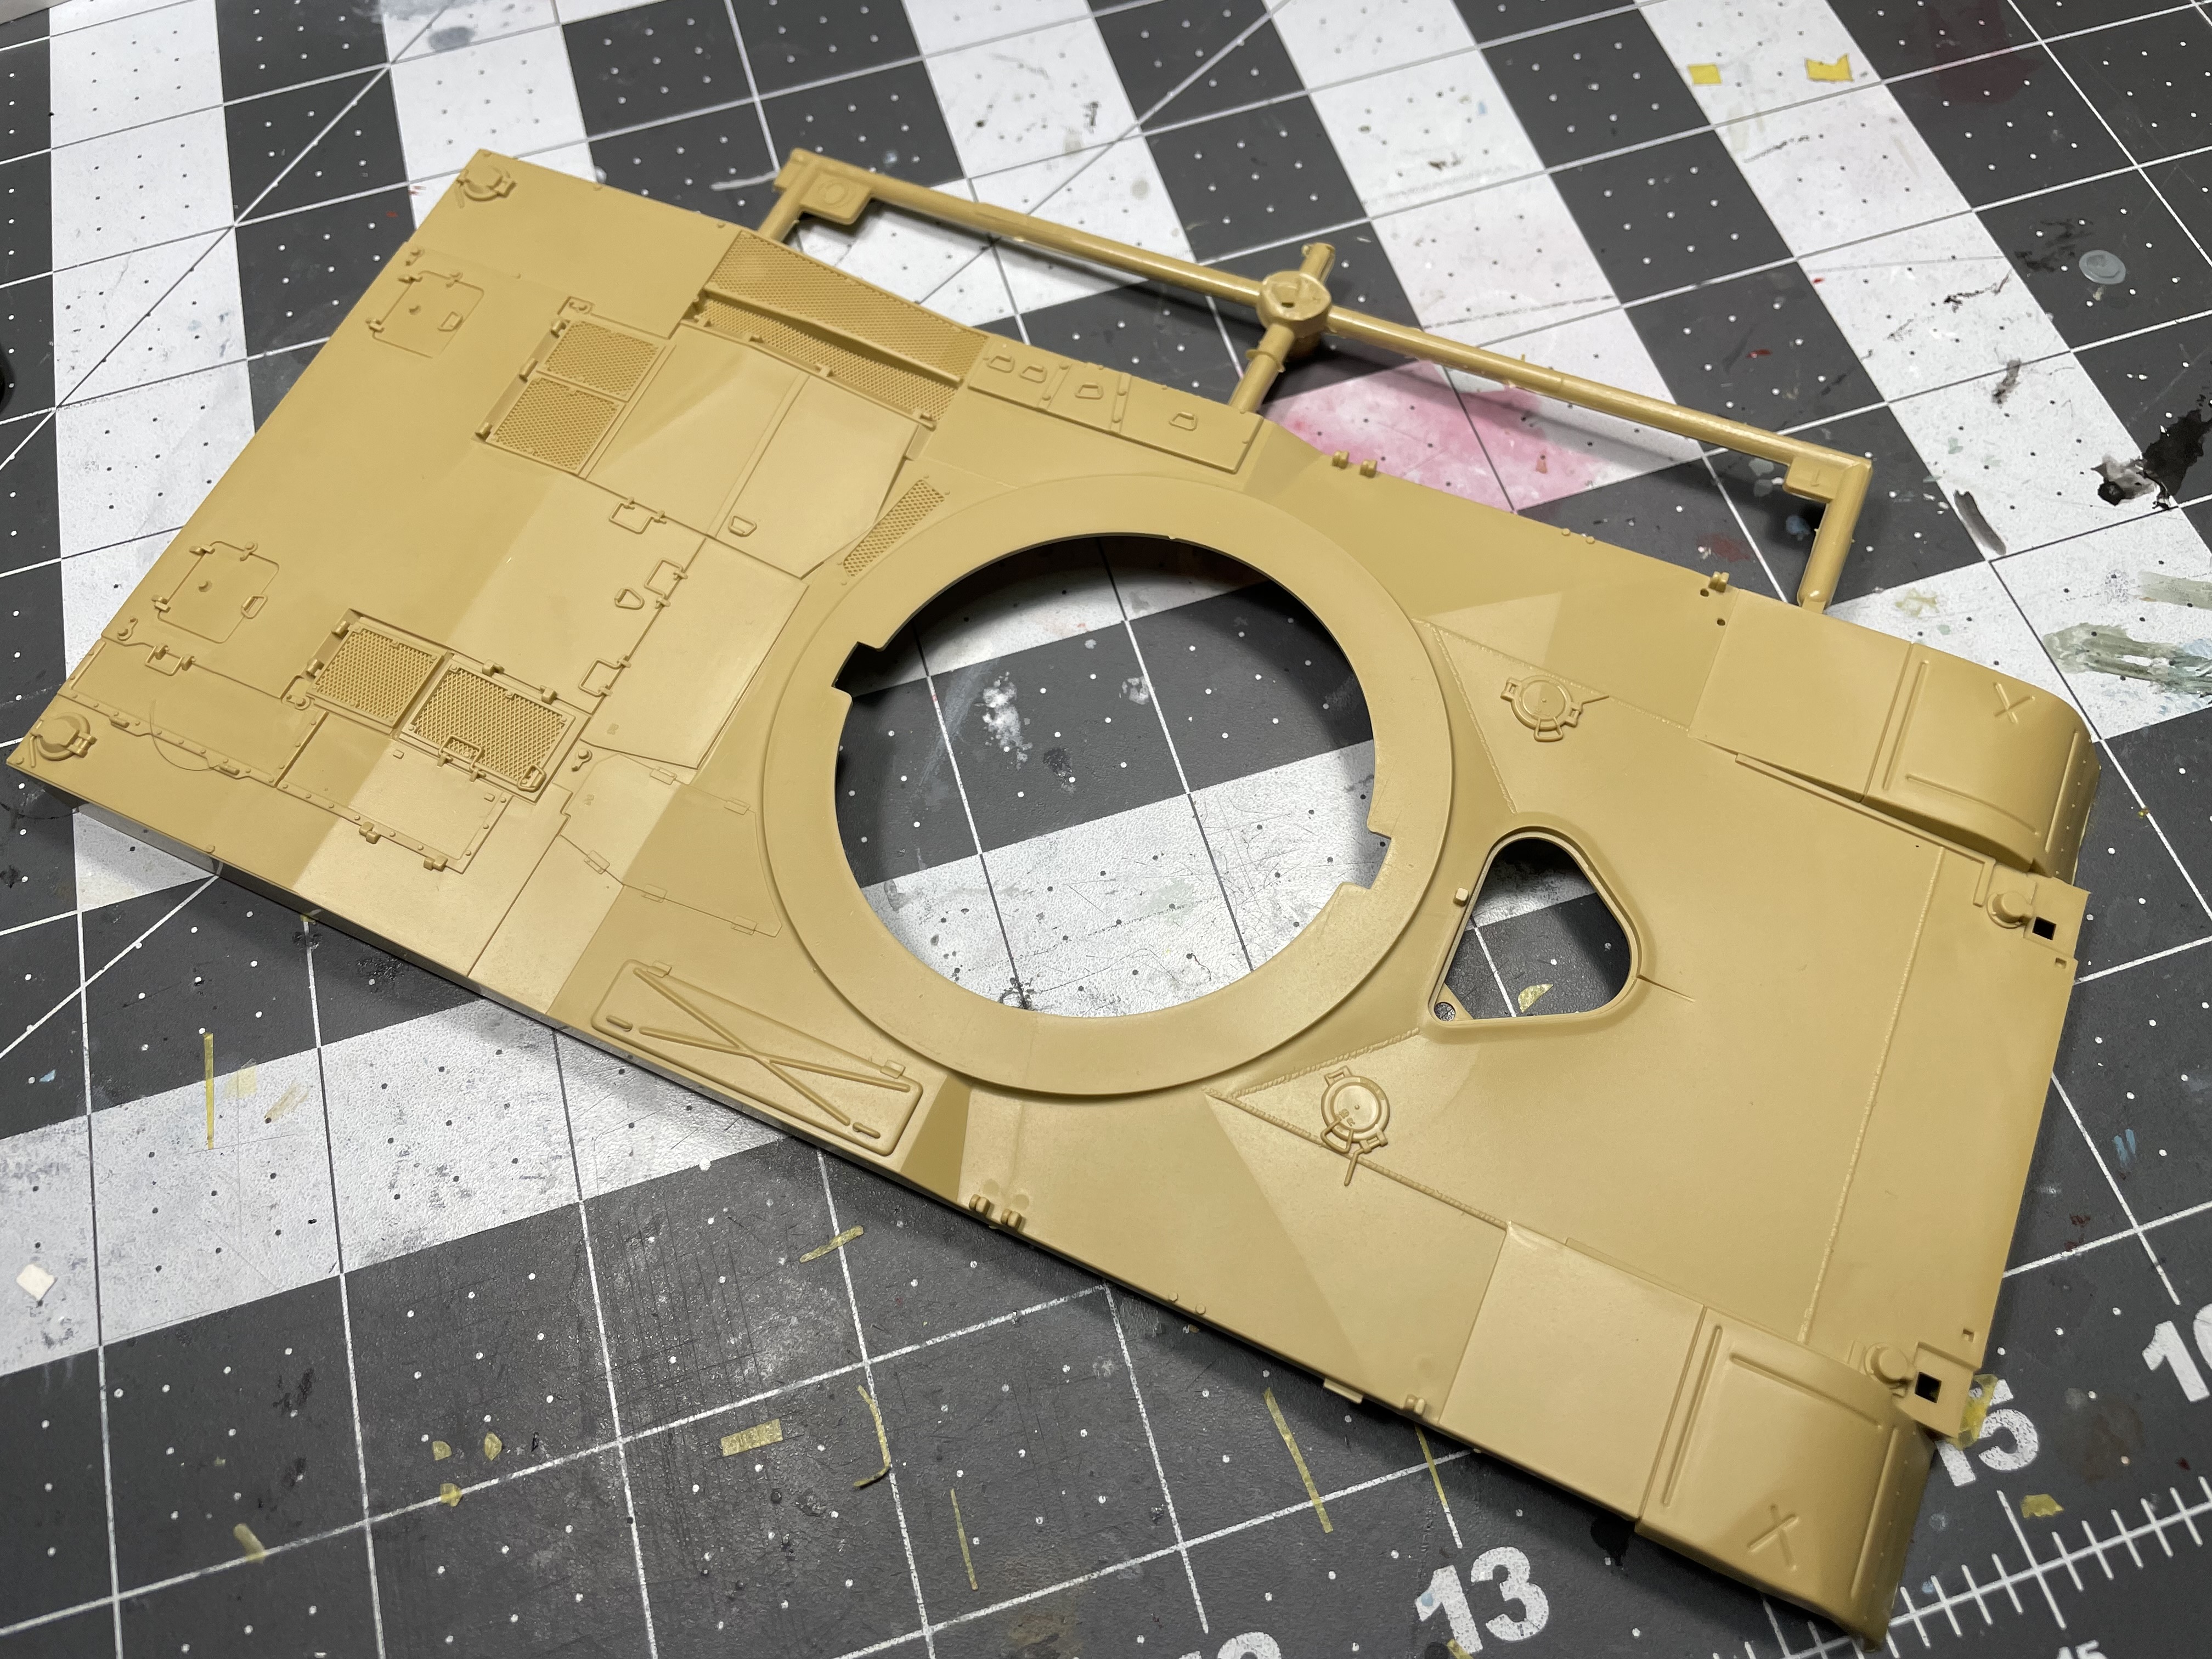
I received this kit as a gift this holiday season and as I’ve been meaning to build a Abrams for a while now, a perfect one at that! Tamiya’s M1A2 retails between $50-$60 CAD, and is definitely a bit cheaper than some of the other Abrams on the market (Meng, RFM) In this review I’ll try to find out how Tamiya’s Abrams fits into the 1/35 lineup.
Kit Features: 13/20
When I saw that Tamiya M1A2 was released back in 2003, I have to admit I wasn’t expecting a whole lot. In terms of the features included however, I was pleasantly surprised. For a kit that is now over 20 years old, it is well furnished even by the standards of today. One notable omission is the absence of photo-etched parts but considering the kit’s history and Tamiya’s tendency to not include a lot of photo-etch, this is hardly a major omission. The kit also includes a plethora of stowage options, figures and one very good boy, something that isn’t really seen even in modern armor releases. I also like the wide variety of possible vehicle variants the kit offers. The differences between a U.S Army, Marines, and NATO vehicle are all slight but are still represented and extra parts are included to build those specific variants. The Abrams does well in this category because it includes those extra options that Tamiya didn’t have to include. I initially scored the kit features higher, around 15/16 but upon reflection a score closer to the average is warranted. The features of this kit are good and better than expected but not class beating.
Quality of Molding: 37/50
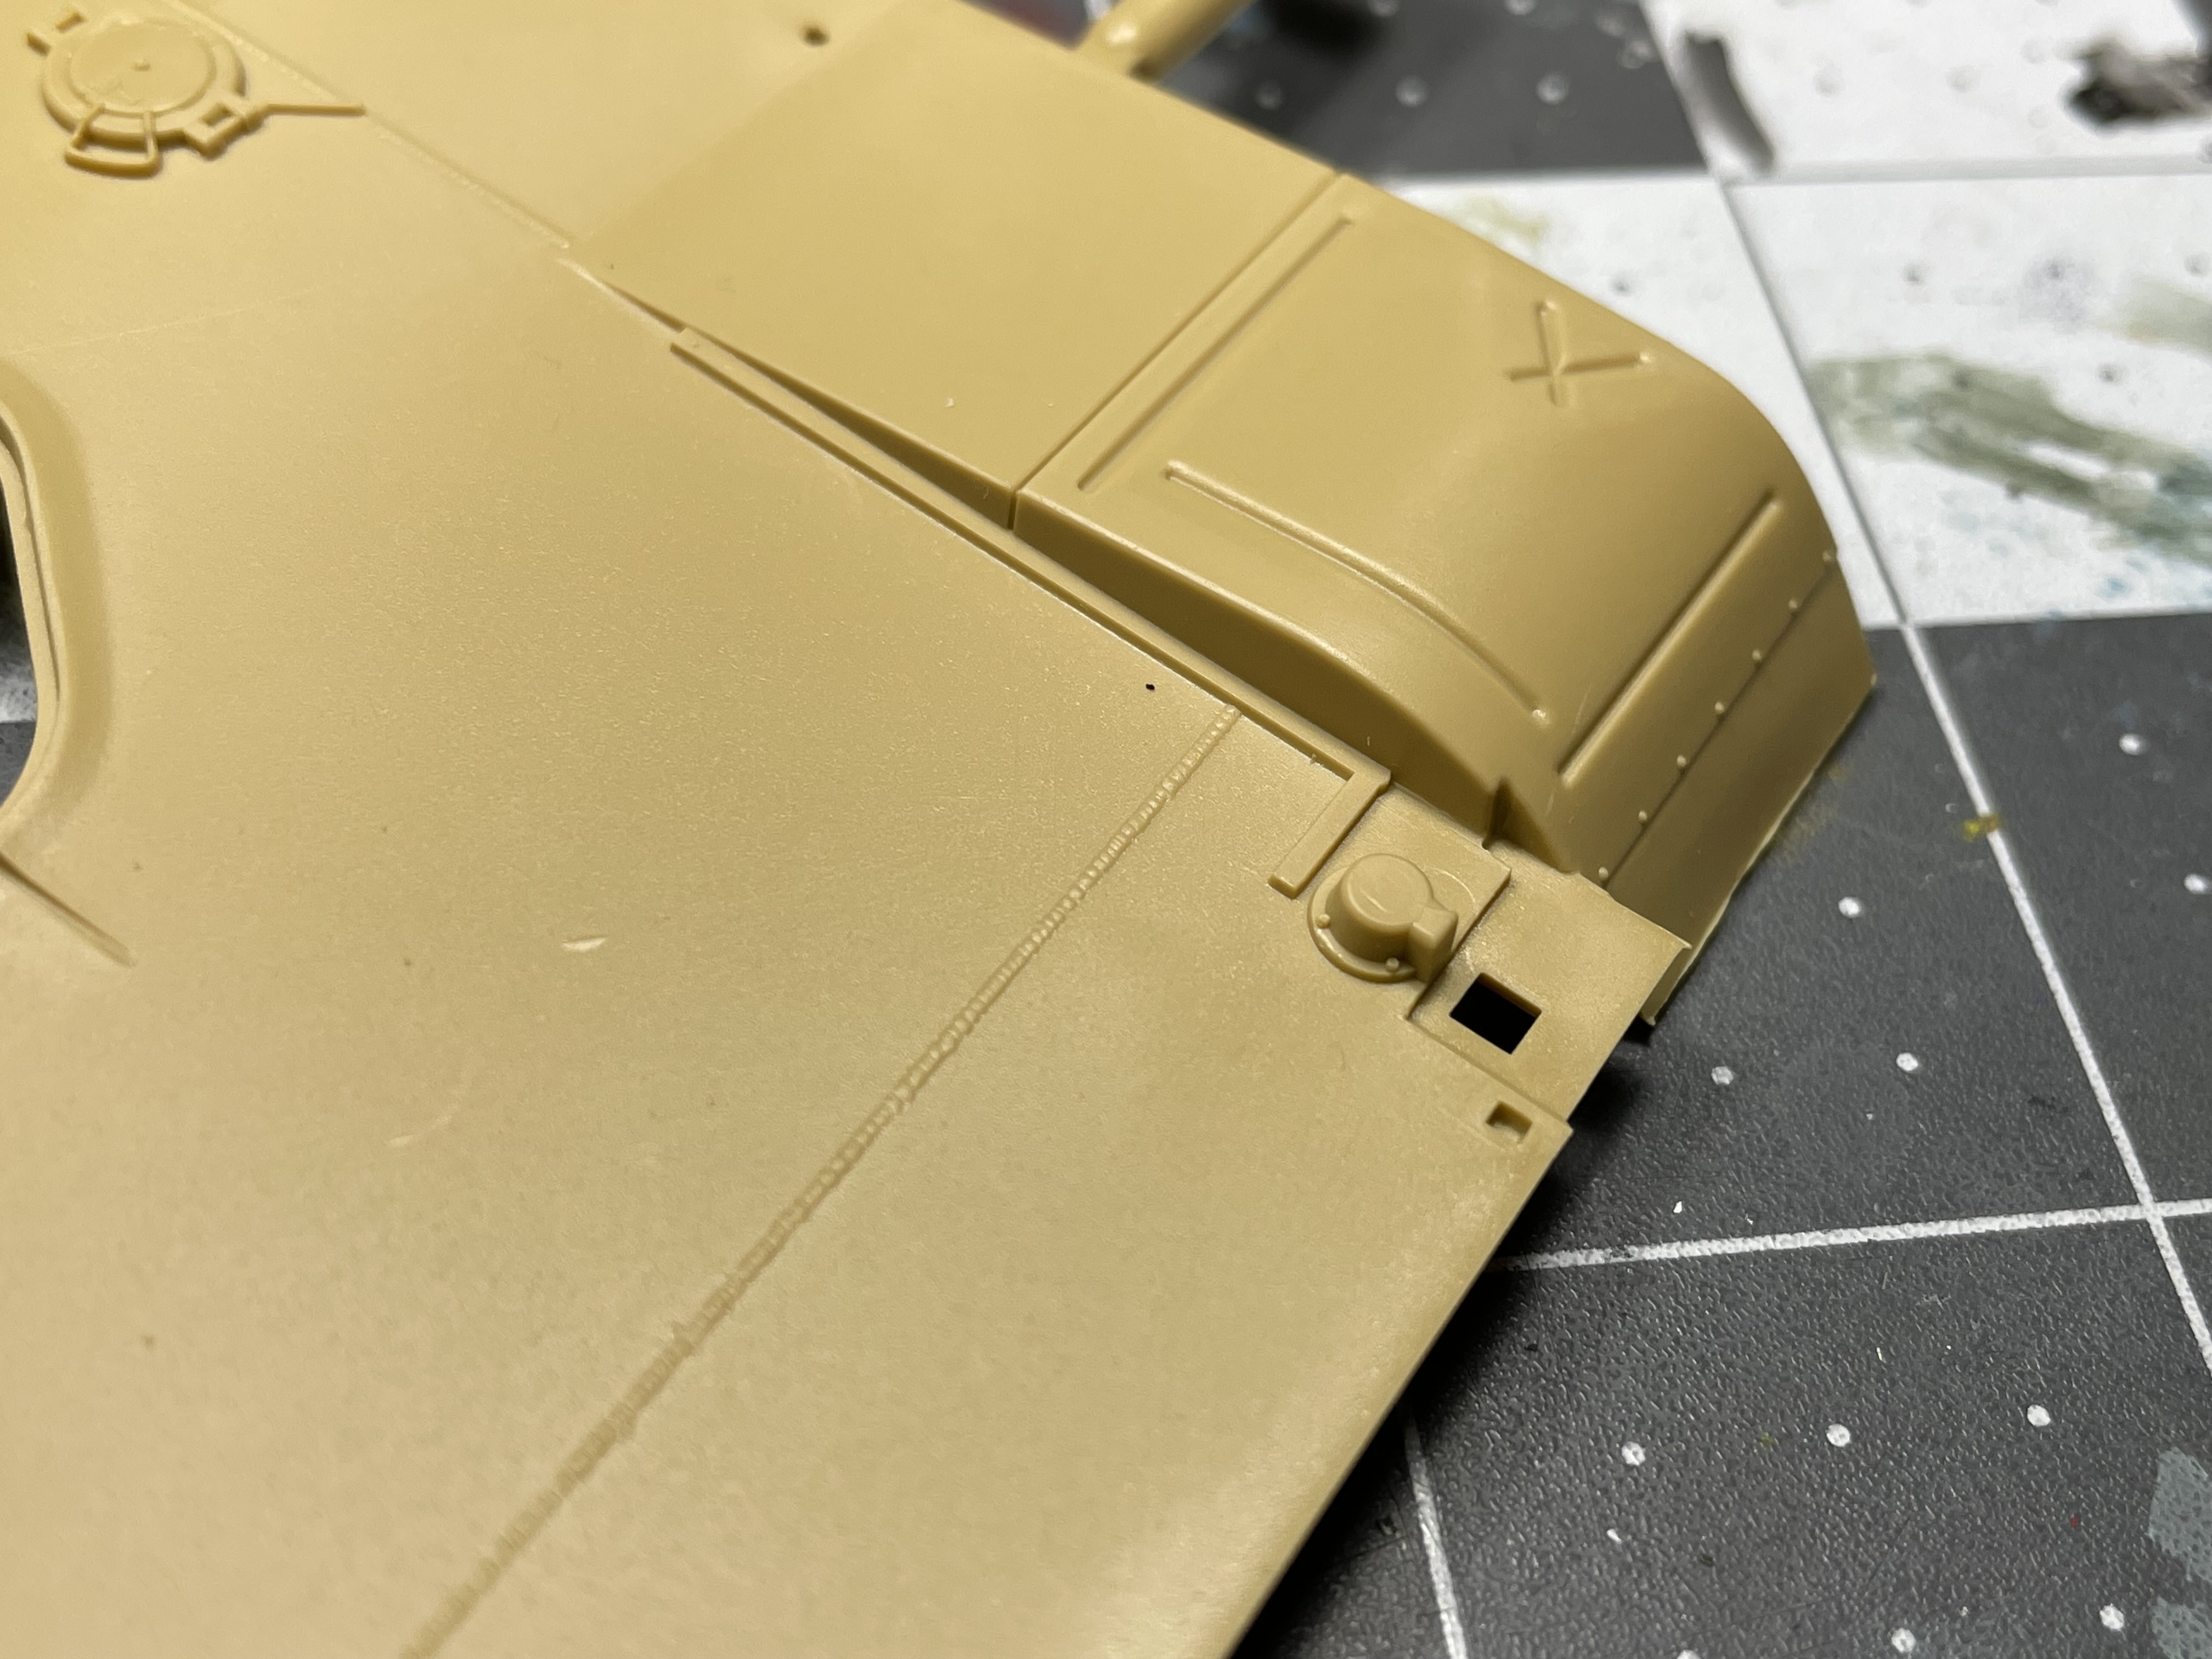
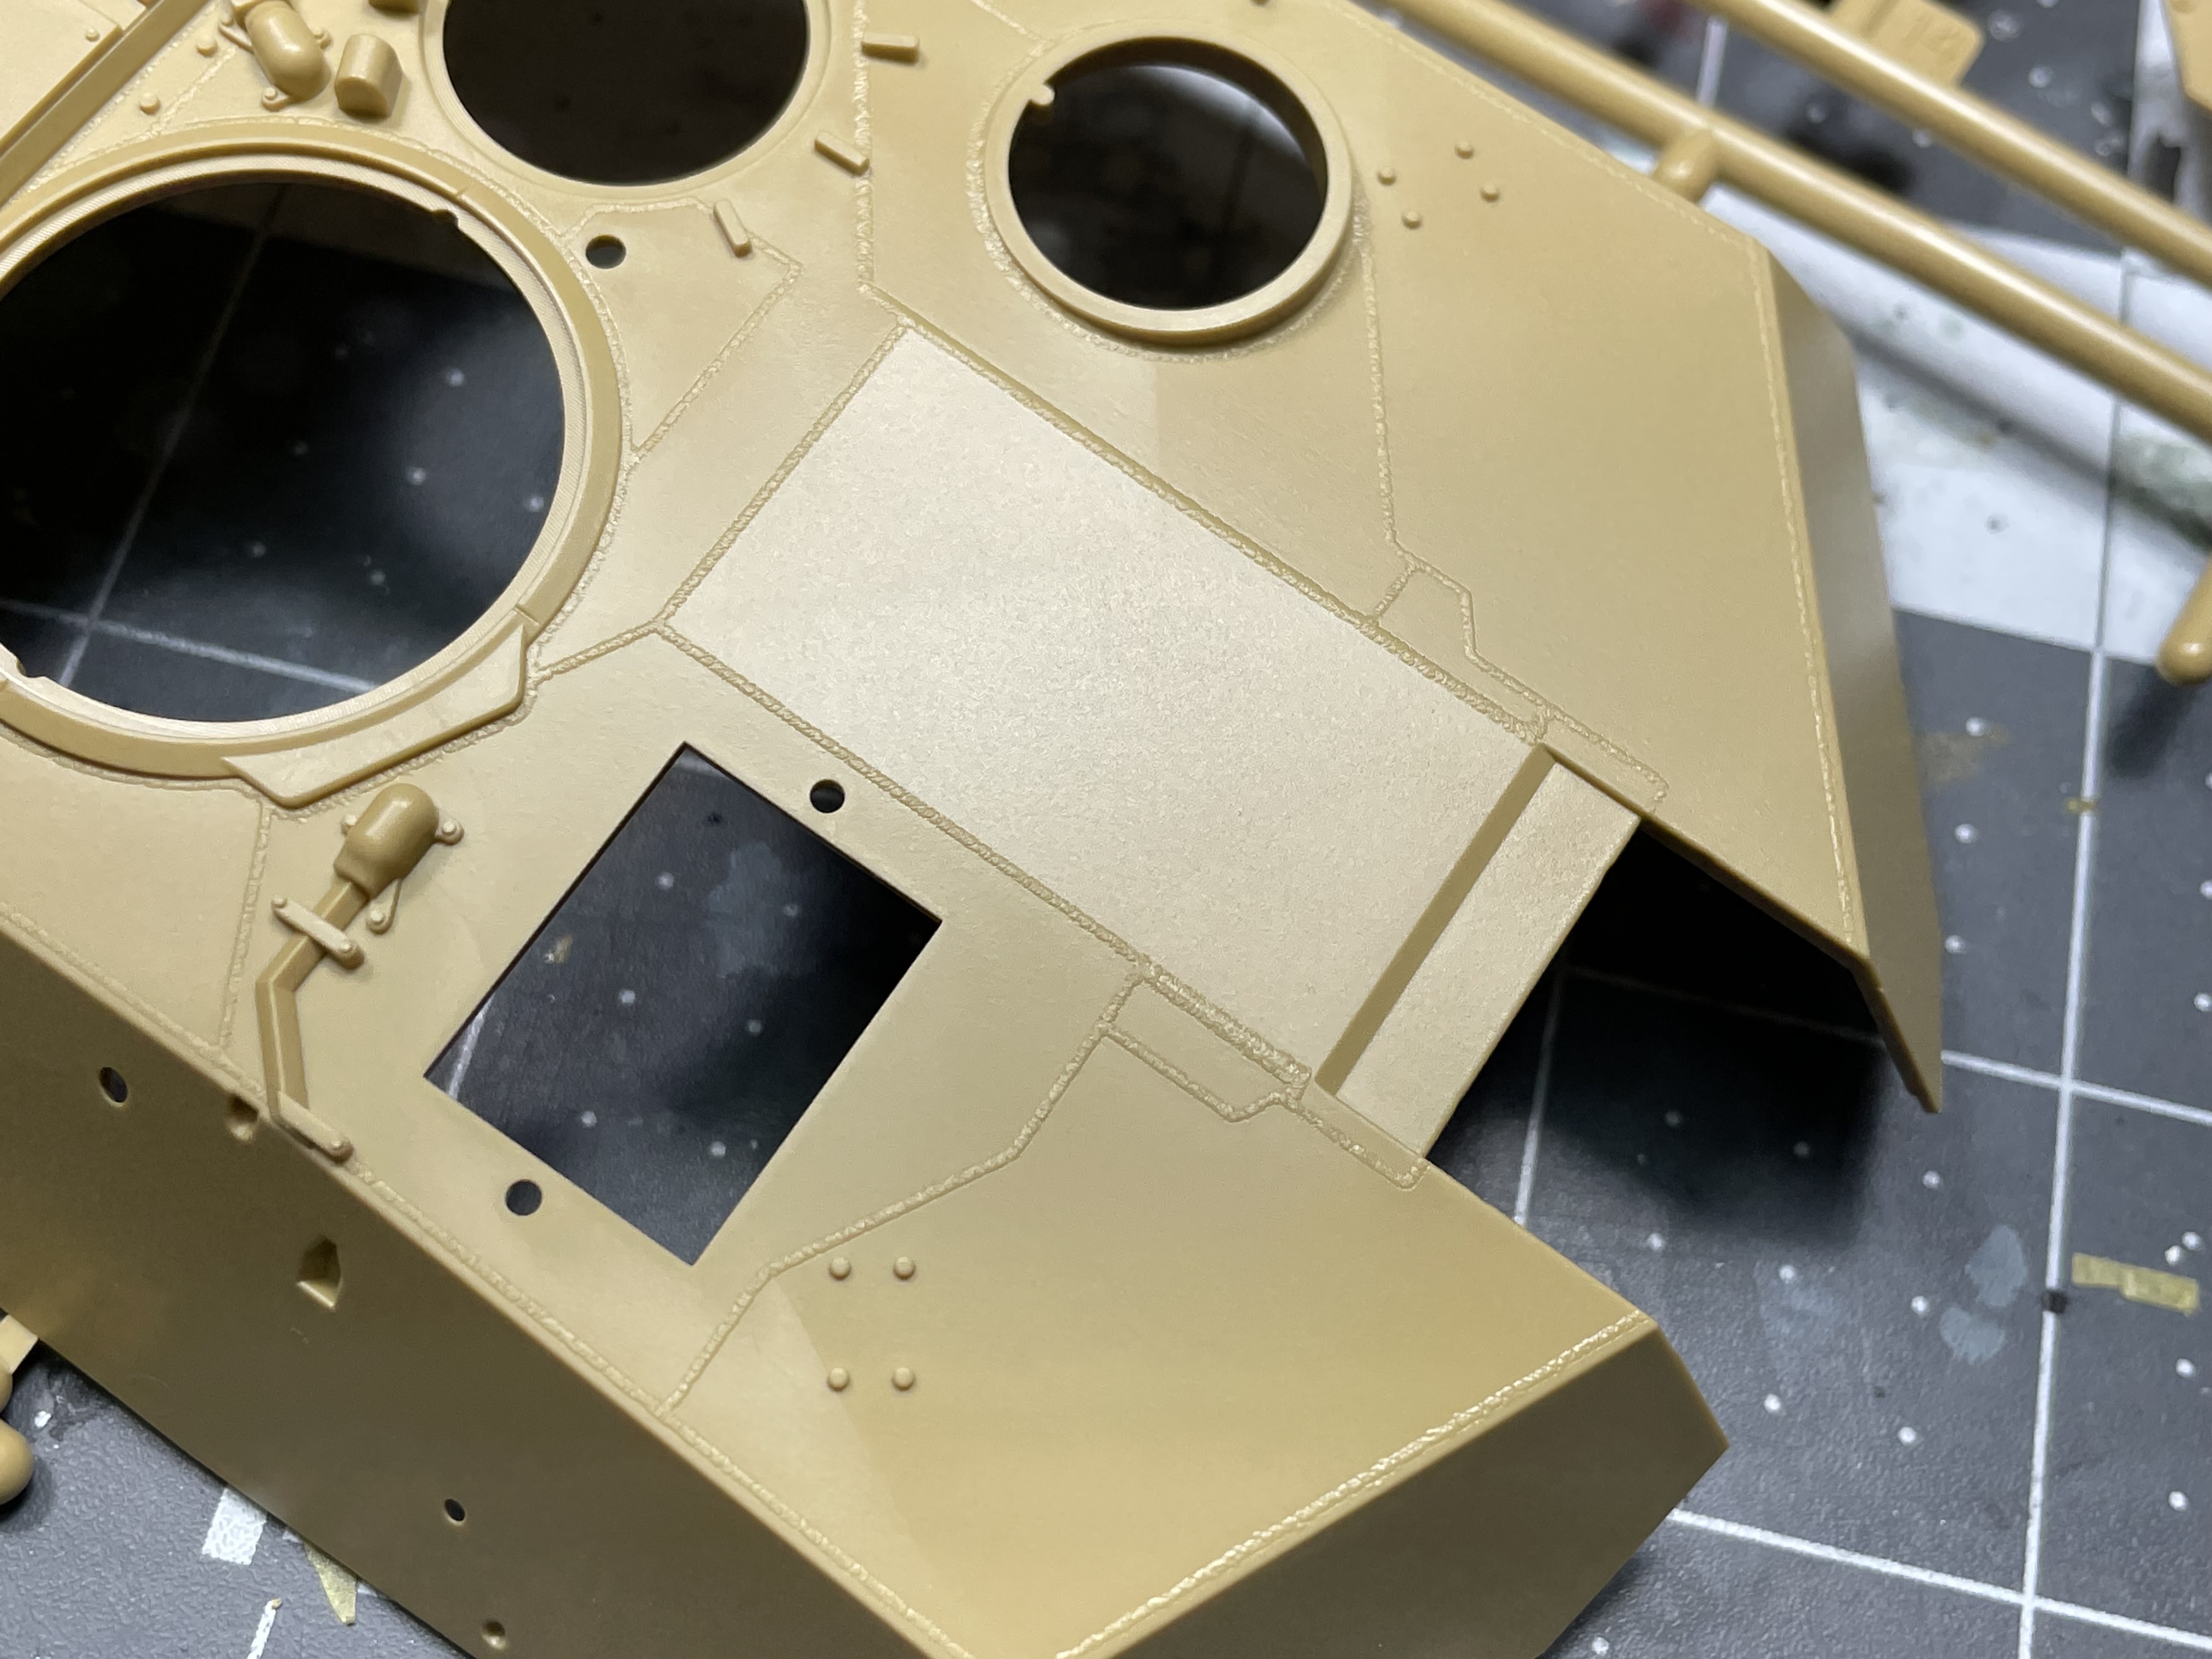
As with the included features, this kit’s molding detail was a surprise. The weld details are of particular note and very finely molded. Again, despite this being an older kit I really don’t feel like I’ll need to go over these with custom welds. In fact I think that this is an advantage this kit has, it’s straightforward and simple to build with detail where it’s needed. This is in contrast to a more modern Abrams kit that, while it may have more detail, will take twice as long to build. The Tamiya Abrams perfectly balances detail and part count as a “baseline” armor model. The grill detail on the engine deck also looks good and with a wash will look fantastic. Also of note are the M2 machine guns that are included (of which there are several) which are superbly detailed for injection molded parts. Overall it is very hard to find flaws in the molding of this kit. One potential issue is that while there is an abundance of weld details, I am not sure if the detail will be deep enough to hold a wash.
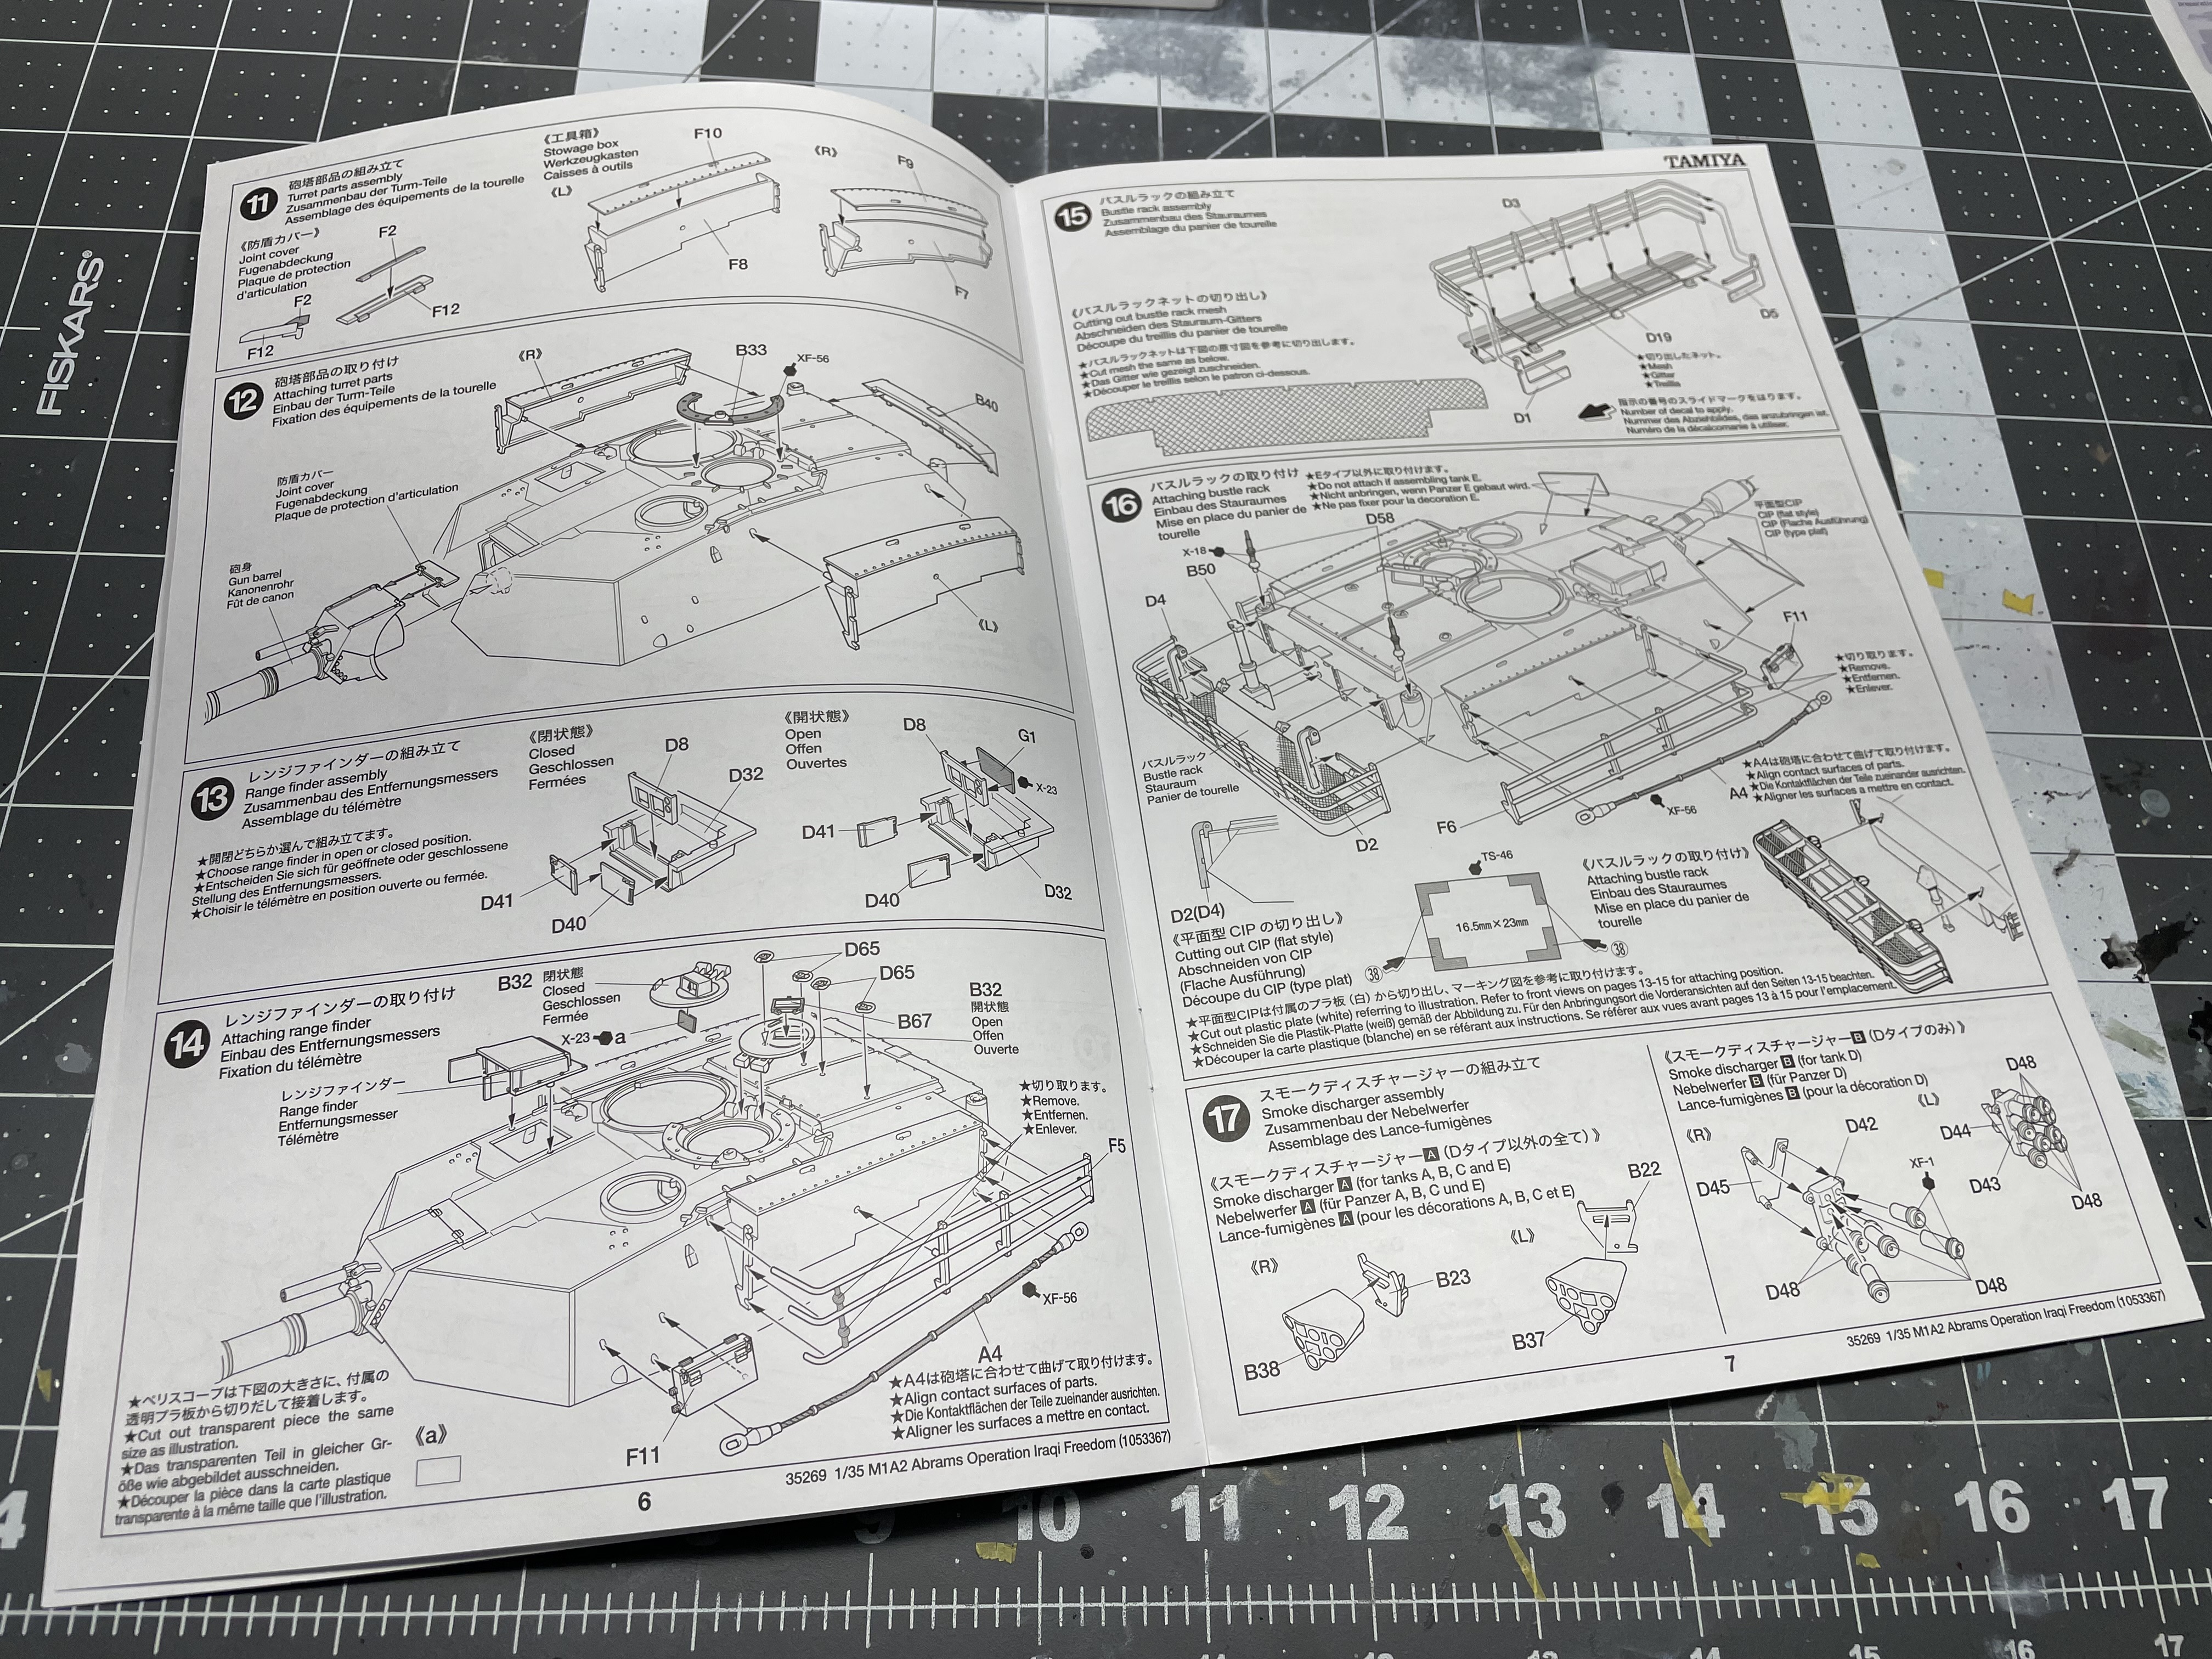
Instructions: 12/20
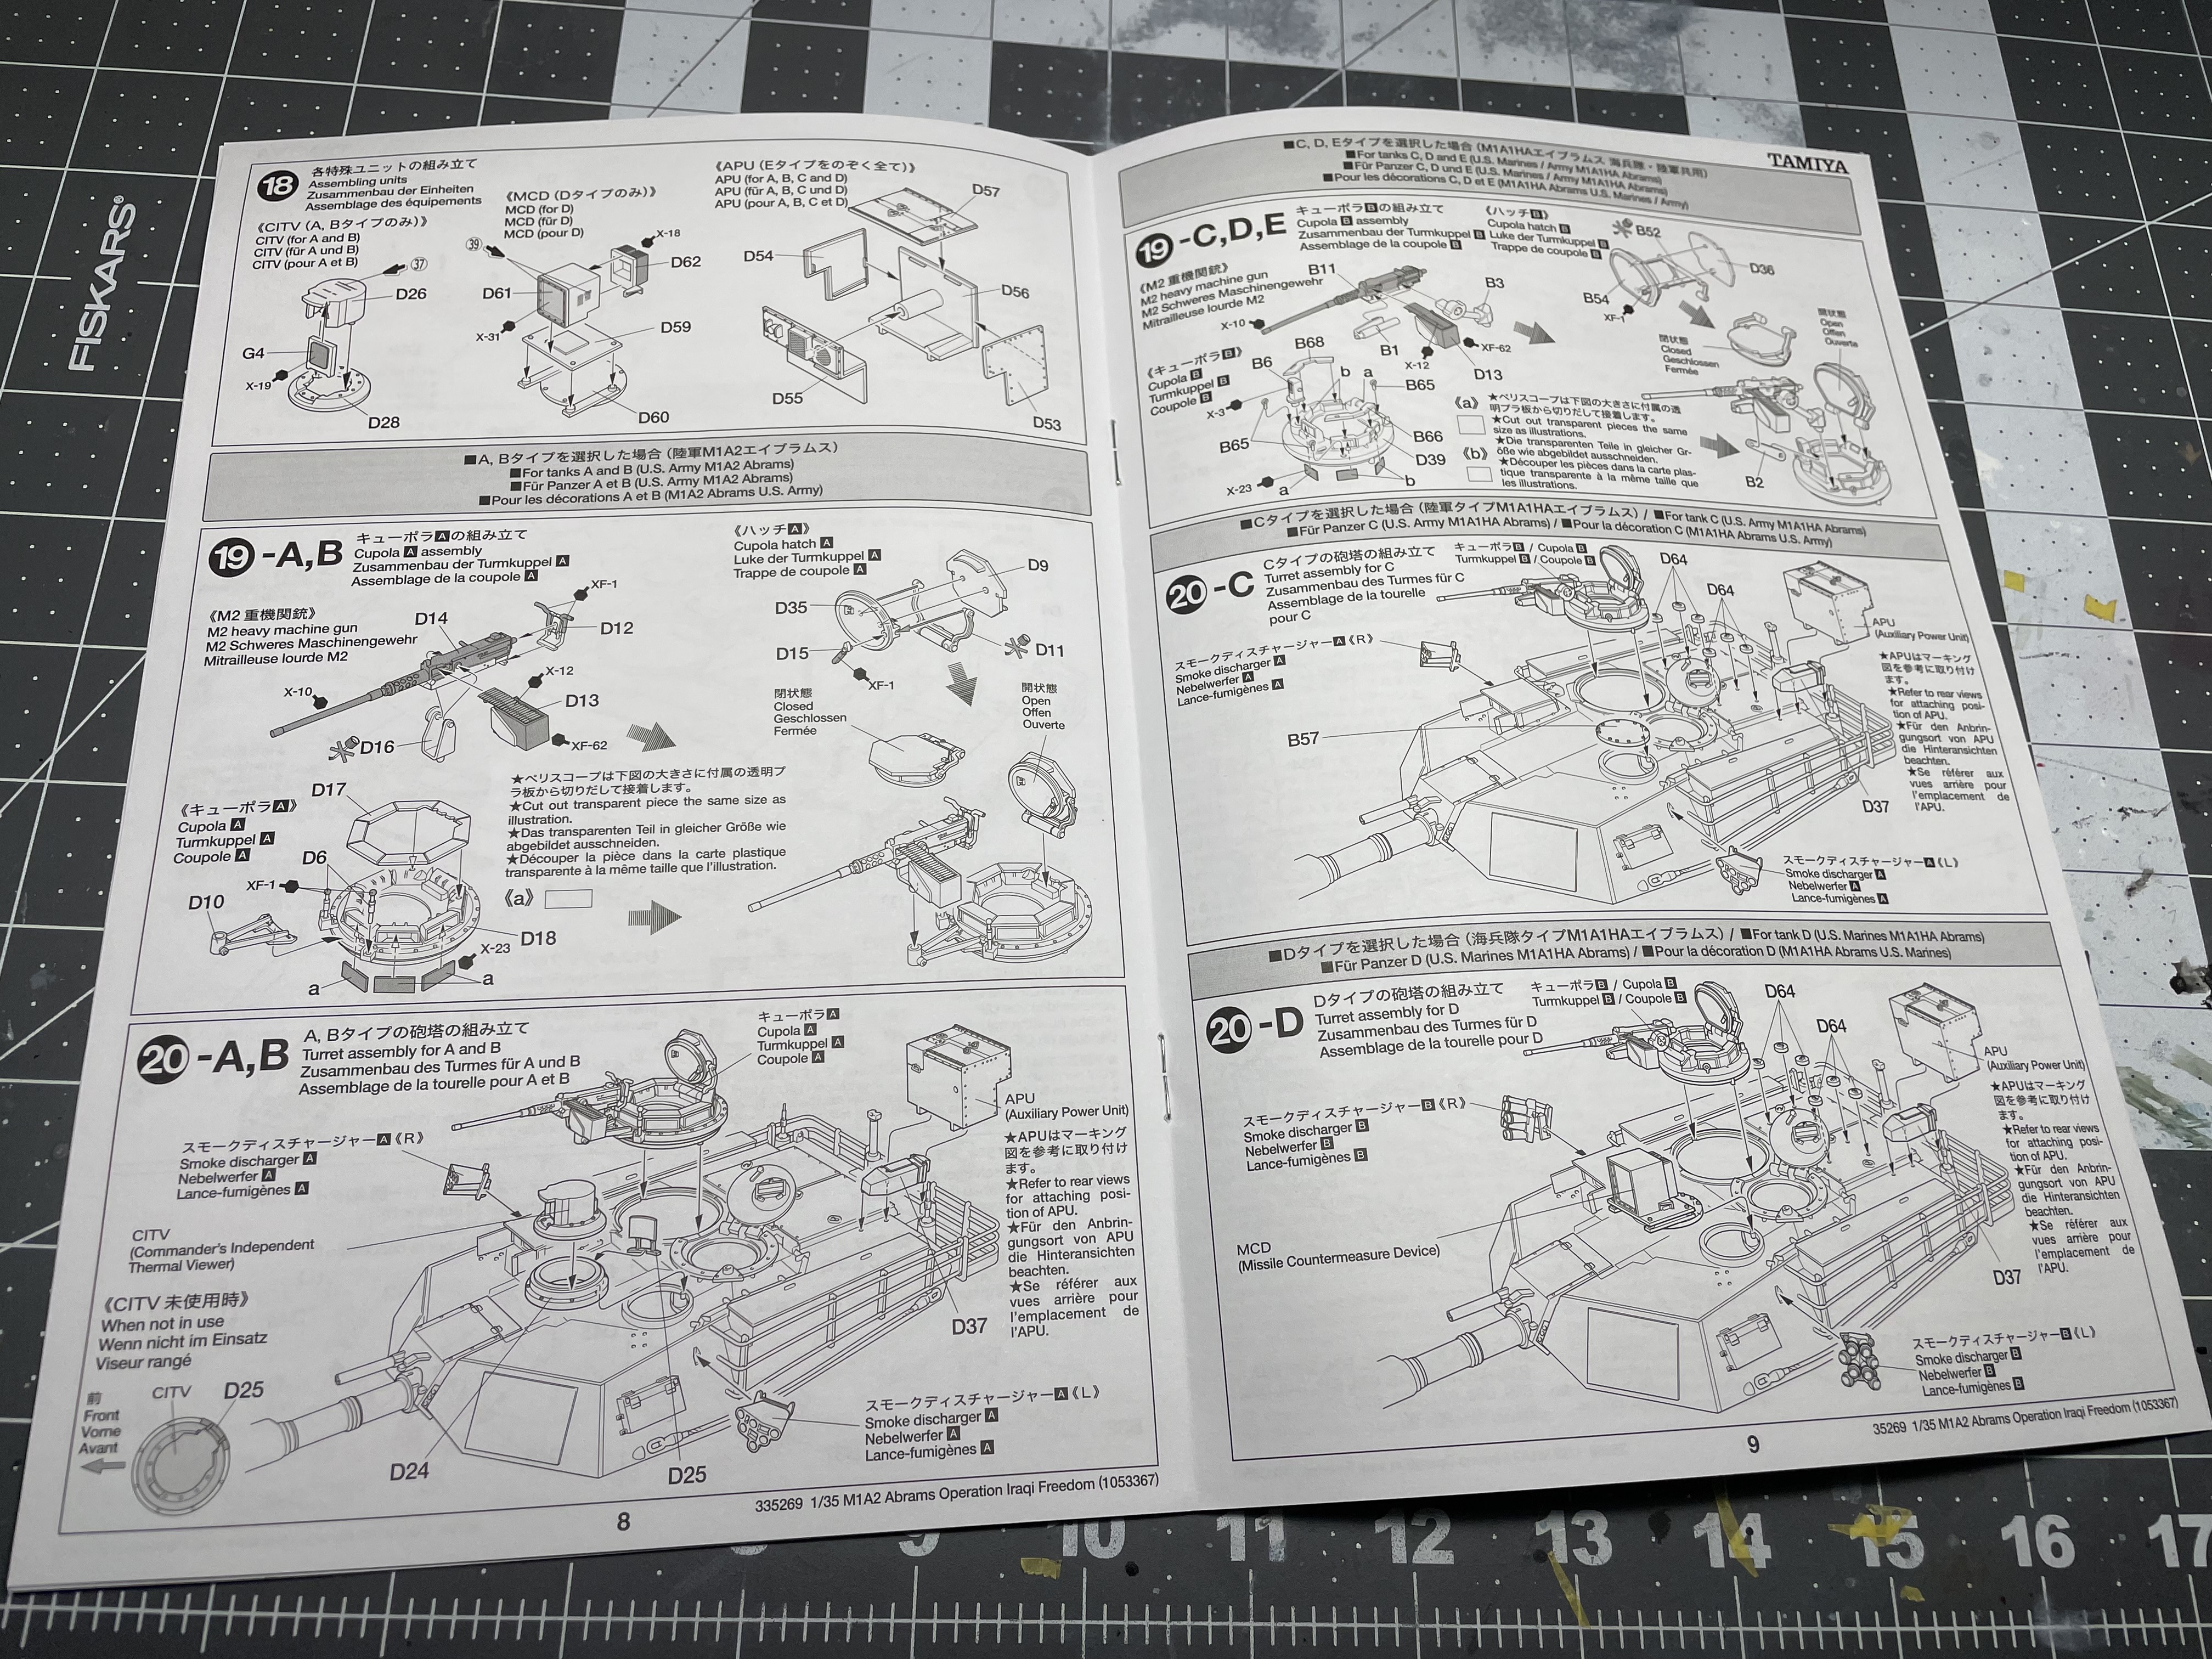
Tamiya’s instructions are as usual perfectly workable. They are deceptively long as on pages 8 and 9 the builder is only meant to follow one of the steps illustrated corresponding to the specific variant they have chosen to build. I actually quite like how much real estate Tamiya gave to the variant specific instructions as typically instructions give little more than “use this part G56 instead of G23 for option B” Tamiya aides the modeller by including full line drawings for each variant. No full colour profiles are included.
Miscellaneous: 8/10
Tamiya included a whopping 5 different markings for this vehicle and went further than just Iraqi Freedom vehicles by also including a KFOR vehicle based in Kosovo. Tamiya kits sometime have a problem where they offer 2-3 different marking options but in reality there’s only one option (see my G-6 review for an example of this). I wouldn’t say there are a lot of options provided but when it comes to the Abrams (I hope you like desert tan or woodland) Tamiya has covered the bases and then some with the Kosovo addition. I’m quite looking forward to building up a dusty woodland schemed Abrams.
Total: 70/100
If there was a kit that could be described as a “Value Stock” I’d be comfortable saying Tamiya’s M1A2 is it. There is not a whole lot to *not* like about this kit. It’s priced pretty reasonably $50-$60 CAD from what I’ve seen and offers a good amount of detail and options for a new to intermediate builder. If you’re looking for a challenge then the Meng or RFM options are well suited to those types of builders. I’d argue that Tamiya’s Abrams is even better positioned on the market, capturing both beginners and a portion of the intermediate skill level builders as well as people who want a build a Abrams, but not spend more than two months with it on the bench.
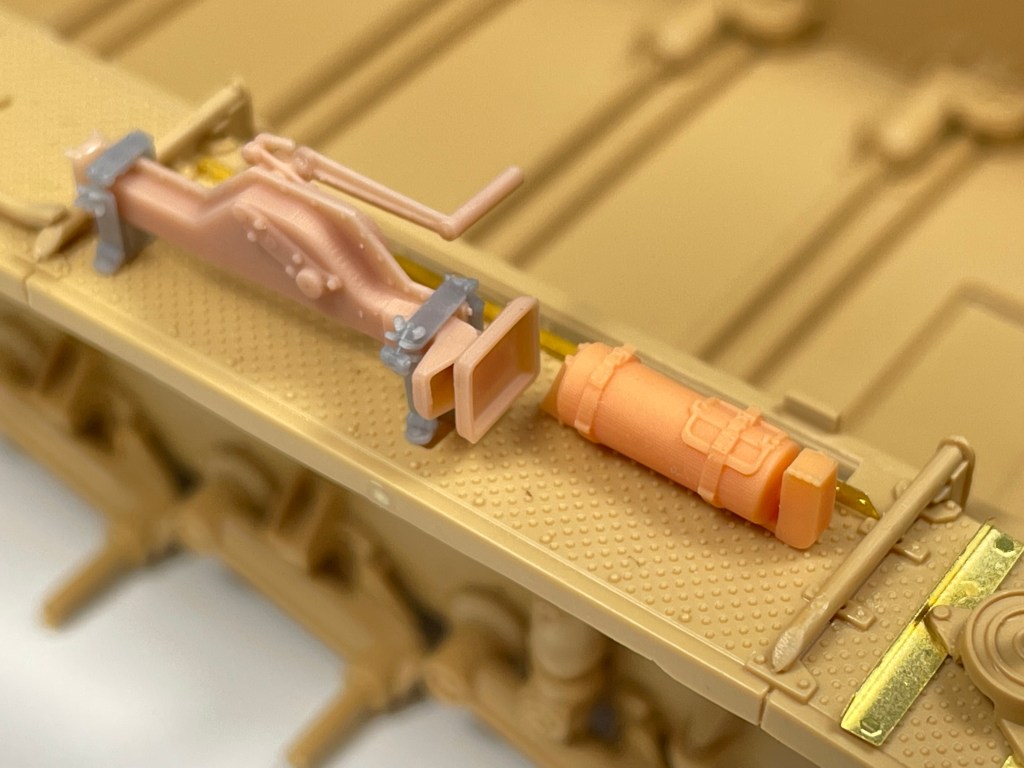
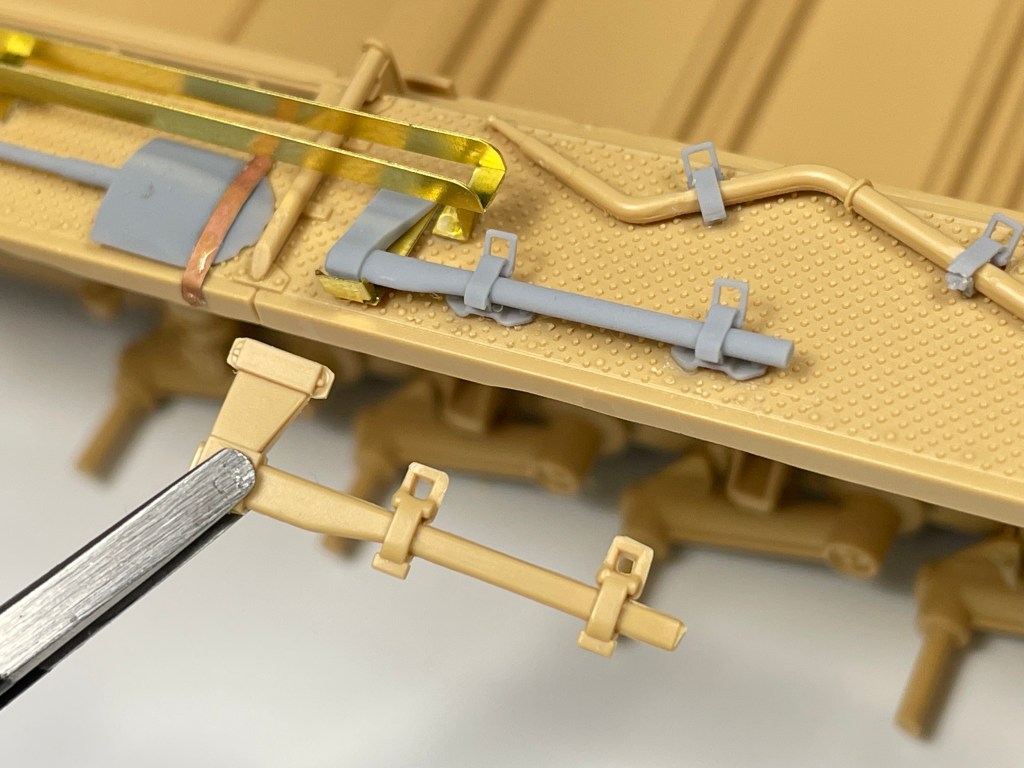
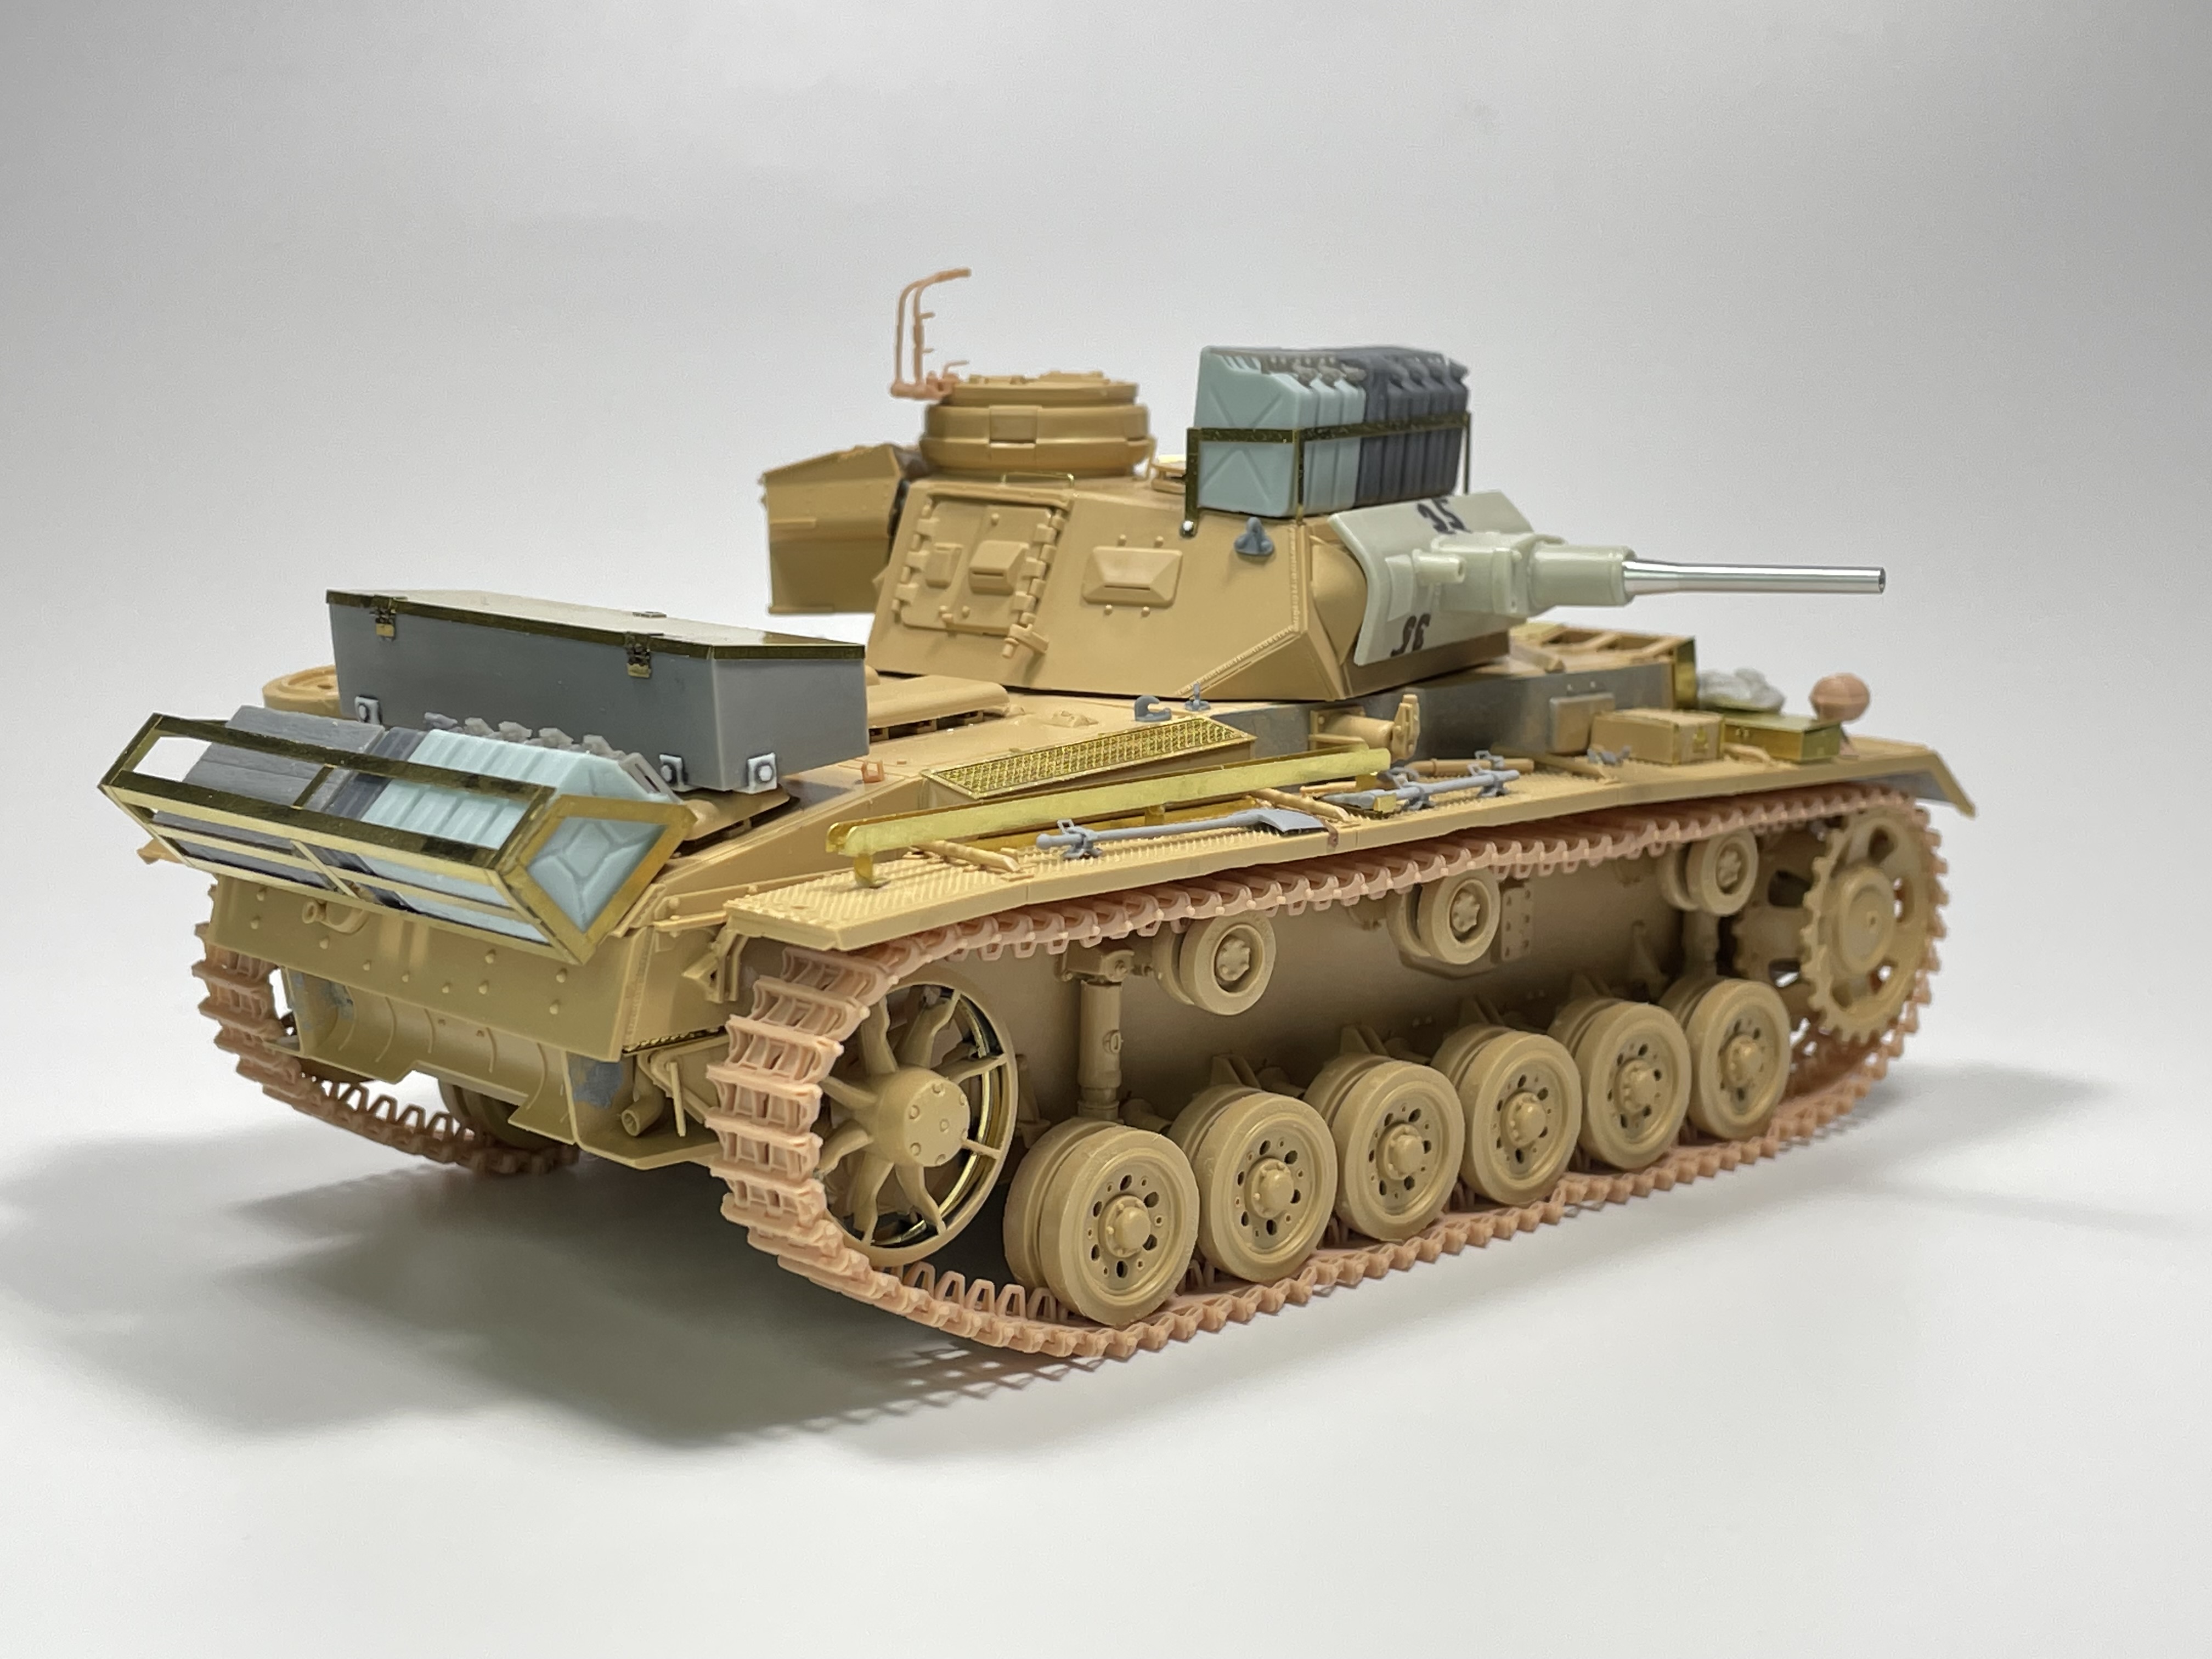
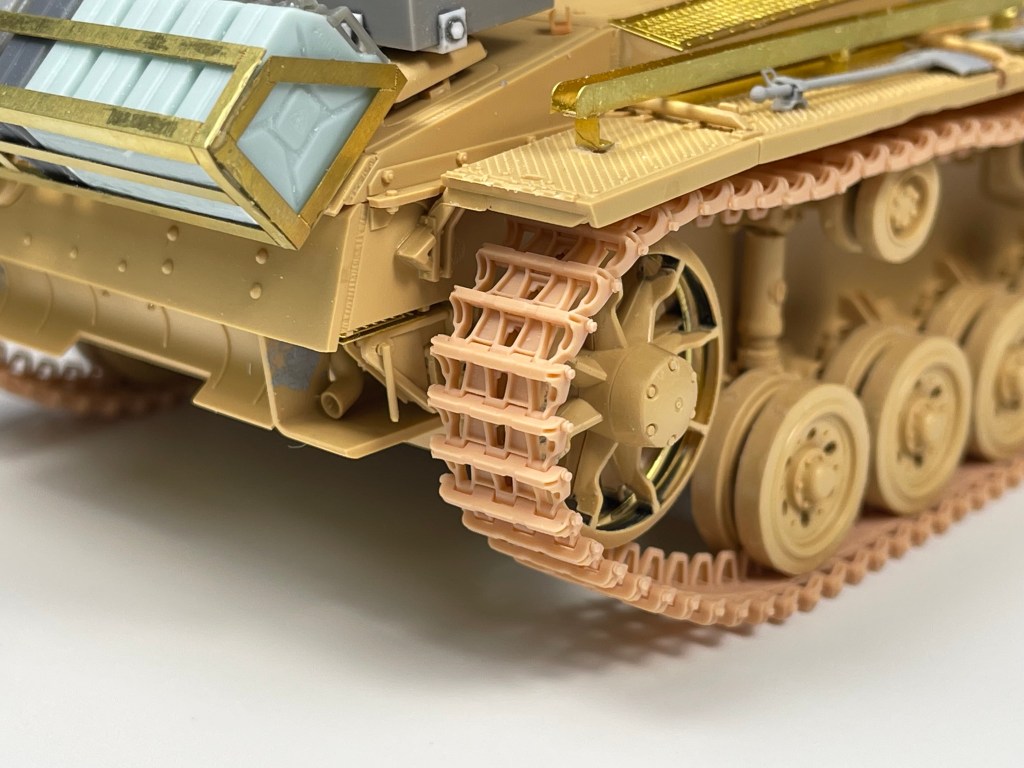
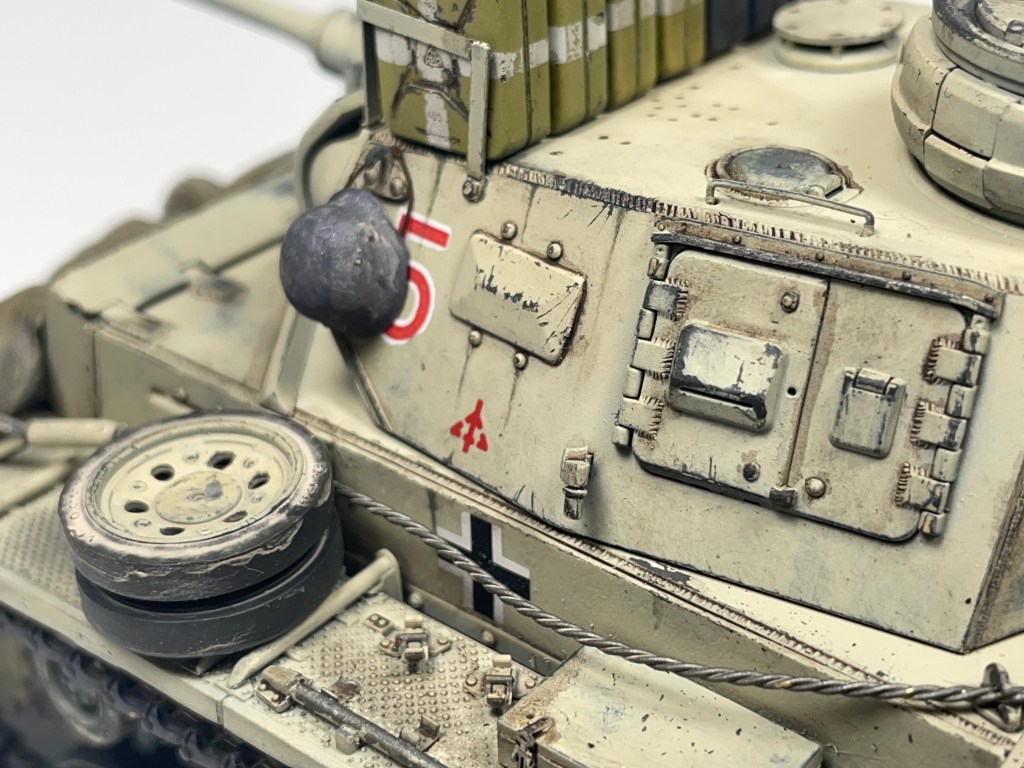
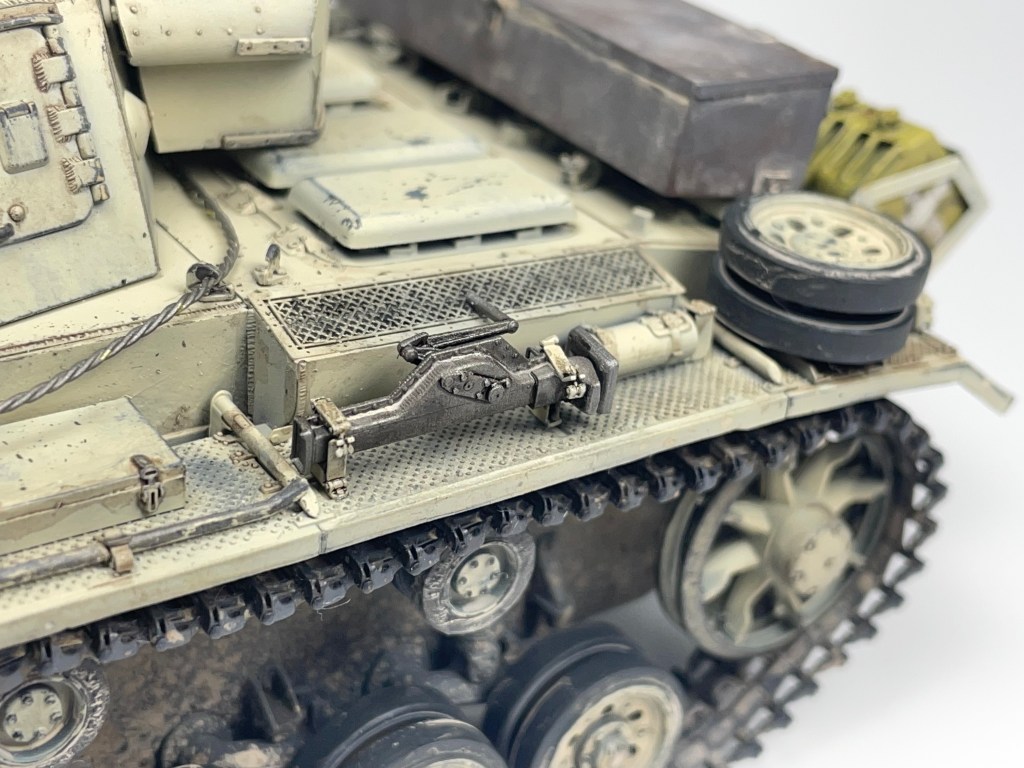
Returning to armour, this past summer I completed RFM’s excellent Pz.III Ausf J in a North African Scheme. I had been meaning to do a DAK scheme for a while now as I find it’s a very interesting look and difficult to pull off effectively. Construction started smoothly and I had the pleasure of using quite a few accessories for the built that I’ve collected over time. As is normally the case, construction started with the lower hull and then moved on to the fenders. I used Eduard PRINT tools and ROCHM jacks for the first time and was very pleased with how they came together.
Construction progressed very smoothly after that, with the minor exception of how the fenders interacted with the top part of the hull.
RFM has you attach the fenders separately from the lower hull and then attach the upper hull on top of the fenders. This was fiddly to complete and the only downside of the kit worth mentioning. I added Accessories from Panzer Art, DEF Model and RFM’s own set for detailing the model.
Of particular note are the tracks by T-Rex. They are by far and away the best tracks I’ve worked with. They are very well detailed and extremely easy to put together. If T-Rex offers a set for a subject I’m building, I’m using them from now own.
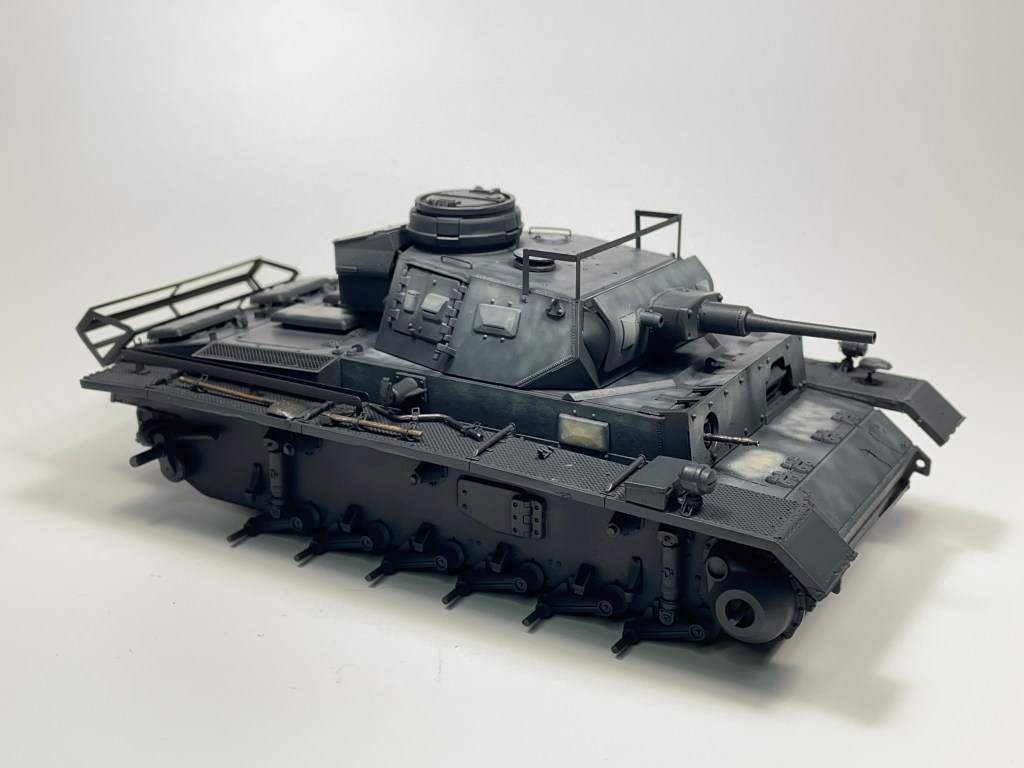
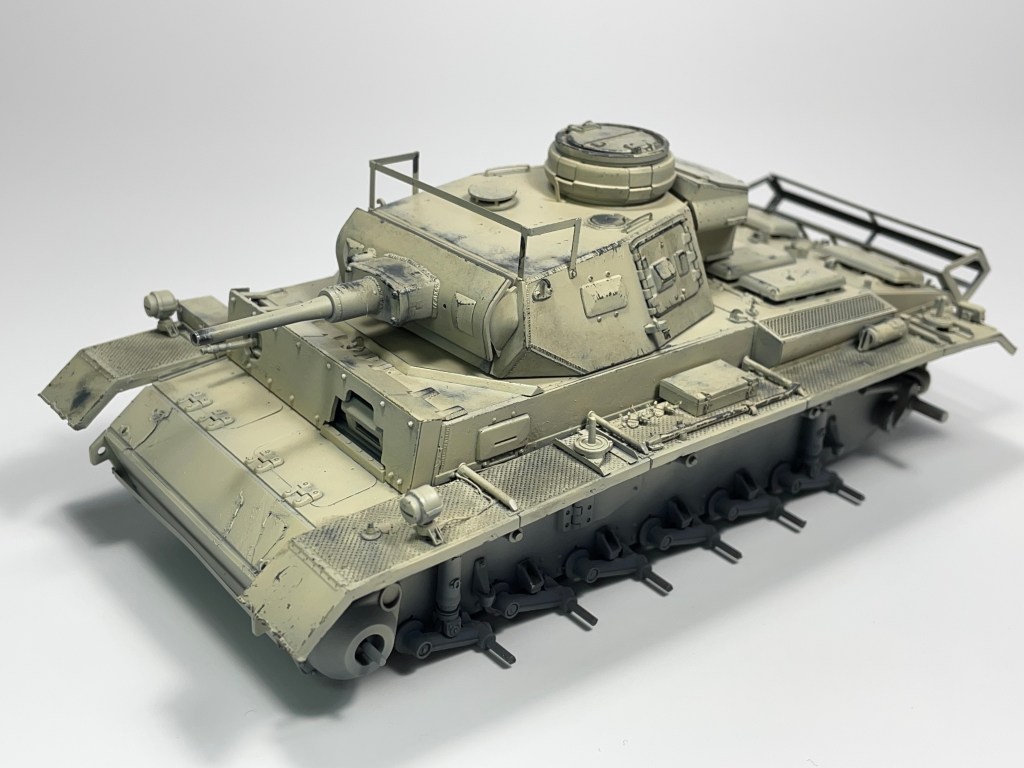
Painting came next, I attempted to mottle my chosen colour for the kit over a panzer grey base but found that it didn’t work quite right IMO. I used an unconventional colour, Sail (for ships) by Mr. Color’s aqueous line. I wanted a very faded colour and not something that just looked like lighter dunkelgelb. In this regard I think it did go a bit too far and for my next DAK subject I’ll darken it ever so slightly I think.
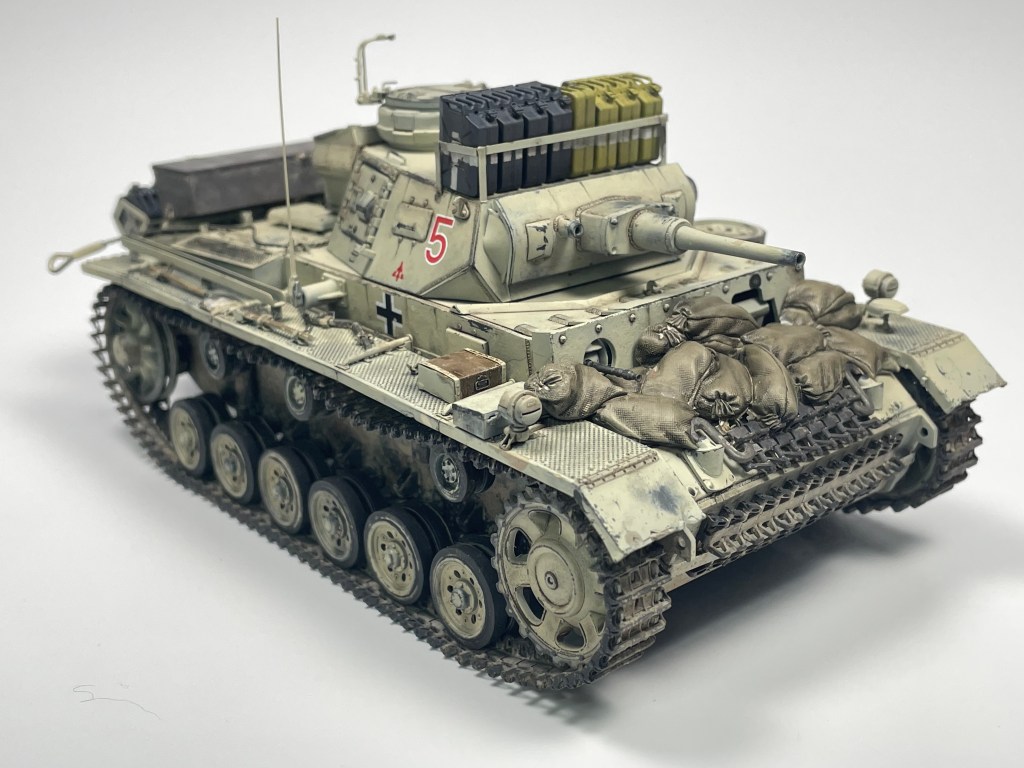
For weathering the standard dark brown oil wash was used. For chipping I took a slightly new approach, and used the technique shown in the book “Tank Art 1” (which is fantastic btw). While I thought my attempts at chipping using lacquer thinner (which tends to melt the paint instead of chipping it) were passable, I do feel like I need more practice in this area. I also used various streaking effects and pigments on the lower surfaces to really sell the fact that this was a desert vehicle and was exposed to harsh elements.
All in all this build took a little over a month to complete and I quite like how my first DAK vehicle came out! This won’t be the last I complete.