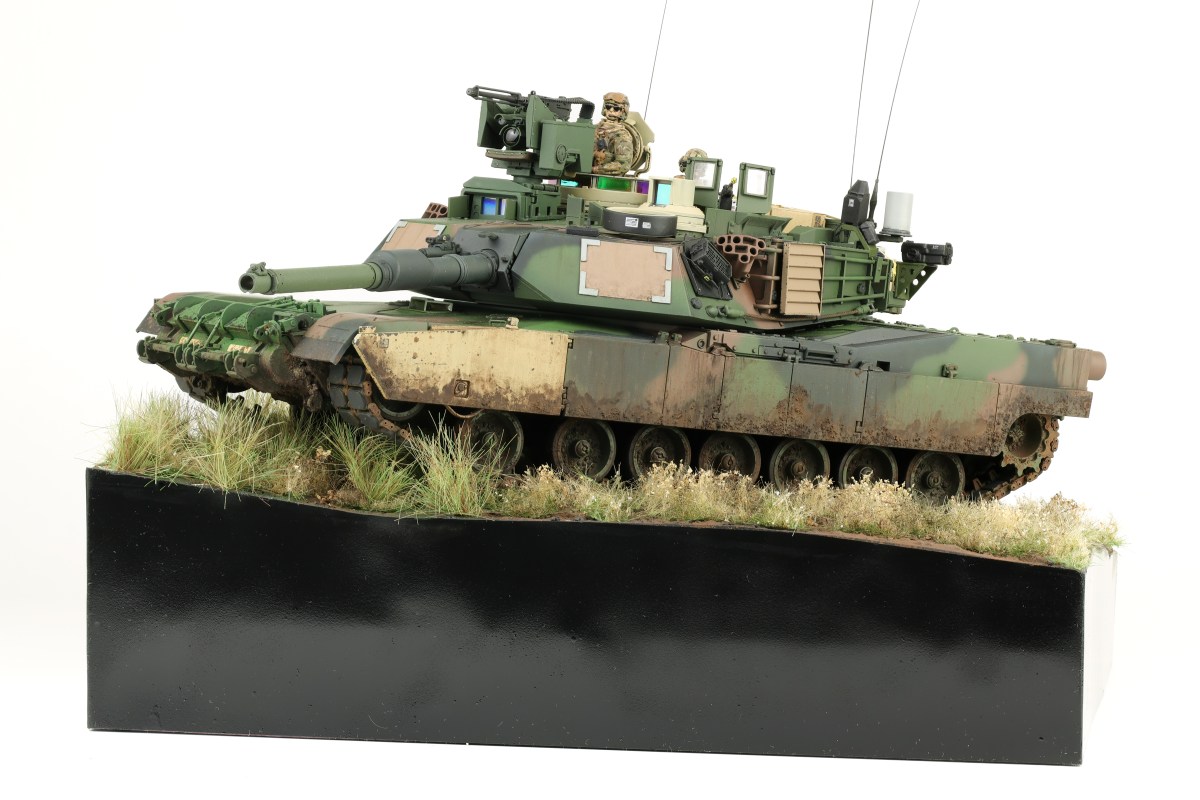
At long last, the completed M1A2 project! Super happy to finally get this on off the bench. After work was compelled on the model, I built up a quick and easy base to show off the completed build. I wanted to do something different here, so I chose to pose the model in a hull down position.
This model had been on my bench for some time, and it’s nice to finally see it finished, Enjoy the completed photos!
With the Abrams sealed with a satin coat, I was now able to move on to the weathering process. I again with a fairly basic, dark brown pinwash, taking care not to overload the model and tint the completed paintwork. I intentionally chose restraint in this step, as I felt that my paint modulation work during the painting phase was the primary weathering effect I wanted to be noticed. After the wash was completed, I then got to work with an enamel paint streaking effect.
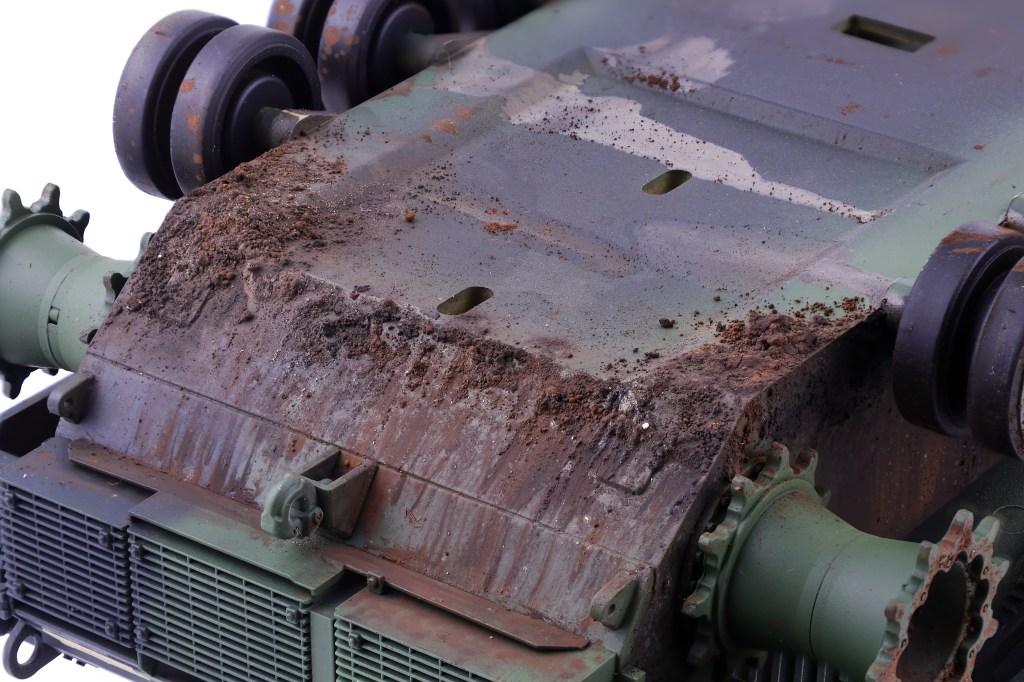
This technique has become one of my favourites as a precursor to more substantial earth and mud effects seen on armoured vehicles, I find this effect perfectly recreates the slow buildup of dirt and dust that is seen in many armoured vehicles. To achieve this effect, I airbrushed XF-10 “Flat Brown” and XF-52 “Flat Earth” thinned 3/7 paint to thinner. Onto the lower areas of the model where dirt and dust was most likely to streak down to and collect. Shortly after the dust layer is airbrushed onto the model, enamel thinner is lightly brushed over top before vertical brushstrokes are applied, creating the effect that dirt and dust has been washed away from rain and the streaks are all that are left.
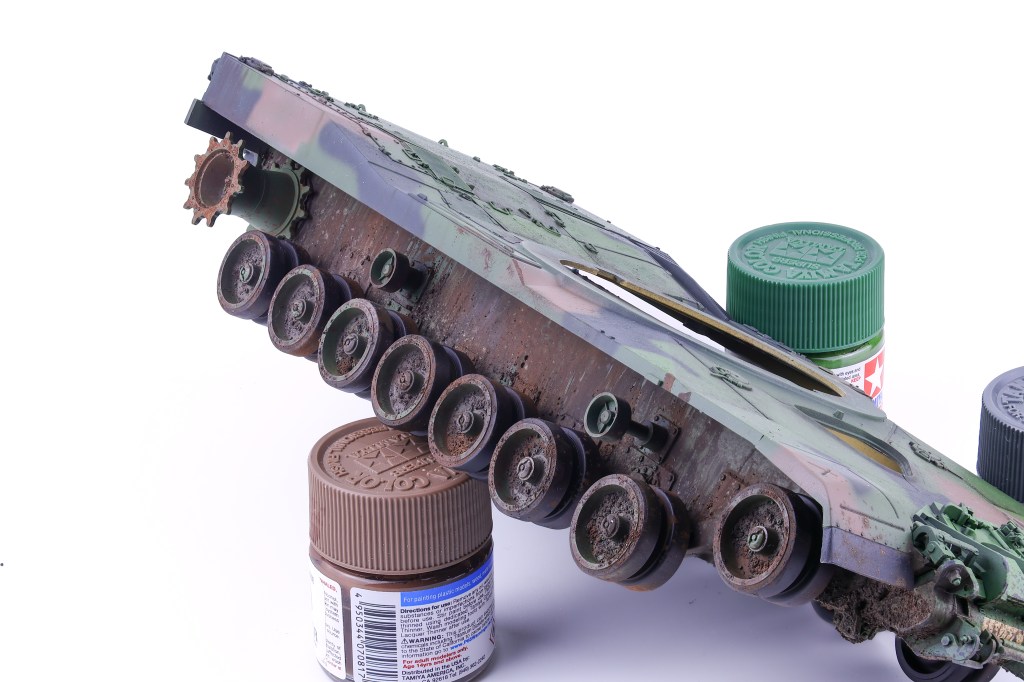
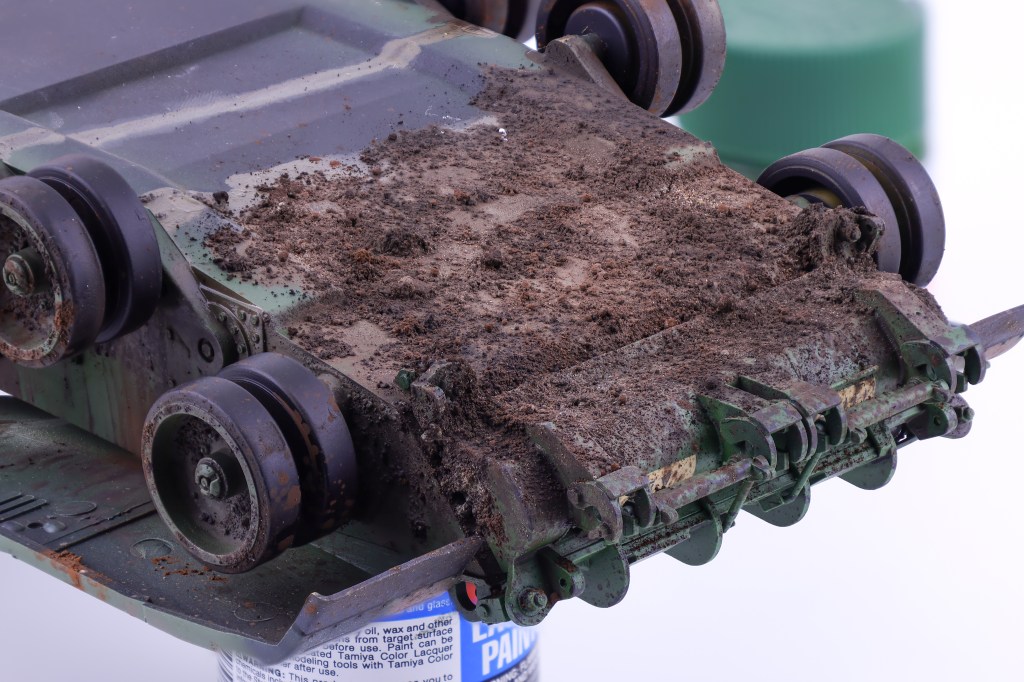
With this approach it is important to only spray thin layers of paint because if too much is applied, it will be difficult to control when attempting to apply the downward brushstrokes. After completing this first step of the enviromental weathering, I could then move on to more substantive mud and dirt effects. To achieve this, I followed the same procedure as seen in my Tiger I project last year. I chose three shades of pigments (a highlight, middle, and shadow tone) along with three complimentary shades of enamel mud effects. Knowing that this vehicle would be based in a cold, damp environment I chose colours that were somewhat darker in an attempt to recreate the correct mud I wanted to depict. The following pigments were chosen: ABTP060 “Trench earth” P414 ‘Track Brown” and ABTP235 “Cargo dust”.
For the application of the pigments, my approach was as follows. I first added clumps of pigment straight from the jar onto areas where I wanted significant mud buildup to occur. After I was satisfied with the initial placement, I then added drops of pigment fixer onto the pigments which wetted them and fixed them in place. This approach can be varied to get a wide range of results. If applying a limited amount of fixer, the pigments will retain their clumpy shape. If more fixer is applied, they will begin to liquify and appear far wetter.
While the pigments are still wet, I then stipple on complimentary colours of enamel mud effects from AK. After this first round of stippling is done, apply vertical brushstrokes to make it appear that the mud has been flung onto the vehicle and slowly drooped down the vehicle. I find that this approach does a great job in ensuring that the mud effects have the proper volume and shape.
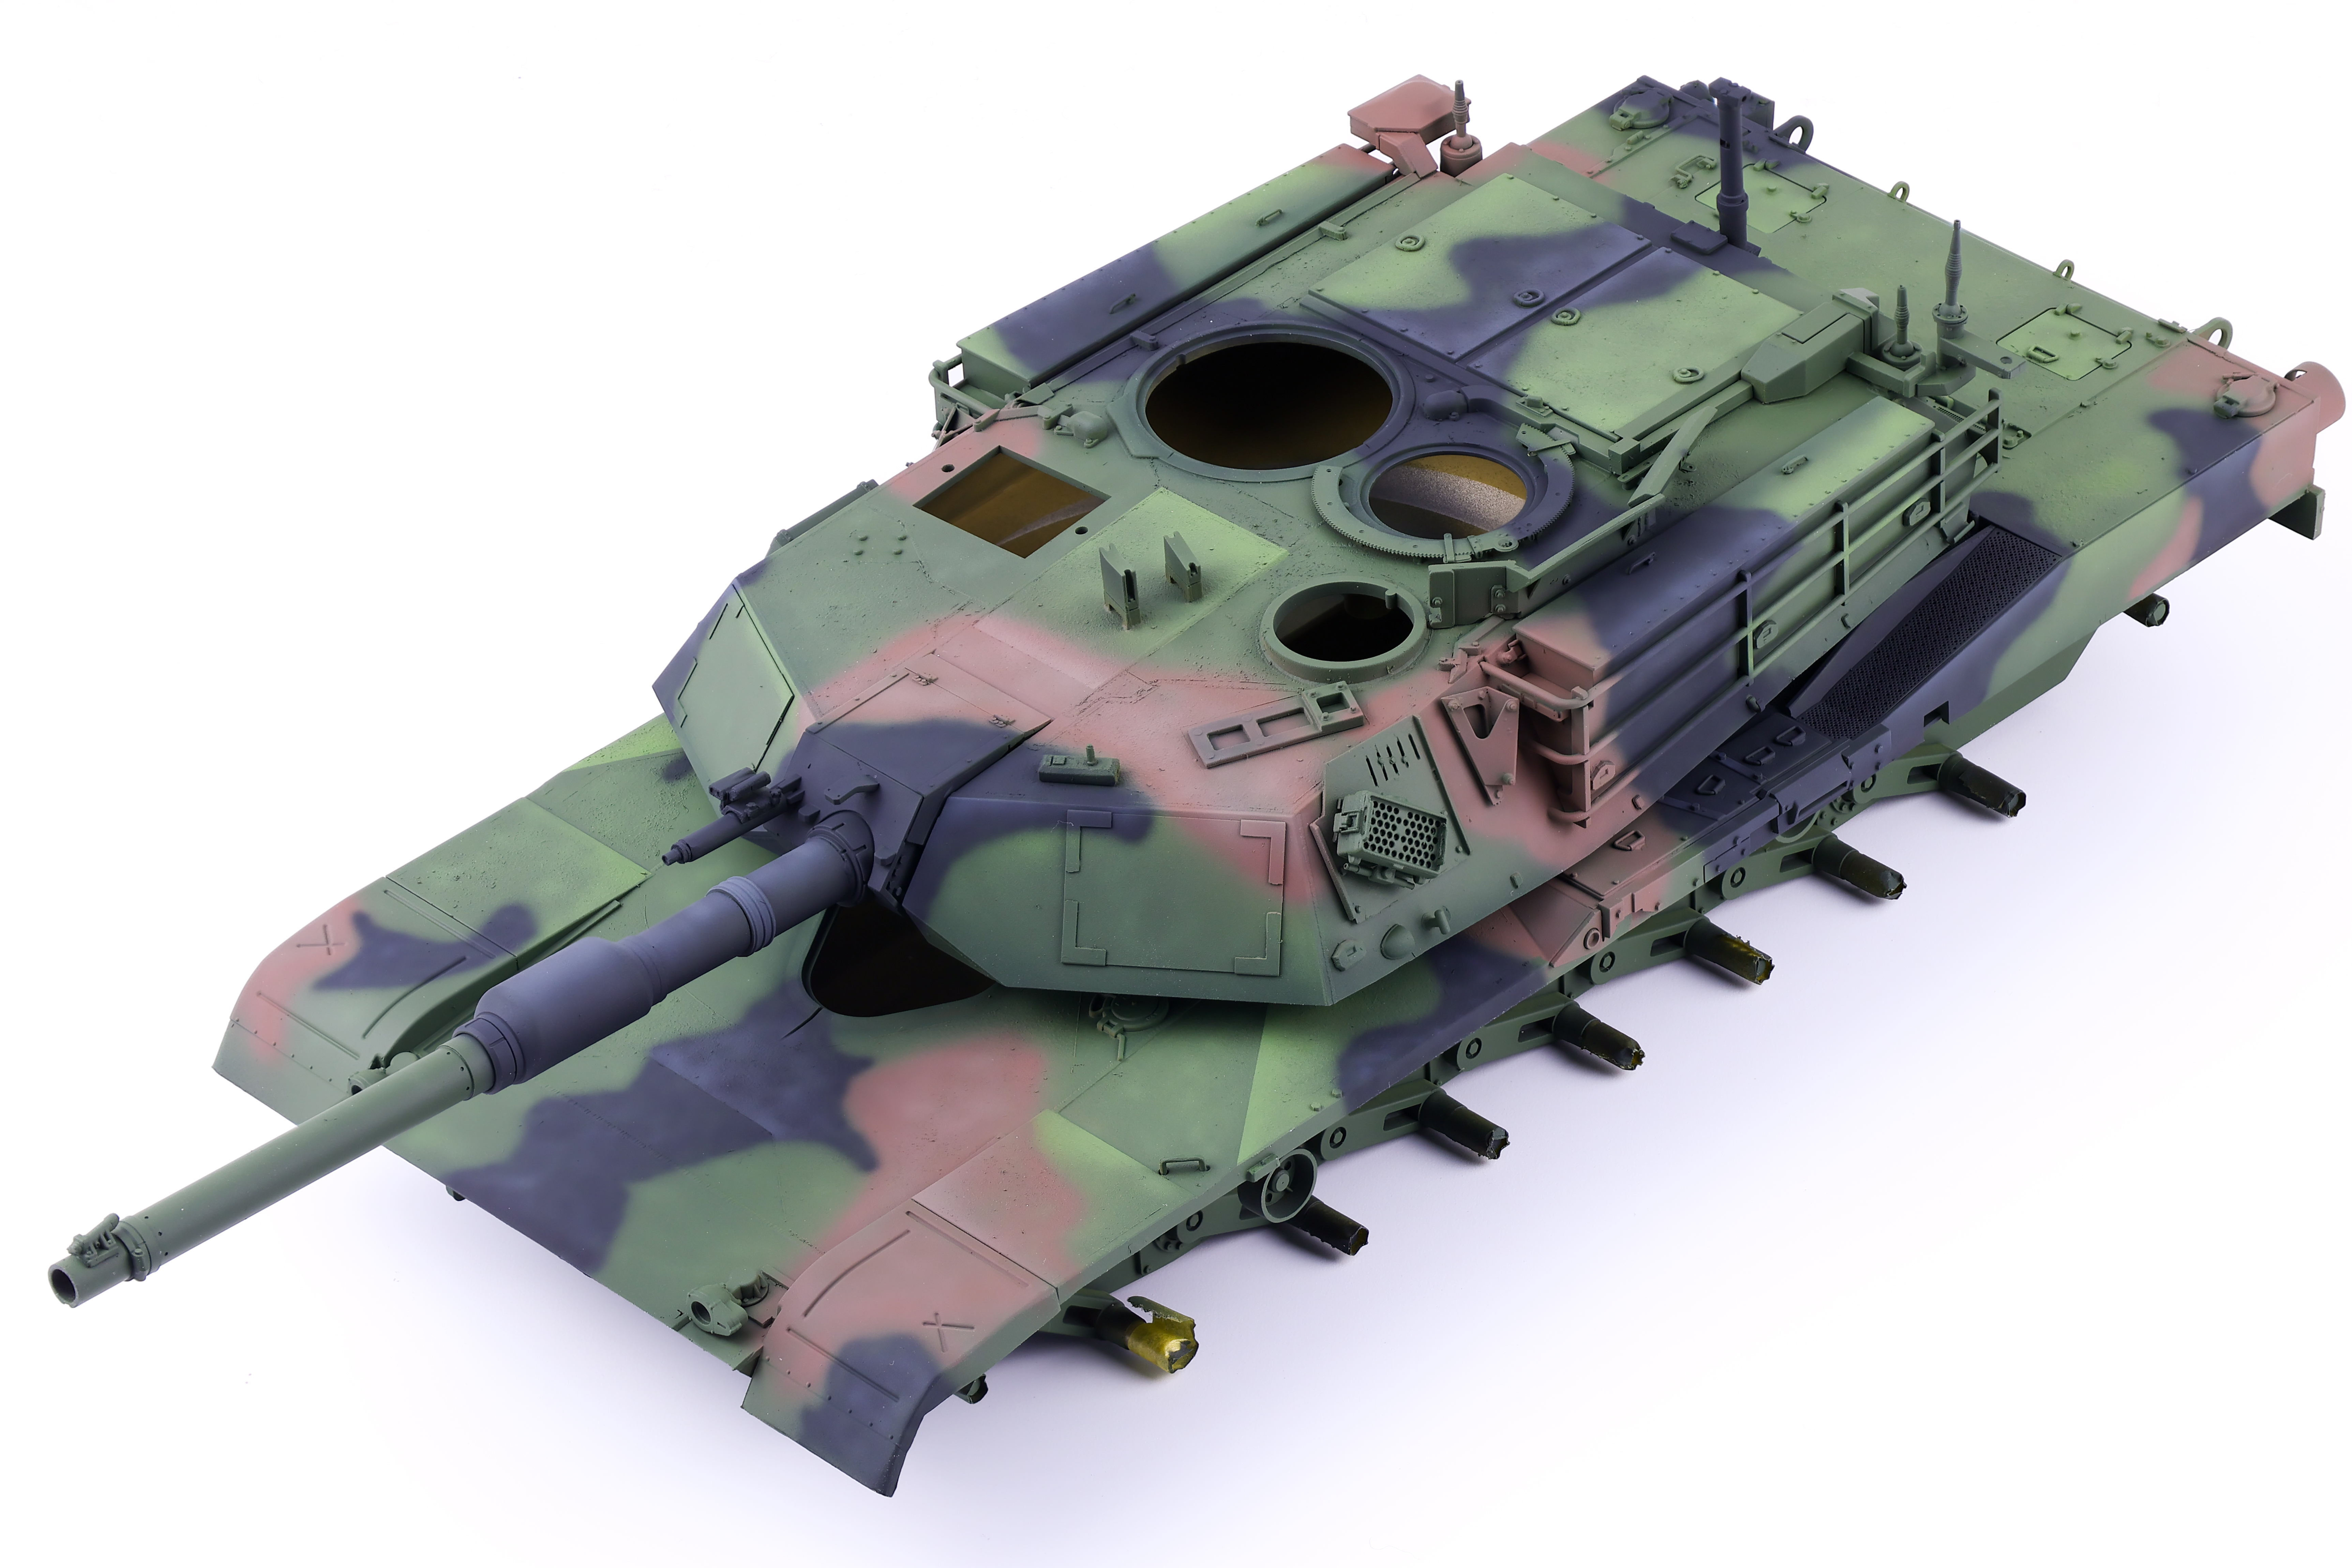
I knew that when I started this project that I didn’t want to build a standard desert tan Abrams, and I opted for a woodland scheme instead. Modern armour paint weathers quite differently then ww2 or Cold War armour and as such I needed to take that into account for this build and decided I would take a more subtle approach to the finish of the model and put more focus in the environmental effects.
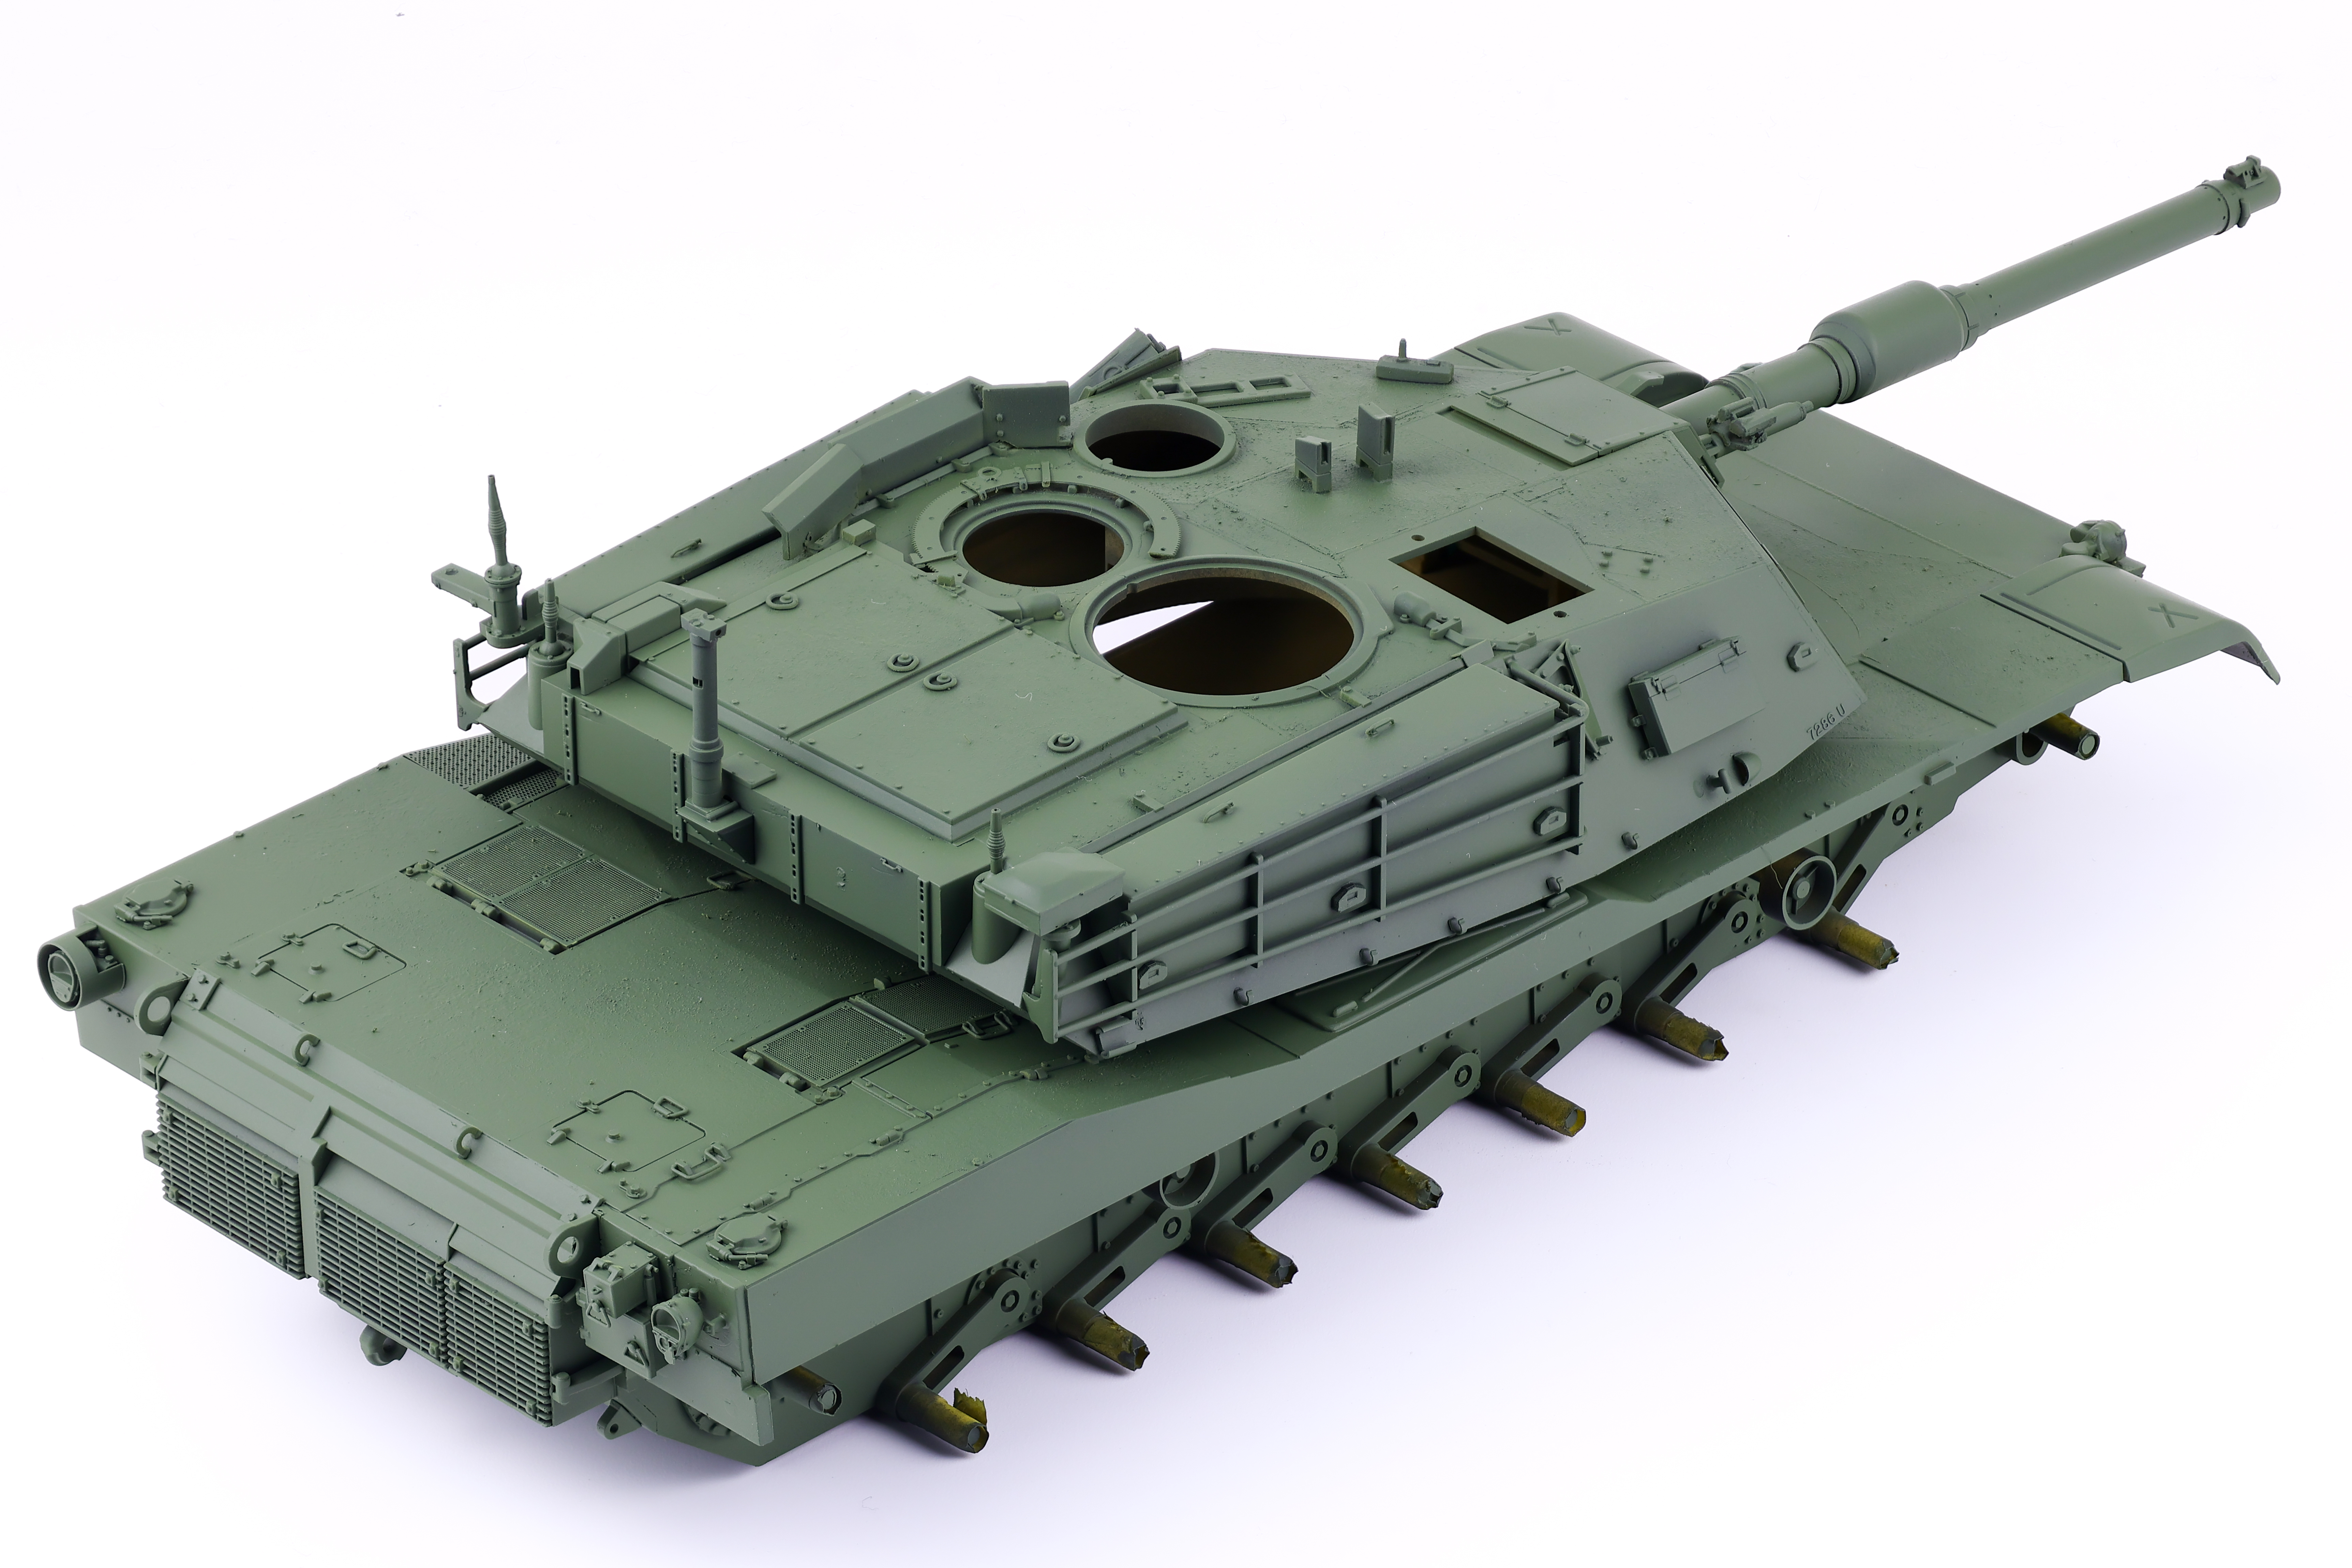
After a coat of Mr. Surfacer 1500 black to the prime the model, I applied a fairly even coat of Tamiya Lacquer NATO Green. I intensionally made this layer uniform as the paint weathering would entire be done with post-shading. For the post shading, I chose a 80/20 mix of NATO Green with flat yellow. This created a fairly vibrant green tone that would serve as the highlight layer that would isolate details I wanted more focus on. After the highlight layer was completed, I chose a dark green shade to darken the lower sections and recesses of the tank, which balanced the overall post-shading technique. All this work helped to serve as a guideline for the next colours, black and brown.
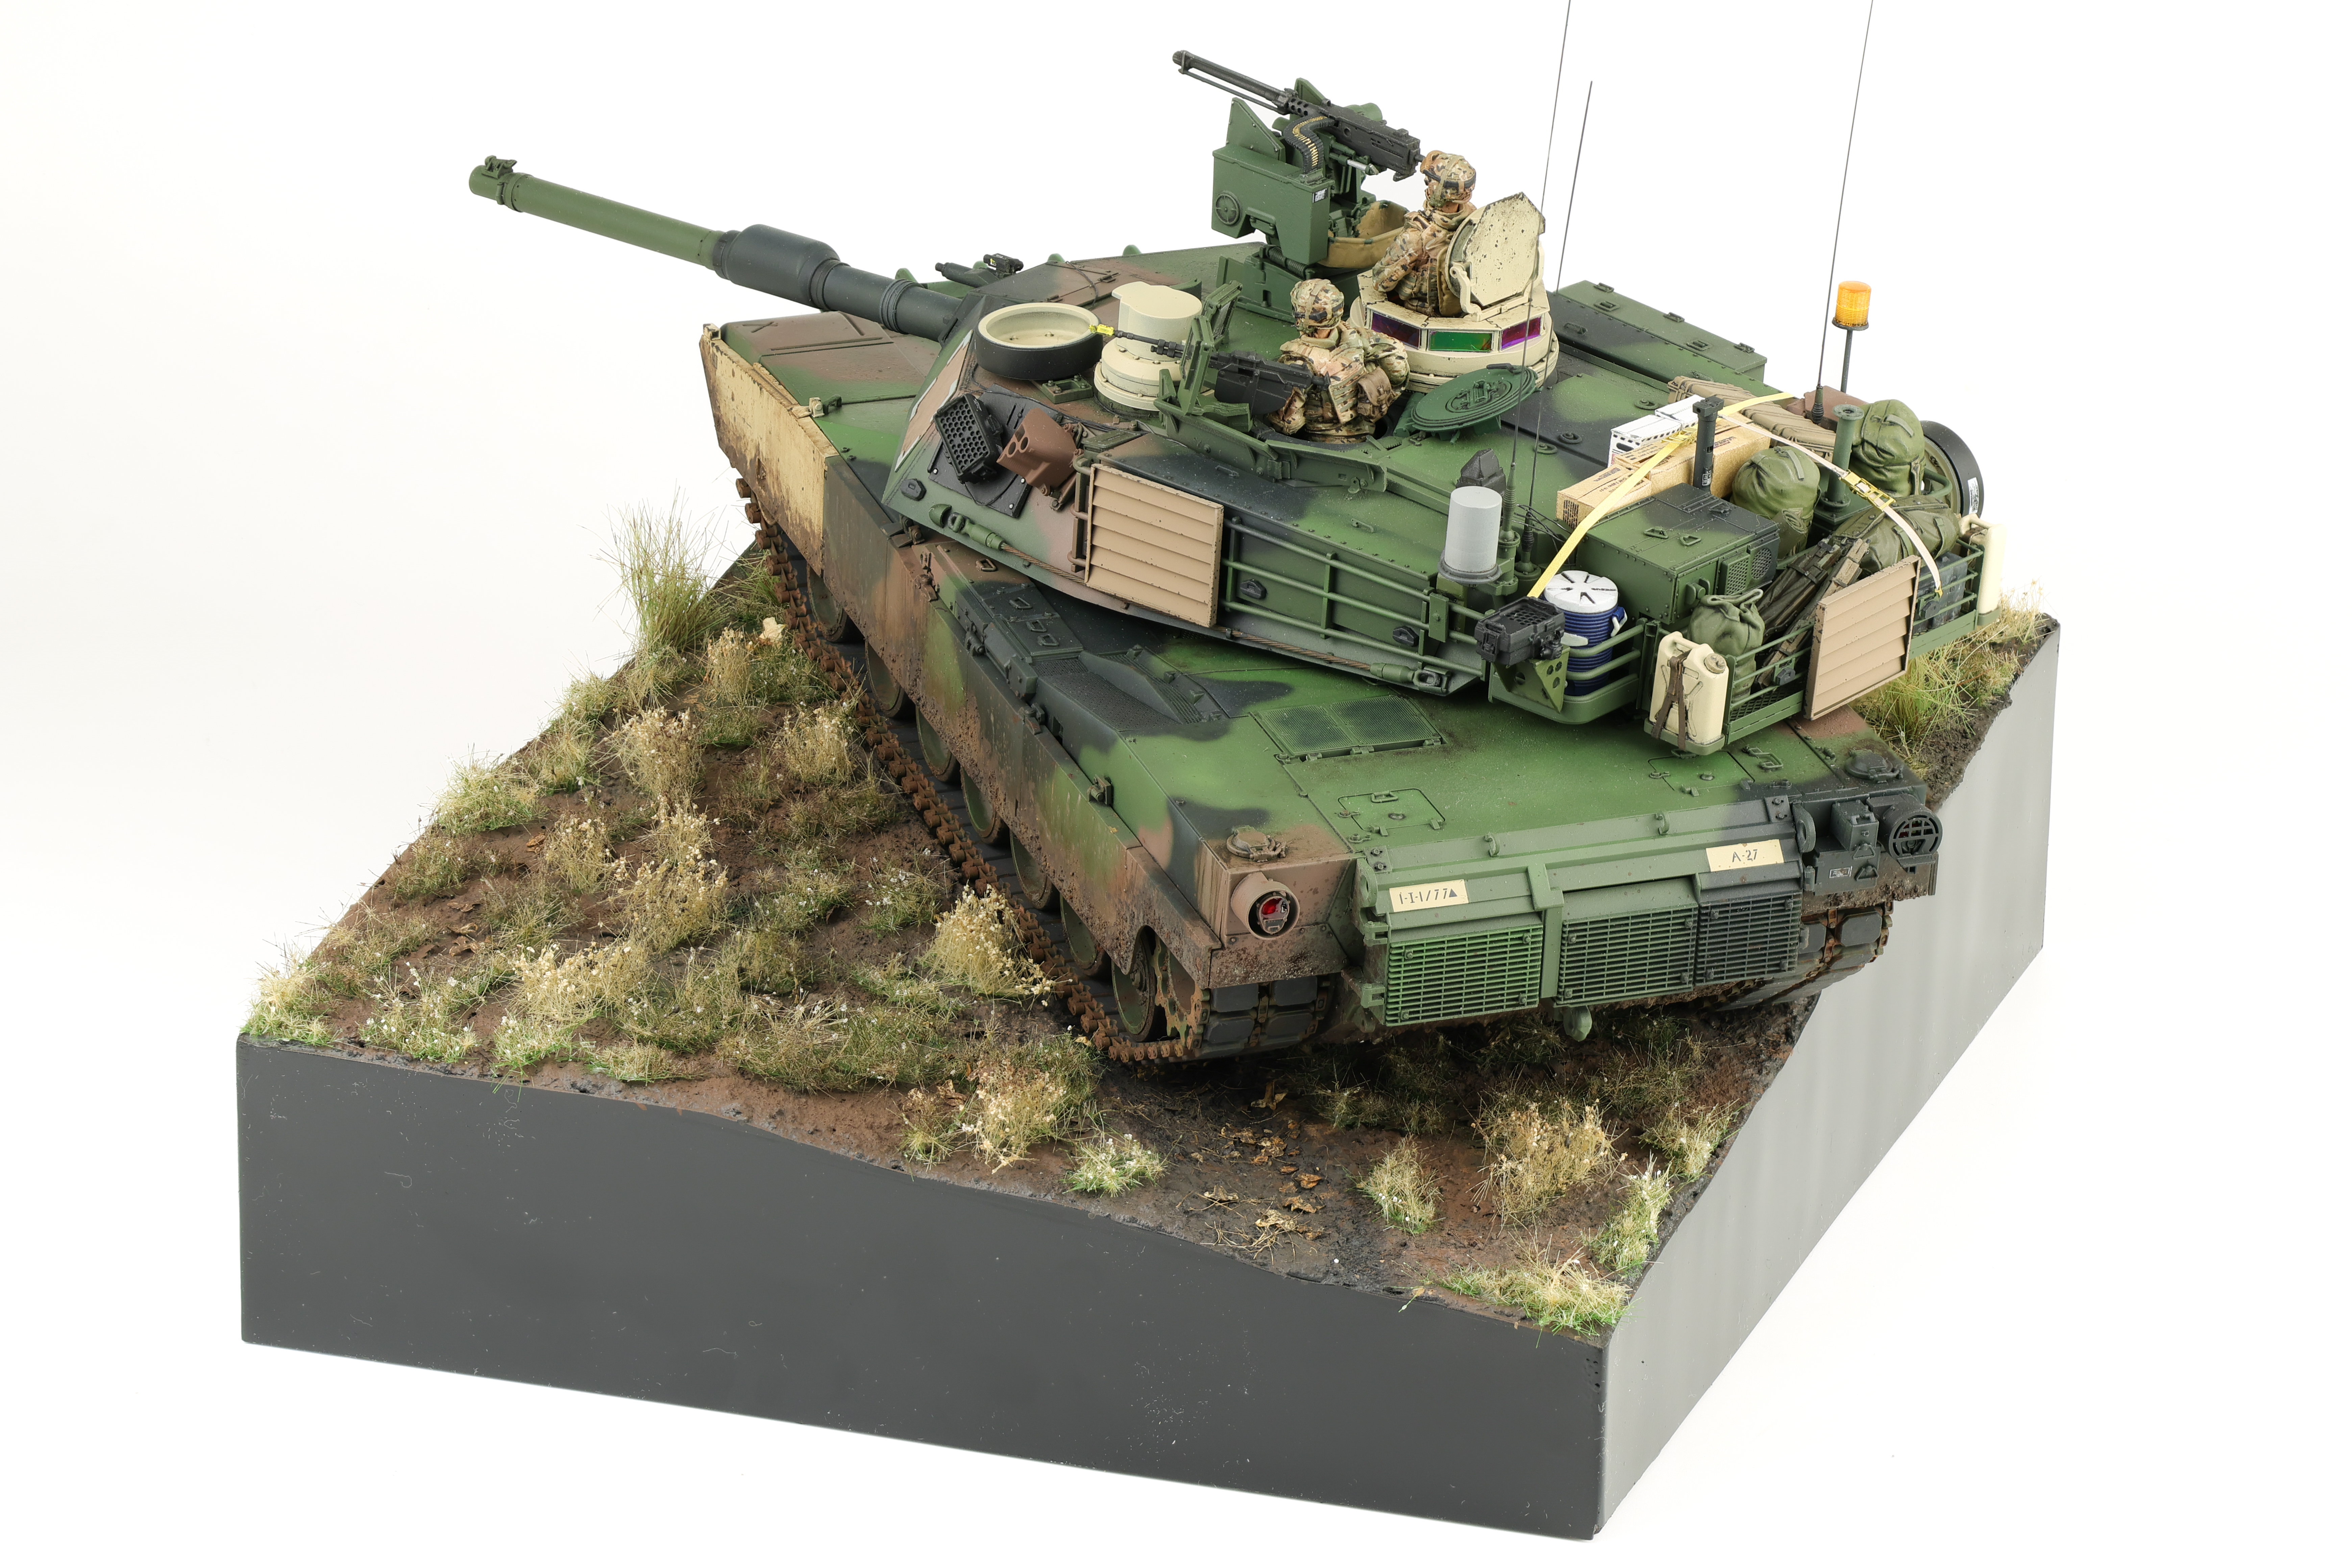
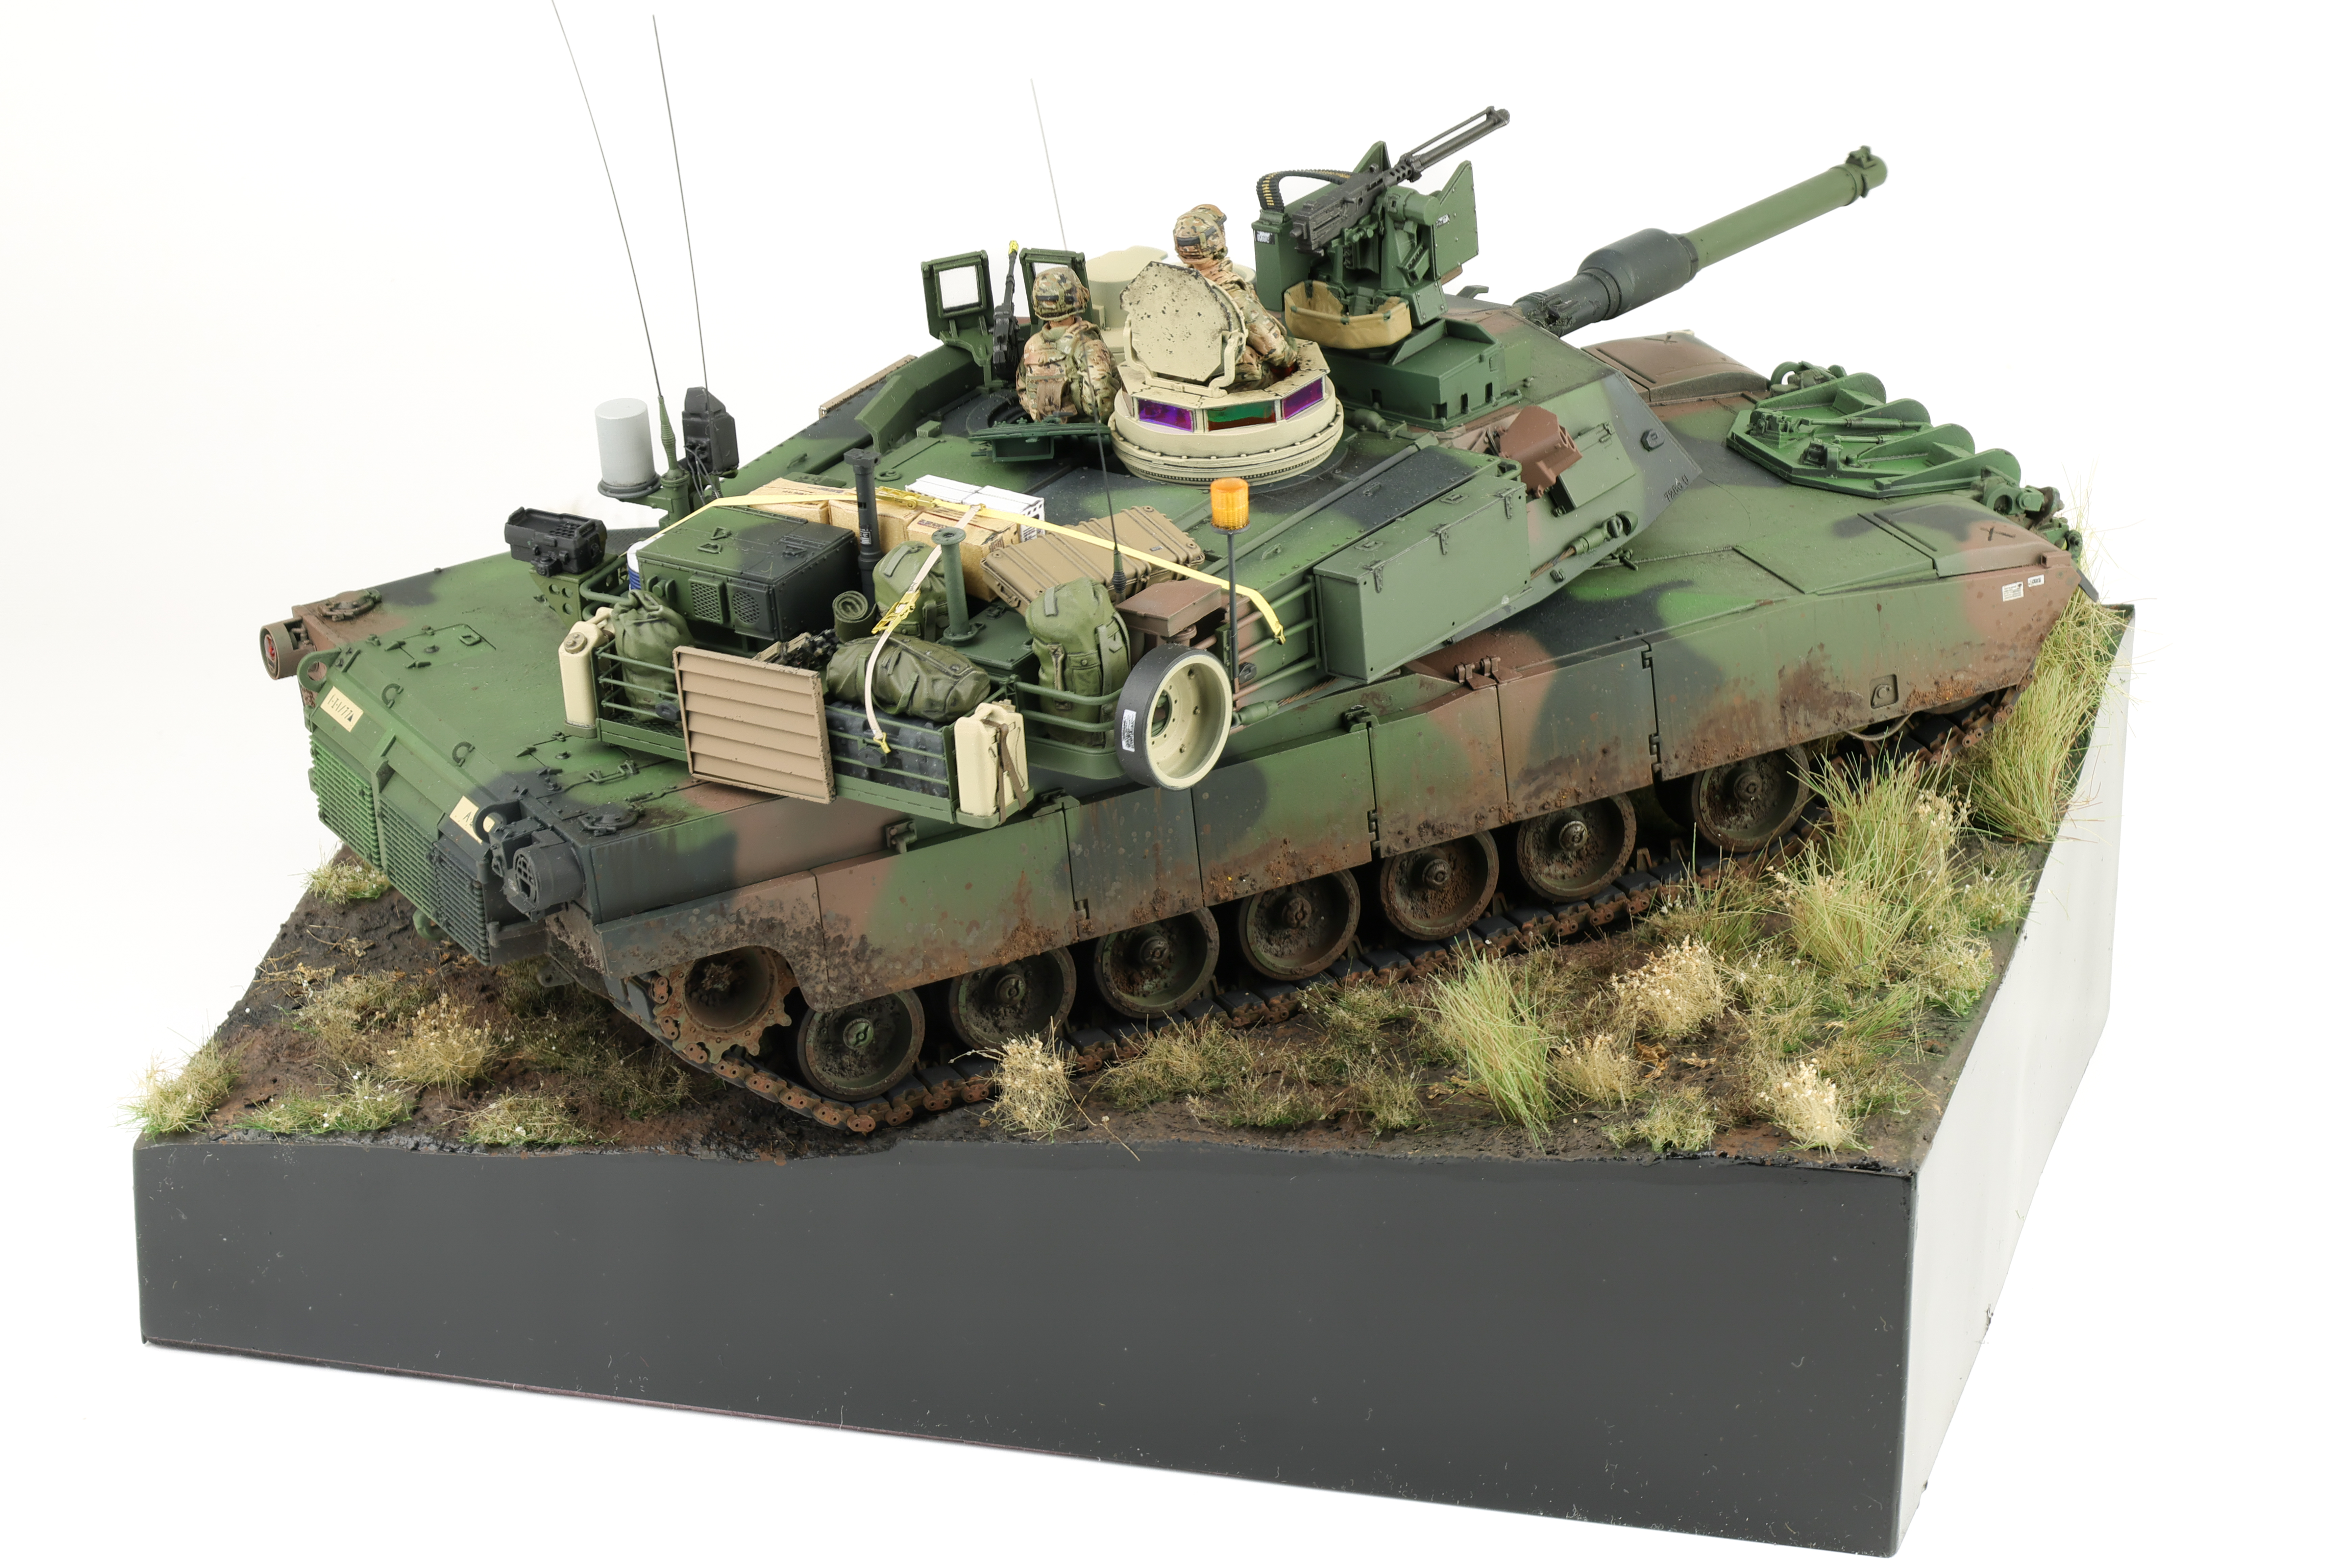
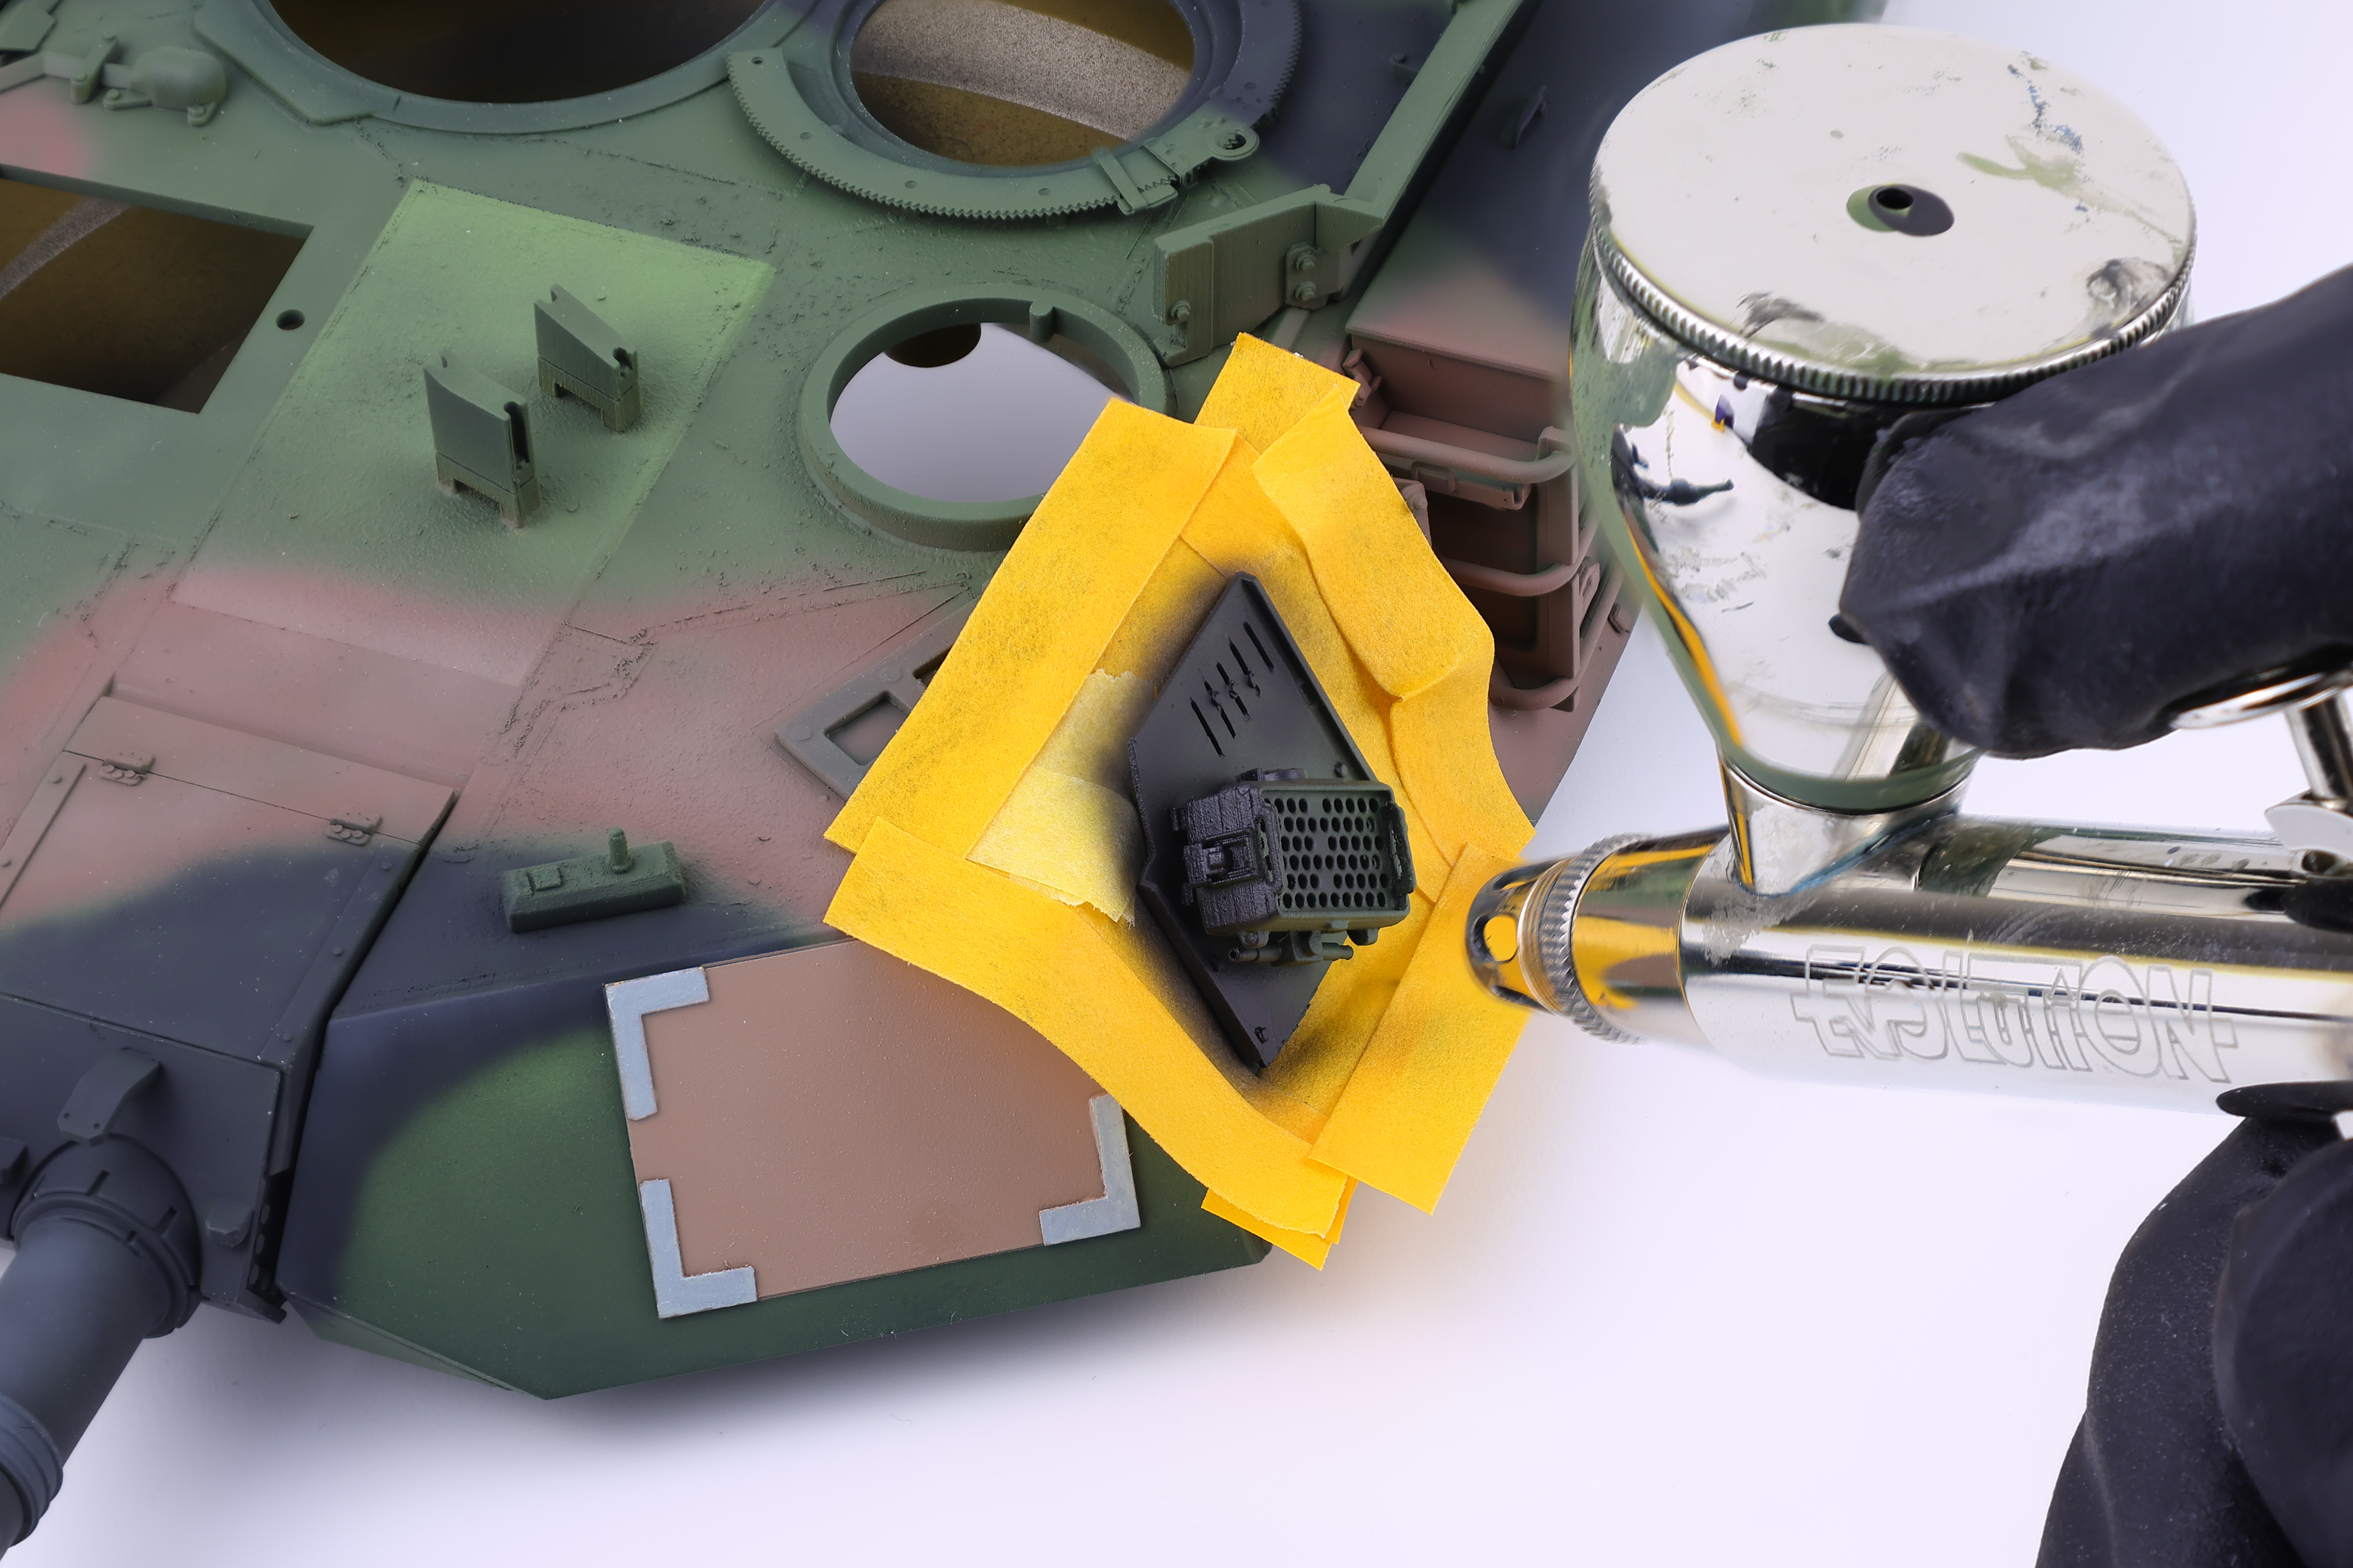
After the post-shading work was complete, It was time to pick out the elements of the tank that were not finished in the standard NATO camouflage. These parts included the CVTESS equipment, various antennas, and the combat identification panels which were partially hand painted. I also opted to paint some parts of the vehicle in desert tan to help add some visual interest and further break up the colours of the Abrams. These parts were chipped in a dark grey colour, and meant to represent parts that may have been swapped from another vehicle that had seen significant damage or wear.
After this stage had been completed, I sealed my work in a satin clear coat in preparation for decals and weathering.
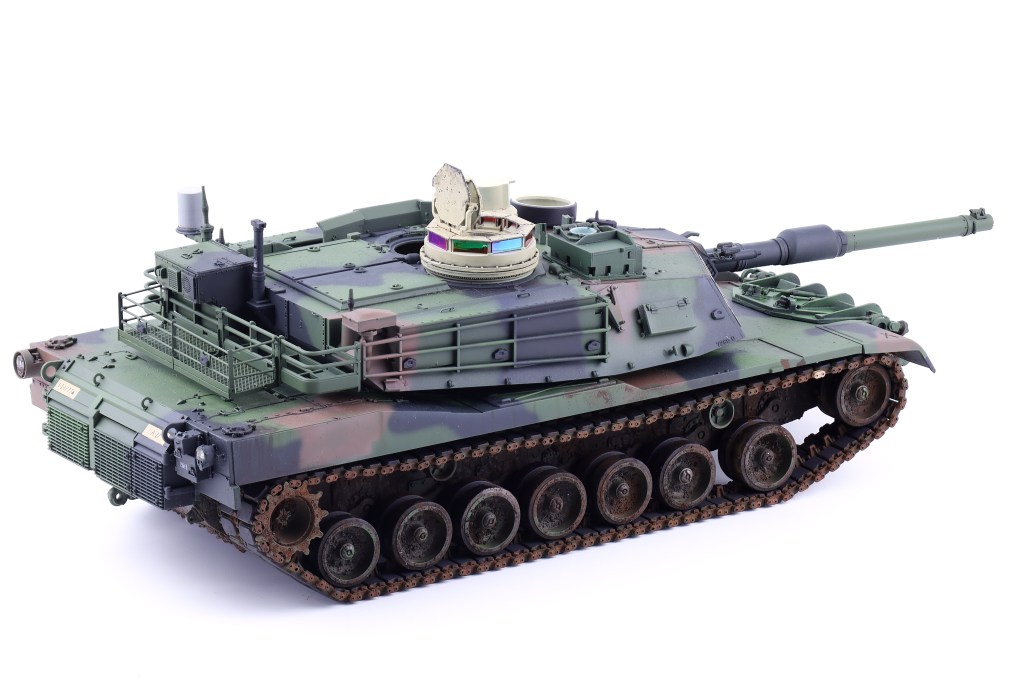
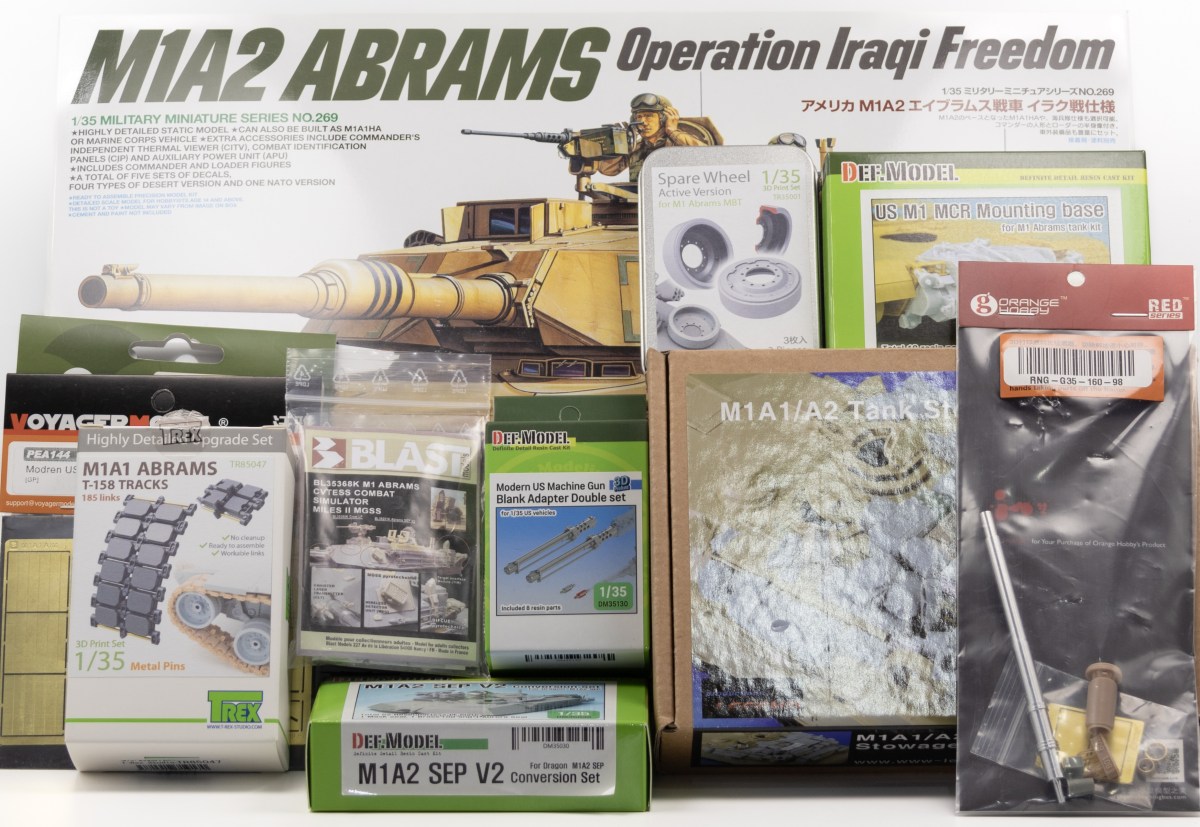
For my next project, I settled on building Tamiya’s 20 year old M1A2 Abrams. I knew from the get go that I didn’t want to build a 2003 vehicle however and that this would call for some modifications.
I settled on bringing this kit into the future by adding various upgrade parts to depict a SEP V2 vehicle undergoing training in Germany. Lots of photos have been taken of the Germany-based Abrams and there’s always one unifying factor, they look absolutley badass:
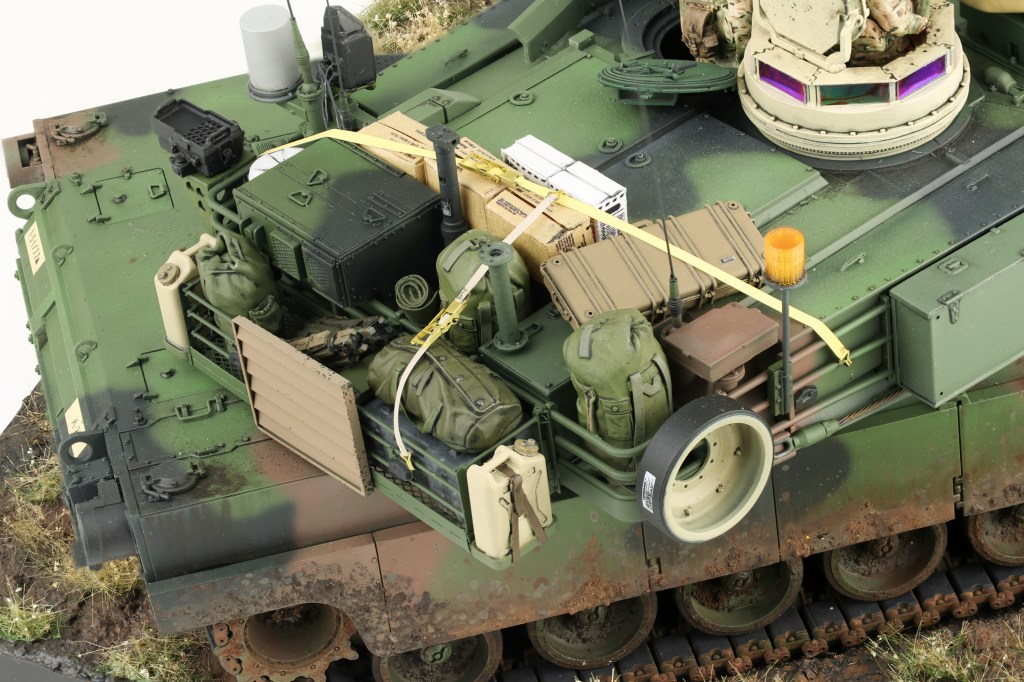
For this project, I opted to use a DEF Model SEP V2 conversion set designed for the Dragon kit along with several other pieces to make the Tamiya plastic a convincing 2024 Abrams. Also of note was the Combat Vehicle Tactical Engagement Simulation System (CVTESS) which is equipment fitted during training exercises. I picked up a resin set from Blast Models from France to depict this specialty equipment on the vehicle.
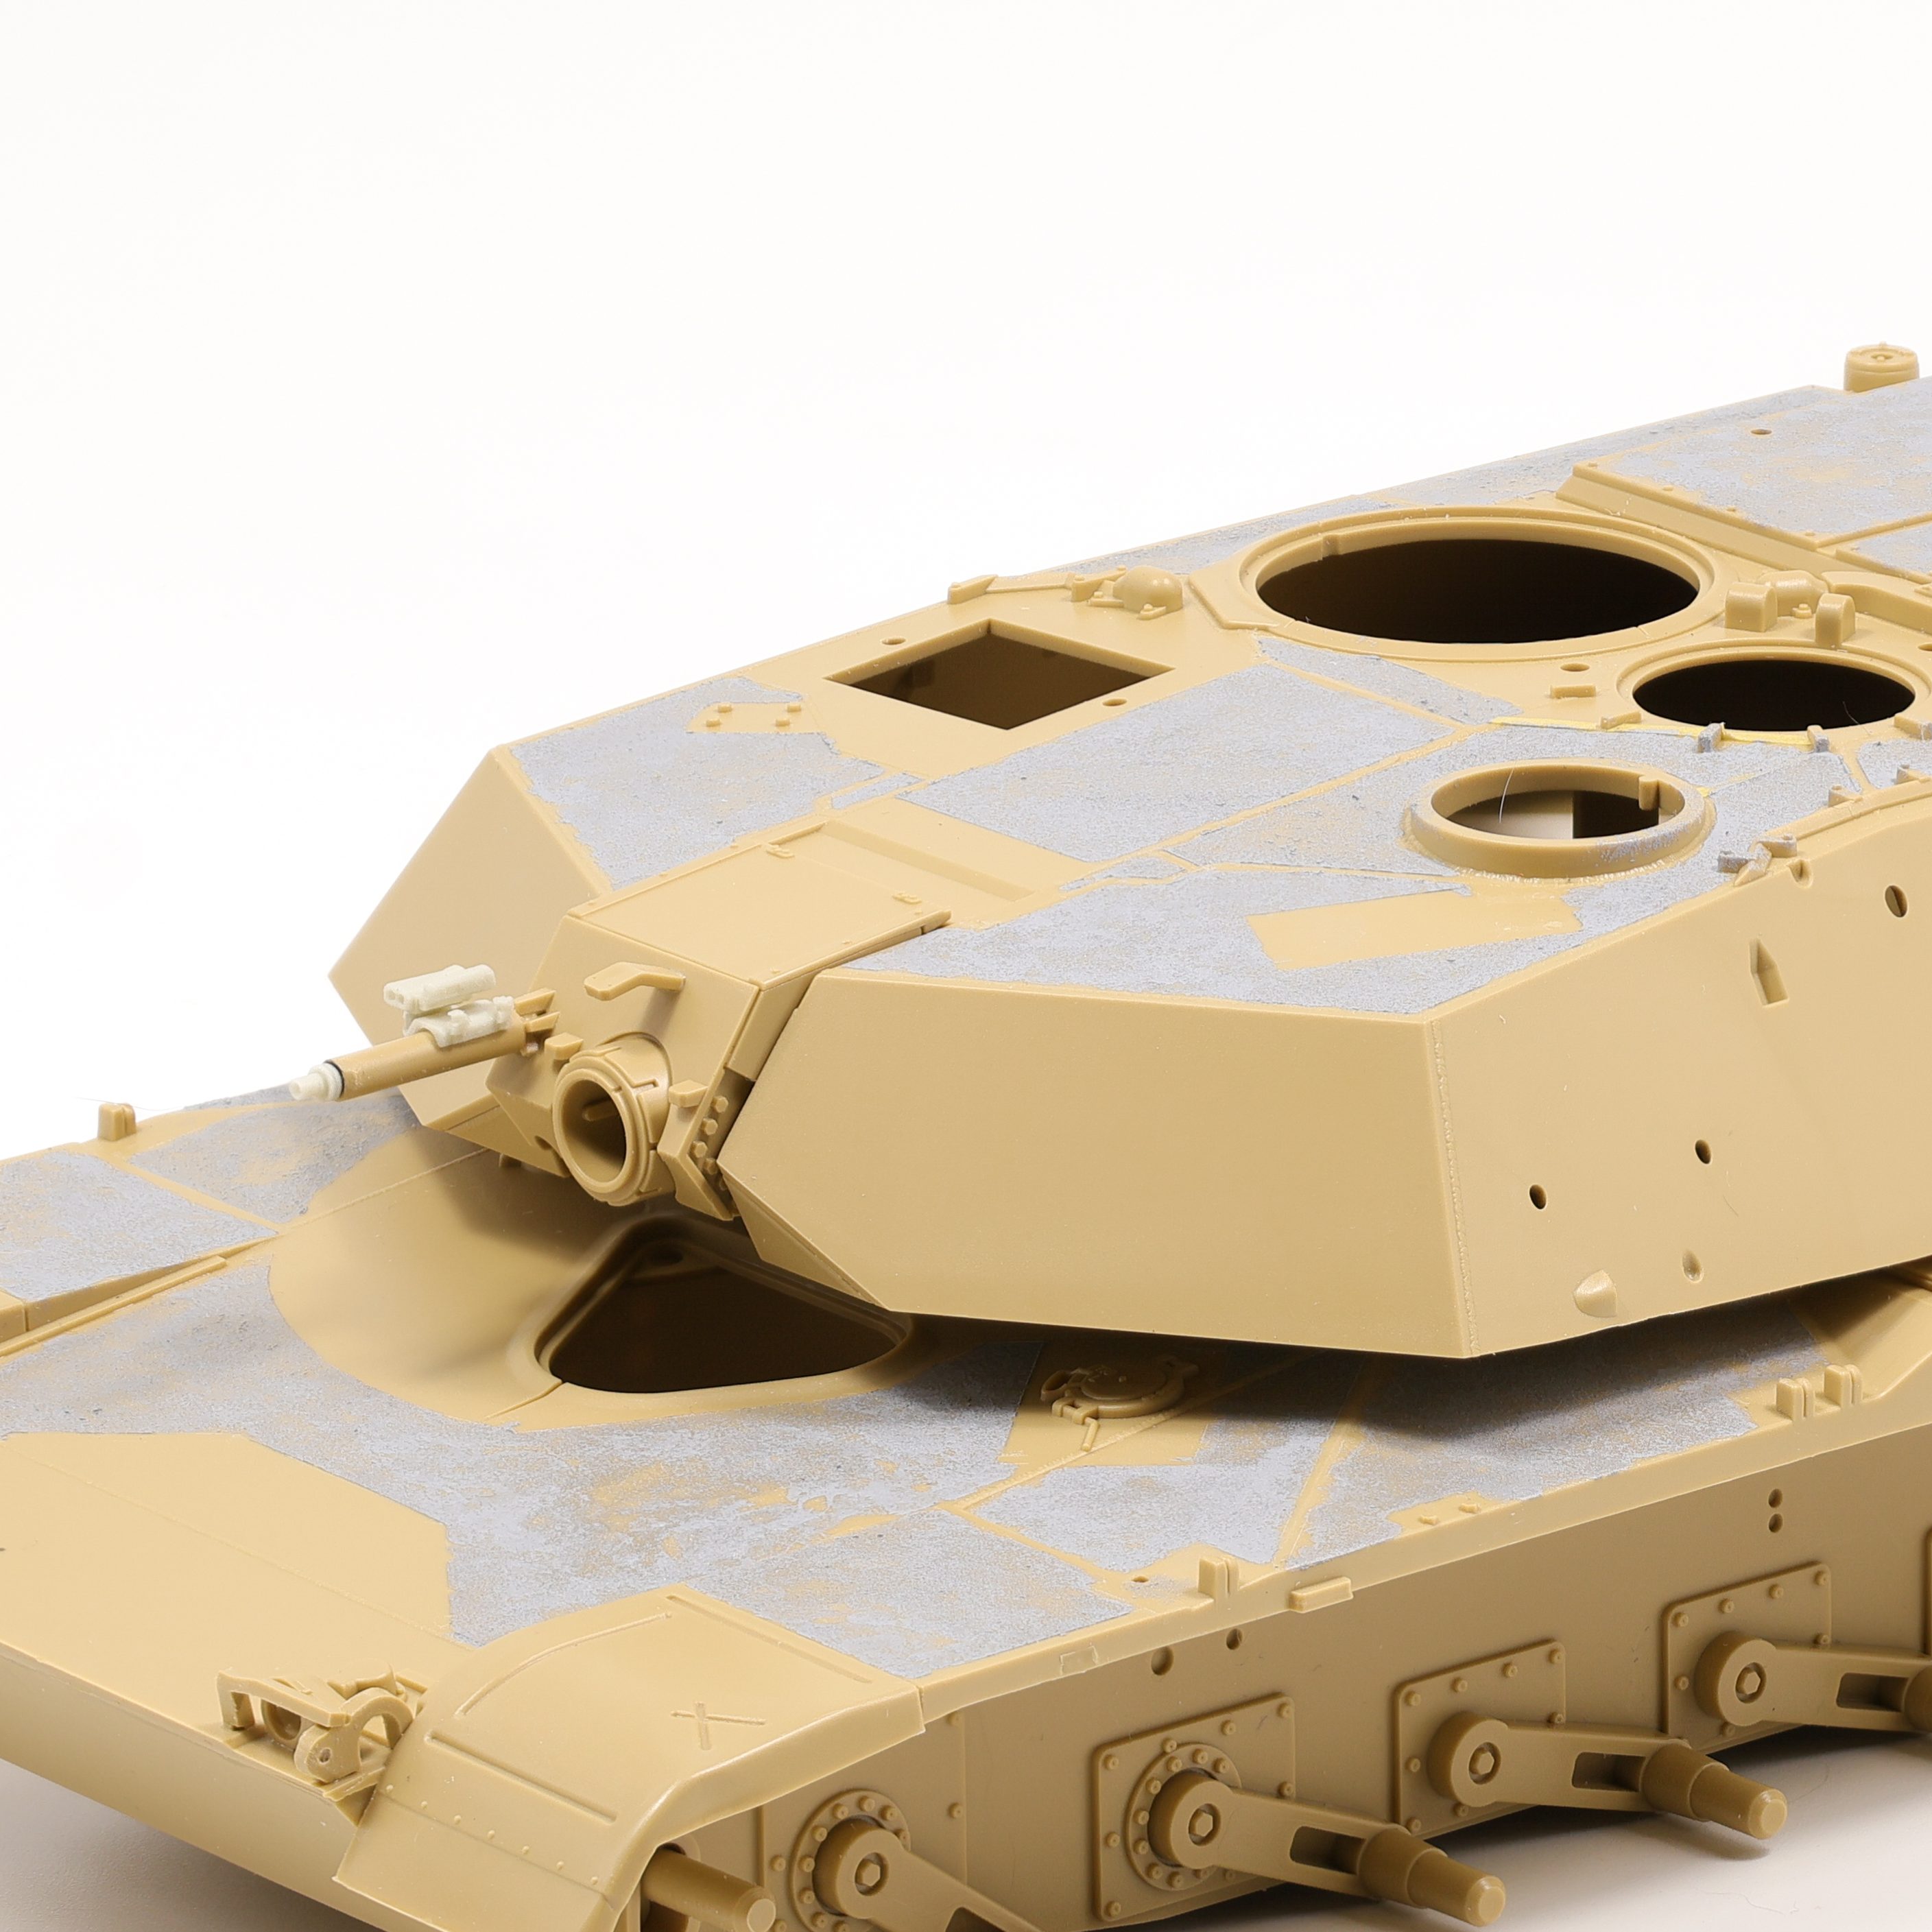
Unlike the Tiger, the Tamiya Abrams is radically more simple and unrefined. This is not necessarily a bad thing as the kit built up quite quickly. One feature missing from the kit is the anti-slip texture that is present on all standing surfaces on the Abrams. This isn’t too much of a surprise, considering that the kit is over 20 years old at this point. To replicate the missing texture, I first masked off the areas in which I didn’t want the anti-slip texture, namely over welds and other details.
The masking was deceptive in how long I thought it would take. I had initially assumed that it would be a quick and easy process but in the end had to be split up over several days. To create the texture, I utilized the same technique I had on the Tiger, Tamiya putty thinned with extra thin cement. I had initially thought that this approach would not produce a rough enough texture to pass as anti-slip, however after heavy stippling and limited standing I think the putty method is worth trying out to achieve this specific element. Only time will tell if it looks realistic under paint.
After completing the anti-slip, the model was ready for the SEP V2 update parts to be added. The more modern variants of the Abrams are absolutely brisling with updates and additions to the basic hull, and it’ll be easiest to add the resin details while the hull is as bare as possible.
The DEF Model update set was designed for the Dragon kit, but is easily adapted to fit the Tamiya plastic. The update kit includes a lot of well detailed resin upgrades and adds a much needed injection of detail to the 20 year old Tamiya offering.
At this stage I began work on the tracks and running gear. This is a fairly straightforward part of the build as the Abrams has a simple suspension setup (compared to some German cats at least). I also picked up a set of T-Rex tracks for this kit while I was in Japan earlier this year with this project in mind. While my prior experiences with T-Rex tracks have been fantastic, this set really bucked the trend unfortunately. Brass pins are utilized in this set and I found that they were too large for the track endcaps and guide horns. This required boring them out slightly to fit the oversized pins. This was an incredibly time consuming and boring process. All told it took me around three days of continuous building to get these assembled. They look great assembled, but I wouldn’t recommend picking these up for your own Abrams build.
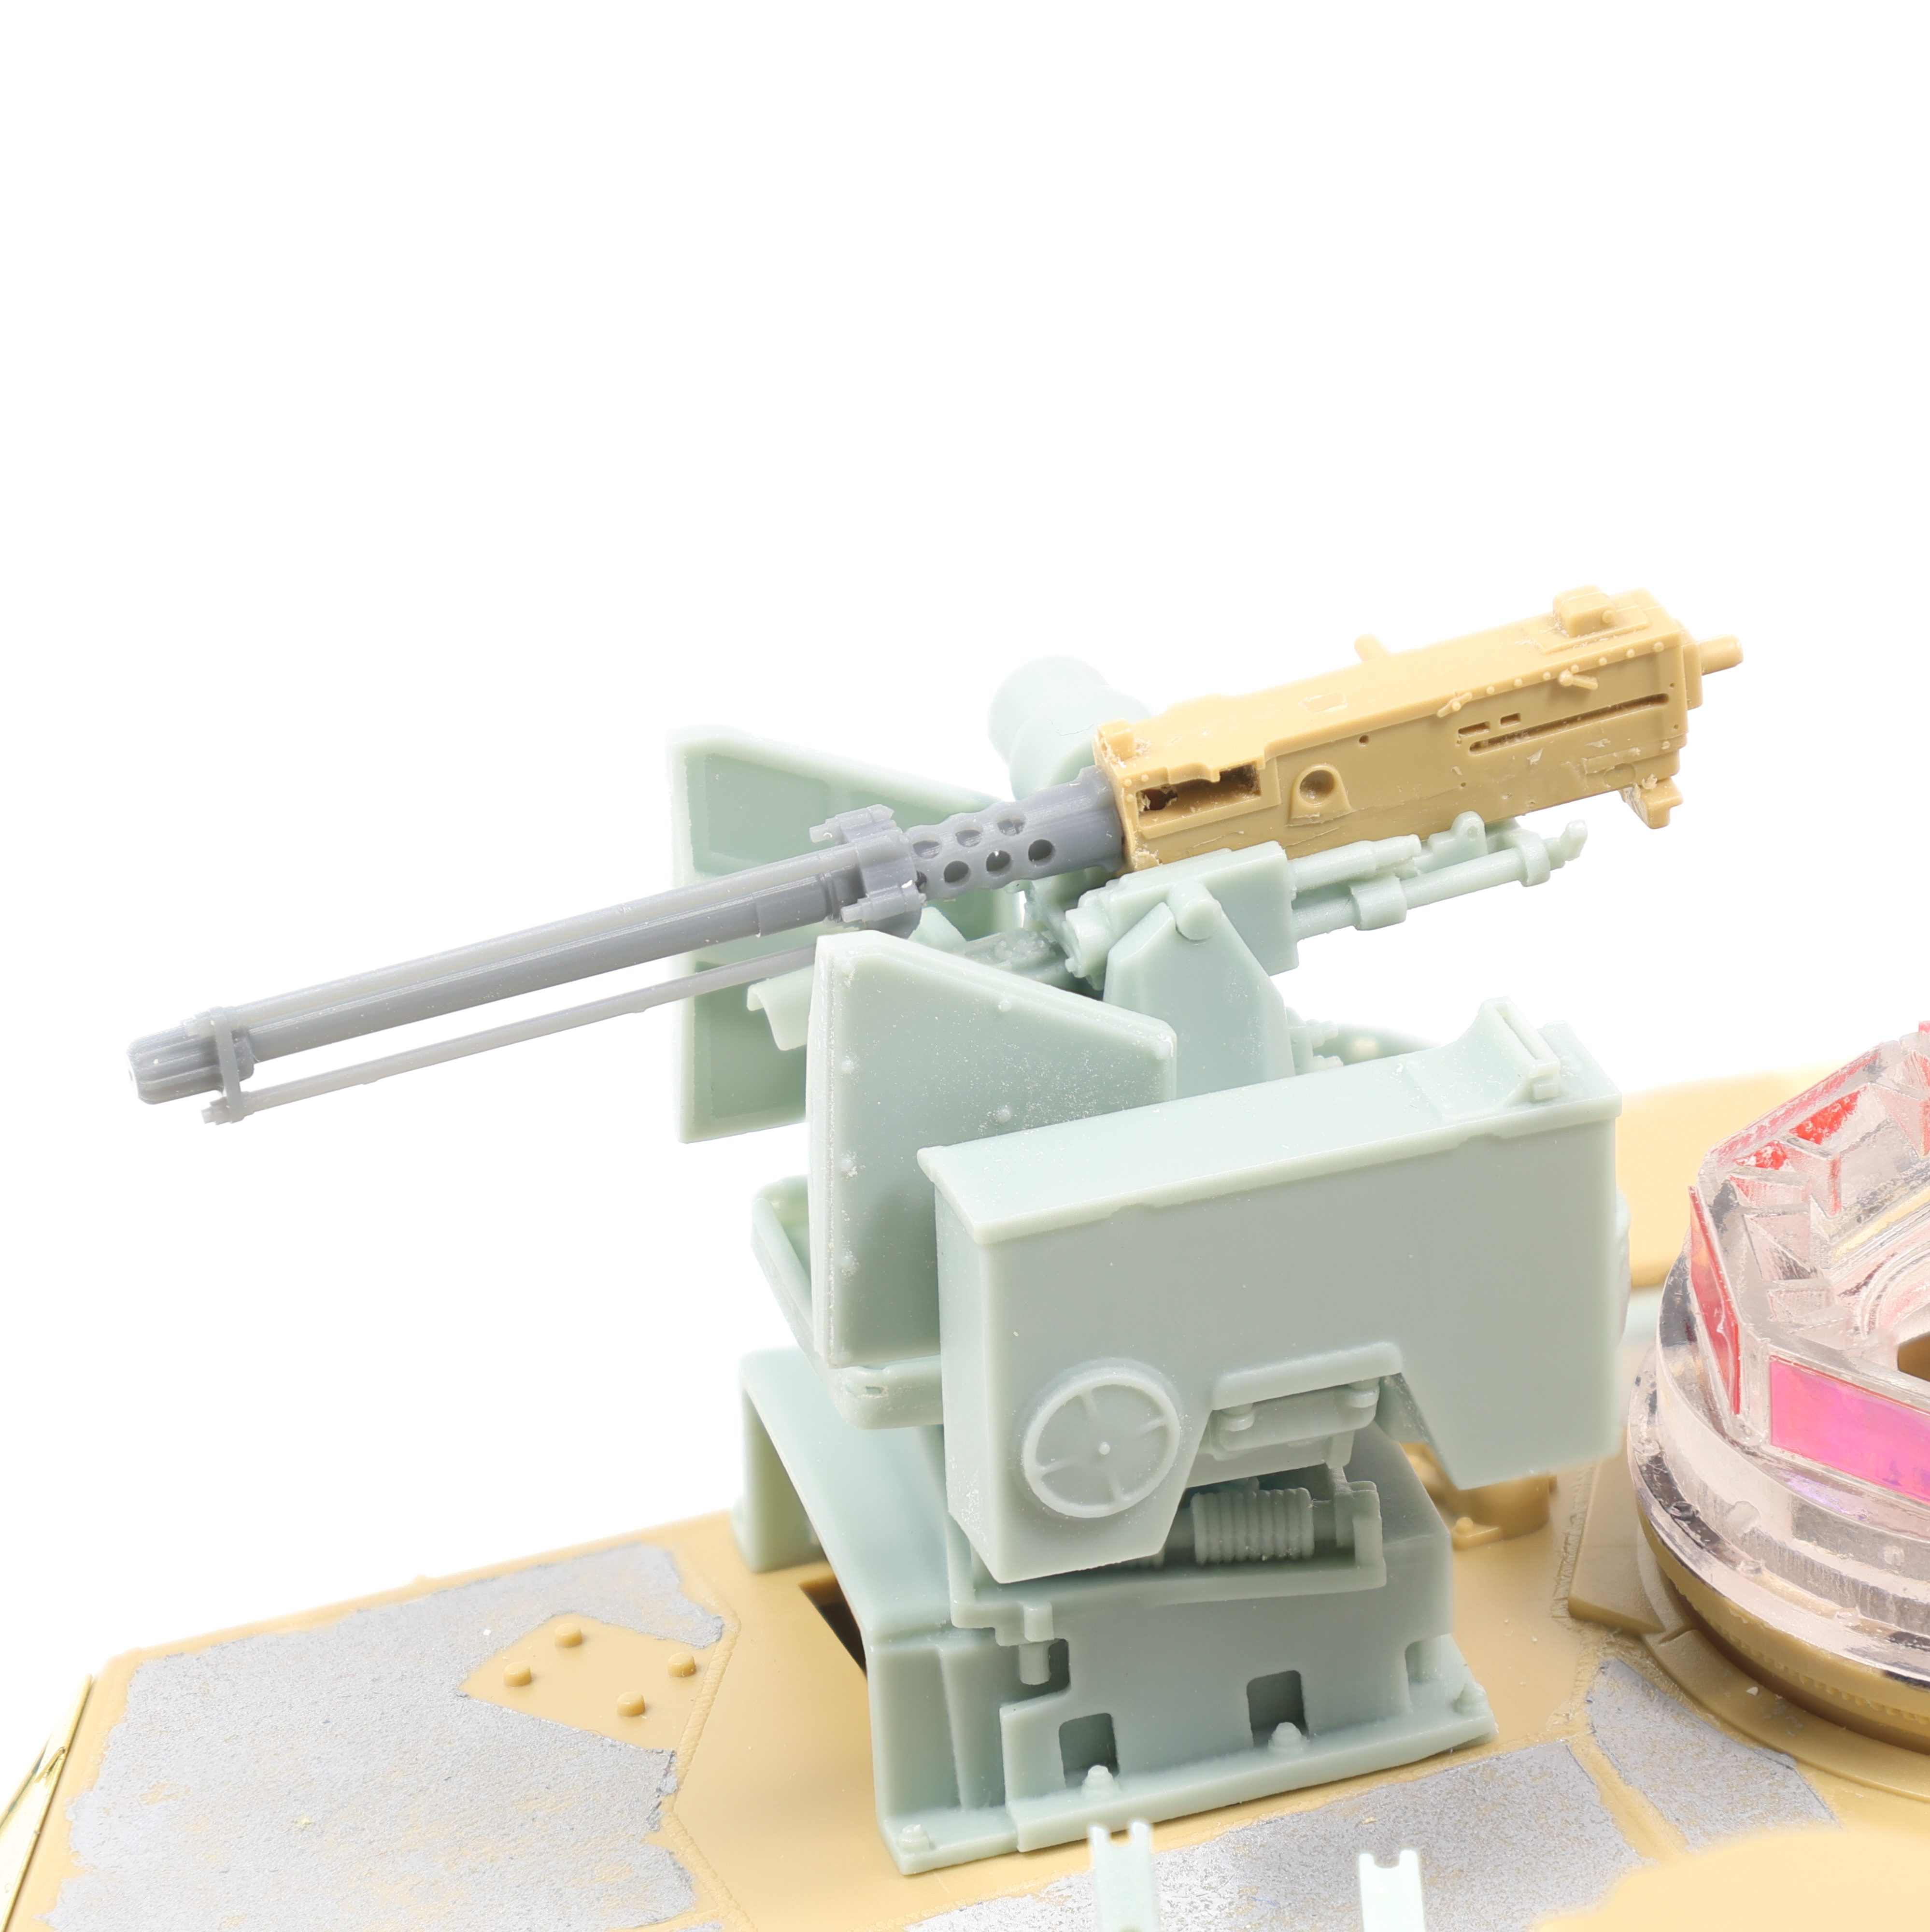
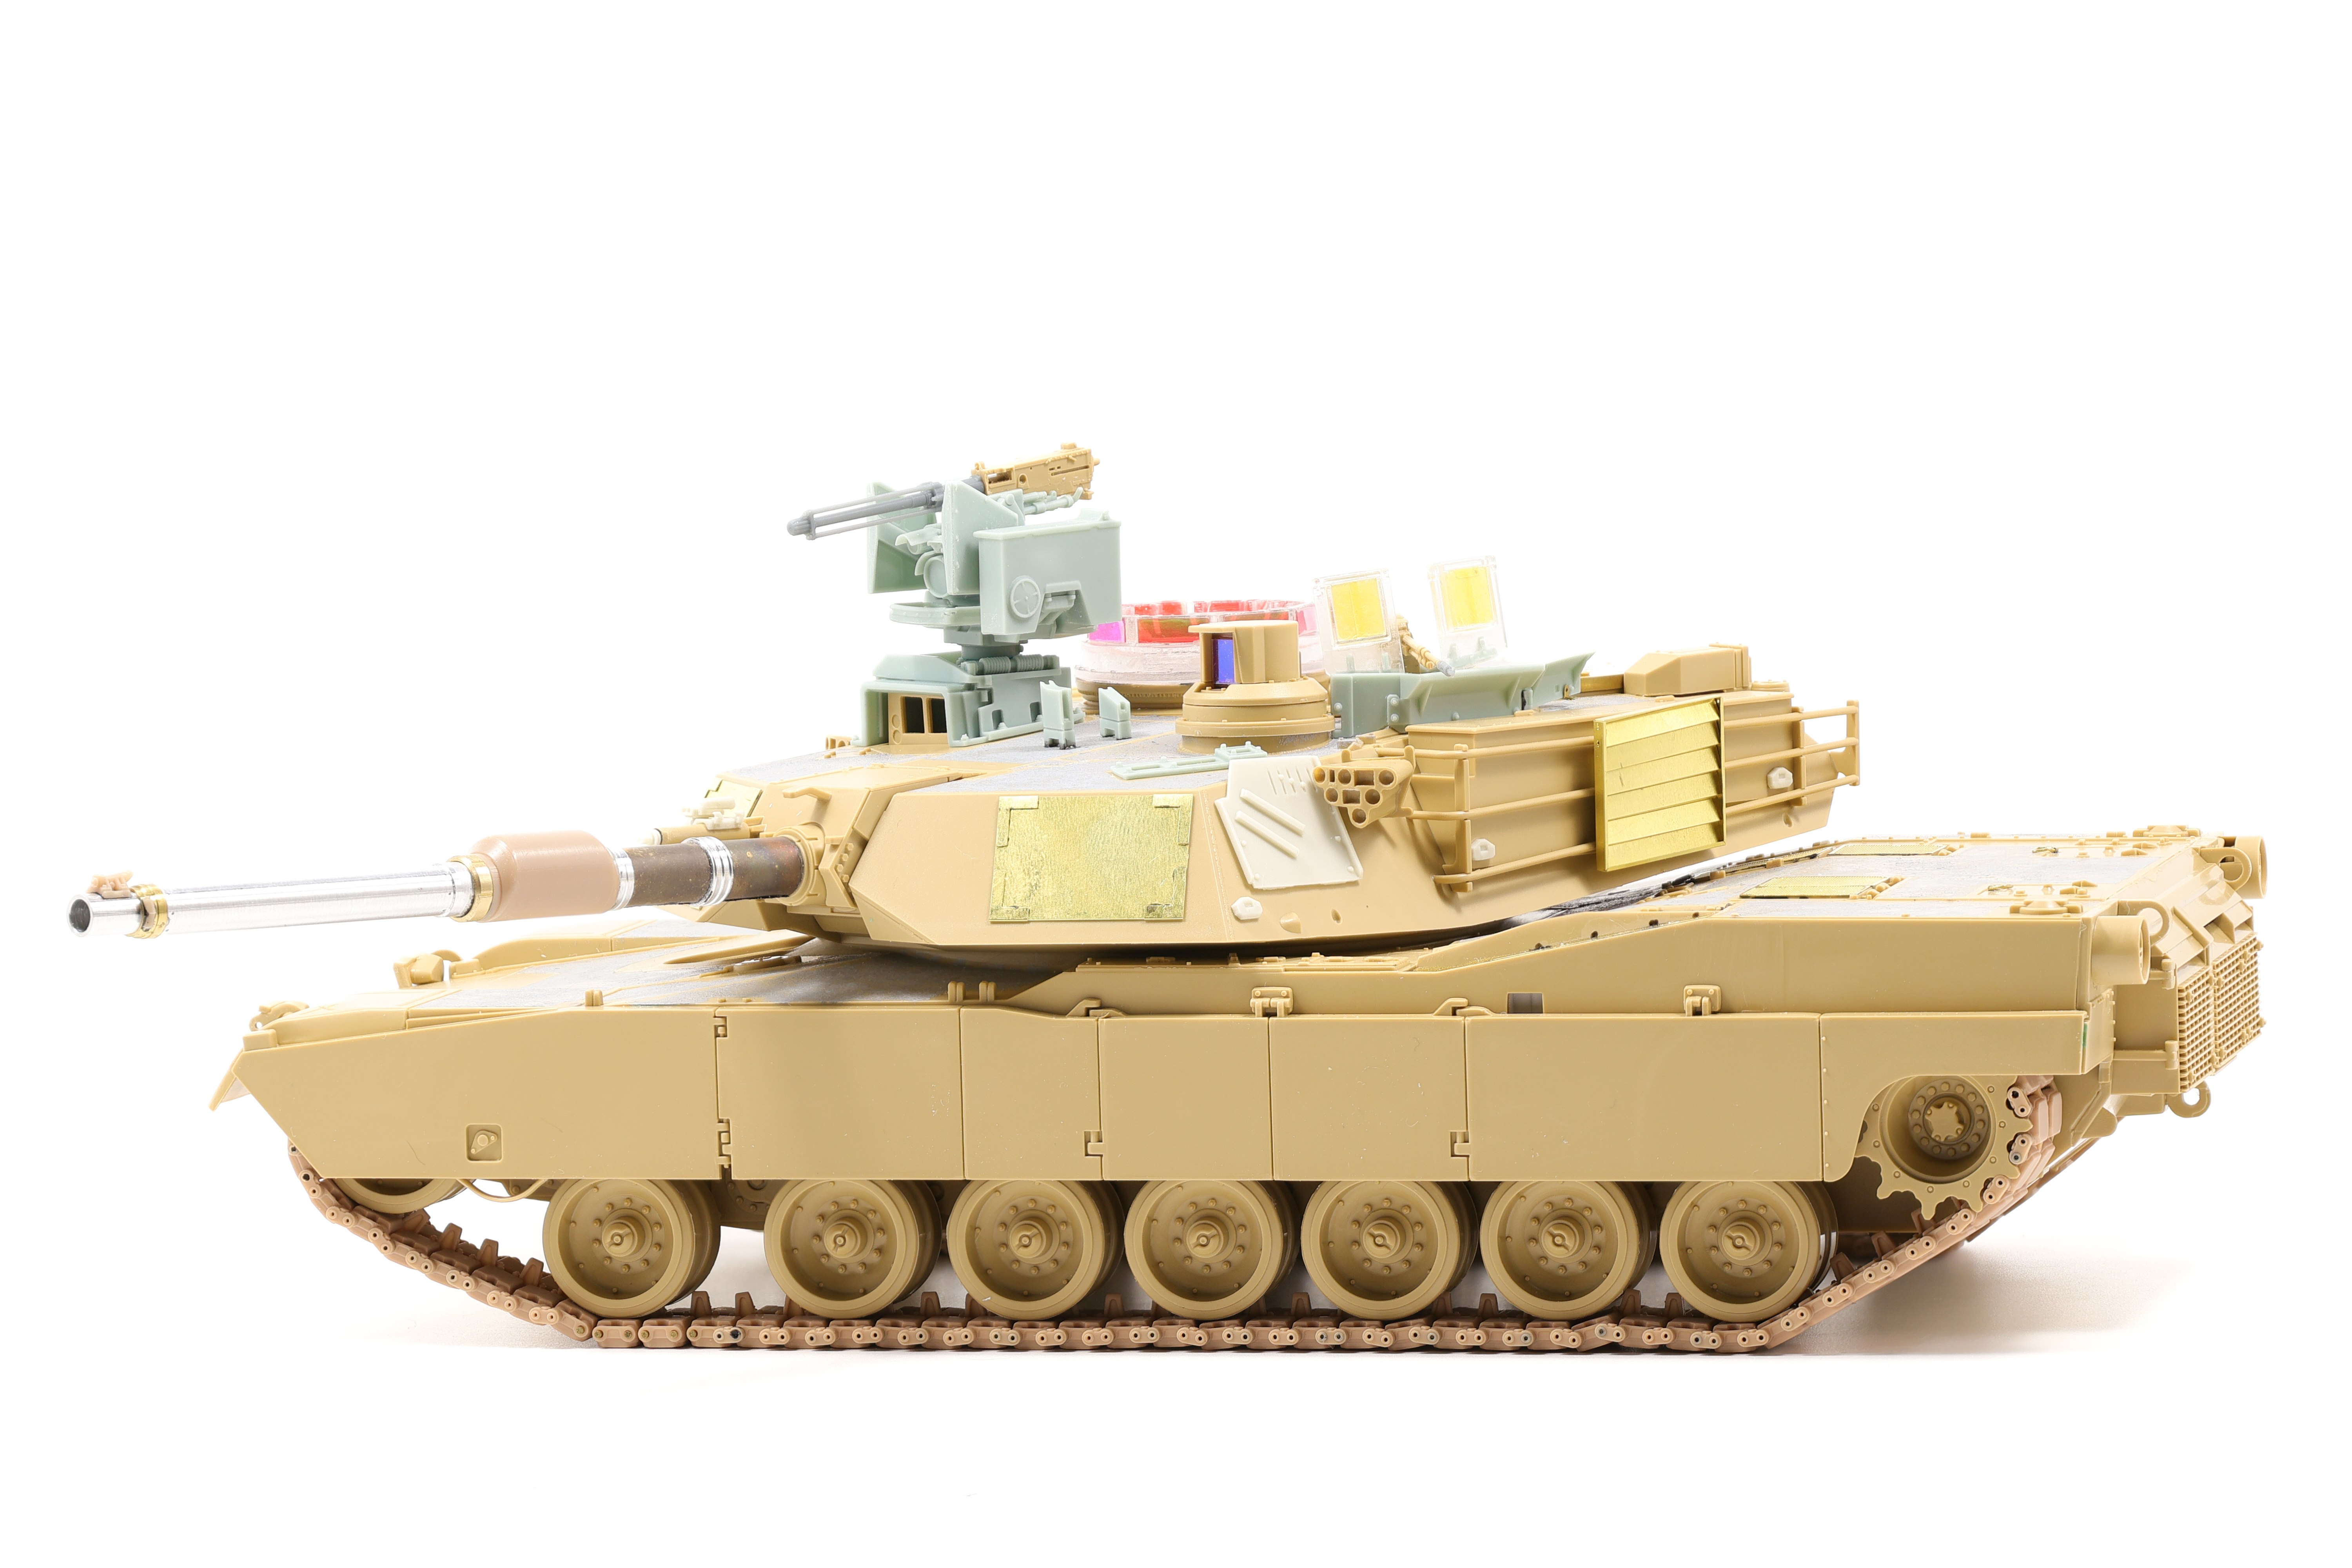
After completing the suspension, I moved on to completing the remote weapon station (RWS). This is a really nice resin part that utilized the kit MG and a 3d printed blank fire adapter. it went together fairly smoothly and I love the presence that the .50 cal has on top of the tank.
I also added some various other parts including the side skirts and photo-etched details. The build was definitely shaping up to be a mean looking Abrams!
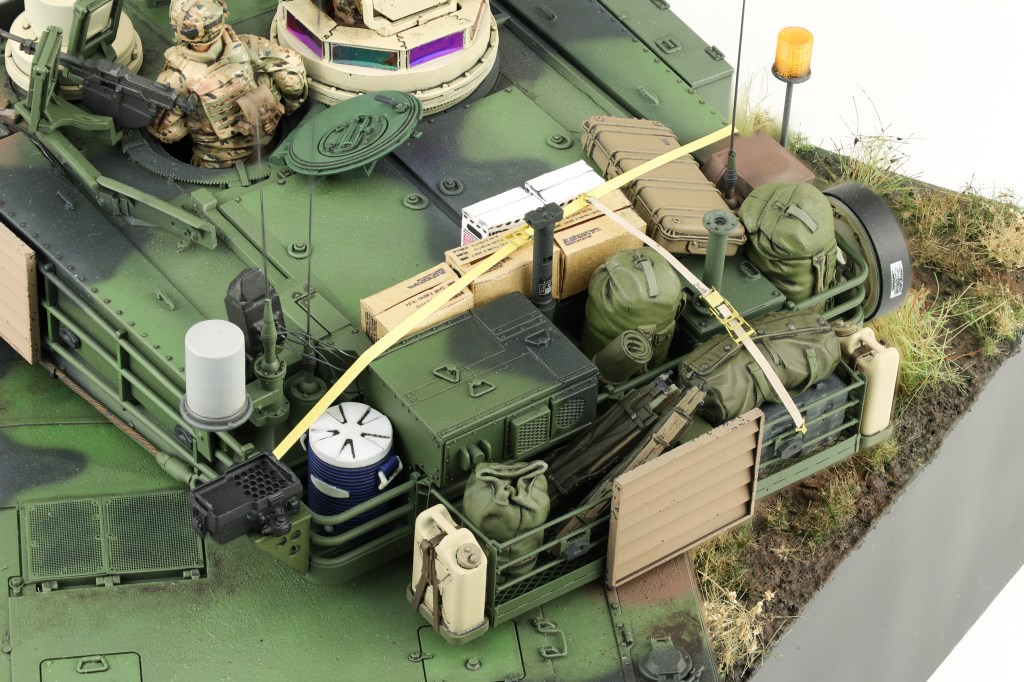
Next up I moved on to the consiterable amount of stowage that was going to be added to the build. M1’s are very frequently are loaded down with large amounts of stowage for the crew and this build would be no exception. I utilized a resin stowage set from Legend which provides a lot of options to choose from to add detail to the model. Legend makes a few variants of stowage sets and while they are pricey, there are enough pieces included to outfit more than one model.