For my next project, I settled on building Tamiya’s 20 year old M1A2 Abrams. I knew from the get go that I didn’t want to build a 2003 vehicle however and that this would call for some modifications.
I settled on bringing this kit into the future by adding various upgrade parts to depict a SEP V2 vehicle undergoing training in Germany. Lots of photos have been taken of the Germany-based Abrams and there’s always one unifying factor, they look absolutley badass:

For this project, I opted to use a DEF Model SEP V2 conversion set designed for the Dragon kit along with several other pieces to make the Tamiya plastic a convincing 2024 Abrams. Also of note was the Combat Vehicle Tactical Engagement Simulation System (CVTESS) which is equipment fitted during training exercises. I picked up a resin set from Blast Models from France to depict this specialty equipment on the vehicle.

Unlike the Tiger, the Tamiya Abrams is radically more simple and unrefined. This is not necessarily a bad thing as the kit built up quite quickly. One feature missing from the kit is the anti-slip texture that is present on all standing surfaces on the Abrams. This isn’t too much of a surprise, considering that the kit is over 20 years old at this point. To replicate the missing texture, I first masked off the areas in which I didn’t want the anti-slip texture, namely over welds and other details.

The masking was deceptive in how long I thought it would take. I had initially assumed that it would be a quick and easy process but in the end had to be split up over several days. To create the texture, I utilized the same technique I had on the Tiger, Tamiya putty thinned with extra thin cement. I had initially thought that this approach would not produce a rough enough texture to pass as anti-slip, however after heavy stippling and limited standing I think the putty method is worth trying out to achieve this specific element. Only time will tell if it looks realistic under paint.
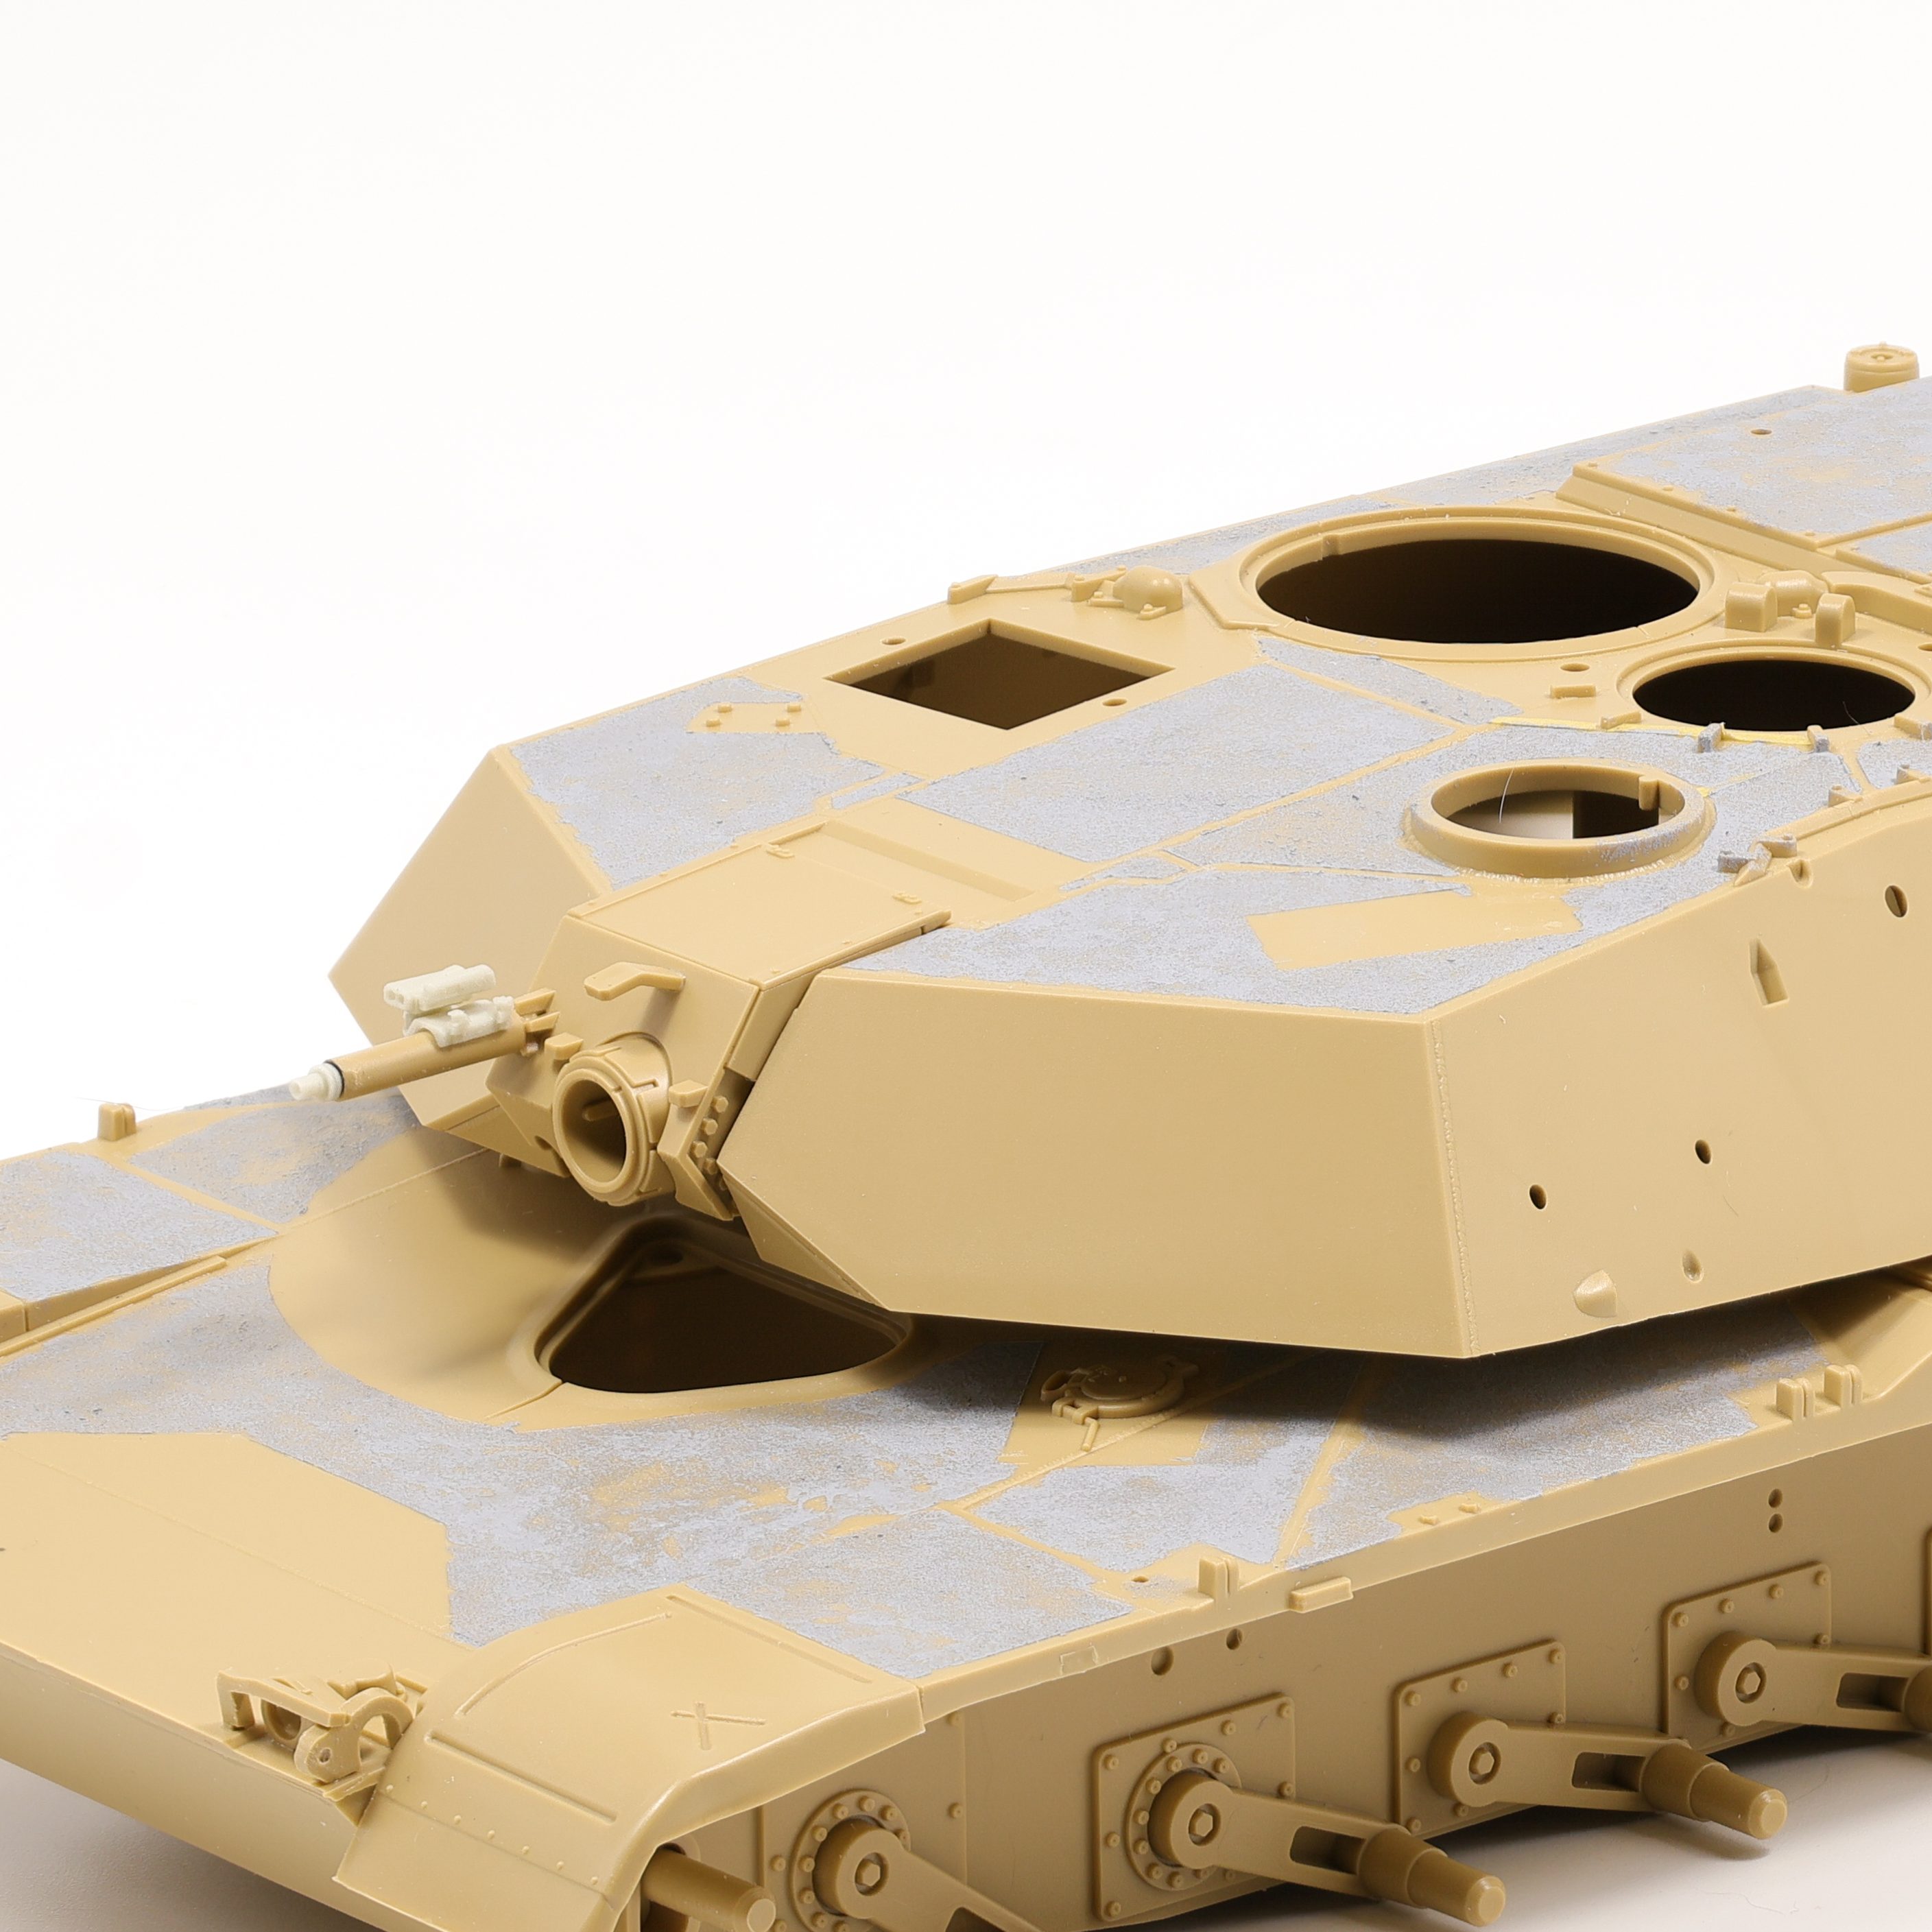


After completing the anti-slip, the model was ready for the SEP V2 update parts to be added. The more modern variants of the Abrams are absolutely brisling with updates and additions to the basic hull, and it’ll be easiest to add the resin details while the hull is as bare as possible.


The DEF Model update set was designed for the Dragon kit, but is easily adapted to fit the Tamiya plastic. The update kit includes a lot of well detailed resin upgrades and adds a much needed injection of detail to the 20 year old Tamiya offering.


At this stage I began work on the tracks and running gear. This is a fairly straightforward part of the build as the Abrams has a simple suspension setup (compared to some German cats at least). I also picked up a set of T-Rex tracks for this kit while I was in Japan earlier this year with this project in mind. While my prior experiences with T-Rex tracks have been fantastic, this set really bucked the trend unfortunately. Brass pins are utilized in this set and I found that they were too large for the track endcaps and guide horns. This required boring them out slightly to fit the oversized pins. This was an incredibly time consuming and boring process. All told it took me around three days of continuous building to get these assembled. They look great assembled, but I wouldn’t recommend picking these up for your own Abrams build.


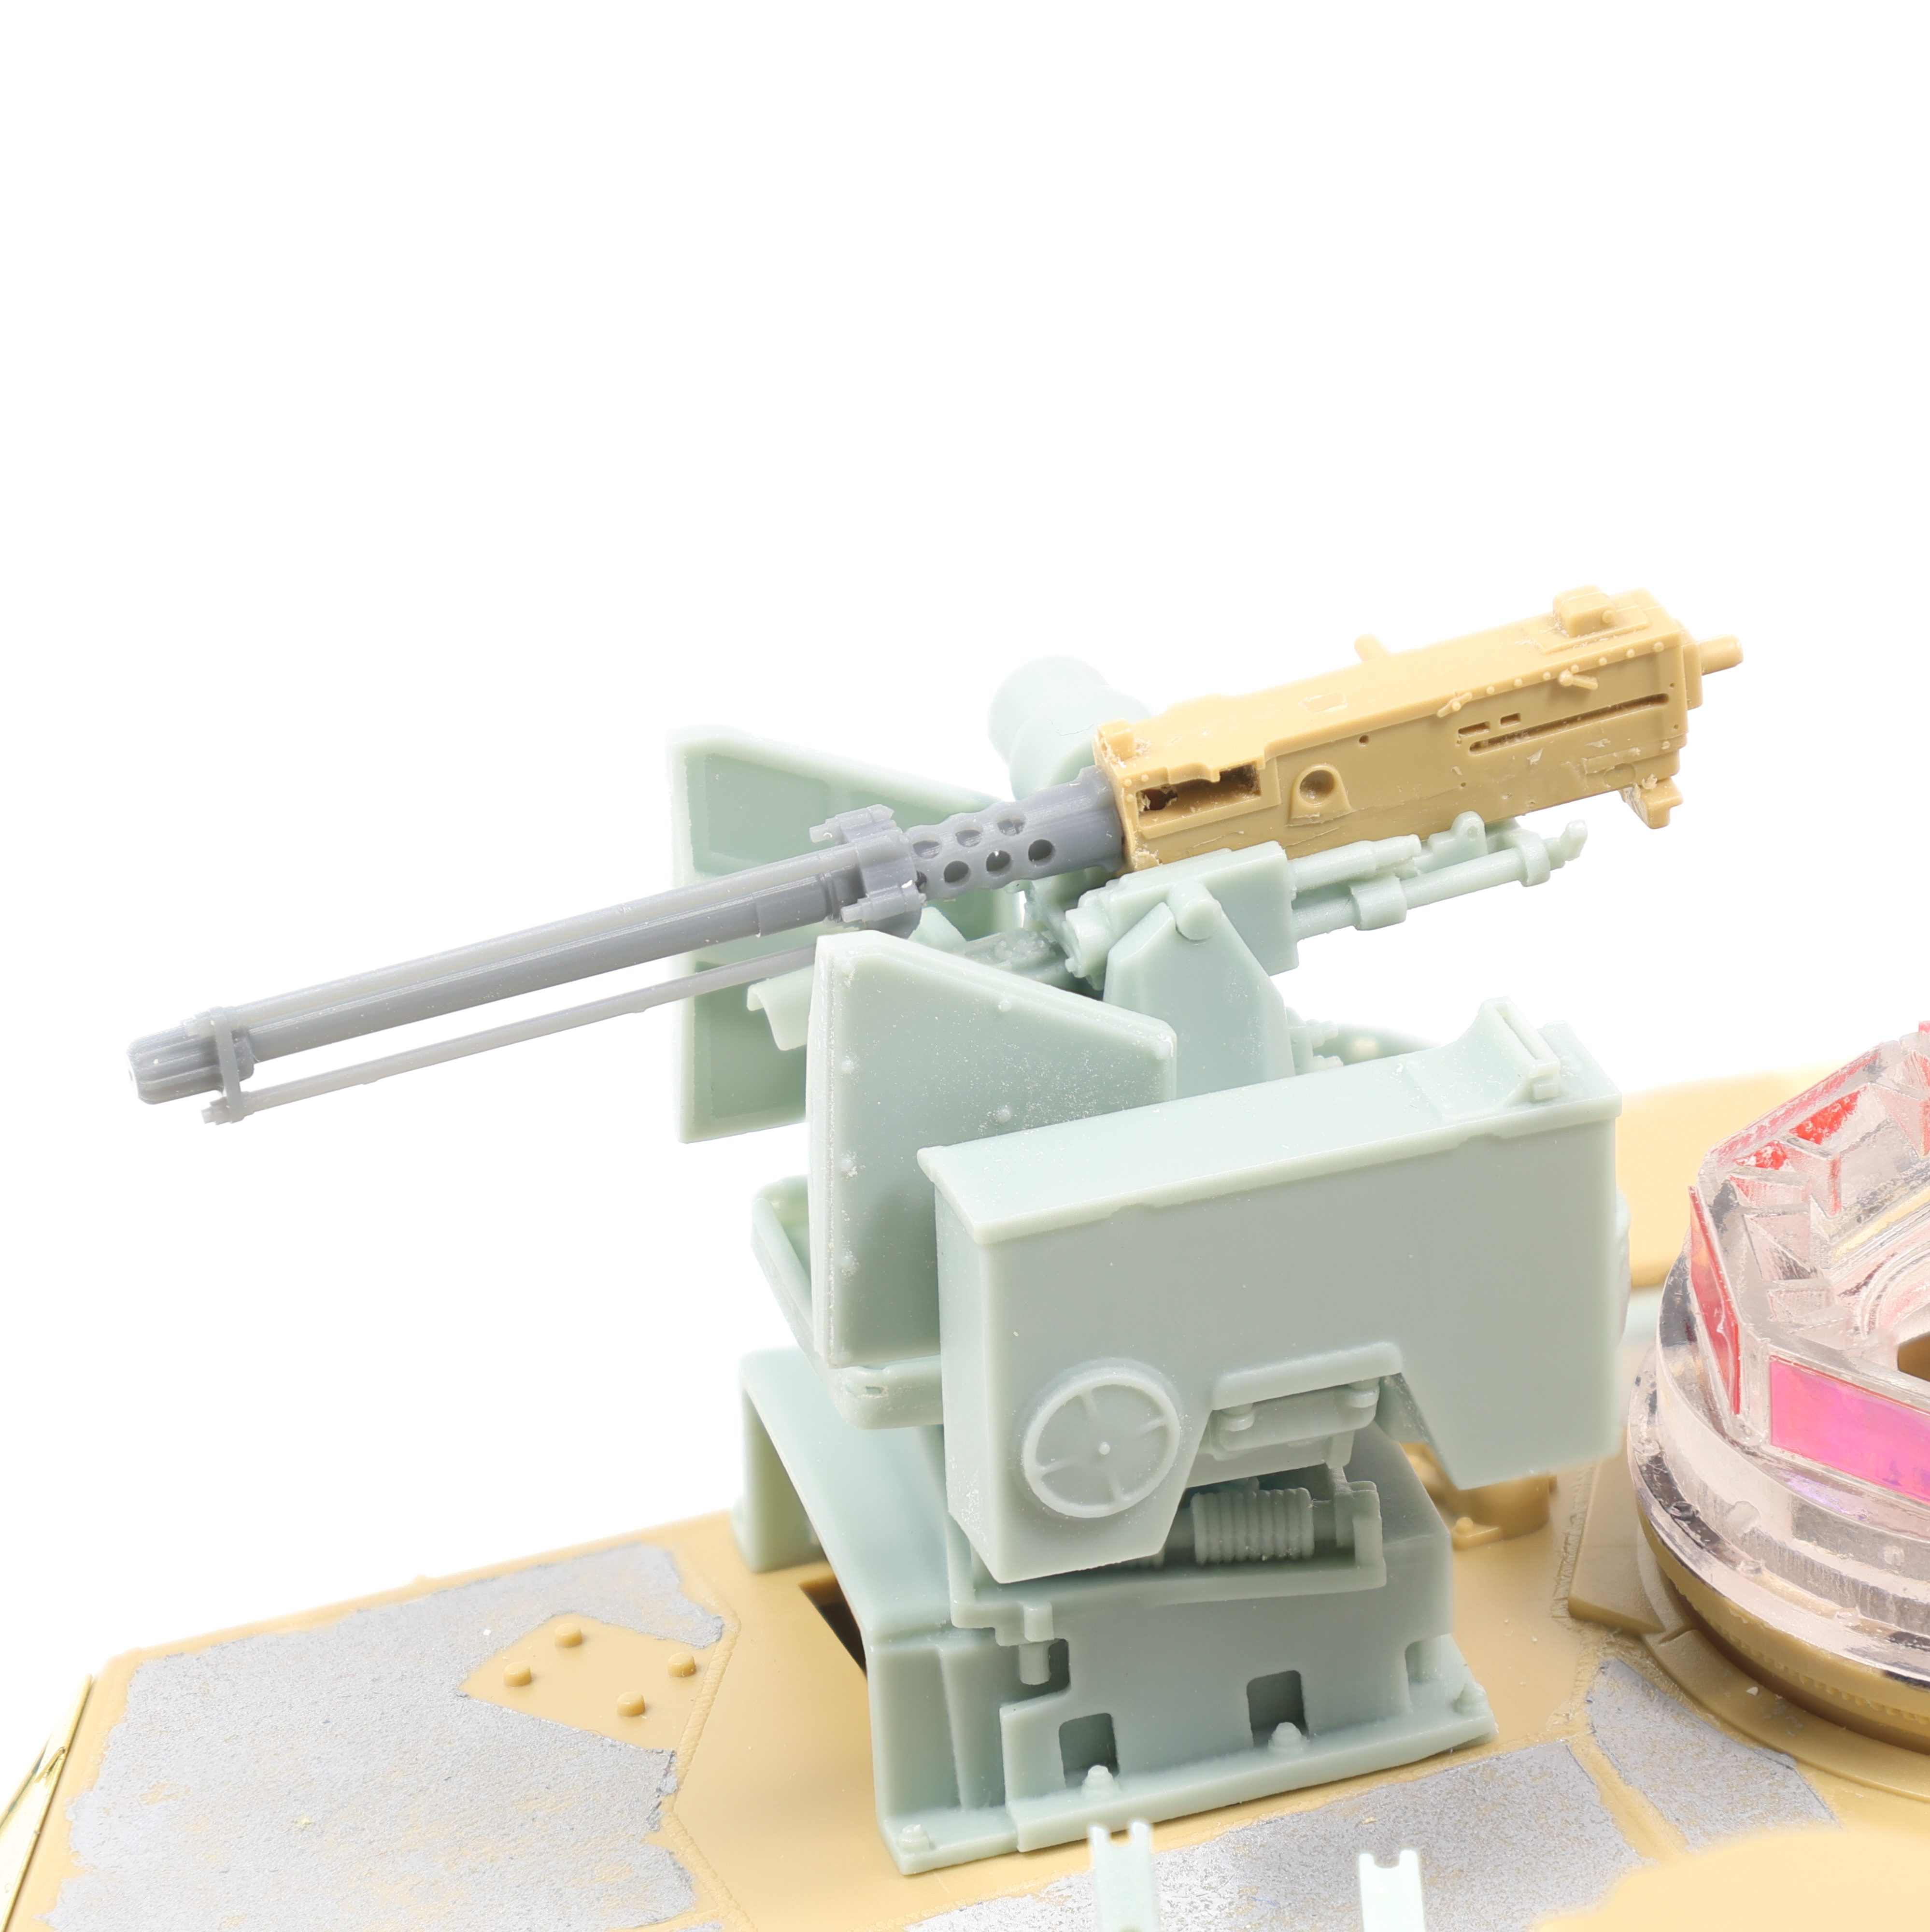
After completing the suspension, I moved on to completing the remote weapon station (RWS). This is a really nice resin part that utilized the kit MG and a 3d printed blank fire adapter. it went together fairly smoothly and I love the presence that the .50 cal has on top of the tank.
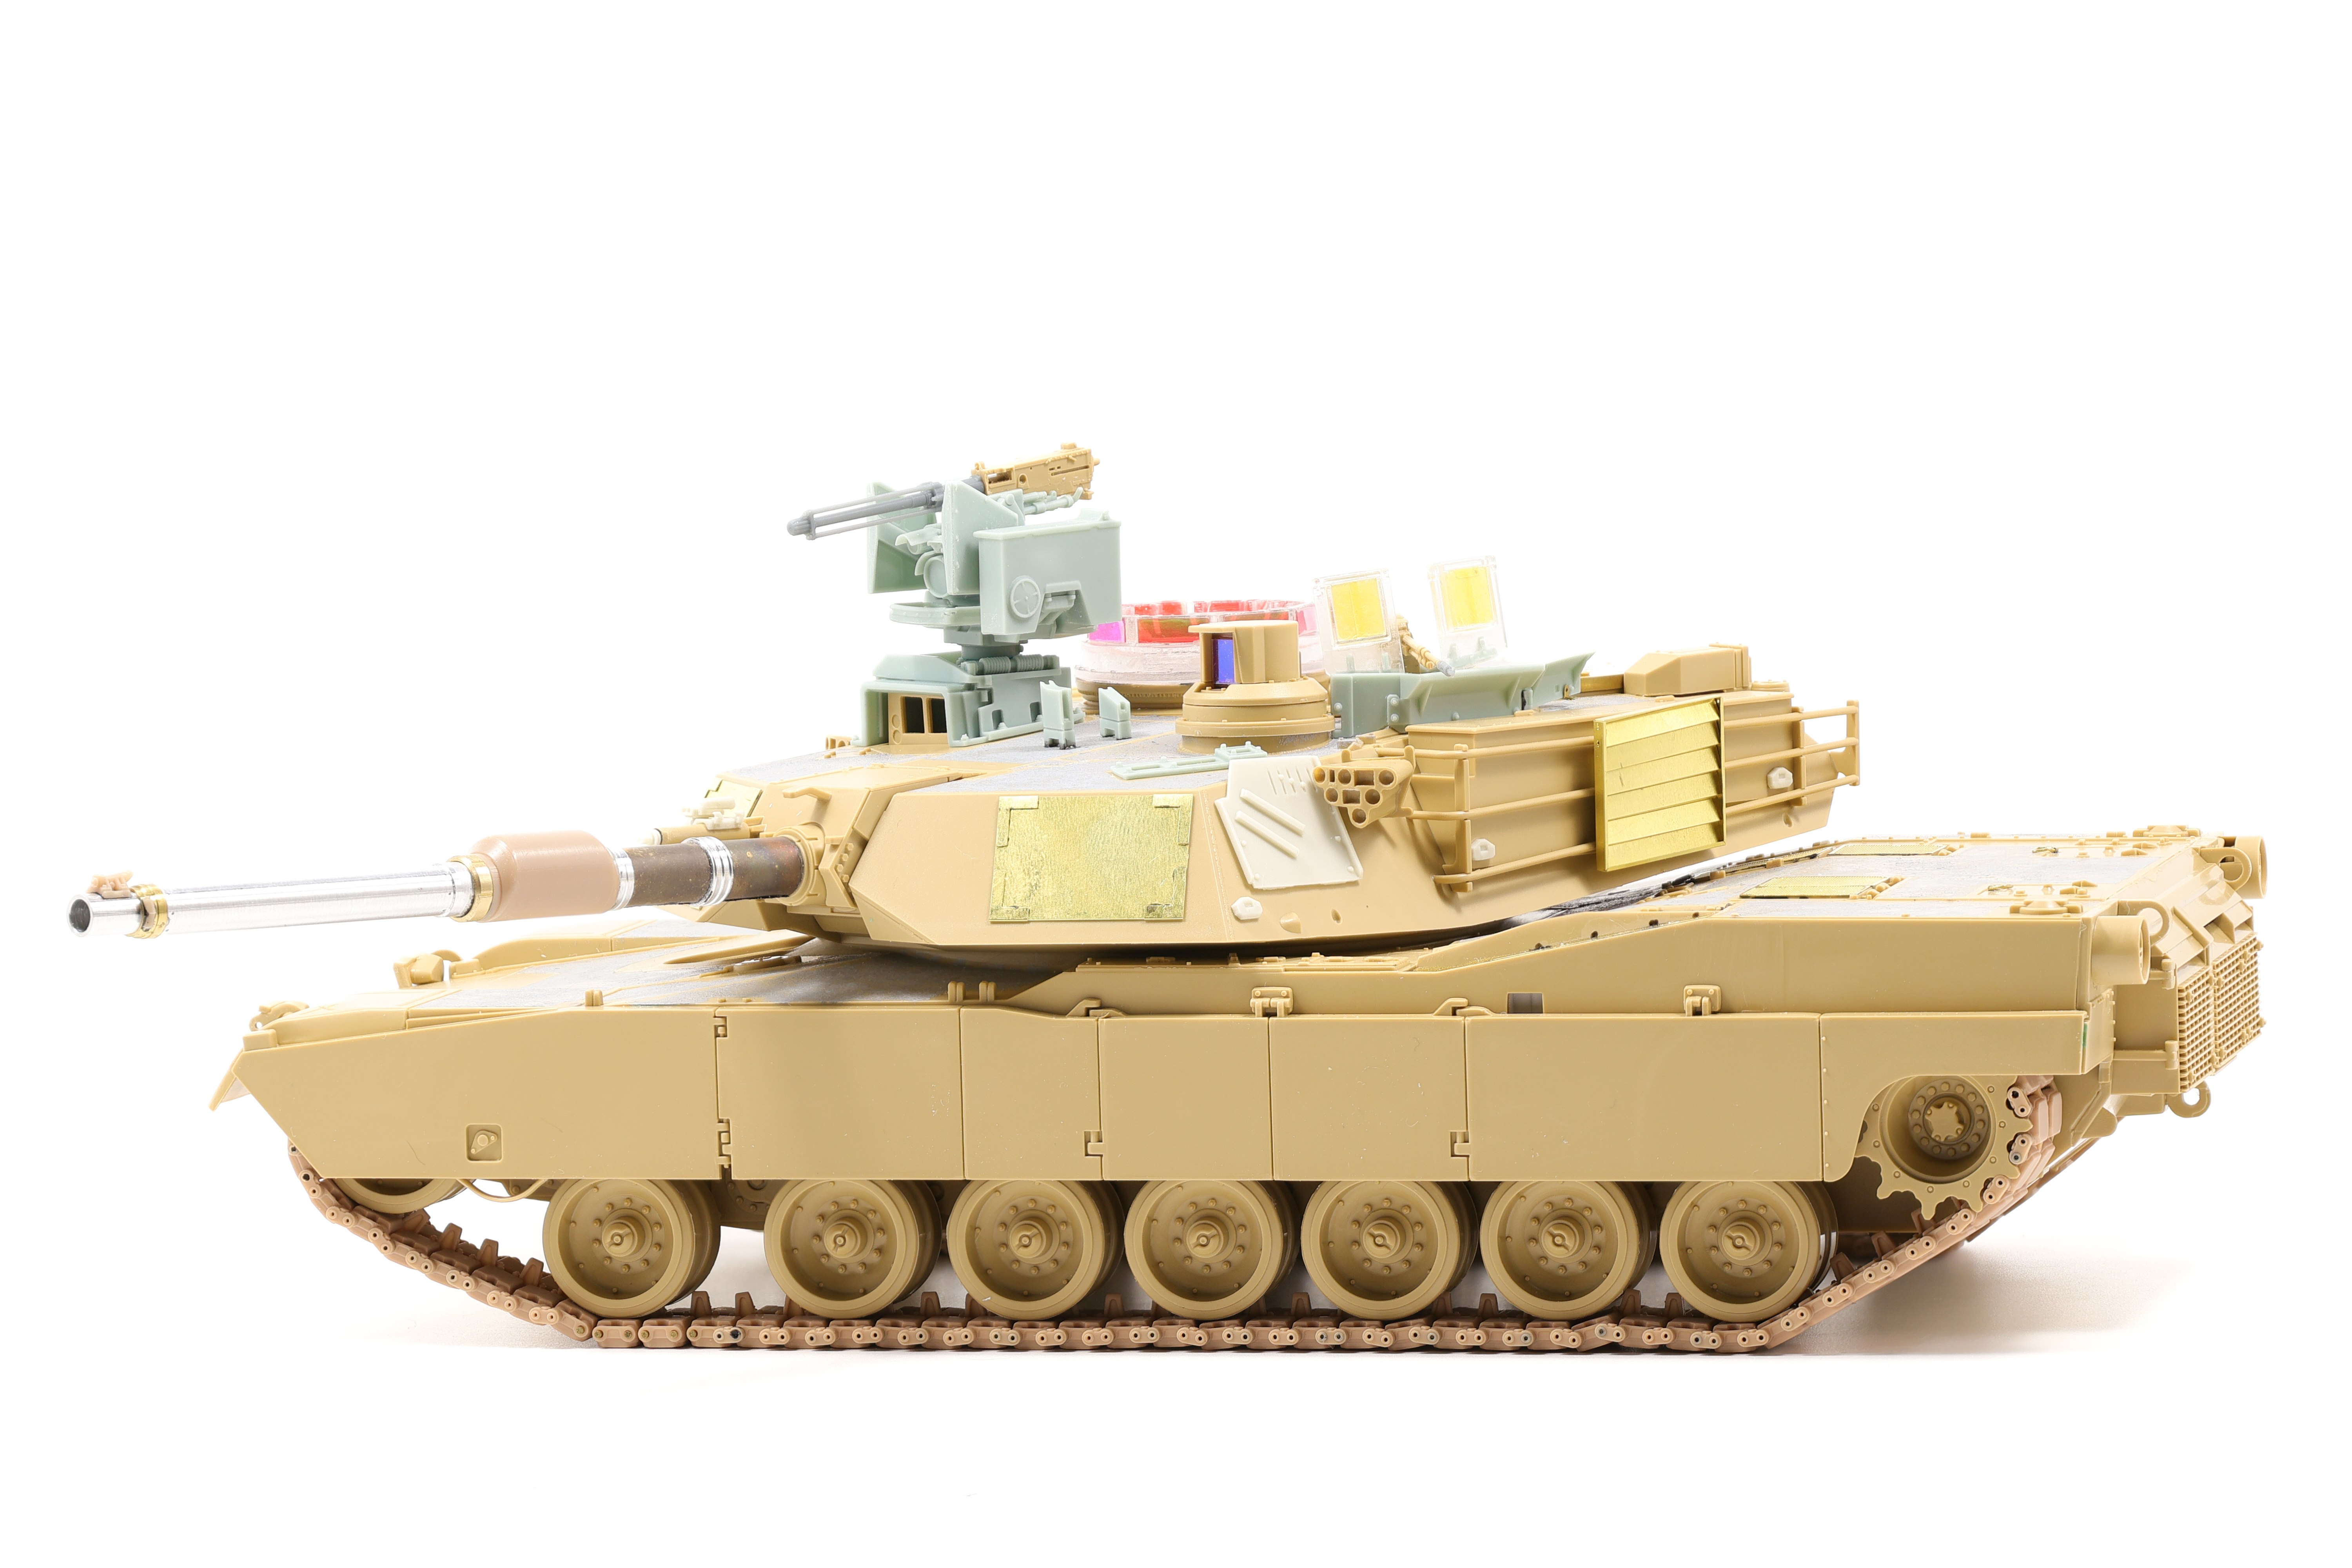
I also added some various other parts including the side skirts and photo-etched details. The build was definitely shaping up to be a mean looking Abrams!
Next up I moved on to the consiterable amount of stowage that was going to be added to the build. M1’s are very frequently are loaded down with large amounts of stowage for the crew and this build would be no exception. I utilized a resin stowage set from Legend which provides a lot of options to choose from to add detail to the model. Legend makes a few variants of stowage sets and while they are pricey, there are enough pieces included to outfit more than one model.

3 replies on “M1A2 Abrams SEP V2: Construction”
nice, I bought a Tamiya one not too long ago and also wanted it to be SEPv2 for a National Guard project, as a matter of fact I bought the SEPv2 converter from DEF model for the Dragon M1A2 SEP but I noticed on the back of the turret where the APU I am familiar with was different, as far as I’m aware I don’t see that part in any of the aftermarket boxes you bought so I was wondering if you could touch up on that?
LikeLike
Hey! So those that are familiar with the evolution of the Abrams will definitely notice that this build is more of a M1A2 Sep V2 *in spirit* and not a super accurate repersentation of a V2 variant. Throughout Abrams development there were two large boxes on the back of the turret, the large, boxy, external APU (EAPU) and the smaller Vapor Compression System Unit (VPSU). EAPU’s were used up until the first SEP variants were introduced when the APU was moved to the left corner of the hull. All true SEP’s and Abrams in use today have the VPSU in the turret basket. Your Dragon kit should have the correct VPSU already (assuming it’s a SEP boxing) while my Tamiya kit modelled vehicles that were in service prior to the introduction of the VPSU. I had originally planned to order a sprue from Tamiya’s TUSK II kit that includes a VPSU however I had some problems with the distributor and long story short, I ended up waiting 4 months for a sprue they forgot to order. There’s no 1/35 VPSU aftermarket parts out there so I had to settle for the inaccurate EAPU.
LikeLike
I see. Thank you for the response, ironically I ordered the same Tamiya sub-assembly and it arrived yesterday. Though I was also hoping to get that extra stowage bustle on the same sprue tree but I won’t complain for free support. Anyways I decided I would steal the extra stowage bustle from an RFM 1/35 scale M1A1-SA for Ukraine since I’ve seen a couple with them destroyed, and when looking through the trees I noticed not one but two of the sub-assembly I just got which don’t even go on the kit it came with. Wish I knew but oh well. I also was aiming for an M1A2 SEPv2 because I wanted a modern day Abrams for the Ohio National Guard, then when I was halfway done getting what I needed I heard that the Ohio national guard completed the transition to M1A2 SEPv3… I’m still gonna build a v2 for now and then upgrade it later to a V3 if I can. But thank you for your post, it helped me a lot with the information on my project.
LikeLike